Occasionally the odd craving will hit me. Such as having a bowl of blistered cherry tomatoes for breakfast. Why? I have not a clue. It felt very British of me. Paired with the salty bursts of flavor and crunchy bites from the bacon, I must say, I have no regrets.
the recipe is my own
serves 1
The Ingredients:
1 slice bacon
1 handful cherry or sungold tomatoes (8-10)
The Process:
Add the bacon to a cold cast iron skillet and set over medium low heat. Fry, turning frequently, until fat has rendered and bacon is crisp. Remove bacon to a paper towel lined plate to drain. Crumble and reserve.
Increase heat to medium-high. Add the tomatoes to the bacon fat in the skillet and sautee until the skins blister and begin to burst, turning occasionally, 4-5 minutes.
Remove blistered tomatoes to a serving bowl. Drizzle pan juices over top. Sprinkle with reserved bacon. Serve warm.
Seize the food! A new year's resolution to experiment with 100 new recipes in the coming year.
Showing posts with label tomato. Show all posts
Tuesday, October 7, 2014
Sunday, September 21, 2014
Tomato Beet Salad with Balsamic Dressing
And any number of vibrant beets. Wouldn't chioggia beets be pretty on this platter?
This is why I love my CSA.
adapted from Martha Stewart
serves 2
The Ingredients:
3 Tbsp extra-virgin olive oil
1 Tbsp Balsamic vinegar
3-4 small beets, scrubbed (about 1/2 lb)
2-3 large heirloom tomatoes (about 1 lb)
1/2 pint cherry tomatoes
2-3 Tbsps crumbled feta
1/4 cup fresh cilantro leaves
Salt and pepper
The Process:
Preheat oven to 400 degrees.
In a small jar, combine the oil and vinegar. Seal tightly and shake until well blended.
Trim the tops and root tip off of the beets. Wrap beets in foil and bake, 50-60 minutes or until tender. Allow to cool. When cool enough to handle, rub beets with a paper towel to remove skins. Slice crosswise 1/4 inch thick.
Slice the tomatoes, and halve cherry tomatoes. Arrange with beets on a platter. Sprinkle with salt and pepper. Top with feta, cilantro, and drizzle with balsamic dressing.
Friday, May 16, 2014
Peppers Stuffed with Farro and Italian Sausage
Some dishes are classic. But I still like to tinker, especially as new ingredients come to my attention. Farro is lovely in this dish. Slightly nutty and more earthy than rice, it adds quite a bit more flavor. It also doesn't disintegrate as much as rice typically does. As a result, the filling has much more texture and doesn't form up into a homogeneous meatloaf mass as some other stuffed pepper fillings are wont to do. The blend of Italian sausage and ground beef lends the filling a little extra kick. Feel free to play around with spicier meat blend. A chorizo tex/mex blend could be fun...
the recipe is my own
serves 4
The Ingredients:
1/2 cup farro
1 cup stock or water 4 medium green peppers
1 Tbsp olive oil
1/2 cup diced onion
2 cloves of garlic, minced
1/4 tsp red pepper flakes
1 - 14.5 oz can petite diced tomatoes
1 - 8 oz can tomato sauce
1 Tbsp capers, minced
1/2 tsp oregano
1/4 tsp basil
1/4 tsp thyme
salt and pepper to taste
1/2 lb ground beef
1/2 lg ground mild Italian sausage
1 egg
The Process:
Preheat the oven to 350 F
In a medium saucepan over medium heat, bring the broth and farro to a boil. Reduce to a simmer. Cover and cook until the farro is tender, about 20 minutes. Drain and set aside.
Slice the tops off of the peppers. Trim away the extra flesh from around the stem, coarsely chop, and set aside. Remove the membranes and seeds from the cavity.
Bring a large pot of salted water to a boil. Blanche the peppers for about 5 minutes, or until they are a vibrant green. Rinse the peppers in ice water and set aside to drain.
Heat oil in a large skillet over medium high heat. Add the onions, garlic and reserved chopped pepper. Sauté until tender and fragrant, about 5 minutes. Stir in the dice tomatoes, tomato sauce, capers, and seasoning. Season with additional salt and pepper to taste. Heat through and set aside.
In a large bowl combine the cooked farro, beef, sausage, egg and 1 cup of the tomato mixture. Mix thoroughly.
Arrange the peppers upright in a lightly oiled baking dish. Spoon the filling into each pepper cavity, doming the mixture slightly.
Spoon the remaining tomato mixture over the top. Bake, uncovered, about 60 minutes.
the recipe is my own
serves 4
The Ingredients:
1/2 cup farro
1 cup stock or water 4 medium green peppers
1 Tbsp olive oil
1/2 cup diced onion
2 cloves of garlic, minced
1/4 tsp red pepper flakes
1 - 14.5 oz can petite diced tomatoes
1 - 8 oz can tomato sauce
1 Tbsp capers, minced
1/2 tsp oregano
1/4 tsp basil
1/4 tsp thyme
salt and pepper to taste
1/2 lb ground beef
1/2 lg ground mild Italian sausage
1 egg
The Process:
Preheat the oven to 350 F
In a medium saucepan over medium heat, bring the broth and farro to a boil. Reduce to a simmer. Cover and cook until the farro is tender, about 20 minutes. Drain and set aside.
Slice the tops off of the peppers. Trim away the extra flesh from around the stem, coarsely chop, and set aside. Remove the membranes and seeds from the cavity.
Bring a large pot of salted water to a boil. Blanche the peppers for about 5 minutes, or until they are a vibrant green. Rinse the peppers in ice water and set aside to drain.
Heat oil in a large skillet over medium high heat. Add the onions, garlic and reserved chopped pepper. Sauté until tender and fragrant, about 5 minutes. Stir in the dice tomatoes, tomato sauce, capers, and seasoning. Season with additional salt and pepper to taste. Heat through and set aside.
In a large bowl combine the cooked farro, beef, sausage, egg and 1 cup of the tomato mixture. Mix thoroughly.
Arrange the peppers upright in a lightly oiled baking dish. Spoon the filling into each pepper cavity, doming the mixture slightly.
Spoon the remaining tomato mixture over the top. Bake, uncovered, about 60 minutes.
Friday, May 2, 2014
IPA Spiked Chicken Tikka Masala
Tikka Masala is no stranger in our household. I've made this dish, and enough of its Indian relatives to whip it up with nothing more than a cursory glance at a ghee stained recipe. The amount of ginger and garlic often varies. Sometimes I use a serrano pepper to two of a kick of heat, other time a subtle touch of chili powder. Fresh and canned tomatoes alternate depending on my mood and the seasons (there are few things sadder than a "tomato" in the middle of a Midwestern winter).
So why does this warrant another visit to this blog...a blog that attempts to chronicle my culinary adventures as I test new waters?
In a word,
Beer.
Ross had requested tikka masala when I asked for dishes to round out our week of dinners. As if by fate, the day before I had planned on our Indian feast, the Beeroness posted a yogurt and ale marinaded grilled chicken. The similarities between her chicken and the marinade for my chicken tikka were uncanny. These long lost cousins were only divided by a mix up of spices and the addition of beer. The discover was enough to revisit and modify this favorite.
I hope you enjoy this dish as much as we did.
Inspired and adapted from The Beeroness, The Pioneer Woman, and my tried and true tikka masala recipe courtesy of Monica Bhide
serves 4
The Ingredients:
for the chicken and marinade
1 1/2 lb boneless, skinless chicken breasts, cubed
3/4 cup Greek yogurt
1/2 cup IPA
1 Tbsp garam masala
1/2 tsp chili powder
1/2 tsp smoked paprika
2 cloves garlic, minced
1-inch thumb of ginger, minced
for the Tikka Masala
3 Tbsp unsalted butter
1 medium red onion, finely diced
3 cloves of garlic, minced
1 inch thumb of ginger, minced
1 serrano pepper, finely diced
1 Tbsp garam masala
1/4 tsp turmeric
1 - 15 oz can petite diced tomatoes
2 Tbsp tomato paste
1 cup heavy cream
2 large handfuls of spinach, coarsely chopped
1/4 cup IPA
salt to taste
for the Basmati rice
1 cup basmati rice
2 Tbsp unsalted butter
1/2 tsp turmeric
1/2 tsp salt
2 cups vegetable broth or water
1/2 cup frozen peas
The Process:
for the marinade
In a large bowl or gallon-sized zip top bag, combine the yogurt, IPA, and spices. Mix well. Add the cubed chicken and stir to coat. Cover and refrigerate 6-8 hours.
for the Tikka Masala:
Pre-heat the broiler.
Remove the chicken from the marinade. Thread onto metal skewers and arrange on an oiled cooling rack set over a foil lined baking sheet. Broil the chicken, 10" from the heat source, 5-7 minutes per side or until the chicken is beginning to char and juices run clear. Set aside.
Meanwhile, prep the rice:
In a medium saucepan, combine the butter, rice, turmeric, salt, and broth. Bring to a boil and stir until the butter has melted. Reduce to a low simmer and cover, cooking 30-35 minutes or until rice is tender and most of the liquid is absorbed.
Back to the Tikka Masala:
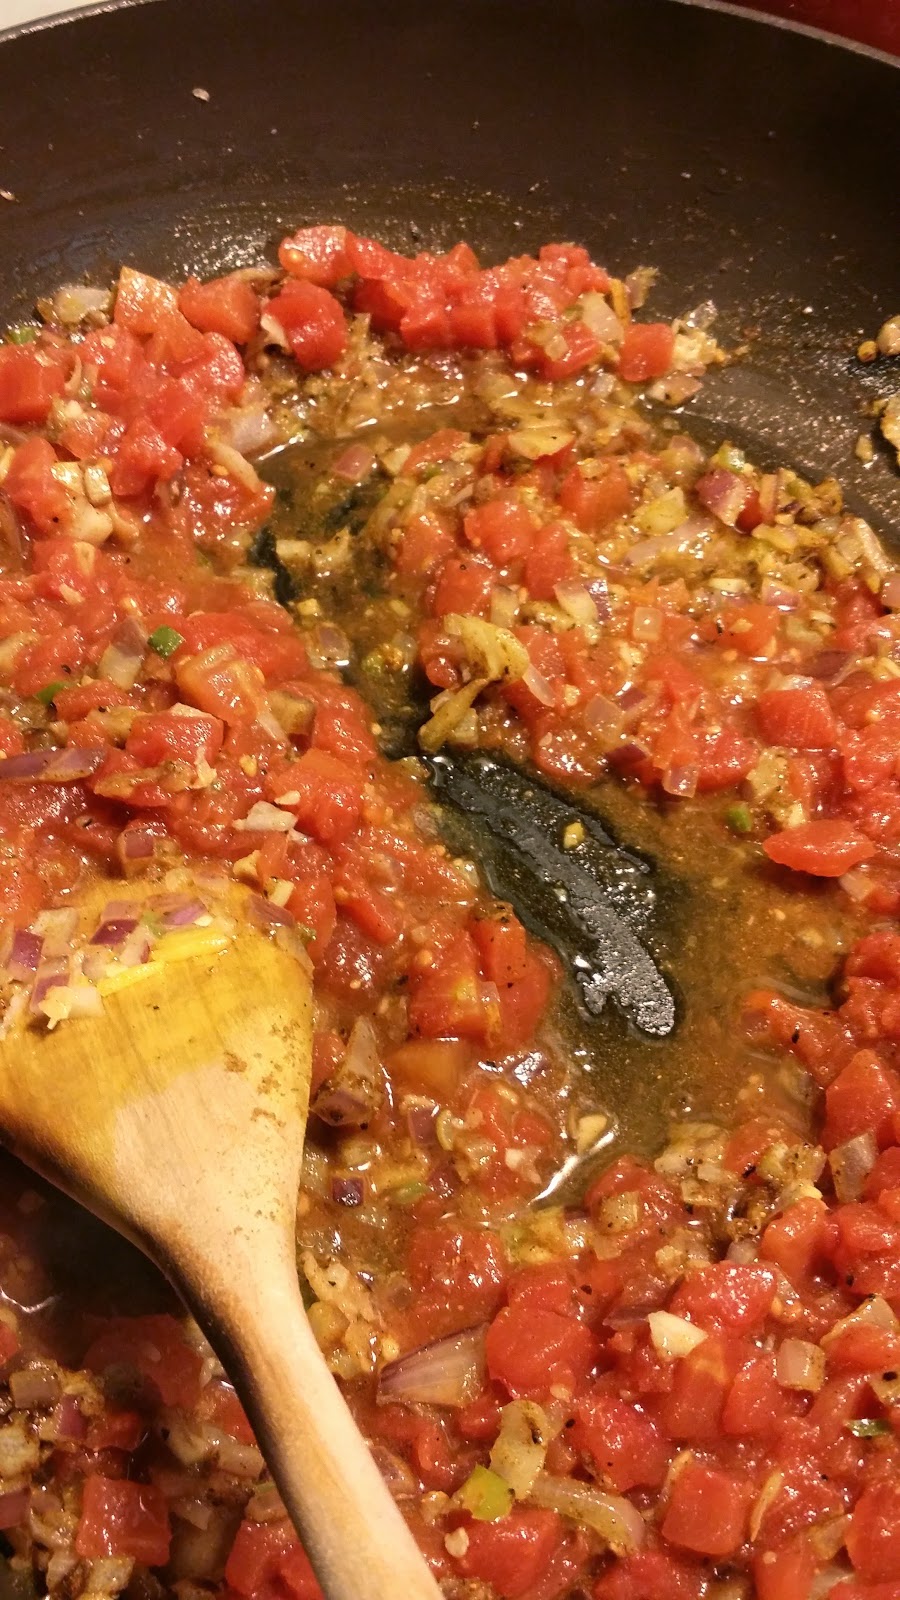
Melt the butter in a large skillet set over medium-high heat. Add the onion, ginger, garlic and serrano pepper. Sauté until fragrant and the onion is translucent, 6-8 minutes.
Add the spices and stir until fragrant, about 30 seconds. Add 1 tsp of salt, the diced tomato and the tomato paste. Simmer on medium low for about 5 minutes.
Whisk in the heavy cream and return to a simmer.
Remove the cooked chicken from the skewers and stir into the sauce. Cover and simmer until the chicken is heated through.
Stir in the chopped spinach and simmer until the spinach wilts. Remove the tikka masala from heat and stir in the 1/4 cup IPA. Adjust salt and seasoning to taste.
Prior to serving, stir 1/2 cup peas into the basmati rice. Spoon pea-studded rice onto each plate and top with tikka masala
Sunday, July 7, 2013
Osso Buco Style Sea Bass with Herb Whipped Potatoes and Orange Gremolata
The seafood adventure continues! What started out as an attempt to enjoy more seafood at home has since tranformed into an all out culinary challenge. Each week, Ross picks a day to stop at the fish monger on his way home from work. Whatever strikes his fancy that day while perusing the tanks and ice trays is destined to become dinner. He'll text me what he picked up. And I have the thirty minute or so bus ride home to decide what to do with it...using only what we have at home at the time, cause ain't nobody got time for last minute grocery trips.
All week I was thinking fish and chips. In all the baked and breaded glory. Served with lemon garlic aioli. I couldn't shake that meal from my head. So what does Ross pick out? White Sea Bass. One of the firmest meatiest fillets out there. Such sacrilige to bread it up and bake it. This was a fillet that demanded a meaty treatment. No poaching or en papillote. No... it wanted to be seared, grilled, broiled, or...braised.
The cooking method eluded me at first after pondering the fish for a while. But the idea of a gremolata jumped into my head immediately. Several types of citrus awaited to be used up at home. But poaching was out of the question. And the charcoal grill would take to long to get going. After poking around for gremolata inspiration, I came across a halibut served osso buco style. The rich, salty tomato and veggie broth sounded like it would stand up to the meaty fillet. Spike with the bright gremolata? Sold. And I still was able to use up a portion of our CSA potatoes in the process.
adapted from Bon Appetit, via Epicurious.
serves 3
The Ingredeints:
for the "Osso Buco"
1 Tbsp olive oil
2 stalks celery, diced
2 medium carrots, diced
1/4 yellow onion, diced
2 cloves garlic, minced
1 Tbsp tomato paste
1/2 cup white wine
2 cups vegetable stock
1/2 tsp salt
1/2 cup crushed tomatoes w/ juices
juice of 1 orange
zest of 1/2 a lemon
2 Tbsp fish sauce
1/2 tsp crushed thyme
1 bay leaf
1 Tbsp olive oil
1 lb white sea bass, skin removed and cut into 3 portions
salt, pepper and cayenne
2 Tbsp balsamic vinegar
1 Tbsp butter
for the whipped potatoes
3/4 lb russet potatoes, peeled and quartered
3 cloves of garlic, halved
2 Tbsp salted butter
2 Tbsp chopped flat leaf parsley
1 Tbsp fresh rosemary, chopped
for the gremolata
2 Tbsp fresh flat leaf parsley
zest of 1 orange
2 cloves of garlic, minced
The Process:
Heat the oil in a large skillet over medium heat. Add the celery, carrots, onion and garlic. Saute, stirring frequently, until the veggies are tender and beginning to brown, about 7-10 minutes. Add the tomato paste and heat through, about 30 seconds. Add the white wine and simmer until reduced by about half, an additional 5-7 minutes.
Add the broth, crushed tomatoes, orange juice, salt, zest, fish sauce, thyme and bay leaf. Bring the mixture to a boil, reduce to a simmer and cook until the liquid is reduced by 1/3...about 40 minutes.
Meanwhile, bring a large saucepan of salted water to a boil and add the potatoes and garlic. Cook until tender, about 25 minutes.
For the gremolata, combine the zest, garlic and parsley. Mix thoroughly and set aside.
Preheat the oven to 350
In another pan, heat the remaining oil over medium high heat. Generously season the fillets with salt pepper, and cayenne. Sear the fillets until browned, about 2 minutes per side. Remove to a warm plate. Add the balsamic vinegar to the same pan and simmer for about 1 minute, reducing slightly. Add the vinegar to the vegetable sauce. Melt the butter into the sauce. Remove the bay leaf and transfer the mixture to a 9 x 13 baking dish. Set the fish on top. Bake, uncovered for 10 minutes, or until the flesh is opaque and flakes easily. Set aside to finish the potatoes.
Drain the tender potatoes, reserving some of the cooking liquid. Return to the potatoes to the pot along with butter and whip with an electric beater set to low, or mash by hand. Add reserved liquid by the Tbsp until the desired consistency is achieved. Stir in the herbs.
to serve:
Spoon 1/3 of the potatoes onto a dinner plate and spread out slightly. Top with one of the fillets and spoon the vegetable sauce over top. Garnish with a generous sprinkle of gremolata.
All week I was thinking fish and chips. In all the baked and breaded glory. Served with lemon garlic aioli. I couldn't shake that meal from my head. So what does Ross pick out? White Sea Bass. One of the firmest meatiest fillets out there. Such sacrilige to bread it up and bake it. This was a fillet that demanded a meaty treatment. No poaching or en papillote. No... it wanted to be seared, grilled, broiled, or...braised.
The cooking method eluded me at first after pondering the fish for a while. But the idea of a gremolata jumped into my head immediately. Several types of citrus awaited to be used up at home. But poaching was out of the question. And the charcoal grill would take to long to get going. After poking around for gremolata inspiration, I came across a halibut served osso buco style. The rich, salty tomato and veggie broth sounded like it would stand up to the meaty fillet. Spike with the bright gremolata? Sold. And I still was able to use up a portion of our CSA potatoes in the process.
adapted from Bon Appetit, via Epicurious.
serves 3
The Ingredeints:
for the "Osso Buco"
1 Tbsp olive oil
2 stalks celery, diced
2 medium carrots, diced
1/4 yellow onion, diced
2 cloves garlic, minced
1 Tbsp tomato paste
1/2 cup white wine
2 cups vegetable stock
1/2 tsp salt
1/2 cup crushed tomatoes w/ juices
juice of 1 orange
zest of 1/2 a lemon
2 Tbsp fish sauce
1/2 tsp crushed thyme
1 bay leaf
1 Tbsp olive oil
1 lb white sea bass, skin removed and cut into 3 portions
salt, pepper and cayenne
2 Tbsp balsamic vinegar
1 Tbsp butter
for the whipped potatoes
3/4 lb russet potatoes, peeled and quartered
3 cloves of garlic, halved
2 Tbsp salted butter
2 Tbsp chopped flat leaf parsley
1 Tbsp fresh rosemary, chopped
for the gremolata
2 Tbsp fresh flat leaf parsley
zest of 1 orange
2 cloves of garlic, minced
The Process:
Heat the oil in a large skillet over medium heat. Add the celery, carrots, onion and garlic. Saute, stirring frequently, until the veggies are tender and beginning to brown, about 7-10 minutes. Add the tomato paste and heat through, about 30 seconds. Add the white wine and simmer until reduced by about half, an additional 5-7 minutes.
Add the broth, crushed tomatoes, orange juice, salt, zest, fish sauce, thyme and bay leaf. Bring the mixture to a boil, reduce to a simmer and cook until the liquid is reduced by 1/3...about 40 minutes.
Meanwhile, bring a large saucepan of salted water to a boil and add the potatoes and garlic. Cook until tender, about 25 minutes.
For the gremolata, combine the zest, garlic and parsley. Mix thoroughly and set aside.
Preheat the oven to 350
In another pan, heat the remaining oil over medium high heat. Generously season the fillets with salt pepper, and cayenne. Sear the fillets until browned, about 2 minutes per side. Remove to a warm plate. Add the balsamic vinegar to the same pan and simmer for about 1 minute, reducing slightly. Add the vinegar to the vegetable sauce. Melt the butter into the sauce. Remove the bay leaf and transfer the mixture to a 9 x 13 baking dish. Set the fish on top. Bake, uncovered for 10 minutes, or until the flesh is opaque and flakes easily. Set aside to finish the potatoes.
Drain the tender potatoes, reserving some of the cooking liquid. Return to the potatoes to the pot along with butter and whip with an electric beater set to low, or mash by hand. Add reserved liquid by the Tbsp until the desired consistency is achieved. Stir in the herbs.
to serve:
Spoon 1/3 of the potatoes onto a dinner plate and spread out slightly. Top with one of the fillets and spoon the vegetable sauce over top. Garnish with a generous sprinkle of gremolata.
Sunday, April 7, 2013
Vegetarian Smoked Porter Chili
The Beeroness strikes again. I tagged this recipe a while back, waiting for the ideal smoked or chipotle beer to come my way. Amazingly the two came together in one collaboration between two of our local breweries: Indeed and Northbound Smokehouse. Northbound smoked the malts and peppers. Indeed brewed the beer. The result was a rich smoking imperial porter with a slight burn on the back end. I'm not a huge fan of Indeed's other beers, but this beer was stellar. And perfect for this chili.
Thank you again Jackie.
adapted from the beeroness
serves 6
The Ingredients
3 Tbsp olive oil
1 onion, diced
1 red bell pepper, diced
8 oz mushrooms, finely diced
2 cloves garlic, minced
2 cups vegetable broth
1/4 cup tomato paste
1 - 15 oz can of black beans, drained and rinsed
1 - 15 oz can of kidney beans, drained and rinsed
1 - 15 oz can stewed diced tomatoes
1 or 2 large chipotle peppers in adoboe, minced
1/2 cup quinoa
1/3 cup bulgur wheat
1 tsp cumin
1/4 tsp smoked paprika
1 tsp salt
1 tsp garlic powder
2 cups smoked porter
The Process:
Heat the olive oil in a large, heavy bottomed pot over medium high heat. Add the onion, garlic, mushrooms and red pepper. Saute until the garlic is fragrant and the veggies are tender, about 3-4 minutes.
Stir in the broth, tomato paste, beans, diced tomatoes, and chipotle peppers. Bring to a simmer and cook for 10 minutes or until beans have heated through. Stir in the quinoa, bulgur and spices. Cover and simmer for 15-20 minutes . The quinoa should be tender and the chili should begin to thicken. Stir in the porter, and heat through, but do not bring to a boil.
Serve warm with garnishes as desired.
Thank you again Jackie.
adapted from the beeroness
serves 6
The Ingredients
3 Tbsp olive oil
1 onion, diced
1 red bell pepper, diced
8 oz mushrooms, finely diced
2 cloves garlic, minced
2 cups vegetable broth
1/4 cup tomato paste
1 - 15 oz can of black beans, drained and rinsed
1 - 15 oz can of kidney beans, drained and rinsed
1 - 15 oz can stewed diced tomatoes
1 or 2 large chipotle peppers in adoboe, minced
1/2 cup quinoa
1/3 cup bulgur wheat
1 tsp cumin
1/4 tsp smoked paprika
1 tsp salt
1 tsp garlic powder
2 cups smoked porter
The Process:
Heat the olive oil in a large, heavy bottomed pot over medium high heat. Add the onion, garlic, mushrooms and red pepper. Saute until the garlic is fragrant and the veggies are tender, about 3-4 minutes.
Stir in the broth, tomato paste, beans, diced tomatoes, and chipotle peppers. Bring to a simmer and cook for 10 minutes or until beans have heated through. Stir in the quinoa, bulgur and spices. Cover and simmer for 15-20 minutes . The quinoa should be tender and the chili should begin to thicken. Stir in the porter, and heat through, but do not bring to a boil.
Serve warm with garnishes as desired.
Labels:
Beans and legumes,
garlic,
hot peppers,
quinoa,
Soup,
tomato,
vegan,
vegetarian
Friday, March 29, 2013
Cleaning out the Pantry: Chicken Spaghetti
Growing up many a meal was concocted with a variety of canned goods, packages of pasta and other pantry staple. Tuna noodle casseroles. Chili. A huge assortment of casseroles. They were quick. Usually uber salty. And damn tasty.
Since then, I've steered away from a lot of canned goods. Broth is homemade. The last four months most of the tomatoes I used were canned myself. Yogurt, sour cream and creme friache spiked with herbs and sauteed onions have replaced cream of something soups. Even beans are usually of the dry variety instead of dished out of cans. Pasta...well, I'm not quite ambitious enough to make my own pasta most days.
But on the rare occurrence, I will dive into the pantry to dig out something full of nostalgia and comfort. This dinner is a quick and dirty treat.
adapted from the Boomer Brief
serves 6-8
The Ingredients:
2 large boneless, skinless chicken breasts
8 oz angel hair pasta
1 - 10 oz can cream of chicken soup
8 oz sour cream
1 - 10 oz can diced tomatoes w/ chilies
1 cup shredded cheese
The Process:
Preheat the oven to 350
Boil the pasta as per package directions, drain and set aside
In a medium skillet over medium-high heat, fry the chicken in a little oil until cooked through and well browned on each side, about 7 minutes per side. Remove from pan and set aside until cool enough to handle. Once cooled, cut into bite-sized chunks.
Combine the chicken, pasta, soup, sour cream and tomatoes in a 2 qt baking dish. Cover and bake thirty minutes, or until heated through and bubbly. Remove foil. Sprinkle with cheese and return to oven for an additional 10 minutes, or until the cheese has melted and is beginning to brown.
Serve hot.
Wednesday, March 6, 2013
Creamy Pesto Shells with Peas and Cherry Tomatoes
At times the winter seems never ending. The cold seeps into every nook and cranny. Grey skyline blends with the grungy white horizon in a seamless canvas of nothing. Spring will come. It will...the days are already lengthening.
But at times I can feel that strong Midwestern resolve and hopefulness weaken. Times such as that call for carbs and comfort. And something bright and green.
Rooting through my freezer trying to come up with something quick and easy that wasn't ramen or spaghetti with tomato sauce, I stumbled across a few quart-sized bags of green bliss. Arugula pesto whirled up in those sweltering dry days of summer when the leafy bitterness was coming out of my ears. Bite and bright and perfect for tonight...
pesto recipe courtesy of Driftless Organics
the rest is my own devising
serves 4
The Ingredients:
for the sauce
3-4 cloves of garlic
1 cup chopped arugula, lightly packed
1/4 cup slivered, blanched almonds, toasted
2 Tbsp Parmesan cheese, grated
3 Tbsp olive oil
2 Tbsp butter
1/2 cup milk
4 Tbsp cream cheese
salt and pepper to taste
for the pasta
1 lb small or medium shells
2 cup peas, thawed if previously frozen
1 pt cherry or grape tomatoes, halved
The Process:
Combine the garlic, arugula, almonds, and Parmesan in a food processor and pulse into a coarse paste. Add oil in a thin stream while the processor is going. Season with salt and pepper to taste. Set aside.
Boil the pasta according to package directions, drain and set aside.
Add the butter and milk to a medium saucepan set over medium-high heat. Once the butter has melted, add the freshly made pesto and stir until well blended. Cut in the cream cheese, a little at a time and stir until melted and well combined.
Transfer the strained pasta to a serving bowl. Add peas and tomatoes. Drizzle with the creamy pesto and toss until well coated. Serve hot.
Labels:
30 minute meal,
arugula,
garlic,
pasta,
peas,
sauces and dips,
tomato
Monday, January 21, 2013
Tomato Soup
Brrr! I'm not sure how the rest of the country is fairing today, but in Minneapolis the temperature is hovering around a blistering -5 F on this sunny MLK day.
This morning was wonderful while still bundled under the covers. But later on Ross and I headed out to grab materials to update my millinery studio. That short time out and about chilled us to the bone.
Soup to the rescue!
Most of the ingredients for this simple tomato soup had been squirreled away early in the fall. Back in August I had frantically canned over 40# of Roma tomatoes, just for a situation like today. Onions and garlic still filled our storage boxes from the last CSA box. Our freezer is bursting with stock from various veggie scrap and roasted birds. Just add wine and seasonings...
the recipe is my own
serves 6-8
The Ingredients:
1 medium onion, diced
4 cloves garlic, minced
2 ribs of celery, diced
1 qt crushed tomatoes
2 cups vegetable stock
1/3 cup dry white wine
1 Tbsp sugar
1 Tbsp dried oregano
1 Tbsp dried tomato skin powder*
salt and pepper to taste
* back when I crushed and canned all of those Roma tomatoes, I couldn't bring myself to discard the skins after peeling them. In a single layer on a parchment lined baking sheet, dry out the skins at 250 for about 4 hours. They should crumble easy. Pulverize in a spice grinder. This bright red powder packs a boost of tomato flavor.
The Process:
In a heavy-bottomed 3-qt stock pot, saute the garlic, onion and celery over medium high heat until the vegetables are soft and fragrant, about 5 minutes.
Add the tomatoes, stock, wine and seasonings. Bring the mixture to a boil, return to a simmer and cook for 15-20 minutes. Using an immersion blender, or working in small batches using a food processor, puree the soup until the desired consistency is achieved. Season with additional salt and pepper to taste.
Served with grilled cheese on a frigid day? Pure heaven!
Labels:
30 minute meal,
CSA,
nostalgia,
onions,
Soup,
tomato,
vegan,
vegetarian
Monday, July 30, 2012
Cannellini and Kale Ragout
The first of our kale has finally arrived! For some reason this was one veggie I worried about the most from our CSA. I have no aversion to leafy greens. Salads are a lunch time staple and whenever I have time, a huge handful of spinach usually finds its way into a breakfast scramble in the morning. But knowing kale's reputation as a super food, I was worried the others in the household may turn up their noses at this superfood. A friend's kale chips had not been terribly well recieved last summer...
So starting simply, I tracked down a dish that had all of the appeal of a hearty Italian soup. This vegetarian friendly dish fit the bill and ended up well liked by everyone.
adapted from recipes at Epicurious and Cooking Light
serves 4
The Ingredients:
1 Tbsp olive oil
1 small onion, chopped
3 garlic cloves, minced
1/4 tsp crushed red pepper flakes
1 zucchini, quartered and cut into1/2-inch slices
6 cups chopped trimmed kale
1/2 cup water or vegetable broth
2 (16-ounce) cans cannellini beans, rinsed and drained
1 (14.5-ounce) can diced tomatoes, undrained
salt and pepper to taste
for the croutons
8 - 3/4-inch-thick slices of day old French bread
2 Tbsp olive oil
1 Tbsp garlic powder
The Process:
Preheat the oven to 400. Brush both sides of the bread with olive oil. Sprinkle generously with garlic and thyme. Place in preheated oven and toast, flipping once, until golden brown, about 8 minutes.
Heat oil in heavy large pot over
medium-high heat. Add garlic, onion and crushed red
pepper to same pot; sauté over medium heat for 2-3 minutes, or until onion is tender and garlic is fragrant. Add the zucchini and saute for 2 minutes more. Add kale, and
broth, tomatoes with juice, and beans. Bring the mixture to a boil, reduce heat to medium-low, cover, and simmer until the
kale wilts, and the beans are heated through, about 15 minutes. Season with
salt and pepper.
Ladle ragout into shallow bowls. Garnish with 2 croutons and
serve.
The Review:
Some had there doubts about the kale. Others weren't sure the dish was fitting given the heat of the day. All opinions were swayed upon trying the dish.
The balance of acidic tomatoes with the smoothness of the beans actual made the dish quite refreshing, even in our terrible summer heat. I was not a fan of stand over the stove while the stewn cooked, but I would gladly sit down to a bowl of this ragout on another hot day in a heartbeat.
The crouton truly sealed the deal on this dish for me. Though I've always been a sucker for sopping up broths and gravies with crusty breads.
Thursday, July 12, 2012
Spaghetti with Rainbow Chard
For a quick and light weekend lunch, pasta is always near at hand in our household (I really should consider making some pasta from scratch one of these days.) Thankfully tomato sauce isn't the only option available to the hungry eater. This veggie and garlic topping was was inspired by the beautiful bunch of rainbow chard that came in the CSA box
the recipe is my own
serves 3-4
The Ingredients:
8 oz uncooked whole wheat spaghetti
2 Tbsp olive oil
2-3 cloves of garlic, minced
2-3 green onions, chopped
2 roma tomatoes, diced
1 Tbsp fresh parsley, minced
1 Tbsp fresh basil, minced
1 bunch of rainbow chard, stems and leaves separated
salt and pepper to taste
splash of red wine
Parmesan cheese (optional)
The Process:
Cook the pasta al dente, according to package directions. Drain and set aside
Heat the oil in a large skillet over medium heat. Add the garlic and onions. Saute until the garlic is fragrant and tender, about 2-3 minutes. Add the tomatoes, parsley, and basil and cook until the tomatoes begin to break down. Stir in the chard stems, simmering until tender. Add a splash of wine and season with salt and pepper. Add the chopped chard leaves and stir until wilted.
Toss with pasta. Sprinkle with Parmesan and serve hot.
The Review:
This may not become a fast favorite for spaghetti...or greens for that matter. But this prepartion was a refreshing change of pace for both. How freeing not to have to rely on red sauce for pasta. And plain greens sauteed with garlic...so dull after a while. The humbrum and routine can really bring a person down.
The vibrancy of the chard stems truly is a pick-me-up here...and the colors did not diminish in cooking. Beautiful deep greens; glowing pinks. yellows and oranges. All kissed with the bright red from the tomatoes. Next time around I'd likely use a squeeze of lemon juice instead of that splash of wine. A touch more garlic and ground pepper may be in order as well.
The leaves of this particular batch of chard were on the larger side. As a result the greens were a bit tougher and more bitter than I would have liked. But I nit pick. Spinach, kale, or greens of the mustard, turnip or collard variety would probably work equally as well.
the recipe is my own
serves 3-4
The Ingredients:
8 oz uncooked whole wheat spaghetti
2 Tbsp olive oil
2-3 cloves of garlic, minced
2-3 green onions, chopped
2 roma tomatoes, diced
1 Tbsp fresh parsley, minced
1 Tbsp fresh basil, minced
1 bunch of rainbow chard, stems and leaves separated
salt and pepper to taste
splash of red wine
Parmesan cheese (optional)
The Process:
Cook the pasta al dente, according to package directions. Drain and set aside
Heat the oil in a large skillet over medium heat. Add the garlic and onions. Saute until the garlic is fragrant and tender, about 2-3 minutes. Add the tomatoes, parsley, and basil and cook until the tomatoes begin to break down. Stir in the chard stems, simmering until tender. Add a splash of wine and season with salt and pepper. Add the chopped chard leaves and stir until wilted.
Toss with pasta. Sprinkle with Parmesan and serve hot.
The Review:
This may not become a fast favorite for spaghetti...or greens for that matter. But this prepartion was a refreshing change of pace for both. How freeing not to have to rely on red sauce for pasta. And plain greens sauteed with garlic...so dull after a while. The humbrum and routine can really bring a person down.
The vibrancy of the chard stems truly is a pick-me-up here...and the colors did not diminish in cooking. Beautiful deep greens; glowing pinks. yellows and oranges. All kissed with the bright red from the tomatoes. Next time around I'd likely use a squeeze of lemon juice instead of that splash of wine. A touch more garlic and ground pepper may be in order as well.
The leaves of this particular batch of chard were on the larger side. As a result the greens were a bit tougher and more bitter than I would have liked. But I nit pick. Spinach, kale, or greens of the mustard, turnip or collard variety would probably work equally as well.
Labels:
30 minute meal,
basil,
CSA,
entree,
garlic,
greens,
italian,
pasta,
tomato,
vegan,
vegetarian
Wednesday, May 30, 2012
Bengalese Onion and Tomato Fish Curry
I was on a bit of a curry kick. I wanted something fast. Fish and veggiecurries often come to the rescue in such situations. This one grabbed my attention with its Italian like combination of onions and tomato. How ever would the other spices play into this?
Adapted from The Curry Bible by Jackie Passmore
serves four
The Ingredients:
1 1/2 lbs thick fish fillets, cut into tenders
1/2 cup flour
1 cup ghee, mustard oil, or vegetable oil
1 - 14 oz can crushed tomatoes
4 cloves of garlic, minced
1 large onion, thinly sliced
1 tsp ground chili
2 tsp sugar
1 Tbsp fresh lime juice
2 fresh green chilies (such as Serrano) de-seeded and diced
3 roma tomatoes, cut into wedges
1 inch knob of ginger, minced
fresh cilantro for garnish
The Process:
Place the fish fillets and flour in a large re-sealable bag and toss until the fish is evenly coated. Heat the oil or ghee in a large, deep skillet. Carefully add the fish and fry until crisp, but not cooked completely through flipping once, about 4-5 minutes. Remove the fish to a pan lined in paper towels. Set aside.
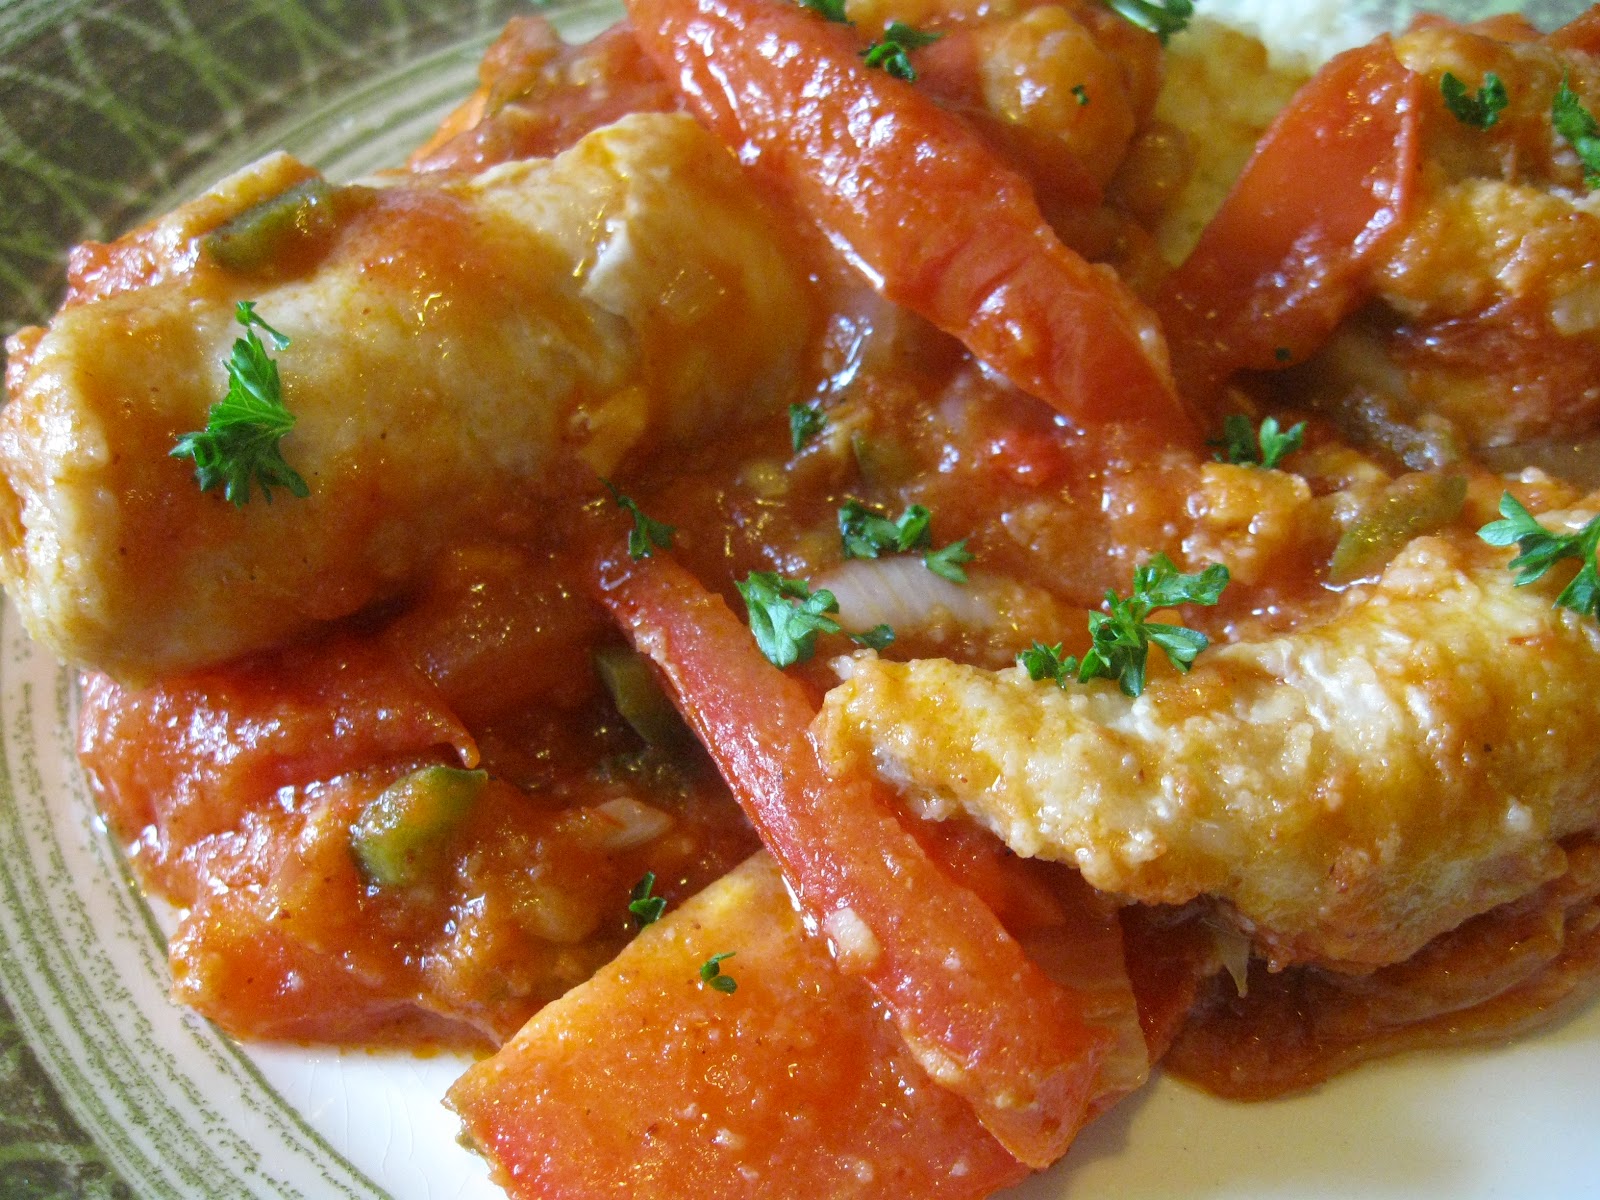
Pour off all but 2 Tbsp of the cooking oil. Add tomatoes, garlic, onion, and chili powder. Simmer until the onions have softened and the sauce has thickened. Add the sugar, lime juice, chilies and ginger. Stir until combined. Season with salt and pepper to taste, Carefully add the fish. Simmer gently, bring the fish with the sauce until the fish is tender and heated through (about 6-8 minutes).
Transfer to a serving dish or warmed plates and garnish with fresh cilantro.
The Review:
This curry strike me an a wonderful introduction to the hesitant eater. It boasts many of the same flavors of a well loved tomato-based Italian dish, with a little extra twist. The recipe is easily adaptable to many variety of fish, though not all are created equal. I had opted for catfish, despite my aversion to the fish in general. The flesh ended up chewy and rubbery...with that muddy undertone that I can never quite overcome. Swai or Tilapia would fair far better for the budget conscious, though cod, halibut, haddock, whiting or pollock would work equally as well.
The curry did make up for the awfully onion-y fish dumpling curry made a few weeks earlier. It is a dish worth attempting again.
Adapted from The Curry Bible by Jackie Passmore
serves four
The Ingredients:
1 1/2 lbs thick fish fillets, cut into tenders
1/2 cup flour
1 cup ghee, mustard oil, or vegetable oil
1 - 14 oz can crushed tomatoes
4 cloves of garlic, minced
1 large onion, thinly sliced
1 tsp ground chili
2 tsp sugar
1 Tbsp fresh lime juice
2 fresh green chilies (such as Serrano) de-seeded and diced
3 roma tomatoes, cut into wedges
1 inch knob of ginger, minced
fresh cilantro for garnish
The Process:
Place the fish fillets and flour in a large re-sealable bag and toss until the fish is evenly coated. Heat the oil or ghee in a large, deep skillet. Carefully add the fish and fry until crisp, but not cooked completely through flipping once, about 4-5 minutes. Remove the fish to a pan lined in paper towels. Set aside.
Pour off all but 2 Tbsp of the cooking oil. Add tomatoes, garlic, onion, and chili powder. Simmer until the onions have softened and the sauce has thickened. Add the sugar, lime juice, chilies and ginger. Stir until combined. Season with salt and pepper to taste, Carefully add the fish. Simmer gently, bring the fish with the sauce until the fish is tender and heated through (about 6-8 minutes).
Transfer to a serving dish or warmed plates and garnish with fresh cilantro.
The Review:
This curry strike me an a wonderful introduction to the hesitant eater. It boasts many of the same flavors of a well loved tomato-based Italian dish, with a little extra twist. The recipe is easily adaptable to many variety of fish, though not all are created equal. I had opted for catfish, despite my aversion to the fish in general. The flesh ended up chewy and rubbery...with that muddy undertone that I can never quite overcome. Swai or Tilapia would fair far better for the budget conscious, though cod, halibut, haddock, whiting or pollock would work equally as well.
The curry did make up for the awfully onion-y fish dumpling curry made a few weeks earlier. It is a dish worth attempting again.
Sunday, May 20, 2012
Kolivartha Curry
I few days ago I handed Ross one of my curry books and told him to pick a chicken dish. Sometimes meal planning and shopping lists happen more easily when delegated this way. This recipe below was the one he chose. His reasoning? We already had most of the ingredient list. Gotta love the man who knows the content of the pantry.
From what I could gather this chicken curry dish is hails from the Chettinad region of Southern Indian. I am hardly an expert in Indian fare, though I adore curries from all over the subcontinent. Please let me know if you have further tidbits on this culinary destination
Adapted form the Curry Bible by Jacki Passmore
serves 4
The Ingredients:
1 1/2 lbs skinless chicken thigh fillets, cut into tenders
4 cloves garlic, minced
1 inch finger fresh ginger, minced
1 onion, diced
1 large tomato, deseeded and diced
2 Tbsp ghee or oil
1/2 cup finely ground almonds or cashews
1 tsp Garam Masala
1 Tbsp ground coriander
1 tsp ground cumin
1/2 - 1 tsp chili powder
1/2 tsp turmeric
2-3 whole cloves
1 1/2 cups coconut milk
salt to taste
fresh lemon or lime
chopped cilantro to serve
The Process:
Rinse the chicken tenders and pat dry,
In a blender or food processor, pulse the garlic, ginger, and onion until a thick paste forms. Add the tomato and set aside.
In a large skillet over medium-high heat, heat the oil or ghee. Add the chicken and saute until lightly browned on all sides. Remove the chicken and set aside. Add the tomato-onion mixture to the skillet and cook for 5-6 minutes, stirring constantly. Add the ground nuts and spices; stir until well mixed.
Return the chicken to the pan. Pour in the coconut milk and season with salt to taste. Bring the mixture to a simmer and cook, uncovered, until the chicken is tender and the sauce has thickened.
Serve with a drizzle of fresh lemon or lime juice and sprinkled with cilantro.
The Review:
Curries with the slightly sweet flavor of coconut seem to be the biggest hits in our household. The mild creamy flavors were well balanced and complimented the chicken instead of overpowering it. I haven't tried many curried with ground nuts, and I loved they way the ground cashews thickened the sauce...added only the slightest nutty flavor. The cashews have a creaminess all of their own. I suspect almonds wouldn't have quite as distinct a flavor when paired with all of the other spices in the dish. .The easy and quickness in which this dish came together was a huge bonus as well. As most of the ingredients are staple in our household, I'm sure we'll be enjoying this curry again!
From what I could gather this chicken curry dish is hails from the Chettinad region of Southern Indian. I am hardly an expert in Indian fare, though I adore curries from all over the subcontinent. Please let me know if you have further tidbits on this culinary destination
Adapted form the Curry Bible by Jacki Passmore
serves 4
The Ingredients:
1 1/2 lbs skinless chicken thigh fillets, cut into tenders
4 cloves garlic, minced
1 inch finger fresh ginger, minced
1 onion, diced
1 large tomato, deseeded and diced
2 Tbsp ghee or oil
1/2 cup finely ground almonds or cashews
1 tsp Garam Masala
1 Tbsp ground coriander
1 tsp ground cumin
1/2 - 1 tsp chili powder
1/2 tsp turmeric
2-3 whole cloves
1 1/2 cups coconut milk
salt to taste
fresh lemon or lime
chopped cilantro to serve
The Process:
Rinse the chicken tenders and pat dry,
In a blender or food processor, pulse the garlic, ginger, and onion until a thick paste forms. Add the tomato and set aside.
In a large skillet over medium-high heat, heat the oil or ghee. Add the chicken and saute until lightly browned on all sides. Remove the chicken and set aside. Add the tomato-onion mixture to the skillet and cook for 5-6 minutes, stirring constantly. Add the ground nuts and spices; stir until well mixed.
Return the chicken to the pan. Pour in the coconut milk and season with salt to taste. Bring the mixture to a simmer and cook, uncovered, until the chicken is tender and the sauce has thickened.
Serve with a drizzle of fresh lemon or lime juice and sprinkled with cilantro.
The Review:
Curries with the slightly sweet flavor of coconut seem to be the biggest hits in our household. The mild creamy flavors were well balanced and complimented the chicken instead of overpowering it. I haven't tried many curried with ground nuts, and I loved they way the ground cashews thickened the sauce...added only the slightest nutty flavor. The cashews have a creaminess all of their own. I suspect almonds wouldn't have quite as distinct a flavor when paired with all of the other spices in the dish. .The easy and quickness in which this dish came together was a huge bonus as well. As most of the ingredients are staple in our household, I'm sure we'll be enjoying this curry again!
Labels:
30 minute meal,
chicken,
coconut,
cumin,
curry,
entree,
garlic,
ginger,
gluten-free,
Indian,
lemon,
lime,
low sugar/no sugar,
nuts,
onions,
south beach phase 2,
tomato
Tuesday, April 10, 2012
Single Serving Veggie Lasagna *Gluten Free*
This is not your typical veggie lasagna. For one, there are no anemic vegetables swimming in a gluey cream-based sauce. And? No noodles. No kidding! Slice zucchini thin enough and it will fool even the most devout pasta-holic. I promise. Well, maybe maybe it won't fool them. But I doubt they'll complain much.
The individual loaf pans make these a breeze to serve as well. No fighting over utensils. No runny mess of cheese and sauce oozing in to replace the missing slices. And who needs a plate when you can enjoy it right out of your own personal pans!
When I first started assembling these there was much grumbling and groaning. All of the slicing, blanching, sauteing, mixing, baking...sheesh! For the amount of time I was looking into spending on these I was hoping for something stellar. It took a while before it dawned on me that this in no more time consuming than traditional noodle and meat lasagna...possibly even less so given that the zucchini noodle blanch quicker than the noodle boil and the onions cook down faster than the meat usually browns. If the time is a deterrent, make huge batch and freeze them for later...either pre or post baking (it doesn't really matter).
yields four single serving lasagna
The Ingredients:
2 medium zucchini
1 Tbsp olive oil
2 medium onions, thinly sliced
1 cup sliced mushrooms
4 cloves of garlic, minced
1 1/2 cups ricotta
1 egg
1 tsp oregano
1/2 tsp parsley
1/2 tsp basil
1/2 tsp salt
2 Tbsp fresh grated Parmesan
2 cups shredded Italian cheese blend (Mozzarella, Provolone, Parmesan, Fontina, Romano and Asiago)
1 large bunch fresh spinach
3 Roma tomatoes, thinly sliced
1 1/2 cups tomato sauce
equipment:
4 mini loaf pans
The Process:
Preheat the oven to 350.
Bring a large pot of lightly salted water to a gentle boil over medium high heat. Cut off stem end of the zucchini. Using a mandolin, vegetable peeler or a sharp knife cut the zucchini lengthwise into 1/8 - inch thick slices. Quickly blanch the zucchini in the salted water, about 1-2 minutes. Drain the zucchini ribbons and set aside.
Heat the olive oil in a large skillet over medium heat. Add the 2 cloves of garlic, onions and mushrooms. Saute until the mushrooms and onions are tender, 8-10 minutes. Set aside.
In a medium bowl, combine the ricotta, Parmesan, remaining garlic, egg, oregano, parsley and basil until well combined.
Gather all of the ingredients to assemble the lasagna.
Lightly oil the each of the four loaf pans. In the bottom of each mini loaf pan, layer 2-3 ribbons of zucchini, completely covering the bottom. Top with a layer of 6-8 spinach leaves, and 3-4 slices of tomato. Spread about 3 Tbsp of the ricotta mixture over the vegetables and sprinkle with about 3 Tbsp of shredded cheese.
Spoon a thin layer of the mushroom and onion mixture on top of the cheeses. Top with a layer of tomato sauce. Repeat all of the layers. Finish with a layer of 2-3 zucchini ribbons, 3-4 slices of tomato and a generous sprinkling of shredded cheese.
Cover each of the mini lasagna loosely with aluminum foil. Bake for 30-35 minutes. Remove the foil and bake an additional 10-15 minutes or until the cheese is bubbly and golden brown. Allow the lasagnas to cool for 5 to 10 minute prior to serving.
The Review:
Was this recipe worth all chopping, slicing, dicing and cursing. The meat loving pasta-holic in my household claimed not to miss the meat or the noodles (though he would have preferred I nixed the mushrooms). A huge plus for those wonderful vegetables. Come summer when our CSA boxes start to arrive, I suspect many a veggie will endure a similarly tasty fate.
The individual loaf pans make these a breeze to serve as well. No fighting over utensils. No runny mess of cheese and sauce oozing in to replace the missing slices. And who needs a plate when you can enjoy it right out of your own personal pans!
When I first started assembling these there was much grumbling and groaning. All of the slicing, blanching, sauteing, mixing, baking...sheesh! For the amount of time I was looking into spending on these I was hoping for something stellar. It took a while before it dawned on me that this in no more time consuming than traditional noodle and meat lasagna...possibly even less so given that the zucchini noodle blanch quicker than the noodle boil and the onions cook down faster than the meat usually browns. If the time is a deterrent, make huge batch and freeze them for later...either pre or post baking (it doesn't really matter).
yields four single serving lasagna
The Ingredients:
2 medium zucchini
1 Tbsp olive oil
2 medium onions, thinly sliced
1 cup sliced mushrooms
4 cloves of garlic, minced
1 1/2 cups ricotta
1 egg
1 tsp oregano
1/2 tsp parsley
1/2 tsp basil
1/2 tsp salt
2 Tbsp fresh grated Parmesan
2 cups shredded Italian cheese blend (Mozzarella, Provolone, Parmesan, Fontina, Romano and Asiago)
1 large bunch fresh spinach
3 Roma tomatoes, thinly sliced
1 1/2 cups tomato sauce
equipment:
4 mini loaf pans
The Process:
Preheat the oven to 350.
Bring a large pot of lightly salted water to a gentle boil over medium high heat. Cut off stem end of the zucchini. Using a mandolin, vegetable peeler or a sharp knife cut the zucchini lengthwise into 1/8 - inch thick slices. Quickly blanch the zucchini in the salted water, about 1-2 minutes. Drain the zucchini ribbons and set aside.
Heat the olive oil in a large skillet over medium heat. Add the 2 cloves of garlic, onions and mushrooms. Saute until the mushrooms and onions are tender, 8-10 minutes. Set aside.
In a medium bowl, combine the ricotta, Parmesan, remaining garlic, egg, oregano, parsley and basil until well combined.
Gather all of the ingredients to assemble the lasagna.
Lightly oil the each of the four loaf pans. In the bottom of each mini loaf pan, layer 2-3 ribbons of zucchini, completely covering the bottom. Top with a layer of 6-8 spinach leaves, and 3-4 slices of tomato. Spread about 3 Tbsp of the ricotta mixture over the vegetables and sprinkle with about 3 Tbsp of shredded cheese.
Spoon a thin layer of the mushroom and onion mixture on top of the cheeses. Top with a layer of tomato sauce. Repeat all of the layers. Finish with a layer of 2-3 zucchini ribbons, 3-4 slices of tomato and a generous sprinkling of shredded cheese.
Cover each of the mini lasagna loosely with aluminum foil. Bake for 30-35 minutes. Remove the foil and bake an additional 10-15 minutes or until the cheese is bubbly and golden brown. Allow the lasagnas to cool for 5 to 10 minute prior to serving.
The Review:
Was this recipe worth all chopping, slicing, dicing and cursing. The meat loving pasta-holic in my household claimed not to miss the meat or the noodles (though he would have preferred I nixed the mushrooms). A huge plus for those wonderful vegetables. Come summer when our CSA boxes start to arrive, I suspect many a veggie will endure a similarly tasty fate.
Labels:
basil,
Dairy,
eggs,
entree,
garlic,
gluten-free,
herbs,
italian,
mushrooms,
onions,
south beach phase 1,
tomato,
vegetarian,
zucchini
Tuesday, February 21, 2012
Garbanzos with Chorizo and Spinach
Beans and pork is a tried and true combination much loved across most of the country. The possibilities are virtually endless once you've moved beyond the backyard barbeque pinto beans and bacon. This dish is much more stew like, with chunks of tender potato, ample bean and a healthy dose of smokey chorizo. Wilted spinach added towards the end helps endow a sense of health and good eating. And the best part? The entire entree can be dished up in about thirty minutes.
I highly recommended the smoked Spanish-style of chorizo for this dish, though the raw nutmeg chili infused Mexican style will work as well. I opted for Palacios mild versions...hot sausages are also available.
adapted from A recipe in Men's Health, December 2011
servers 4
The Ingredients:
1/2 Tbsp olive oil
2 links Spanish-style chorizo, chopped
1 large onion
2-4 cloves of garlic, minced
1/4-1/2 tsp red pepper flakes
1 tsp paprika (preferably pimenton)
2 Tbsp tomato paste
1 lb yukon or russet potatoes, cut into 1/2 inch cubes
2 bay leaves
1 1/2 to 2 cups chicken or vegetable stock
2- 14 oz cans garbanzo beans, drained and rinsed
salt and pepper to taste
8 cups baby spinach
The Process:
Heat the oil in a large pot or saucepan over medium heat. Add the chorizo and saute until lightly browned, about 5 minutes. Remove from the pant and set aside.
Add the onion, garlic, red pepper, and paprika to the pot and cook until the onion begins to caramelize. Stir in the tomato paste and cook for another 2-3 minutes or until the paste evenly coats the onions. Add the stock, potatoes, and bay leaves. Reduce to a simmer and cook until the potatoes are tender, about 10 minutes.
Add the Garbanzo beans and cook for another 5 minutes or until beans are heated through. Season to taste with salt and pepper. Remove the bay leaves and add the cooked chorizo and the baby spinach. Continue to cook until the spinach is wilted.
The Review:
Upon beginning to saute the chorizo, I would have thought the end result would be a greasy mess due to the red slick of fat that coated the saucepan. instead of the rich, smokey dish ultimately served up. The meat was not a substantial part of the meal, quantity wise (though you could easily double or triple the amount if you are a huge fan of this Iberian treat) but it infuses smokey and slightly spicy nuances in every bite. The potatoes and chickpea both lend a wonderful soft and velvety texture, but with enough difference to keep you from getting bored. The contrast of something firm or with a little more bite was missing, but not by much. The flavors more than make up for what the texture front may lack. And the spinach...eight cups seems like a lot until the bunch cooks down. The beautiful flecks of green amidst the deep red sauce made for an incredibly picturesque dish. However, this one is so tasty you may polish it off before the camera had a chance. Leftovers were just as wonderful the next day.
I highly recommended the smoked Spanish-style of chorizo for this dish, though the raw nutmeg chili infused Mexican style will work as well. I opted for Palacios mild versions...hot sausages are also available.
adapted from A recipe in Men's Health, December 2011
servers 4
The Ingredients:
1/2 Tbsp olive oil
2 links Spanish-style chorizo, chopped
1 large onion
2-4 cloves of garlic, minced
1/4-1/2 tsp red pepper flakes
1 tsp paprika (preferably pimenton)
2 Tbsp tomato paste
1 lb yukon or russet potatoes, cut into 1/2 inch cubes
2 bay leaves
1 1/2 to 2 cups chicken or vegetable stock
2- 14 oz cans garbanzo beans, drained and rinsed
salt and pepper to taste
8 cups baby spinach
The Process:
Heat the oil in a large pot or saucepan over medium heat. Add the chorizo and saute until lightly browned, about 5 minutes. Remove from the pant and set aside.
Add the onion, garlic, red pepper, and paprika to the pot and cook until the onion begins to caramelize. Stir in the tomato paste and cook for another 2-3 minutes or until the paste evenly coats the onions. Add the stock, potatoes, and bay leaves. Reduce to a simmer and cook until the potatoes are tender, about 10 minutes.
Add the Garbanzo beans and cook for another 5 minutes or until beans are heated through. Season to taste with salt and pepper. Remove the bay leaves and add the cooked chorizo and the baby spinach. Continue to cook until the spinach is wilted.
The Review:
Upon beginning to saute the chorizo, I would have thought the end result would be a greasy mess due to the red slick of fat that coated the saucepan. instead of the rich, smokey dish ultimately served up. The meat was not a substantial part of the meal, quantity wise (though you could easily double or triple the amount if you are a huge fan of this Iberian treat) but it infuses smokey and slightly spicy nuances in every bite. The potatoes and chickpea both lend a wonderful soft and velvety texture, but with enough difference to keep you from getting bored. The contrast of something firm or with a little more bite was missing, but not by much. The flavors more than make up for what the texture front may lack. And the spinach...eight cups seems like a lot until the bunch cooks down. The beautiful flecks of green amidst the deep red sauce made for an incredibly picturesque dish. However, this one is so tasty you may polish it off before the camera had a chance. Leftovers were just as wonderful the next day.
Friday, November 11, 2011
Black Bean and Pumpkin Soup
Rounding out our evening of pumpkin and beer...and adding a bit more substance to an otherwise carb-ridden table, was this black bean and pumpkin soup. I first happened upon the recipe at Saucy and Bossy and had been waiting all fall for an oppertuner time to try it out. When Ross annouced his next beer would be a pumpkin ale, I knew the soup's moment had come.
I added about twice as much pumpkin as either of the linked recipes used. My pumpkin of choice was roasted and pureed from a fresh pumpkin...not canned. But in a pinch either will work. I also omitted the ham steak and used vegetable broth to make this a vegan/vegetarian friendly dish.
The recipe was also adapted for use in the slow cooker, as to be readily on hand throughout several hours of entertaining.
Adapted from the recipe posted at Saucy and Bossy, but originally from Smitten Kitchen
yields 9 cups
The Ingredients:
3 cans (15.5 oz) black beans, rinsed and drained
1 cans stewed tomatoes, drained and chopped
1 medium red onion, diced
1 shallot, diced
5 cloves of garlic, minced
2 Tbsp ground cumin
1 tsp salt
1/2 tsp. fresh ground black pepper
3 Tbsp olive oil
6 cups vegetable, chicken or beef stock
2 cups pumpkin puree
1/2 cup sherry, cider or dry white wine
3-4 Tbsp red wine vinegar
additional slat and pepper to taste
The Process:
Combine drained tomatoes and black beans in a food processor. Blend beans and tomatoes into a course puree
In large skillet, sautee onions, shallot, garlic, cumin, salt and pepper in olive oil until onion is beginning to brown and the cumin is fragrant. Transfer onion mixture to a 6-qt slow cooker. Stir in bean puree, stock, pumpkin puree and sherry.
Simmer the soup on high for 2-3 hours or on low for 4-6 hours
Just before serving, stir in the vinegar and season to taste with salt and pepper. Garnish with sour cream and toasted pepitas.
The Review:
I really wanted to like this soup. I really truly did. I make several varaiations of black bean soup throughout the colder months and hoped this incarantion would add a welcome diversion from my cumin studded, chili-like line up.
It wasn't as new and exciting as I had hoped. The dominate flavor was most assuredly the cumin. I adore cumin, but I can't seem to avoid a black bean soup that relies on this spice. The pumpkin was present, but in more of supporting role than leading actor. The textures were good, though a bit smooth for my taste. The sherry did add a lovely bright finish to the dish, but only when ladled freshly after adding. Allowed to simmer longer in the crock pot, it's clean bite quickly faded.
More pumpkin, less bean. Less cumin. And sorry vegetarians...I think the soup needs the beef stock for that added depth. And the ham steak for more interest. Better yet...stock made from a ham shank...now I know what to do with those holiday leftovers.
I added about twice as much pumpkin as either of the linked recipes used. My pumpkin of choice was roasted and pureed from a fresh pumpkin...not canned. But in a pinch either will work. I also omitted the ham steak and used vegetable broth to make this a vegan/vegetarian friendly dish.
The recipe was also adapted for use in the slow cooker, as to be readily on hand throughout several hours of entertaining.
Adapted from the recipe posted at Saucy and Bossy, but originally from Smitten Kitchen
yields 9 cups
The Ingredients:
3 cans (15.5 oz) black beans, rinsed and drained
1 cans stewed tomatoes, drained and chopped
1 medium red onion, diced
1 shallot, diced
5 cloves of garlic, minced
2 Tbsp ground cumin
1 tsp salt
1/2 tsp. fresh ground black pepper
3 Tbsp olive oil
6 cups vegetable, chicken or beef stock
2 cups pumpkin puree
1/2 cup sherry, cider or dry white wine
3-4 Tbsp red wine vinegar
additional slat and pepper to taste
The Process:
Combine drained tomatoes and black beans in a food processor. Blend beans and tomatoes into a course puree
In large skillet, sautee onions, shallot, garlic, cumin, salt and pepper in olive oil until onion is beginning to brown and the cumin is fragrant. Transfer onion mixture to a 6-qt slow cooker. Stir in bean puree, stock, pumpkin puree and sherry.
Simmer the soup on high for 2-3 hours or on low for 4-6 hours
Just before serving, stir in the vinegar and season to taste with salt and pepper. Garnish with sour cream and toasted pepitas.
The Review:
I really wanted to like this soup. I really truly did. I make several varaiations of black bean soup throughout the colder months and hoped this incarantion would add a welcome diversion from my cumin studded, chili-like line up.
It wasn't as new and exciting as I had hoped. The dominate flavor was most assuredly the cumin. I adore cumin, but I can't seem to avoid a black bean soup that relies on this spice. The pumpkin was present, but in more of supporting role than leading actor. The textures were good, though a bit smooth for my taste. The sherry did add a lovely bright finish to the dish, but only when ladled freshly after adding. Allowed to simmer longer in the crock pot, it's clean bite quickly faded.
More pumpkin, less bean. Less cumin. And sorry vegetarians...I think the soup needs the beef stock for that added depth. And the ham steak for more interest. Better yet...stock made from a ham shank...now I know what to do with those holiday leftovers.
Monday, October 10, 2011
White Bean and Tomato Bruschetta
The highlight of the bruschetta bar, at least for me, was this little gem right here. Our event was kicking off an evening of drinking and revelry, and while finger food doesn't offer much by way of substance, I was bound and determined to have something with a little more protein to sate us.
Adapted from a Bon Apetit recipe found at Epicurious
yields about 20 servings
The Ingredients:
1 cup dried Great Northern beans (or one can, drained and well-rinsed)
3 plum tomatoes, seeded, chopped
1/4 cup pitted Kalamata olives, chopped
4 Tbsp olive oil
1/4 cup chopped fresh basil
2-3 cloves garlic, minced
salt and pepper to taste
The Process:
Adapted from a Bon Apetit recipe found at Epicurious
yields about 20 servings
The Ingredients:
1 cup dried Great Northern beans (or one can, drained and well-rinsed)
3 plum tomatoes, seeded, chopped
1/4 cup pitted Kalamata olives, chopped
4 Tbsp olive oil
1/4 cup chopped fresh basil
2-3 cloves garlic, minced
salt and pepper to taste
The Process:
If using dry beans: beans in large saucepan. Add enough cold water to cover the beans by 3 inches. Bring to boil. Cover and remove from heat. Allow the beans to stand 1 hour. Drain beans and return to pan. Add enough cold water to cover by them 3 inches. Bring to boil. Reduce heat and simmer until tender, stirring occasionally, about 1 hour. Drain and cool.
Transfer cooked (or canned) beans to medium bowl. Add in tomatoes, olives, 4 tablespoons oil, basil and garlic. Mix until well combined. Season to taste with salt and pepper.
Serve cold or room temperature with crostini.
The Review:
The flavor and texture of this simple topping was astounding. Fresh red-ripe fall tomatoes, smooth and creamy white beans, salty olives and just enough seasoning to tie everything together....heavenly. I went a little heavier on the bean than the recipe called for, but with no regrets.
The original recipe suggests serving by spreading freshly toasted slices of French bread with a goat's cheese such as Montrachet and then topping with the bean mixture. While I'm sure this would have added an even more exquisite depth of flavor and a wonderful play of warm crisp toast against cool and creamy toppings, we opted to keep it simple and remove the broiler and cheese from the equation. That's quite alright. This meant I was able to savor a lovely bit of Montrachet on my own some days later.
Saturday, October 8, 2011
Double Tomato Bruschetta
At a recent opening night party for work we were treated to a spread of savory Italian finger foods. The highlight of the Mediterranean treats was the bruschetta bar. Large bowls of lightly toasted bread headed a table filled with about half a dozen varieties of tasty toppings. I was itching to have an excuse to set up something similar. Double tomato bruschetta is the first of the three I treated out guests to on the chosen night.
Adapted from Laurie Thompson's recipe at Allrecipes.com
The Ingredients:
for the toasts:
1-2 day old baguettes
olive oil
for the topping:
6 roma tomatoes, chopped
1/2 cup sun-dried tomatoes, packed in oil, chopped
3 cloves garlic, minced
1/4 cup olive oil
2 Tbsp balsamic vinegar
1/4 cup fresh basil, chiffonade
1/4 tsp salt
1/4 tsp ground black pepper
The Process:
For the toasts:
Preheat the oven to 450.
Slice the baguette on a diagonal about 1/2 inch thick slices. Coat one side of each slice with olive oil using a pastry brush. Arrange slices in a single layer on a cooking sheet, olive oil side down. Place a tray of bread slices in the oven on the top rack. Toast for 5-6 minutes, until the bread just begins to turn golden brown.
Allow to cool.
for the topping:
In a medium bowl combine the two types of tomato, garlic, oil, vingear and basil. Season with salt and pepper to taste.
to serve:
Arrange toasted bread on a serving platter. Carefully top each slice with a spoonful of the tomato mixture. Alternatively, set the toasts in a large basket at the table alongside a serving dish of the tomato mixture and allow guests to create their own bruschetta.
The Review:
The sun-dried tomato added a deep and slightly sweet taste that brought a pleasant and rich tomato flavor to their anemic Roma relations. The vinegar likewise added a sweet hint, making me wish I had added just a touch more salt to balance the flavors out.
These little toasts could just as easily be finished off with a touch of mozzarella and a minute or two under the broiler, but with people coming and going the serve yourself bruschetta bar seemed to result in much fresher flavors. And no soggy toasts were to be found from bread topped too soon. Overall this double tomato bruschetta was a big hit, though not the favorite of the evening.
Subscribe to:
Posts (Atom)

.jpg)