Showing posts with label chocolate. Show all posts

Wednesday, December 17, 2014

Chocolate Lace Sandwich Cookies (Brussels)


Photo by Heather Hanson 
 

Beligan beers and chocolate are a favorite pairing of ours, especially a dubbel. When I came across this recipe, I was sure I had a treat on my hands. Do the cookies look familiar? They do bear a striking resemblance to a popular brand-name cookie named after the capital of Belgium. It seemed only fitting to pair them with a Belgian style beer!

These cookies are one of the more challenging ones I've made to date. The first batch turned out perfectly: an even golden brown, beautiful lacing, wonderfully crisp. Only they had melded into one large cookie. The second batch, I had halved the recipe, but forgot to halve the flour, resulting in a very different, albeit tasty, cookie. The third batch I rolled instead of dropped and as a result the cookies didn't spread as thin as they should have. The fourth batch burned. Once they start to caramalized, they brown quickly! The fifth batch finally yielded something close to the desired result, but nothing nearly as pretty as the ones at Two Peas. But they tasted wonderful.

So what did I learn?

3/4 tsp is really 3/4 tsp. Any larger you risk one giant cookie as they meld together.

Space them FAR apart. I ended up making 10 per sheet to give the cookies ample room to spread.

Drop the dough, don't roll it. Rolling compressed the batter and the cookies did not spread evenly thin. The edges burn before the center was done as a result.

Mix the sugars and butter well before adding the dry ingredients. The dough comes together very fast anyway, so not point in rushing by trying to throw everything into the same bowl as once. You'll achieve that wonderful brittle like texture if you dirty that extra bowl.

Parchment paper or silpats are a must.

Watch the cookies closely during the last 4-5 minutes of baking. Once they spread, they caramelize fast. Be prepared to yank them out the oven the moment they look uniformly golden.

And over course, enjoy! Even the accidents were incredibly tasty!
 

Recipe adapted from Two Peas and Their Pod

Yields 20 sandwich cookies

Ingredients
  • 1/3 cup melted butter
  • 2 Tbsp heavy cream
  • 2 Tbsp light corn syrup
  • 1 tsp vanilla extract
  • ½ cup granulated sugar
  • ½ cup flour
  • ½ cup old-fashioned oats
  • ½ tsp cinnamon
  • ¼ tsp baking powdered
  • pinch of salt
  • 2 oz dark chocolate, melted

Preparation
  • Preheat the oven to 375 degrees F
  • Line several baking sheets with parchment paper. Set aside.
  • Whisk together the butter, cream, corn syrup, and vanilla extract. Beat in the sugar until smooth.
  • In a separate bowl, combine the flour, oats, cinnamon, baking powder and salt. Slowly mix the flour mixture into the butter mixture until just combine.
  • Drop dough by the scant teaspoon onto the prepared baking sheets, leaving at least 3 inches between cookies. They will spread a lot as they bake. 10-12 cookies per sheet is ideal.
  • Bake for 8-10 minutes, checking after the 6 minute mark. Remove them when they are a deep amber on the edges and golden brown in the center. The cookies will begin to brown very quickly once they spread.
  • Allow to cool slightly on the baking sheets and then transfer cookies to a wire rack to cool completely. They will crisp up as they cool.
  • Pair up cookies of similar size and shape. Spread one cookie with a thin layer of melted chocolate. Top with the second cookie, gently pressing together. Repeat with remaining pairs.

Friday, September 5, 2014

Chocolate Milk Stout BBQ Ribs with Mole Spice Rub


Chocolate, beer and barbecue don't seem like an obvious pairing, but trust me on this one. Do you like mole sauce? How about chocolate milk stout? dark roasty beers have an affinity for roasted and grilled meats. Stouts and Porters also love chocolate. See? The combination isn't so crazy after all.

These ribs are brilliant on the grill, if you are a master at the low and slow. They are equally as tasty slow roasted in the oven.

The recipe is my own

serves 4

The Ingredients:
1 rack (2 1/2-3 lbs) pork ribs

for the rub
1 1/2 tsp salt
1 1/2 tsp ground black pepper
1 1/2 tsp ancho chili powder
2 tsp brown sugar
2 tsp paprika
1 tsp cumin
1 tsp oregano
1 tsp cocoa powder
pinch cayenne pepper

for the sauce
2 cloves of garlic, minced
1 Tbsp oil
1 can tomato paste
1 cup chocolate milk stout
1/3 cup brown sugar
1 T cocoa powder
2 tsp paprika
1 Tbsp Ancho chili powder
1 tsp salt

The Process:
For the rub
Combine the spices.

Rub the mixture on both sides of ribs. Cover and let stand at room temperature for about 30 minutes.

for the sauce
Heat the oil in a medium saucepan over medium high heat. Add the garlic and saute until fragrant, about 2-3 minutes. Whisk the remaining ingredients into the saucepan. Bring to a boil, remove from heat and allow to cool. Refrigerate until ready to use.

for the ribs
Preheat the oven to 250 

Line a baking sheet with aluminum foil. Place the seasoned ribs on top. Brush with BBQ sauce and roast in the preheated oven, turning ribs and brushing with BBQ sauce every 30-45 minutes until fork tender, about 4 hours.

Allow to rest 10-15 minutes before serving

Serve with remaining Mole Stout BBQ sauce

Friday, August 1, 2014

Strawberry Chocolate Mini Muffins

Are these breakfast or are they dessert? Personally,  I am more of an eggs and bacon kind of girl for breakfast, though I love sneaking one of these chocolate-y gems in for elevensies. The batter can easily be adapted for full sized muffins... just bake for 20-25 minutes. But I much prefer the one bite indulgence the mini muffin size provides. Especially since they turned out more like mini brownie bites. But I'm certainly not complaining! 

 The recipe is my own

Yields 48 mini muffins or 16 regular sized muffins

The Ingredients
4 eggs, lightly beaten
1 cup oil
1 cup sugar
2 cups all purpose flour
1/3 cup cocoa powder
1 Tbsp baking soda
1/2 tsp salt
1 tsp vanilla extract
1 cup diced strawberries
1/3 cup mini chocolate chips

The Process
Preheat the oven to 350 degrees F.

Lightly oil the mini muffins tins.

In a large bowl, combine the eggs, oil, sugar, flour, cocoa powder, baking powder, salt and vanilla. Stir until just combined. Fold in the strawberries and mini chocolate chips.

Spoon by heaping Tbsps into the prepared mini muffin tins.  Bake for 10-14 minutes,  or until a toothpick inserted into the center of a muffin comes out clean. Transfer muffins from the tin to a wire rack to cool.

Friday, July 4, 2014

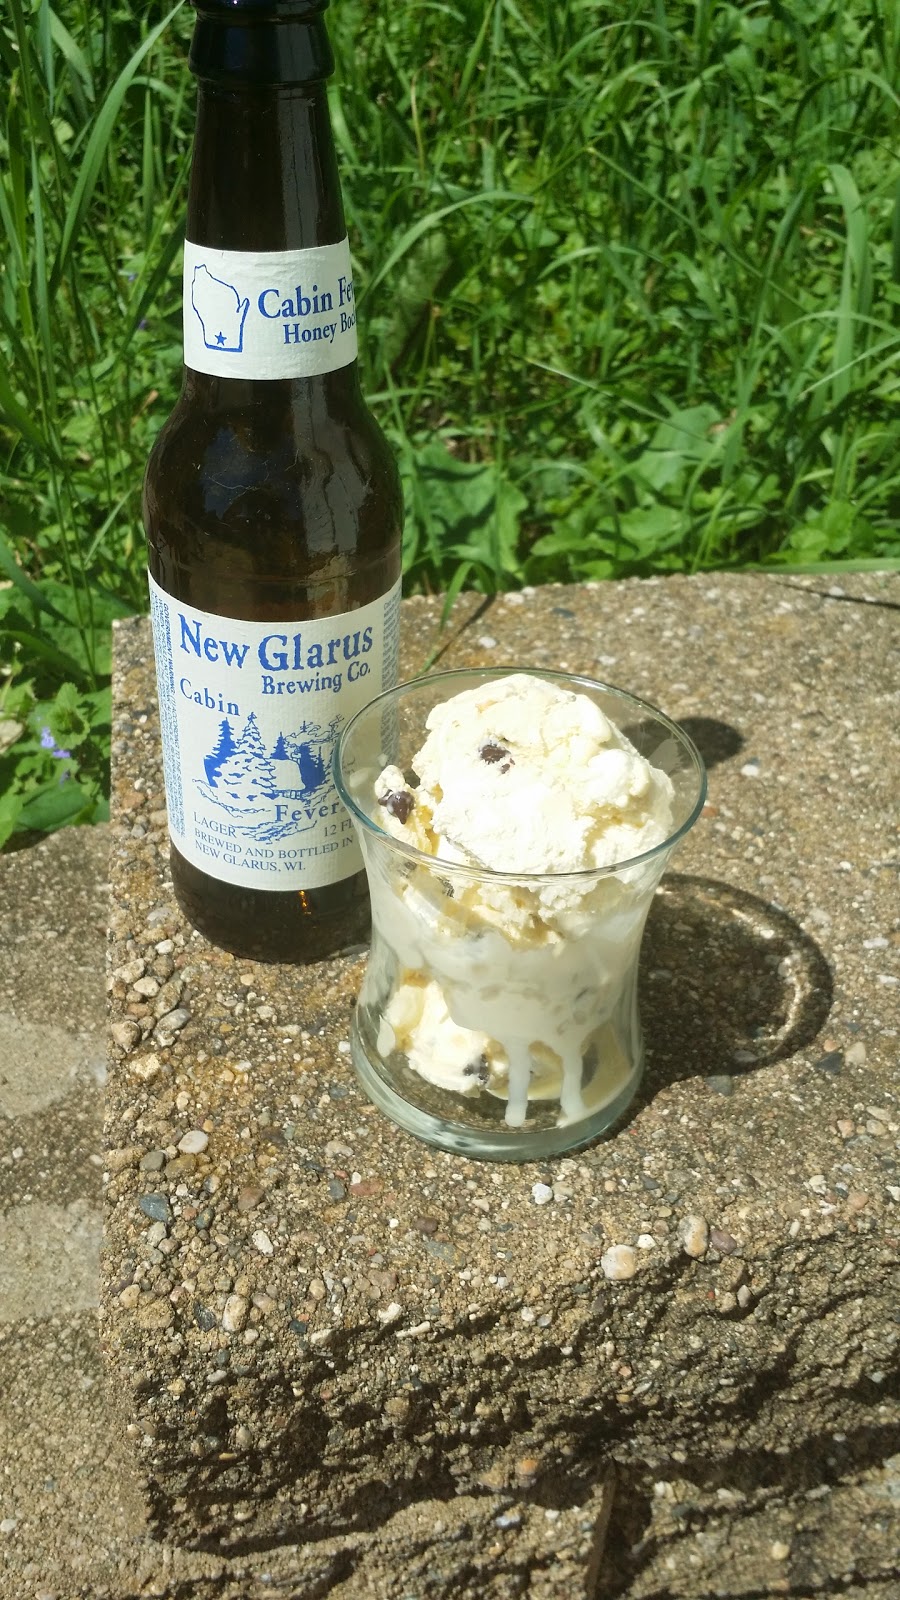
Bock Tracks Ice Cream

 
Beer and ice cream has come together again. I wanted to vamp on rocky road but was a bit stumped on which beer to use. Bock seemed like an ideal fit...particularly due to the name of the style. Bock. Goat. And their tendency to frolic among rocky crevices and outcroppings.

Thus, Bock Tracks was born.

In order to keep the boozy flavor of the bock in the forefront, I opted to skip the traditional chocolate base rocky road ice cream is know for and instead just stuck with those classic mix-ins of nuts, marshmallows and chocolate chips.

Adapted from America's Test Kitchen and The Brown Eyed Baker

yields about 1 quart

The Ingredients:
12 oz bock beer, divided
1 tsp vanilla
1/2 to 3/4 cup sugar
3 egg yolks
1/8 tsp salt
2 cups heavy cream
1 cup mini marshmallows
1 cup slivered almonds
1/2 cup mini chocolate chips

The Process:
In a medium saucepan over medium-high heat, add 10 oz of the beer, reserving the remaining 2 oz. Reduce to about half, stirring to prevent the beer from foaming up. Combine the reduced beer to the reserved 2 oz. Add the vanilla and set aside to cool.

Set up an ice bath of cold water and ice in a large bowl. Set fine mesh strainer over a medium-sized bowl and position into the ice bath. Set aside.

In a clean, medium saucepan, whisk together the egg yolks, sugar and salt until smooth. Whisk in the cream until well combined. Set over medium-low heat and cook, stirring constantly, until the custard begins to thicken. Keep the stovetop low and continue gently stirring to avoid inadvertently making scrambled eggs. Bring the custard up to 180 F and promptly remove from heat.

Carefully strain the custard through the fine mesh strainer into the bowl set over the ice bath. Pour slowly...you don't want to capsize the custard into the ice bath below. Whisk in the reduced beer. Allow the custard to cool to room temperature, stirring periodically. Remove from the ice bath, cover, and let chill in the refrigerator for at least 8 hours, preferably overnight.


Using an ice cream maker, freeze the chilled base according to the manufacturer's directions.  Once the ice cream has finished churning fold in the marshmallows, nuts and chocolate chips.

Transfer the ice cream to a 1.5 qt container and allow to set in the freezer for an additional 24 hours.

Tuesday, May 27, 2014

Chocolate Cupcakes with Bourbon Cream Cheese Frosting and Candied Bacon


I made these beauties a while back, during a fit of madness in the kitchen. Unfortunately the madness hit the same time I was in the midst of a long lapse in blogging. But the recipe lives on!

the recipe is my own

yields 16-20 cupcakes and a lot of extra frosting

The Ingredients
Bourbon Chocolate Cupcakes:
1/2 c cocoa powder
1 cup boiling water
1 1/3 cup flour
2 tsp baking powder
1/4 tsp salt
1 stick butter, room temp
1 cup sugar
2 eggs
2 tsp vanilla extract
1 Tbsp bourbon

Bourbon Cream Cheese Frosting: 
8 oz cream cheese, room temp 
1 stick unsalted butter, room temp 
1/8 tsp salt (or use salted butter) 
3-3 1/2 cup powder sugar, sifted 
1- 2 Tbsp bourbon 
1-2 Tbsp milk

Candied bacon: 
5 stripes of bacon 
2/3 cup brown sugar 

The Process
for the cupcakes
Preheat oven to 375 and line 16-20 cupcake tins

Whisk together boiling water and cocoa powder, set aside. Combine flour, salt and baking powder, set aside. Cream together butter and sugar until fluffy. Add the eggs, one at a time until incorporated. Whisk in vanilla and bourbon. Add flour mixture, alternating with chocolate mixture, until just combined. Do not over mix.

Fill cups 1/2 to 2/3 full. I had enough for about 18...they did puff up quite a bit.

Bake 15-20 minutes or until a toothpick inserted in the center comes out clean. Allow to cool completely before frosting.

for the frosting
cream together cream cheese, butter and salt until fluffy. Add sugar, a cup at a time, alternating with 1 Tbsp liquid. I started with 2 Tbsp bourbon and found I did not need the milk to further beat it to a spreadable consistency. 2 Tbsp Bourbon was enough with that amount of powdered sugar.

Spread or pipe onto cupcakes.

for the bacon
preheat oven to 350 and line a baking sheet with foil.

Cut bacon into quarters and press each piece, both sides, into the brown sugar, coating as evenly as possible. Arrange in a single layer on the baking sheet.

Bake 10-20 minutes. This largely depends on the thickness of the bacon. The most recent bacon I used was a Patrick Cudhay which seemed sliced incredibly thin...8 minutes tops. But I've had thick cut bacon take nearly half and hour before. You want to cook the bacon until the sugar has caramelized the bacon is still slightly pliable.

Transfer to a plate or wire rack to cool...it will crisp up more as it cools. Do NOT place the bacon on paper towel to drain. The sugar coating will cause stick.

Allow to cool completely and then use as garnish on the cupcakes.
Enjoy!

Sunday, January 13, 2013

Beer Pretzel Toffee


Last year I fell in love with Audra's family toffee recipe.  Though that isn't difficult to do.  Heath bars have long been a guilty pleasure of mine on a bad day.

And then Jackie upped the ante by throwing beer and pretzels into the mix.  I dare you not to try this.

Adapted from thebeeroness.com

The Ingredients:
for the toffee
1 lb salted butter
2 cups dark brown sugar
1 cup ale*

for the topping:
12 oz bittersweet baker's chocolate
4 oz ale
2 cups crushed pretzels

I highly recommend Third Street Brewery's Sugar Shack or Langunita's Brown Shugga' if you can find them.

The Process:
Line a cookie sheet with parchment paper and set aside. 

In a large heavy-bottomed pot over high heat add the brown sugar, butter and ale.  Use a much much bigger pot than you feel you need, the syrup will triple in volume. Stir until the mixture starts to boil. Allow to boil untouched until the mixture reaches about 230 degrees. Stir occasionally, scraping down the sides of the pot until the syrup reaches 290 degrees. It may start to smell like burning.  Don't panic, it is burnt sugar.  Let it reach 290.  Pour the hot syrup onto the prepared cookie sheet.  Shake gently to help the toffee spread into an even layer and allow to cool.

Coarsely chop the baker's chocolate and add to a large bowl. In the microwave, using 20 to 30 second increments, heat the beer until hot but not boiling. Pour the hot beer over the chocolate  and stir until well combined and melted.

Pour the chocolate over the cooled toffee and smooth out in an even layer. Sprinkle the crushed pretzels over the chocolate.  Gently press the pretzel bits into the chocolate.   Chill until the chocolate has set, about 1 hour. Cut into pieces.

Sunday, December 23, 2012

Snow Day Cocoa

Nothing beats a hard day of shoveling like coming in to hot cup of cocoa.

Growing up, hot cocoa had a special place in my heart.  Come fall, I would trek out to the chilly soccer fields to watch my brother kick the ball around with his team mates.  That early in the morning nothing fended off the cold quite like a cup of cocoa.  Even a cup of cocoa made from a pouch with hot water.

Mom always upped the ante.  After a cold day of shoveling or playing we would often come in to a pot of rich cocoa on the stove.  Thank you Hersey's.

This cocoa ups the ante a notch further.

Adapted from Hersey's cocoa recipe

The Ingredients:
1/3 cocoa powder
1/2 cup vanilla scented sugar*
1/3hot water
1/4 tsp salt
1/8 tsp cinnamon
dash of corriander
1/2 tsp vanilla extract
3 cups milk
1 cup heavy cream


The Process:
Combine the cocoa, sugar, salt, cinnamon and coriander in a medium saucepan.  Slowly stir in the hot water and mix until well combined.  Bring the temperature to a boil over medium high heat.

Reduce the temperature to low.  Whisk in the cream, milk, and vanilla extract  Stir until heated through.  Label into mugs and garnish with marshmallows or whipped cream, if desired.. 

*stick a pod or two of spent vanilla bean in a jar full of granulated sugar.  Add more sugar as you use it up.  The vanilla pods will keep fragrant for months

Friday, August 17, 2012

Stout S'mores Bars


I have many, many recipes bookmarked or flagged...online, in cookbooks, clipped from magazines or newspapers.  It will take me years to cook my way through all of them. But I carry on.

Very rarely do I come across a recipe that I need to make immediately.  The Beeroness has that effect on me.  You've seen a variation of her bacon jam.  And  beer marinaded pork chops.  A sriracha stout BBQ sauce.  Ale biscuits.  Her recipes inspire and encourage me like few other bloggers do. Perhaps it is my mild obsession with craft beer and home brewing.

This recipe is one I made the very same day that I found it.  I almost couldn't wait for the bars to cool down before I dug in.  Jackie's recipe uses Young's Double Chocolate Stout...a very tasty beer on its own.  Due to my impatience, I made due with the stout i had on hand, as well as the baker's chocolate in lieu of her chocolate chips.   

Still with the substitutions, I'm glad I didn't wait...

yields 12 bars

adapted from the Beeroness

Ingredients:
10 graham crackers
4 Tbsp butter, melted
2 Tbsp brown sugar
3 eggs
1 cup white sugar
1/2 cup brown sugar
4 oz semi sweet chocolate, chopped
1 stick butter
1 cup cocoa powder
1/2 tsp salt
1/2 cup flour
3/4 cup stout
24 large marshmallows


The Process:
Preheat oven to 350

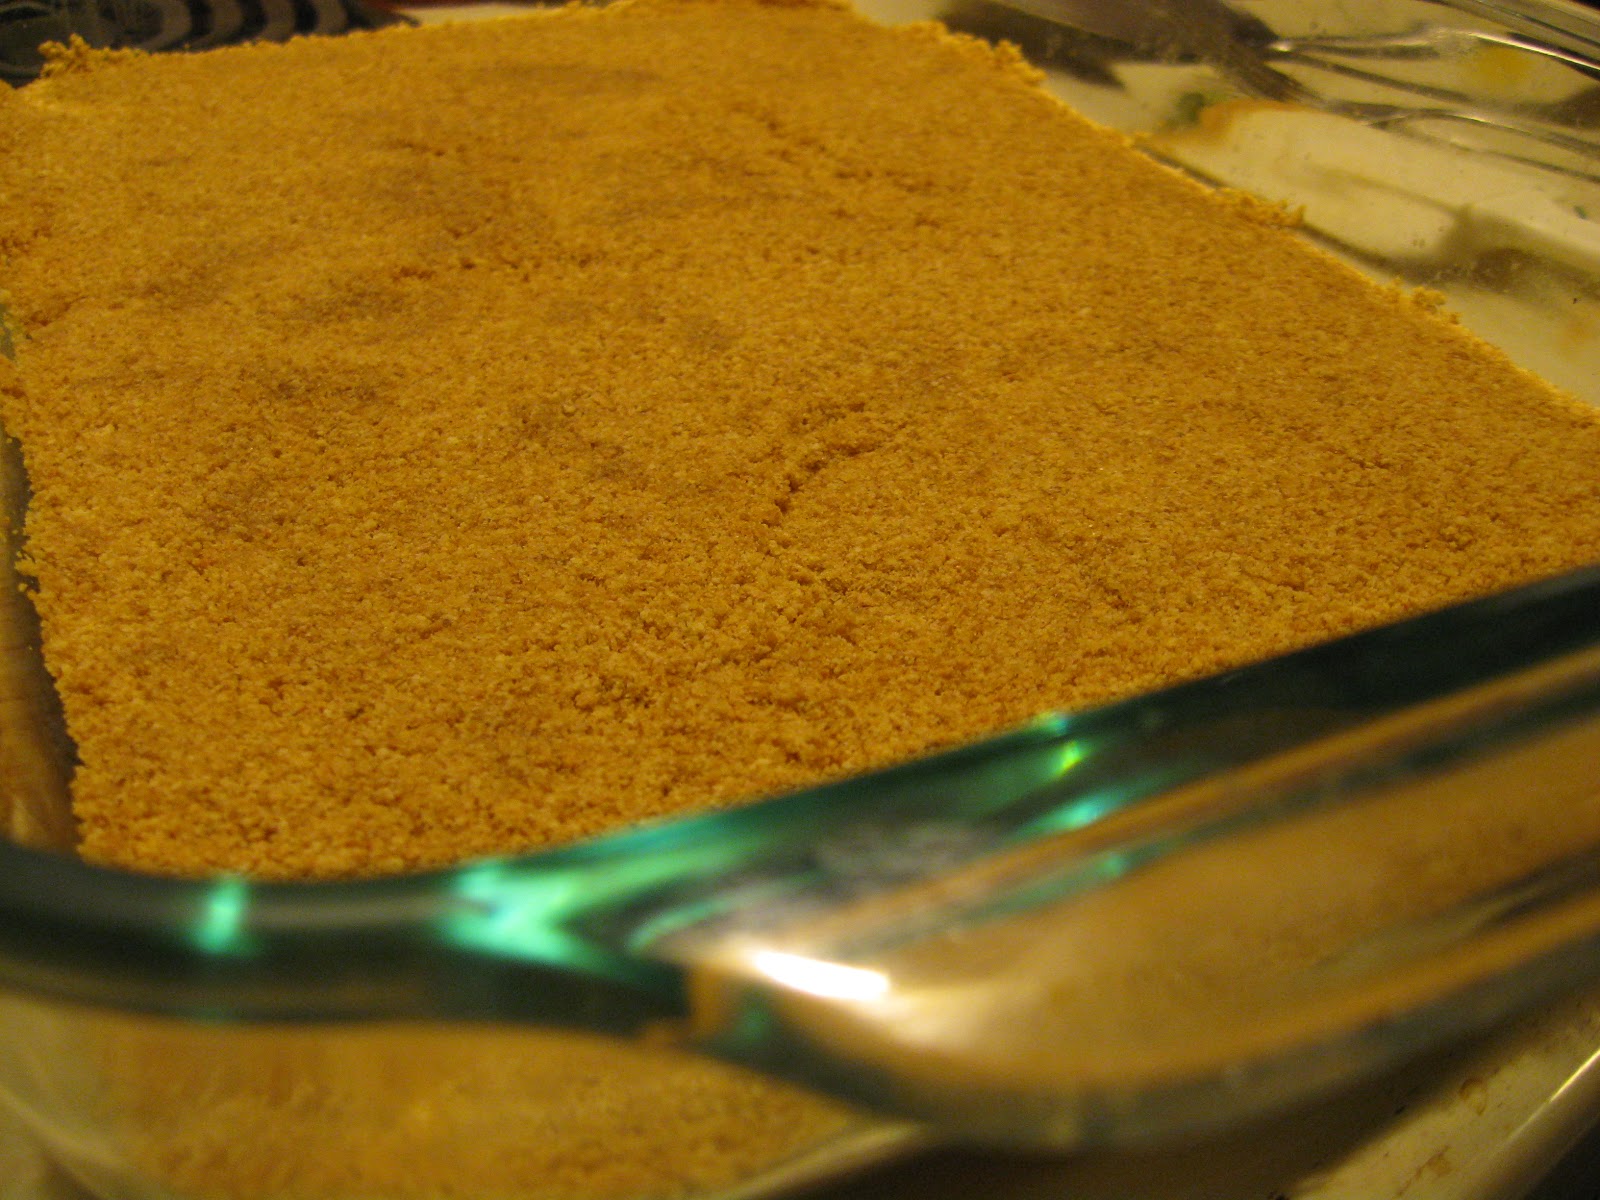
Add the graham crackers and the brown sugar to a food processor and blend until an even crumb is formed.  With the food processor still running, slowly drizzle in the melted butter.  Process until the mixture resembles wet sand.

Spoon the crumb mixture into a 9 x 13 pan and press into an even layer.

In a medium  bowl, beat the eggs and both sugars on high until well combined, about 3 minutes.

Combine the chopped chocolate and butter in a microwave safe bowl. Microwave on high for 30 seconds at a time, stirring and repeating until melted and well combined. Allow to cool slightly.  Add the chocolate to the egg/sugar mixture and beat until well combined.

In a separate bowl, sift together the cocoa powder, salt and the flour. Add flour mixture to the chocolate mixture, mixing until well incorporated. Add the beer and stir until just combined.
Pour the batter over the crust and spread into an even layer.

Place marshmallows in even rows across the top, leaving a 1/2 inch boarder along the edge.
Bake at 350 for 20 minutes or until the marshmallows are golden brown.

The center of the bars should be soft but not soupy.  They will continue to set at the bars cool.  Allow to cool and cut into bars.

The Review:
Can't type...fingers sticky....


Friday, July 20, 2012

Classic Yellow Cake with Chocolate Frosting


What sort of dessert do you request on your birthday?  For me, the cake of choice was usually yellow with chocolate frosting.  Apparently great minds think alike.  After much poking and prodding Ross finally requested a specific dessert.  Low and behold, it was the classic yellow cake with chocolate frosting.

I knew any old box mix would not do the big day justice (sorry Betty Crocker and Pillsbury!)  The cake had to be made from scratch.  Thankfully a post from Liz at the Skinny Chick Can Bake caught my eye.

Holy heaven, is this cake a winner!

adapted from Martha Stewart via That Skinny Chick Can Bake

yields one 2-layered cake

The Ingredients:
for the cake

1 1/2  cups all-purpose flour
1 1/2  cups cake flour 
1 Tbsp baking powder
1/2 tsp salt
1 cup unsalted butter ( 2 sticks), room temperature
1 3/4 cups sugar
4 eggs
2 tsp vanilla
1 1/4 cups milk


for the frosting:
1 lb semi-sweet chocolate, chopped
6 Tbsp cocoa powder
6 tablespoons boiling water
1 1/2 cups unsalted butter (3 sticks),  room temperature
1/2 cup powdered sugar
1 tsp vanilla
The Process:
for the cake:
Preheat the oven to 350.  Butter two 9-inch cake pans.  Line the bottom with parchment paper.  Butter the parchment and dust the entire pan with flour.  Set aside. 
In a medium bowl sift together the flours, baking powder and salt.  Set aside.
In a large bowl cream together the  butter and sugar until fluffy and well combined, about 4 minutes.  Beat in the eggs one at a time, making sure each is well incorporated before adding the next.  Mix in the vanilla.
With the mixer set to low, add one third of the flour at a time, alternating with the milk.  Mix well after each addition.
Divide the batter between the two prepared pans.  Bake in the preheated oven for 30-35 minutes or until a toothpick inserted into the center of the cake comes out clean.  
Allow to cool in the pans for 10 minutes.  Invert the pan to remove the cake from the pans and peel off the parchment paper.   Allow to cool completely on wire racks.
for the frosting:
In a large microwaveable bowl, melt chocolate in microwave, stopping and stirring at 30 second increments until the chocolate is melted and smooth.  Set aside to cool to room temperature, about 15 minutes...do not skip the cooling, especially on a hot day.  The frosting will not be a spreadable consistency otherwise.

Whisk the cocoa powder into the boiling water until smooth.

In a large bowl, cream together the butter and powder sugar until fluffy, about 2-3 minutes.  Beat in the vanilla.  Add cooled chocolate and mix until well combined.  Add cocoa mixture and beat until the desired consistency is achieved.  

Assemble and frost the cake as desired.

The Review:
Ross had the privilege of sampling as I mixed everything.  It was his cake after all.  I had to ensure it would meet his approval.  Upon sampling the batter he exclaimed, is that the frosting! It's so good!"  The wheels are churning for later.  Has anyone ever attempted a cake batter frosting before?

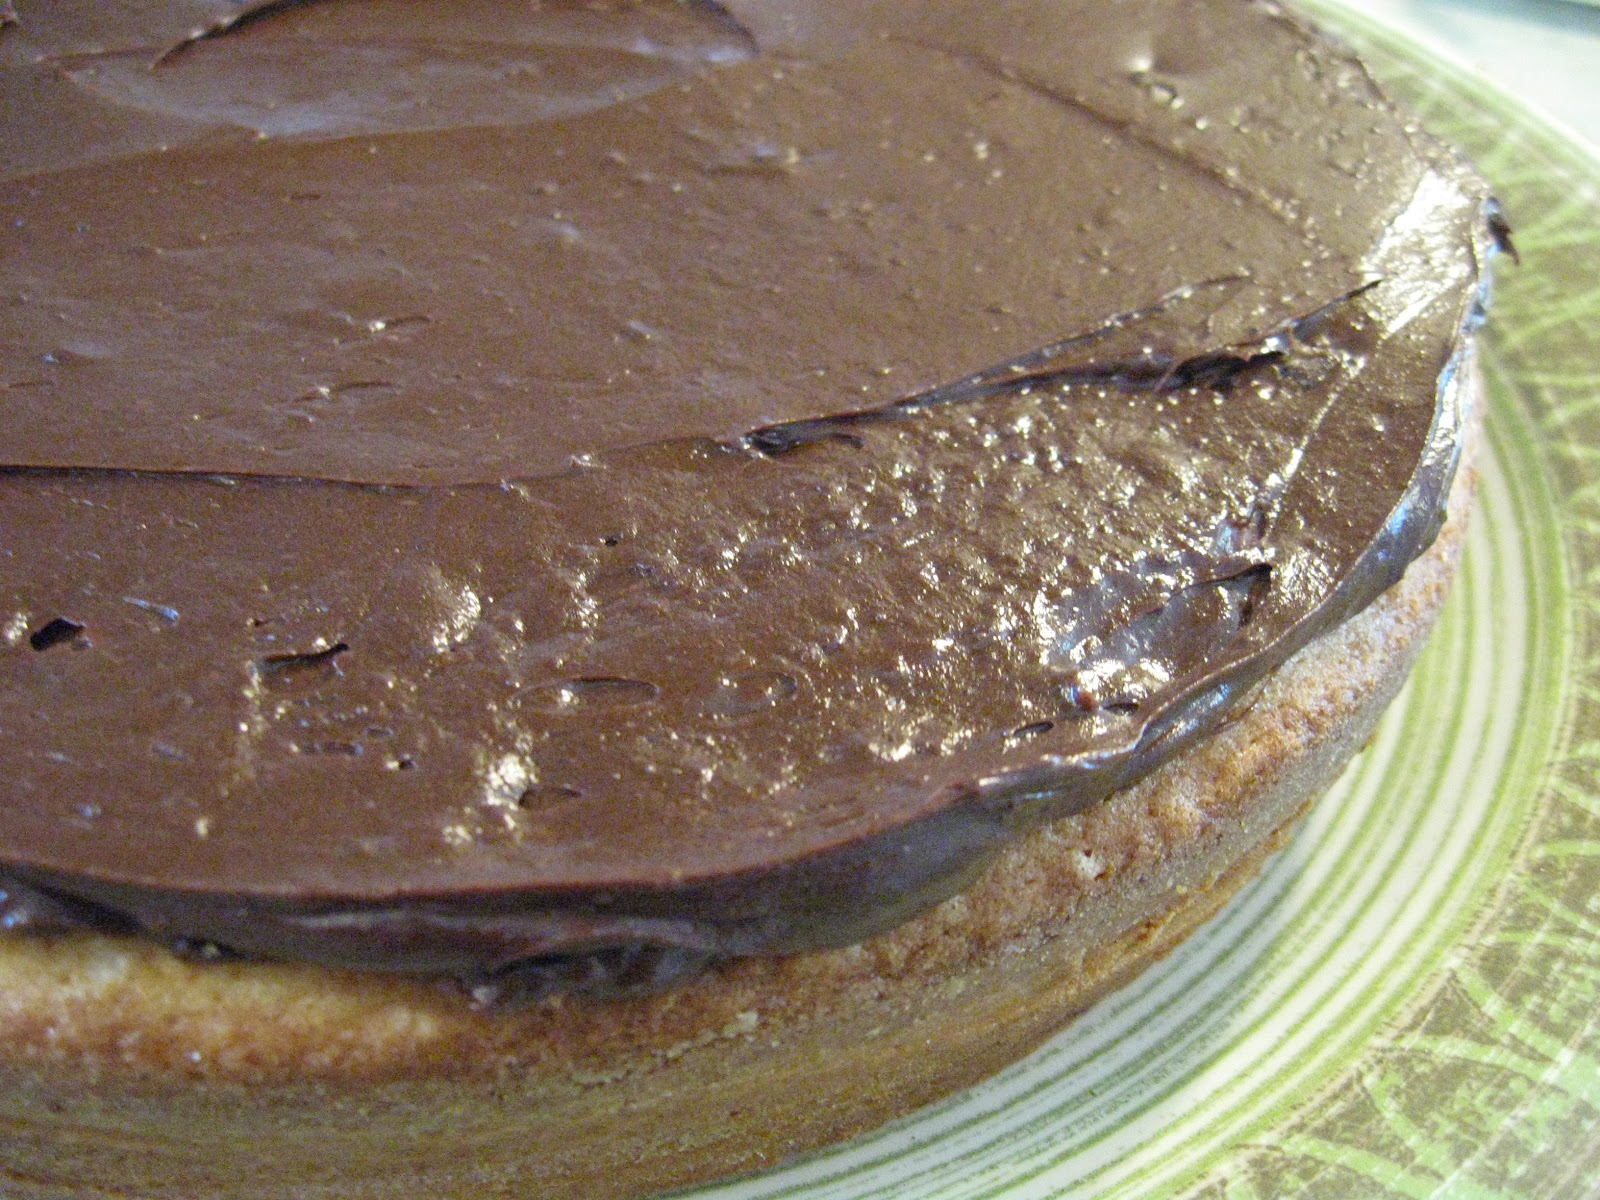
The cake itself baked up beautiful and sat eagerly awaiting it's chocolatey covering.  

Here I ran into a few problems.  The recipe as written is not the problem in the slightest.  The problem stemmed from the sheer quantity of butter on a sweltering July day.  No amount of cooling outside of the refrigerator was going to keep the frosting from turning soupy during my feeble attempts at frosting (I'm getting better, but man, what I wouldn't give for an off set spatula!)

The problem I ran into with chilling the ingredients between steps was it cooled off TOO fast.  Rock hard to soupy to rock hard again.  I managed.  And the cake looked stunning in the end.  The finish beauty hung out in the fridge until the big moment.  I broke 4 candles trying to poke the candles into the chilled frosting.  30 candles ablaze, the frosting wasn't so stiff anymore!

But even better than the look of the cake was the taste. Having sampled along the way, I warned people about the sugar bomb they were about to partake in.  Only a few heeded the warning.  Everyone loved it.  There was nary a crumb left.  Only it is truly, very rich and very sweet.  A little bit goes a long way.

Next time...cupcakes...

Some of us need the built in portion control.
 

Saturday, February 25, 2012

Chocolate Cream Cheese Brownies

The first time I read over this recipe I did a double take.  And a third look just be sure I read it right.  Eighteen tablespoons of butter?  Five eggs?  And that's only one layer.  A ribbon of chocolate cheesecake hides between the layers of decedent brownie.  And to top it all off, a thin layer of semi-sweet chocolate is added, just in case there wasn't enough chocolate.

I still haven't replaced my electric mixer and the just thought of beating cream cheese and butter in such large quantities sent a spasm through my wrist.  And the recipe would use up the last of my sugar.  But I was not going to let that stop me.  I apologize profusely to any readers who may be observing lent by giving up sweets or chocolate.  I couldn't pass this dessert up. 

adapted from a recipe at cooking.com

makes 48 brownies

The Ingredients:
for the filling:
1 cup bittersweet or semi-sweet chocolate, chopped
1/4 cup heavy cream
8 oz cream cheese, room temperature
1 egg
2 tsp flour

for the brownies:
18 Tbsp unsalted butter, room temperature
1 1/2 cups sugar
5 eggs
1 tsp vanilla extract
1/4 tsp almond extract
1 1/2 cup all purpose flour
3/4 cup unsweetened cocoa powder
1/4 tsp baking powder

for the topping:
2 cups semi-sweet chocolate, finely chopped

The Process:
for the filling:
Slowly melt half of the chocolate with the heavy cream in a double boiler or in the microwave.  Stir until smooth and allow to cool.  Meanwhile, in a medium bowl cream together cream cheese and egg until fluffy.  Slowly pour in chocolate mixture and blend until well combine.  Stir in the remaining chocolate and flour and mix well.  Chill in the refrigerator until ready to use.


for the brownie:
Preheat the oven to 350

Butter a 9 x 13 baking dish and set aside.

In a large bowl with an electric mixer (or by hand) cream together the butter and sugar until fluffy.  Beat in the eggs, one at a time, blending thoroughly before the next addition.  Add the vanilla and almond extracts.

In medium bowl sift together flour, cocoa powder and baking powder.  Gently blend the dry ingredients into the wet until just combined.


To assemble:
Spoon half of the brownie batter into the prepared baking dish.  Smooth into an even layer.  Spread the cream cheese layer evenly over the brownie batter.  Spoon the remaining batter on top as evenly as possible and gentle spread to cover.

Bake in the preheated oven for 35 minutes or until a toothpick inserted in the center comes out clean.

As soon as the brownies come out of the oven , sprinkle the chopped chocolate evenly over the surface.  Allow to rest for five minutes or until the chocolate begins to melt.  Gently spread the soft chocolate into a thin, smooth layer.

Allow the bars to cool completely.  Cut into approximately 1 1/2 inch squares.

The Review:
This recipe yields 48 brownies for a reason.  These are rich and ridiculously dense.  The consistency is more fudge like than cake.  And I certainly am not complaining!   Left overnight in the fridge the layered decadence became even more smooth and dense.  A little taste goes a long, long way.

The only frustration I had with this recipe was the same I have with most layered recipes...getting the layers smooth and even.  The first layer was a breeze.  A spatula does quick work of the spreading the thick batter.  The second layer was an almost pourable consistency, so a few passes was all I needed to smooth it over the first layer.  The third...well there in lies the challenge.  Because the batter was so thick I needed to spoon it on top.  The second layer did not provide enough friction for the top and spreading became more about evenly distributing the brownie batter than creating a smooth consistent layer.  The forth and final layer did a good job of covering any cracks and fissures left by the less than satisfactory job I did on the layers below. The end result created an undulating ribbon of cream cheese filling that was thick in some areas, thin in others.

Considering how chocolatey these are, I doubt anyone will even notice if the layers turn out uneven...

Sunday, February 12, 2012

Banana Waffles with Nutella

Sunday has come again, and with it my obsession with my waffle iron and a use for a banana or two from my freezer.  Does that happen to you?  Bananas are purchased with every intent on eating them within the next few days only to see the brown spots creep in almost overnight.  Rather than throw out the perfectly ripe fruit, the banana is banished to the freezer until time is made to concoct something wonderful at a later date...preferably not endless loaves of banana bread.  Before you realize it and army of frozen banana has begun to take over...

The recipe is an attempt to hold the bananas at bay...at least for a while.  Its dancing partner was inspired by a childhood joy of spreading Nutella on bananas as a snack.  Okay, maybe more of an adult joy...I didn't truly discover and come to appreciate Nutella until college.  As a child, pre-Nutella, I actually preferred dipping bananas in strawberry yogurt and rolling it in Grape-nuts.  Did anyone else ever do that?  But yogurt/Grape-nut/banana waffles doesn't sound quite as appealing as banana Nutella waffles...

This waffle recipe is a nice alternative for those too groggy to beat egg whites to soft peaks first thing in the morning.

waffle recipe adapted from Waffles of Insane Greatness at foodnetwork.com

serves 3-4

The Ingredients:
3/4 cup flour
1/4 cup cornstarch
1 1/2 Tbsp sugar
1/2 tsp baking powder
1/4 tsp baking soda
1/4 tsp salt
2 Tbsp unsalted butter, melted
1 overripe banana, mashed
1 egg, beaten
1 cup buttermilk
1/2 tsp vanilla

for topping:
1/3- 1/2 cup Nutella
1 ripe banana sliced


The Process:
Preheat the oven to 200.  Preheat and lightly oil the waffle iron.

In a large bowl whisk together flour, cornstarch, baking powder and soda, salt and sugar.  In a medium bowl blend butter and mashed banana until well combined.  Whisk in egg, buttermilk and vanilla.  Slowly pour wet ingredients into dry, folding and stirring until just combined.  Do not over mix the batter. 

Cook waffles according to iron manufacturer's directions.  My waffle iron used about 1/2 cup of batter.  This batter is thicker than some and may need to be spread before closing the iron.  The batter also puffs up a lot more than other batters I've tried, so be careful not to overfill the iron.

Once cooked, set waffle aside on plate in the oven to keep warm.  Prepare other waffles in the same manner.

The make the topping, heat the Nutella in the microwave at 20 second intervals or in a double boiler on the stove top until liquid enough to pour.  Drizzle each waffle with about 2 Tbsp of Nutella and top with sliced banana.

The Review:
After beating egg whites for waffle batter during my last few waffles, it was nice to give my wrist a break (my hand mixer bit the dust and for those who actually have a stand mixer...do you really want to haul that thing out just to beat one egg white?).  I may have found my go to waffle base for future fruit additive varieties.  The original recipe called for 1/3 cup of oil.  Figuring the banana would sub well for the wet, I nixed the oil...but did add in a little butter.  I also kept the sugar on the low end knowing the Nutella topping was going to be pretty sweet.

The banana flavor was wonderfully subtle, just enough real ripe fruit flavor to make the waffle interesting.  The waffle wasn't quite sweet or flavorful enough on its own, but with the Nutella and sliced bananas on top, it was a match made in heaven.  I would like to find a way to may the Nutella into more of a sauce.  The chocolate nut butter does not stay very fluid for long.

The waffles puffed up a lot and remained soft in the center, though a bit dense.  The outside reached my platonic ideal of crispness and retained the soft to crunch ratio even after topping.  With syrup though, I'm not sure how soggy they may become, nor how quickly.  But there are many a future Sunday to find out.

Thursday, February 9, 2012

Chocolate Waffles with Cherry Bourbon Compote and Fresh Whipped Cream

Please excuse this minor break in the regularly scheduled luau menu... 

Two weeks have passed since our last chance to enjoy Sunday morning waffles.  Since that time I've created a short list of combinations I am itching to try.  Chocolate waffles?  Breakfast for dessert, baby.  What better toppings to pair chocolate with than juicy cherries and velvety whipped cream.  You may never go back to syrup again...

the compote recipe is my own
the whipped cream recipe is adapted from BHG Cookbook
the chocolate waffles are adapted from Gale Gand's recipe at FoodNetwork.com

Makes 4-8 waffles, depending on the waffle iron.
The Ingredients:
6 Tbsp sugar
1/4 cup water
1/4 cup bourbon
3 Tbsp fresh lemon juice
1 lb (about 2 1/2 cups) fresh cherries, rinsed and pitted
1/2 tsp vanilla extract
1/2 tsp corn starch

for the whipped cream
1 cup whipping cream
2 Tbsp sugar
1/2 tsp vanilla

for the waffles
2 eggs, separated
3 Tbsp sugar
1 1/2 cups milk
1 cup all-purpose flour
1/4 cup cocoa powder, preferably Dutch-processed
2 tsp baking powder
1/2 cup salted butter, melted

The Process:
for the compote
In a medium saucepan combine water, bourbon, sugar and lemon juice. Bring to boil over high heat, stirring until sugar dissolves. Continue to boil until thin syrup forms, about 7 minutes. Reduce to simmer; add cherries and vanilla extract. Cook over medium heat, stirring gently for 5 to 7 minutes, or until the cherries soften, but retain their shape.  Remove cherries from the syrup with a slotted spoon and set aside in a serving dish.  Add the corn starch to the syrup, whisking until well combined.  Bring the syrup to gentle boil and cook until  thickened and reduced by half, about 5 minutes.  Pour syrup over cherries.  Cool, cover and set aside.

for the whipped cream
In a chilled bowl combine whipping cream, sugar and vanilla.  Beat with chilled beaters on medium speed until soft peaks form.  Set aside in the fridge.


for the waffles
Preheat oven to 200 and warm up the waffle iron

In a medium bowl whisk the whites by hand or with a mixer until soft peaks form.   Add the sugar and continue whipping until stiff.

In a medium bowl whisk the egg yolks and milk until well combined.  Slowly incorporate the flour, cocoa powder, and baking powder.  Add melted butter and mix until smooth. Gently old in the whipped whites, being careful not to overwork the batter.

Brush or mist the waffle iron lightly with oil and spoon batter into waffle iron, spreading quickly with a spatula to cover the entire griddle surface (amount varies depending on waffle iron, mine uses just over 1/2 a cup). Cook according to iron manufacturer’s instructions.

Transfer waffles to rack in oven to keep warm and crisp. Make more waffles in same manner.


The Review:
Pure unadulterated bliss.  Tart cherries; red, ripe and round.  Erupting with a juicy burst of bourbon.  Smooth, velvety whipped cream offering a rich douse of sweetness to cut the tang of the fruit and slightly bitter cocoa.  Wonderfully white and as pure and light as summer clouds.  And the dark platter of  decadence that supports it all...the rich chocolate waffle.


Taken together this combination is a force to be reckoned with.  And for the most part the components stand well on their own.  The only downside was the texture of the waffles.  For some reason this version did not puff up and retain its shape as well as previous waffles had.  The underside was nicely crisped while shielding a fluffy interior...the top side unfortunately remained slight soft and deflated quickly...no beautiful geometric ridges to contain the cherry studded heaven that the waffles supported.  With a tweak or two to make the waffle stand on its own, this may be the best Belgian inspired breakfast variation yet.

Monday, January 23, 2012

Homemade Toffee

Thank you, Audra, for sharing this family recipe!  Toffee has long been one of my favorite sweets.  Especially when coated in chocolate.  As a belated holiday treat, I made up a batch of this to share with my family in Madison.


Adapted from Audra's recipe at the Baker Chick

Yields: toffee for days, but still never quite enough...

The Ingredients:
1 lb butter, unsalted
2 cups dark brown sugar
1 1/2 lb. confectioner's chocolate
1/2 - 3/4 cup blanched almonds, ground

The Process:
Line a rimmed cookie sheet with foil or parchment paper.  Set aside.

In large saucepan, combine butter and brown sugar.   Mix using a wooden spoon until the sugar dissolves.  Stir occasionally (not often...just enough to keep the sugar from burning) until the syrup reaches just over 275 on a candy thermometer. Keep the syrup at 275 for about a minute longer. Pour immediately into cookie sheet. Gently shake the sheet to spread the toffee evenly over the entire surface.

After cooling slightly blot with a paper towel to pick up any excess oil.

Meanwhile melt half of the chocolate in a double boiler over medium heat or in the microwave in a microwave safe bowl for 30 seconds to a minute at a time until smooth and fluid

Pour the chocolate over hardened syrup. Spread evenly over the surface and sprinkle with half of the ground almonds.

Cool until chocolate is firm, flip and repeat the process on the other side.  Break into pieces to serve.

The Review:
Holy cow, why have I never made this sooner!   With toffee like this, I may never touch a heath bar again.  Buttery ad sweet.  Smooth chocolate paired with the snap of the toffee.  And aside from the wait time as the chocolate set up, the candy went together without any hassle.  Pure heaven!

Saturday, December 3, 2011

Black Bean Turtle Brownies

My intern is leaving!  For several months he has shared same workshop and helped to keep me sane.  In honor of his last day, and as a thank you to all of the hard work done during the last three months, I crafted this spin on a recipe he first introduced me to....black bean brownies.

This gluten free, protein laden sweet is topped with toasted pecans, slathered in homemade caramel and drizzled with high quality chocolate.  If you couldn't sell others on the original black bean brownie, this version may be the key to winning them over.

adapted from my intern's recipe.

yeilds one pan (12 to 16 brownies)

The Ingredients:
for the brownie
1 - 15 oz can of black beans (preferably low or no sodium)
1/3 cup agave syrup
1/4 cup sugar substitute (truvia or splenda)
3 Tbsp vegetable oil
1/3 cup cocoa powder
1 tsp instant coffee
1 tsp baking powder
1 tsp vanilla extract
pinch of salt
3 eggs

for caramel:
1/2 cup honey
1/2 cup granulatewd sugar
2 Tbsp unsalted butter
1/4 cup heavy cream
1/4 tsp vanilla
1/4 tsp salt


for the topping:
1 cup toasted pecan, coarsely chopped
8 oz semi-sweet or dark chocolate

The Process:
Preheat the oven to 350.

Drain the black beans and rinse thoroughly. Add beans to a food processor and blend on high until a smooth puree is formed. Transfer to a large bowl. Whisk in agave, sugar substitute, oil, cocoa powder, instant coffee, baking powder vanilla extract and salt, and blend until just combined. Gently beat in the eggs, one at a time. The batter will be runnier compared to other brownie batters. Fold in chocolate chips. Pour the batter into a lightly greased, 8 x 8 inch baking pan.

Bake in preheated oven 30-35 minutes until the brownies begin to pull away from the side of the pan and a toothpick inserted in the center comes out clean. Set aside to cool.

While the brownies bake, prepare the caramel.  Warm the heavy cream in a saucepan to a gentle simmer ans set aside.  Melt the butter over medium heat in a heavy bottomed saucepan. Add the honey and sugar. Stir over medium heat until the sugar has mostly dissolved.Turn the heat to medium low. Using a candy thermometer cook the mixture over medium-low heat, stirring occasionally, until the mixture reaches the firm ball stage about 246.  Remove from heat and slowly stir in the cream and vanilla.  Allow to cool slightly.

While the brownies and caramel cool, toast the pecans in the preheated oven for 10-12 minutes.  Stir frequently...these can burn quickly if left unattended.  Sprinklr toasted pecans evenly over the brownies.   Pour the still warm caramel over the top of the pecan and gently spread into an even layer using a spatula.  Melt the chocolate in the micorwave or with a double boiler.  Spread over top of caramel.  Allow the brownies to completely cool, allowing the chocolate to set.

The Review:
Those who weren't easily fooled by health food parading as brownie couldn't get enough of these!  The pecans, homemade caramel, and chocolate gave the brownies just enough naughtiness to be indulgent and forgave the fact they were full of fiber and protein.  My gluten-free co-workers loved that they could share in this treat.  The pastry chef among them claimed he would friend me on facebook for the sole purpose of getting this recipe.  And the intern for whom the brownies were made claimed they were better than his...a true honor seeing as he was the one to provide the original recipe.  

Seriously.  Try these brownies already!

Sunday, September 18, 2011

Black Bean Brownies

Wait. Say what? Black beans? In a dessert? That was my initial reaction when my intern and I were discussing a multitude of amazing baked goods we wanted to try. I had no doubt these gluten-free, high fiber, high protein brownies would hit a high note with some people. I just couldn't believe the end result would be as chocolaty divine as he made them out to be. So I set out to find out for myself.

adapted from a recipe as described by my intern

yields one pan (about 12-16 brownies)

The Ingredients:
1 - 15 oz can of black beans (preferably low or no sodium)
1/3 cup agave syrup
1/4 cup sugar substitute (truvia or splenda)
3 Tbsp vegetable oil
1/3 cup cocoa powder
1 tsp instant coffee
1 tsp baking powder
1 tsp vanilla extract
pinch of salt
3 eggs
8 oz chocolate chips, or semi-sweet chocolate, chopped

The Process:
Preheat the oven to 350.

Drain the black beans and rinse thoroughly. Add beans to a food processor and blend on high until a smooth puree is formed. Transfer to a large bowl. Whisk in agave, sugar substitute, oil, cocoa powder, instant coffee, baking powder vanilla extract and salt, and blend until just combined. Gently beat in the eggs, one at a time. The batter will be runnier compared to other brownie batters. Fold in chocolate chips. Pour the batter into a lightly greased, 8 x 8 inch baking pan.

Bake in preheated oven 30-35 minutes until the brownies begin to pull away from the side of the pan and a toothpick inserted in the center comes out clean. Cool slightly before serving.

The Review:
Don't be fooled. Something is afoot...these aren't your fudge-y, Betty Crocker variety of brownie. But I bet most people would be hard pressed to put their finger on what really is different about these brownies.

In batter form the flavor of the legumes is still present, but as the brownies baked the chocolate aroma took over. Out of oven the counterfeit brownies looked denser and darker than typical boxed brownie mixes, but still had an airy, cake-like appearance. They were moister than most, and just as prone to crumbling as other brownies we've had.

The major difference any of us could deceiver was a slightly mealy texture, but not in a bad way. It made for a brownie that was smooth and almost dissolved in your mouth. The chocolate was rich, but mellower than in other chocolate brownies. Overall they had a richer, more earthy taste. Had I not known, I never would have guessed that the key ingredient was black beans. I certainly would not have been able to tell they were made without flour.

Unlike other gluten-free brownie recipes, these were actually cake-like. Most gluten-free brownies and flourless cakes I've tried in the past had a wonderfully dense and fudge-like texture. While good in their own regard, I was pleased that this black bean version offered a more airy alternative.

Try these out on some fellow unsuspecting brownie connoisseurs. I'd love to hear what their impressions were...and if any were able to guess the secret.

For the health nuts among you, here is the approximate break down compared to Betty Crocker's fudge brownies:

Betty: ____________ Black Bean:
170 calories ________ 155 calories
9g fat_____________ 7.9 g fat
90 mg sodium _______80 g sodium
65 mg potassium_____ 109 mg potassium
23 g carbs __________20 g carbs
16 g sugar __________12.3 g sugar
less than 1 g fiber_____ 2.3 g fiber
1 g protein _________3.2 g protein

Sunday, August 7, 2011

Cheesecake Stuffed Strawberries


A few days ago, Ross directed my attention to another sweet recipe he wanted me to try. I perused the recipe and was amused to see that the filling was the same one I used (sans the juice and zest) for the cranberry phyllo baskets I had made a few weeks back. So really, these are cream cheese stuffed, not cheesecake. But they are so heavenly on a summer day I doubt anyone will care what you call them...

adapted from Nutmeg Nanny's recipeLink
makes about 2 -3 dozen depending on the size of your berries

The Ingredients:
1 lb large strawberries
8 oz cream cheese, softened
3-4 Tbsp powdered sugar
1 tsp vanilla extract (or lemon juice)
Graham cracker crumbs

The Process:
Rinse strawberries and cut around the top. Remove the hull and clean out inside with a paring knife if necessary. If you want to stand your strawberries upright slice a bit off the bottom. Once strawberries are prepped set aside.

Combine cream cheese, powdered sugar and vanilla with a mixer or by hand. Spoon the cream cheese mixture into a piping bag and fill strawberries. Once strawberries are filled dip the top in graham cracker crumbs.

My Modifications:

As per Nutmeg Nanny's suggestion, I dipped the bottom tip of the strawberry in chocolate. I had wanted to use white chocolate, but for whatever reason, as soon as the chocolate reached that smooth melted stage it immediately disintegrated in to a grainy mixture before I could dip a single berry. Milk chocolate to the rescue...

If you wish to dip the berries, I recommend doing this after preparing the strawberries, but before filling them. After dipping, set the strawberries upright on parchment paper and chill in the fridge for 15 to 20 minutes prior to filling.

The Review:

What seemed like a large quantity of dessert disappeared in mere minutes among four people. You can imagine the guilt felt by all parties for devouring the gems with out reservation...

But it's mostly fruit, right?

Saturday, May 21, 2011

Chocolate Rapture Cake with Sour Cream Frosting


Perhaps it is a bit rude to poke fun at a small group utterly convinced that our judgement was upon us. But when I came across this cake recipe from the 1950's I couldn't think of a better way to celebrate what very well might have been our last hours...baked goods and friends....

Well, the supposed hour of the rapture has come and gone, and perhaps those who fell until the spell of this small groups is a little wiser for it...and hopefully prepared for a much longer stint on Earth than they planned for. But at least there's still cake!

Cake adapted from "Pepper's" recipe at allrecipes.com
Frosted adapted from Better Homes and Gardens

Yeilds one 9 inch 2-layer cake
The Ingredients:
Cake
1 3/4 c cake flour
1 1/2 c white sugar
3/4 tsp salt
1/2 tsp baking powder
3/4 tsp baking soda
1/2 c shortening
3 (1 oz) squares unsweetened chocolate, melted
1 c buttermilk
1 tsp vanilla extract
2 eggs
1 cup shredded coconut

Frosting
1/2 cup (1 stick) butter, softened
8oz sour cream
2 lb powdered (confectioner's) sugar
1 tsp vanilla extract
1 Tbsp milk

The Process:
For the cake:
Preheat oven to 350 degrees. Grease and flour two 9 inch, round cake pans.

Sift together cake flour, sugar, salt, baking powder, and soda. Add shortening, chocolate, buttermilk, and vanilla; beat for 2 minutes. Add eggs, and beat for 2 minutes. Stir in coconut. Pour batter into p
repared pans.

Bake for 25 to 30 minutes. Cool, and frost.

For the frosting:
In large mixing bowl beat softened butter with mixer 30 seconds; beat in sour cream. Gradually beat in powdered sugar. Beat in vanilla and milk. Use at once or refrigerate up to 3 days. Remove from refrigerator 30 minutes before using.

My Modifications:
A few commented how un-chocolatey this cake was, and perusing the ingredient list I was inclined to agree. I did not wish to over do it, but I did opt to add 1 Tbsp of cocoa powder to the dry ingredients.

And I forgot in a moment of distraction to flour my cake pans...which led to some choice words that probably would have condemned me to the next several months of hell on Earth should the rapture have come to fruition. Ross stepped in and managed to free the cakes...mostly intact...

The Review:
Of our Rapture eve tasters there were many a mixed review. No one hated. Some of us found the cake sort of boring and dry. Others found it perfect because it wasn't overwhelmingly sweet. Ross and I thought the frosting was on the verge of putting us into a sugar comma...neither of us were able to finish the more frosting coated bits on our plate. However one among us absolutely loved the frosting and practically licked the plate clean.

This was my first attempt at a frosting from scratch, and I was pretty disappointed. The consistency was runnier that I expected...causing most of the frosting to sigh under its own weight and settle around the base of the cake before it finally decided to settle. I am by no means an artist at frosting.

Overall, I may make the cake again, though I do need to find a way to make it more moist. And perhaps make it batter more fitting to the chocoholic. But this frosting was definitely not a good pairing...

Saturday, April 30, 2011

Banana Caramel Brownies


About two weeks ago, a wonderful classmate of mine from Stevens Point posted this brownie recipe on her blog "The Baker Chick" and they have been on my mind ever since. Finding uses for overripe bananas is a perpetual dilemma in our house. There are only so many variations of banana bread and banana muffins I can take. I was really excited to see Audra sing the praises of her successful chocolatey treat and secretly relished the thought of finding a new use for that pesky be-spotted fruit.

Adapted from Audra's recipe at "The Baker Chick"

The Ingredients:
Caramel
6 Tbsp unsalted butter
3/4 cup sugar
1/2 cup heavy cream
1/2 tsp vanilla extract
1 tsp kosher salt

Banana Layer
1/4 cup unsalted butter, softened
3/4 cup white sugar
1 egg
1/2 cup sour cream
1/2 tsp vanilla extract
1 cup all-purpose flour
1/2 tsp baking soda
1/8 tsp salt
1/2 cup mashed ripe bananas

Brownie Layer
3/4 cups all-purpose flour
1/2 tsp salt
1 Tbsp unsweetened cocoa powder
5.5 oz dark chocolate (60 to 72% cacao), coarsely chopped
1/2 cup unsalted butter, cut into 1-inch pieces
1/2 tsp instant espresso powder
3/4 cups granulated sugar
1/4 cup firmly packed light brown sugar
2 large eggs, room temperature
1 tsp vanilla extract

The Process:
Preheat oven to 350. Grease a 9 x 13 inch baking pan and set aside.

Prepare the Caramel :
Melt butter in a heavy sauce pan over medium high heat, add sugar and stir frequently until sugar is a golden brown. As soon as the sugar starts to smoke, remove it from the heat and with caution whisk in 1/2 cup of cream. It will bubble up like lava. Whisk in vanilla and salt. Let cool while you make the other layers.

For the Banana Layer:
In a large bowl, cream together the butter and sugar until smooth. Beat in the eggs, one at a time, then stir in the sour cream and vanilla. Combine the flour, baking soda and salt; stir into the batter. Finally, mix in the mashed banana. Spread evenly into the prepared pan.


For the Brownie Layer
In a medium bowl, whisk the flour, salt, and cocoa powder together. Put the chocolate, butter, and instant espresso powder in a large bowl and set it over a saucepan of simmering water, stirring occasionally, until the chocolate and butter are completely melted and smooth.

Turn off the heat, but keep the bowl over the water and add the sugars. Whisk until completely combined, then remove the bowl from the pan. Add 1 egg to the chocolate mixture and whisk until combined. Add the remaining egg and whisk until combined. Add the vanilla and stir until combined. Do not overbeat the batter at this stage or your brownies will be cakey.

Sprinkle the flour mixture over the chocolate mixture. Using a spatula (not a whisk), fold the flour mixture into the chocolate until just a bit of the flour mixture is visible.

Assemble the layers
Pour the caramel over the banana layer, trying to avoid the edges if possible.
Spoon or pour the brownie batter evenly across the caramel layer. Using a spatula, gently spread it over the caramel to make an even layer over the top.

Bake for 35-40 minutes or until a toothpick comes out with a few moist crumbs. Let cool completely before cutting.

*Baking Note: The individual recipes only called for 25/30 minutes in the oven. For some reason though, these needed a bit more. (Maybe because of the caramel.) Start low and add more time if needed.

Modifications:
I made no modifications to the recipe as written.

The Review:
When Audra stated the caramel bubbles like lava when the cream is added, she was not kidding! Be extremely cautious of the steam that will escape as the cream is incorporated.

I did have some issue with the brownie layer. The batter ended up exceedingly fudge like...almost a cement. The tickness made the batter incredibly difficult to "spread" over the caramel and banana layers. I'm not sure where the error lies...it may be likely I accidentally used a full cup of flour instead of the 3/4 listed. So instead, the batter was spooned into little island of chocolate afloat in a sea of caramel over the bedrock of banana.

So as a result, I did not have the beautiful layers that posed Audra's amazing photos. The banana cake swelled up to envelope the spooned bits of chocolate brownie with the caramel bubbling up between. I found mine to be finished baking at 30 minutes...which is odd as my oven tends to need more time for most baked goods.

But you know what...they still tasted absolutely amazing. The chocolate was thick, rich and fudge-y, the banana cake was sweet and cloud-like, the caramel was a complex dance of sugar and salt.

These will be made again!

And if you have a moment, and don't mind drooling a bit more...do check out The Baker Chick. Give her a "buzz" for Foodbuzz and "like" The Baker Chick on Facebook to keep updated on her baking adventures. You won't regret it!

Sunday, March 6, 2011

Slow Cooker Chicken Mole


Nothing seems more fitting for yet another cold snowy day than something that fills the apartment with spicy aromas all afternoon. This slow cooker recipe wasn't quite the "fix it and forget it" varieties I've tried in the past. All the ingredients for the mole sauce were combined and blended before adding to the crock pot, And the cut up chicken pieces need to be removed of their skin before layering in the pot as well. Still for the amount of prep time up front...the pay out nine hours later sounded well worth it.

Adapted from the BHG Biggest Book of Slow Cooker Recipes

serves 4-6

The Ingredients:
1 can (14.5 oz) diced tomatoes
1/2 cup chopped onion
1/4 cup slivered almonds, toasted
3 cloves garlic, quartered
2 canned jalapeno peppers, drained
3 Tbsp unsweetened cocoa powder
3 Tbsp raisins
1 Tbsp sesame seeds
1 tsp sugar
1/4 tsp cinnamon
1/8 tsp nutmeg
1/8 tsp ground coriander
2 Tbsp quick cooking tapioca
2 1/2 to 3 lb broiler-fryer chicken, cut up and skinned
2 Tbsp slivered almonds or pepitas, toasted (optional)

The Process:
For the mole sauce, in a blender or food processor combine undrained tomatoes, onion, the 1/4 cup almonds, garlic, jalapeno peppers, cocoa powder, raisins, sesame seeds, sugar, salt and spices. Cover and blend or process until mixture is a coarse puree.

In a 3 1/2 to 4 quart slow cooker place the tapioca. Add the chicken and then sauce. Cover; cook on low-heat setting for 9 to 11 hours or on high heat setting for 4 1/2 to 5 1/2 hours.

Remove the chicken from cooker and arrange on serving platter. Stir sauce; pour over chicken. Sprinkle with remaining almonds or pepitas. Serve with rice.

My Modifications:
I used skinless, bone-in chicken leg quarters. Usually I prefer chicken breasts, but the richer flavor seemed better with the darker meat. Plus it was what I happened to have on hand.

I used a 4 oz can of fire roasted green chilies, drained, instead of the jalapenos. I felt they would add a milder heat, but more depth to the flavor. To kick the heat back up a notch, I in turn added 1 Tbsp ancho chili powder, as well as a few extra cloves of garlic.

In the end, I believe the chicken stewed in the sauce on low for about ten hours. It was falling off the bone when I pulled it out.

The Review:
The meat was dripping off of the bones when I went to pull the chicken out of the slow cooker. The sauce left behind was thick and rich brown in color...and the chocolate smell permeated the entire kitchen. Surprisingly, the chocolate flavor was actually pretty subdued. As was any spice. The was no one distinct flavor in the mole, so much as just a rich, deep, earthy flavor. Ross commented that it was very different than a previous mole I had tried. Still good, but different. Only he couldn't put his finger on what was different. The previous recipe was not for a slow cooker, and it made use of boneless, skinless chicken breast, which yielded drier results. But overall the ingredient list was very much the same. I chalk the difference up to the cooking methods. The first simmered on the stove top for maybe half and hour which seemed to allow the individual ingredients to each shine through. The slow cooker's long cook time blended the sauce in to a deeper harmonious whole and allowed the flavor to penetrate the meat more deeply. And I can't say one is actually better than the other...