Showing posts with label pork. Show all posts

Friday, September 5, 2014

Chocolate Milk Stout BBQ Ribs with Mole Spice Rub


Chocolate, beer and barbecue don't seem like an obvious pairing, but trust me on this one. Do you like mole sauce? How about chocolate milk stout? dark roasty beers have an affinity for roasted and grilled meats. Stouts and Porters also love chocolate. See? The combination isn't so crazy after all.

These ribs are brilliant on the grill, if you are a master at the low and slow. They are equally as tasty slow roasted in the oven.

The recipe is my own

serves 4

The Ingredients:
1 rack (2 1/2-3 lbs) pork ribs

for the rub
1 1/2 tsp salt
1 1/2 tsp ground black pepper
1 1/2 tsp ancho chili powder
2 tsp brown sugar
2 tsp paprika
1 tsp cumin
1 tsp oregano
1 tsp cocoa powder
pinch cayenne pepper

for the sauce
2 cloves of garlic, minced
1 Tbsp oil
1 can tomato paste
1 cup chocolate milk stout
1/3 cup brown sugar
1 T cocoa powder
2 tsp paprika
1 Tbsp Ancho chili powder
1 tsp salt

The Process:
For the rub
Combine the spices.

Rub the mixture on both sides of ribs. Cover and let stand at room temperature for about 30 minutes.

for the sauce
Heat the oil in a medium saucepan over medium high heat. Add the garlic and saute until fragrant, about 2-3 minutes. Whisk the remaining ingredients into the saucepan. Bring to a boil, remove from heat and allow to cool. Refrigerate until ready to use.

for the ribs
Preheat the oven to 250 

Line a baking sheet with aluminum foil. Place the seasoned ribs on top. Brush with BBQ sauce and roast in the preheated oven, turning ribs and brushing with BBQ sauce every 30-45 minutes until fork tender, about 4 hours.

Allow to rest 10-15 minutes before serving

Serve with remaining Mole Stout BBQ sauce

Friday, August 15, 2014

Seared Pork Chops with Garlic Scape Chimichurri

One of my favorite parts of our CSA box is the garlic scapes. I love these elegant tender curls. Often I'll sautee them up like green beans. Or add them to a morning omelet with feta and whatever herbs tagged along in that week's box. But lately I've been coming across many scape pesto and chimichurri recipe and thought I'd give one a go.

I'd much rather grill these chops over an open flame than sear them in the pan, but the endless rain we've had this summer has put a damper on much of our grilling plans. Ah well, seared chops work in a pinch.

Pick thick-cut bone-in chops with a lot of marbling. Pork is a much leaner meat than beef and needs the extra fat, unless you want to end up with a tough and chewy chunk of meat. Rib chops...center cut of the loin...seem to grill up among the best. Thick cut helps keep them from drying out too quickly. And the bone? Well, honestly, I just enjoy gnawing the last bit of flavor off of the bone.

Enjoy!

adapted from The Brook Cook

serves 5

The Ingredients
for the chimichurri
1/4 cup fresh parsley, chopped
3 Tbsp fresh, chopped
3 Tbsp fresh cilantro, chopped
1 green onion, thinly sliced
4 to 6 garlic scapes, thinly sliced
1 Tbsp lemon juice
1 tsp kosher salt
1/8 teaspoon red pepper flakes
1/2 cup olive oil

for the chops
5 thick cut bone-in pork loin chops
generous pinch of salt and pepper
1 Tbsp oil

The Process
for the chimichurri
Combine the herbs, green onion, garlic scapes, lemon juice, salt, and red pepper flakes in a food processor. Purée. With the food processor still running, drizzle in the olive oil. Transfer to a bowl and set aside.

Chimichurri will keep in the fridge, covered, for up to a week.

for the chops
Generously season the chops with salt and pepper. Heat a large cast iron skillet over high heat. Add the oil and reduce heat to medium-high. Add the chops and sear 3 to 5 minutes, with out moving. Flip and cook until meat is just cooked through, about 3-4 minutes more.

Alternatively, grill the chops...searing 1-2 minutes per side over direct heat until a golden crust forms. Move the chops to indirect heat and cook an additional 4-5 minutes per side or until the internal temperature reaches 135-140 degrees F.

Let rest 5 minutes before serving. Serve topped with chimichurri.

Friday, April 18, 2014

IPA Marinated Pork Chops

Need something else to use up some of that marmalade from a few days ago? This pork is the perfect companion.

Initially I had been a little disappointed about the amount of beer flavor that came through in the marmalade. But paired with these chops, it just sings. The entire combination melds together in pure euphoric bliss. Okay...that is a bit of a ridiculous claim to lay on a piece of pork topped with some preserves. But it WAS damn tasty.

The pork is marinated in an IPA and buttermilk mixture that not only tenderizes the meat, but also imbibes the pork with wonderful citrus and floral notes from the hops. The marmalade pulls out those citrus notes even further. The breading on the pork returns the favor by teasing out hints of hefeweizen in the marmalade.

These chops can certainly stand on their own. But the bitter and sweet citrus on top truly helps them shine.

adapted from The Craft Beer Cookbook by Jacqueline Dodd

serves 4

The Ingredients:
4 - 4 oz boneless pork chops
6 oz IPA
6 oz buttermilk
1 tsp onion powder
1 tsp salt, divided
2/3 cup flour
2/3 cup panko
1/2 tsp pepper
pinch of cayenne

The Process:
Combine the IPA, buttemilk, onion and 1/2 tsp of salt in a large bowl. Add the pork, making sure each chop is fully submerged. Cover and refridgerate for 6-8 hours.

In a shallow bowl, combine the flour, panko, remaining salt, pepper and cayenne. Remove the chops from the marinade. Press each chop into the breading mixture, coating evenly on both sides. Set aside to come to room temperature, 15-20 minutes.

Heat oil in a large skillet over medium heat. Add chops and fry, 4-5 minutes per side or until golden brown and juices run clear.

Serve with a dollop of marmalade.

Wednesday, June 19, 2013

Vietnamese Pork Chops

Meat.  Summer.  Grill.

And of course.  Rain.

So a slight change of plans.  These thick-cut marinaded pork chops would have been phenominal on the grill, but with the 20 minute windows of sunshine we seem to have been experiencing, the skillet will have to do.

And the marinade reduced into a dipping sauce?  Amazing.

adapted from Bon Appetit

serves 2

The Ingredients:
2 - 1" inch thick cut pork chops (about 1 lb)
1/2 shallot, minced
2 Tbsp packed brown sugar
2 Tbsp fish sauce
1 Tbsp rice vinegar
1/2 tsp ground pepper
olive oil
salt to taste
lime, quartered

The Process:
Whisk together the shallot, brown sugar, fish sauce, vinegar and pepper.  Pierce the pork chops all over, place in a zip top bag and pour the marinade over.  Seal and marinate for 20 minutes at room temperature, or chill 4 hours to overnight

Remove chops and reserve marinade.  Generously salt the chops with salt.  Heat the oil in a large skillet over medium high heat.  Sear, until browned and cooked through, about 4 minutes per side.  Remove from skillet, cover to keep warm and allow to rest for about 9 minutes

While the chops rest, add the reserved marinade to a small saucepan.  Bring to a boil and cook until reduced until about 1/4 cup.

Serve chops with reduced marinade and lime wedges.


Thursday, April 25, 2013

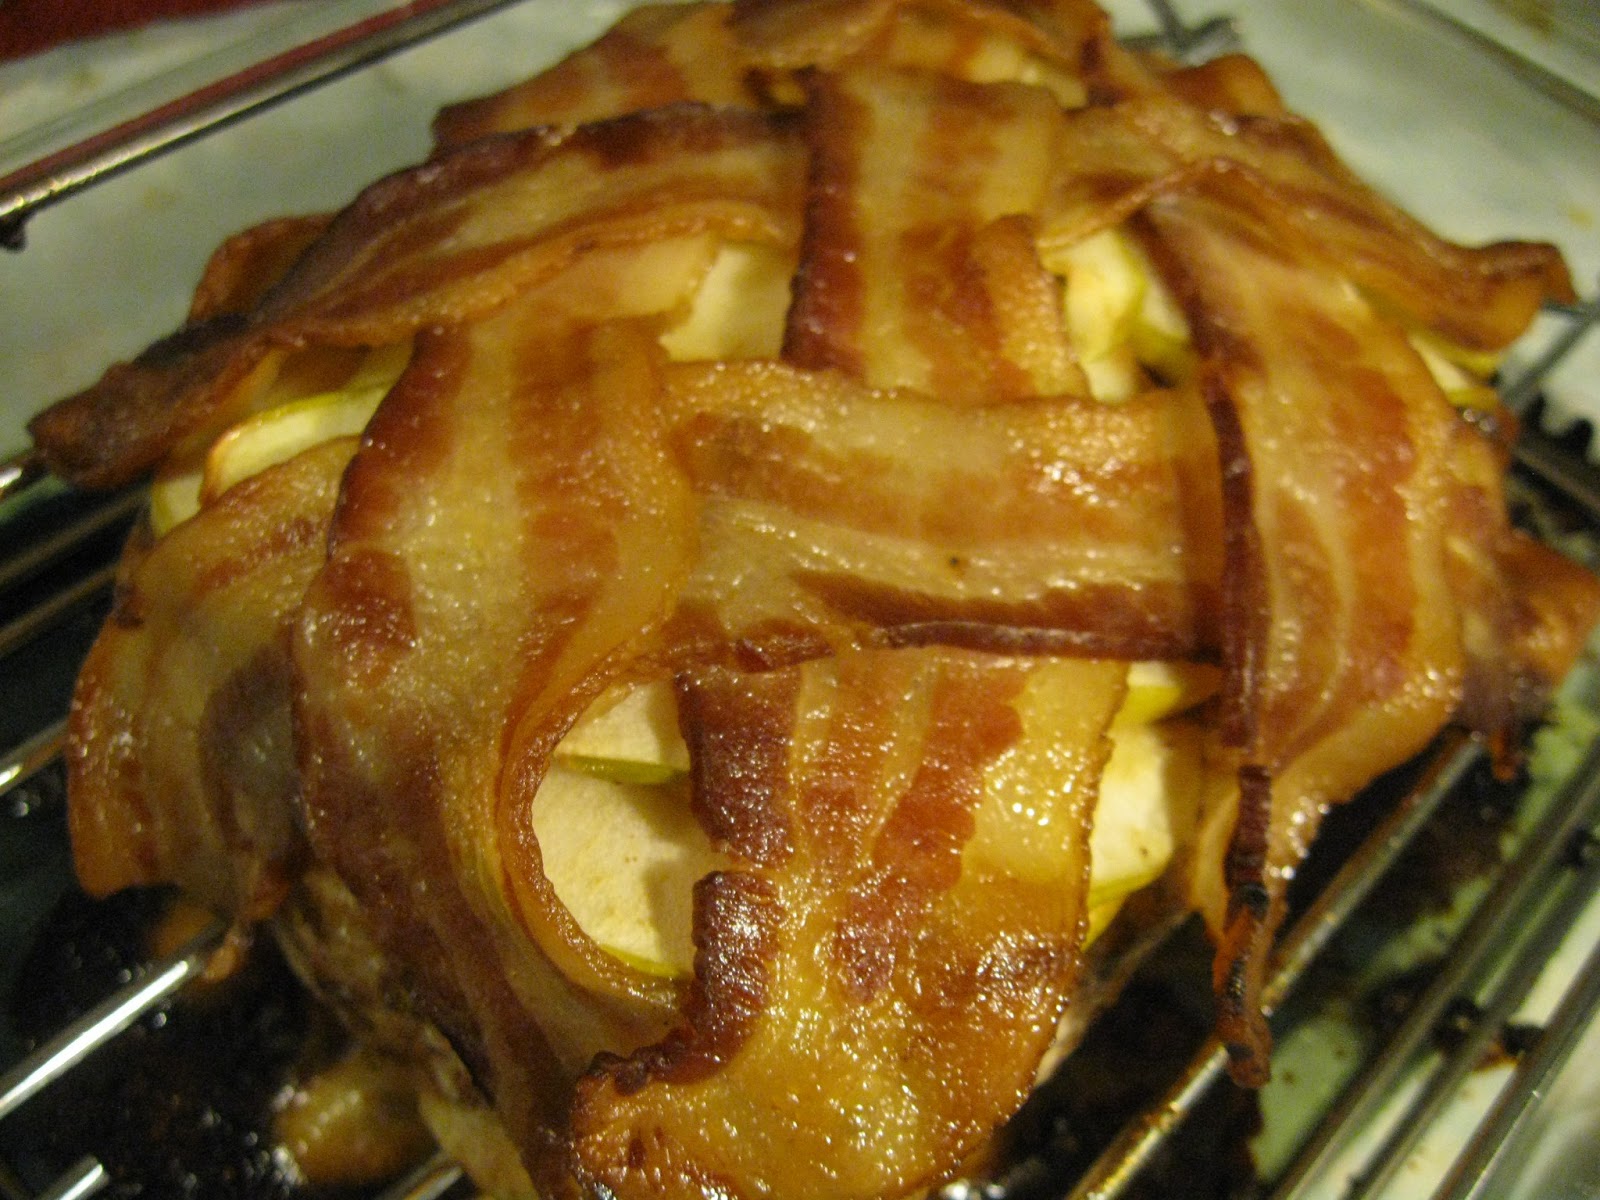
Maple Apple Bacon Pork roast

 Sweet, salty, smokey and just a little bit of spice...this may be one of the best pork roasts I've concocted to date!

The recipe is my own

The Ingredients:
2-6 lb boneless pork roast, preferably a rib end roast
1 Tbsp of your favorite spice rub per lb
1 Tbsp brown sugar per lb
1 Tbsp maple syrup per lb
1 granny smith apple, thinly sliced
6-8 sliced hickory smoked bacon

The Process:
Preheat the oven to 325

In a small bowl combine 1 Tbsp each of the spice rub, brown sugar and maple syrup for every pound of roast.  Mash into a thick paste and spread over the entire roast.  Place the apple slices on top of the coated roast in slightly overlapping layers.

 Lay the bacon diagonally over the top, weaving into a lattice.

Place the roast in a roasting pan and cook, uncovered, for about 25-30 minutes per pound or until the interior temperature reaches 145 (160 for well done), and the bacon has begun to crisp.  Remove from the oven and loosely tent with foil.  Allow to rest at least 10 minutes before slicing.

Tuesday, April 16, 2013

Tangerine-Glazed Ham


Ham is an interesting meat.  Hickory smoke and salt overwhelm the flavors.  A mighty powerful glaze is needed to cut through all of the fat and salt to compliment and play off of the whole.  Sweet pairs well with the smokey.  And citrus manages to cut through the rich smokey flavors to bring a bit of balance.  It's a fine line.  One I truly enjoy playing with round about this time every year.

Sage brings a nice burst of earthy fragrance to the super sweet tangerine glaze.  I adored the carrots sopping up all of the flavor as they simmered below during the last half hour of cooking.   And the tangerine rings are absolutely edible.


Recommended beer pairing: a Belgian Tripel or strong Pale Ale.  The high carbonation will help cut through the richness of the meat, while the citrus-y spice from the yeast will compliment the tangerine. 

adapted from Tyler Florence's recipe

serves 10-12

The Ingredients:
1 - 8 to 10-pound smoked ham, bone-in, skin on  
freshly ground black pepper
1 bunch fresh sage leaves
1/4 cup extra-virgin olive oil
1/2 cup unsalted butter, cut in chunks 
4-6  tangerines
1 cups light brown sugar, packed
1/2 cup water
1/4 teaspoon whole cloves 
1 cinnamon stick
1 1/2 pounds baby carrots

The Process:
Preheat the oven to 300

Place the ham on the rack of a roasting pan, fat side up.  Score into the fat, about 1/4-inch deep, in a diamond pattern.  Sprinkle generously with pepper.

Coarsely chop 8-10 large sage leaves. In a small bowl, or with a mortar and pestle, combine the chopped sage and oil until a thick paste is formed.  Rubbed all over the surface of the ham. 
Bake, on a lower rack in the oven for 1 1/2 - 2 hours.
Meanwhile for the glaze:
Juice 3-4 tangerines, yielding about 1 cup of juice.  Strain out any seeds and pulp.  Thinly slice the remaining tangerines, removing seeds.  In a medium saucepan, combine the juice and fruit with the butter, brown sugar, water and spices.  Bring the mixture to a gentle boil, and reduce to a simmer.  Continue to cook at a simmer for 30-40 minutes or until the mixture has reduced to a thick syrup. 

After 1 1/2 hours of cooking, moving the ham and coat with the tangerine glaze, studding the top with the sliced fruit.  Return to the oven for an additional hour.  Remove and add the carrots around and under the ham.  Toss to coat with the glaze.  Return the ham to the oven and bake an additional 30 minutes, or until carrots are tender.

Allow to rest 10-15 minutes before carving.

Wednesday, March 20, 2013

Pork Carnitas


Sometimes the mood strikes for something in particular.  I find in those moments, the best course is to heed those moods.  On the first day of spring, when the snow still lingers and temperatures continue to dip, this hearty dish provides hope...

adapted from My Kitchen Escapades

serves 3-4

The Ingredients:
2 pounds boneless pork butt
1 small onion, quartered
1 orange
1 lime
1 cup water
1 bay leaf
1/2 tsp cumin
1/2 tsp oregano
1 tsp salt
1/2 tsp pepper

The Process:
Preheat the oven to 300

Trim the fat off of the pork roast and cut into 2" chunks. Half and juice the orange, reserving the peels.  Juice and zest the lime.  Combine the pork, juices, zest, orange peel, onion, spices and water in a 1-quart Dutch oven.  Bring the mixture to a boil over medium-high heat.  Cover and transfer the Dutch oven to the oven.  Cook until the meat starts to fall about, about 2 hours.

Remove the Dutch oven from the oven,  Spoon the pork into a separate bowl.  Discard the peel and onions, reserving the juices.  Heat the mixture on the stove top to a rolling boil.  Cook the mixture until reduced by about half, about 15 minutes.

Preheat the broiler.

Meanwhile, using two forks, pull the meat apart into bit-sized chunks, but do not shred.  Add the pork into the juices and stir to coat.  Spread the pork and juices in a single layer onto a rimmed baking.  Transfer the pan back into the oven and broil until the meat begins to brown, about 5 minutes.  Using a large spatula, flip the meat, and broil for an additional 3-5 minutes.

Serve hot with tortillas, avocado, onion and cilantro

Sunday, August 5, 2012

Bacon Jam

Yes.  You read that right.  Bacon.  Jam.  As in spreadable bacon.

Oh...and there is beer in there mix as well.

yields one pint jar

adapted from The Beeroness


The Ingredients:
12 oz bacon (8-10 strips)
4 cloves of garlic, minced
1/2 cup onion
8 oz amber ale
1/4 cup apple cider vinegar
3/4 cup brown sugar

In a large saucepan or dutch oven, fry the bacon until crispy.  Work in batches as necessary.  Alternatively, you can bake or microwave the bacon to the desired level of crispness.  Remove the bacon from the pan and blot off any excess drippings.  Allow to cool and then roughly chop. Reserve about 1 Tbsp of the bacon drippings and discard the rest.  

Add the dripping to the  pot along with the onions.   Cook the onions over medium-high heat until the onions become translucent and tender, about 3 minutes. Add the garlic and stir for about 30 seconds. Slowly add the amber ale and vinegar, scraping the bottom of the pot to deglaze.  Add  the brown sugar and the bacon.  Reduce the heat to simmer a simmer and cover, keeping the lid slightly tilted or offset to allow steam to escape.  Stir occasionally and cook until the mixture is  reduced to a thick and syrupy consistency, about 45-60 minutes. Transfer to a food processor and pulse until a coarse paste is formed.

Serve at room temperature.

Will keep in the refrigerator for about two weeks...if it lasts that long...

The Review:
There will be skeptics.  Let them be suspicious.  It will leave far more of the salty, meaty, slightly sweet and boozy wonderfulness all for you...

We tried it on burgers.  We tried it on biscuits.  We refrained from eating it by the spoonful.

Wednesday, June 13, 2012

Beer Marinated Pork Chops with Peach Salsa

Summertime and beer...they hand in hand.  I grew up in a state that took pride in its beer.  And brats.  Oh...beer boiled brats at every family BBQ, tailgate party, summer cookout...beer, everywhere.   But sadly the beer used was often the cheapest variety available, drinkability notwithstanding. 

Several weeks back my sister directed my attention to an amazing food blog...The Beeroness.  The blog is devoted to appreciating and cooking with craft beers.  And why not?  The food sphere is all a twitter with proper wine and food pairings, both for dining and cooking.  Beer really should be no different.  In the midst of the craft beer and home brew boom the market is awash with so many styles.  Each with their own unique flavor profiles.

With Ross' growing  passion in home brewing we've broadened our range of beers.  IPAs still are a hard one for me  to appreciate, but when I came across this recipe for marinated pork chops, along with highly recommended IPA I knew I would have to give these hoppy beers another shot. 

Do check out Jackie's blog. 

adapted from Jackie's recipe at TheBeeroness.com

serves 8

The Ingredients:
for the chops and marinade
8 bone-in pork chops, cut 3/4- 1 inch thick
12 oz IPA style beer
juice of two lemons
1 tsp sriracha, or more to taste
2 tsp agave or honey
2 tsp salt
4-6 cloves garlic, minced
additional salt and pepper to taste


for the salsa
2 ripe peaches, diced
1 red pepper, chopped
1 pablano pepper, chopped
1/2 large red onion, diced
2-3 green onions, sliced
1/2 tsp cumin
1 tsp chili powder
1/2 tsp salt
2-3 Tbsp IPA style beer

The Process:
In a large bowl or baking dish, combine the beer, lemon juice, salt, agave, garlic and sriracha, stir to combine. Add the pork chops, turning to coat. Cover and place in the refrigerator.  Marinate for at least 30 minutes or up to 4 hours.

To prepare the salsa, combine  all of the  ingredients in a medium bowl and toss to combine.  Cover and refrigerate until ready to use. 

Heat olive oil in a large skillet over medium high heat (I prefer a cast iron) until scalding hot but not smoking. Add the pork chops, cooking one or two at a time to not over crowd the pan. Sprinkle with salt and pepper.  Sear on each side for 3-4 minutes.  The chops will still be slightly pink at the center. Transfer to a baking sheet in a oven preheated to 200 to keep warm.  Cook remaining chops in the same manner.

Transfer the cooked chops to serving plates and top with salsa. Serve immediately.


The Review:
For this batch of chops, I went with Jackie's recommendation for Stone's Ruination.  If you can find it, I highly recommend trying it.  But at about $18.99 for a six pack, it is a bit of a splurge.  However, if you like me, are IPA averse, this may help to at least earn the hop forward style a little more appreciation.

Paired with the chops, the IPA worked incredibly well.  The meat was tender and flavorful.  The beer flavor subtle.  The peach salsa truly stole the show.  Plan on having plenty of chips near at hand to scoop up the leftovers.  Or spoon it on top of a simple green salad for a refreshing lunch.

Here, beer is not the star, but it fulfills its supporting role with gusto.

Wednesday, April 18, 2012

Mom's Split Pea Soup with Ham

Growing up, ham usually formed the centerpiece of our Easter brunch or dinner.  A few days later this meant we would be treated to a wonderful split pea soup loaded with smokey and salty bits of ham.  My mom's secret?  The ham bone.  Into the pot it would go with peas, seasonings, and a few extra veggies.  The soup is ridiculously simple.  I suspect I don't make it often only for lack of a ham bone.  Tossing in a handful of cooked meat at the end just isn't the same as letting that hock simmer in the broth for hours on end.

Adapted from childhood memories, with some help from Mom and the BHG cookbook.

serves 6-8

The Ingredients:
1 meaty ham bone, about 1 to 1 1/2 lbs
2 cups split peas
1 onion, finely diced
1 potato, finely diced
1 celery stalk, finely diced
2-3 carrots, chopped
2 cloves of garlic, minced
1-2 Tbsp fresh thyme
1 bay leaf
1/4 tsp marjoram
4 cups chicken stock
2 cups water
salt and pepper to taste

The Process:
Place the ham bone in a 4-qt slow cooker.  Add peas, diced vegetables and seasonings.  Pour chicken stock and water over the top.  Cover and cook on the low heat setting for 8 to 10 hours or on high for 4 to 6 hours.  Remove the ham bone.  As soon as it is cool enough to handle, remove any meat from the bone and coarsely chop or shred.  Return the meat to the slow cooker.  Remove the bay leaf and season with salt and pepper to taste.

The Review:
Isn't it amazing, how one big bowl of soup can whisk you back to everything that was good ans wonderful about childhood?  I love this soup.  I love how simple it is.  I love the sweet bits of carrots, the tender bits of potato, the salty bits of ham and the savory bursts of thyme.  I love the soup even better the next day when it has thickened the the consistency of book paste.  But I am a bit odd like that.  And I am a bit of a bibliophile.  Though I never ate paste as a child...that I can recall.  It brings to mind one of my favorite childhood books...Cloudy with a Chance a Meatballs (don't ask me about the film, I was too horrified to even bother seeing it...)  The image of pea soup fog stuck with me all of these years.

Sorry...tangent.  But most dishes like this seem better the next day.  And nothing is quite the same as generous shreds of ham off of a meaty hock that has been simmering with tender peas for the entire day.

I'm sad it's been devoured already.  I kind of want to buy a ham hock just to have more soup...

Saturday, March 31, 2012

Maple Brined Pork Tenderloin

One cannot live on chutney alone.  Well, perhaps one can, but I made the roasted pear chutney a few days back to serve in tandem with this lovely pork roast.  I adore brining.  Everything I have bathed in a salty spice bath has emerged far more tender and flavorful than I could ever anticipate.  The thought of piney juniper berries and rosemary paired with deliciously sweet maple syrup sounded like a heavenly combination (and yet another blend I am bookmarking later for venison or elk roasts come fall...)  I already had juniper berries in my spice cabinet, thanks to the corned beef I made on Paddy's Day.  I highly recommend adding this spice to your repertoire...especially if you are a fan of German roasts, fragrant sausages, and rich stews.

The recipe halves beautifully for smaller roasts as well.  But who doesn't enjoy leftovers?
adapted from Thyme in Our Kitchen 
serves 6-8

The Ingredients
for the brine
1 cup kosher salt
1/2 cup brown sugar
1 cup maple syrup
2 Tbsp Dijon mustard
2 tsp red pepper flakes
1 Tbsp black peppercorns
2 tsp mustard seeds
2 Tbsp juniper berries
1/2 tsp whole cloves
1/4 cup fresh rosemary, chopped
2 Tbsp fresh thyme, chopped
12 garlic cloves, minced
2 Tbsp fresh ginger, minced
8 cups water

for the roast
1 3-4lb pork loin roast
2 Tbsp vegetable oil
pepper to taste
1 Tbsp brown sugar
1 Tbsp maple syrup

to serve
sprigs of fresh rosemary
1 recipe of roasted pear chutney

The Process:
for the brine:

In a large saucepan, combine all of the brine ingredients together.  Over medium high heat, bring the mixture to a boil. Turn off the heat and stir the brine until the salt, sugar, and maple syrup have completely dissolved. Let the brine cool. Pour the brine into a large stainless steel or glass container.  
Pierce the pork loin all over with a skewer and add it to the brine, weighing down if necessary to keep the roast submerged. I have found that oven roasting bags, very securely tied, work well for brining, should a non-reactive container large enough to accommodate the roast is not available. Cover and refrigerate for no longer than 12 hours, turning the roast at least once. 

for the roast:
Preheat the oven to 400

Remove the pork from the brine and pat dry. Do not rinse. Sprinkle generously with pepper. Heat the oil in a large pan over med-high heat. Sear the roast on all sides until browned. Place into a large roasting pan. In a small bowl whisk together brown sugar and maple syrup.  Brush over the top of the roast.
Place uncovered in the oven and roast until internal temperature reaches 145° to 150 and juices run clear, about one hour.  Remove from the oven. Loosely cover with foil and allow to rest for 10-15 minutes before slicing. 

Slice thinly and serve with Roasted Pear Chutney.

The Review:
This is one of the most flavorful and juiciest pork roasts I've had to date.  I adore pork tenderloin, but on occasion, even in the slow cooker, I've managed to dry the meat out.  Not so with this recipe.  Even after being sliced and dressed on the plate...sitting patiently as photos were snapped, the meat remained wondrously moist.  The pork has a wonderful salty unami flavor about it, with a touch of sweetness from the maple syrup.  I would have liked the rosemary and juniper to sing forth a little more, and I am not sure the red pepper or ginger lent much to the end flavor.  Simplified a bit more perhaps a few more flavors could be coaxed out of the background.

But what really makes this meal sing is the addition of the roasted pear chutney.  The vinegary tang and warm spice of the chutney elevated the meat to a completely new level. 

The meal was everything I could hope for from a Friday night with my husband.  Perfect dinner date for two...with leftovers a plenty! 

Wednesday, March 21, 2012

Mini Caramelized Onion Quiches with Sriracha Glazed Bacon

Have you noticed how many recipes for mini quiches are out there?  And yet so few of them utilize a crust.  I completely sympathize.  The pastry is fussy and time consuming when you're trying to work small.  One of my least favorite tasks in the kitchen is rolling out uniformly thin layers of pastry crust or cookie dough.  But in this instance, the butter crust adds a lot to the texture and flavor of the quiche.  And the crimped and pleated edges of pastry practically blossom out of the muffin tins.  They are quite stunning.

Many tarts, galettes, pastries and quiches have been featuring caramelized onions as of late.  So I have decided to  jump on the bandwagon.  Added bonus...mini quiches means I'll breakfast ready to heat on eat for the next few days.

the recipe is my own

yields 12 mini quiches

The Ingredients:
for the bacon
3 slices thick cut bacon
1 Tbsp honey
1-2 tsp Sriracha


for the onions
2-3 medium onions, peeled and thinly sliced
1 Tbsp olive oil
1 Tbsp butter
1/4 tsp salt

for the quiche
pie crust or pate brisse  for a dbl crust
4 eggs
1/2 cup +2 Tbsp heavy cream
1/2 cup + 2 Tbsp milk
1/2 tsp salt
1/4 tsp pepper
1/4 tsp thyme
pinch cinnamon
3/4 cup cheese of your choice, shredded


The Process:
for the bacon:
Preheat the oven to 450.  On an aluminum lined baking sheet, lay the bacon out in a single layer.  In a small cup or bowl, stir together the honey and sriracha.  Brush the glaze evenly over each slice of bacon.


Bake for 10-15 minutes or until the bacon reaches the desired level of crispness.  Remove the bacon to paper towels to drain and cool.

for the onions:
In a large skillet over high heat, melt the butter and heat the oil.  Add the onions in a single layer over the entire bottom of the skillet.  Reduce the heat to medium, medium-low.  Saute the onions over low heat, stirring every 2-3 minutes.  After 5-7 minutes sprinkle with salt to extract more of the liquid from the onions.  Continue to saute over medium-low heat, stirring only every 2-3 minutes.  The onions should slowly begin to brown and caramelize. 


After the desired caramelization is achieved, about 20-30 minutes, remove from heat and set aside.


for the quiche:
Preheat the oven to 375 and lightly oil a 12 cup, standard-sized muffin tin.

Roll out the pastry crust or pate brisse.  Cut out twelve 5- inch circles and gently press one circle into each cup of the tin, gently pleating and folding the edges as needed.

In a medium bowl whisk together the eggs, cream, milk and seasonings.  Set the egg mixture aside.

Divide the caramelized onions between the 12 pastry cups, using roughly 1 tsp per quiche.  Top each with 1/4 strip of bacon, snipped into small pieces.  Sprinkle with 2-3 tsp of shredded cheese. Pour about 3 Tbsp of the egg mixture into each cup, filling within 1/4 inch of the crust's lip.

Bake for 30 to 35 minutes until the quiche puffs up and begins to brown.  A toothpick inserted into the middle should come out clean.  Allow the mini quiches to cool in the tin for 5-10 minutes, enabling the egg mixture to set up.  Gently remove the mini quiches from the muffin tin to a cooling rack.  Let rest until the egg settles and levels out and the quiches are cool enough to handle.
Serve warm.

The Review:
Fresh out of the oven, domed golden treasures peeked out from their pastry petals.  They quickly settled, but with that first glimpse I knew I was in for a treat.
I had a hard time waiting for the mini quiche to cool enough to take a bite.  But that first bite...heavenly.  The crust broke away in a flaky, buttery burst to reveal the smooth, velvety egg within.  A salty, smokey pop of bacon followed, and close behind that...the slight sweetness and almost creamy layer of caramelized onion.  A subtle warmth danced across my tongue as the Sriracha came forward to finish off the bite.  One small bite...so many flavors and textures. 

While still warm, the egg and bacon flavors dominated these lovely little breakfast bites.  As with many things, the flavor improved with time.  The next day the Sriracha created the most wonderful subtle warmth without a trace of vinegar or bite.  The onions held their own more strongly against the smokey burst of bacon.  And all in all the flavors mellowed and mingled a little more harmoniously.

Of course, saving them for next morning's breakfast sacrifices that gloriously flaky crust, unless you have time to reheat them in the oven.  Convenience always has its price.

Ross didn't care much for the Sriracha.  But the fillings for these quiche are limitless.  Even a change as simple as a maple-peppercorn or honey-whiskey glaze on the bacon would be enough to launch these breakfast gems into completely different flavor-filled waters.

Tuesday, March 6, 2012

Ham and Cheese Quinoa Cups

I am horrible when it comes to eating breakfast.  I know I should.  But most mornings that extra few minutes of sleep usually out ranks the need to properly fuel up for the day ahead.  Often I pour a cup of coffee and bolt out of the door. 

One trick that seems to work well for me is to make a large batch of something ahead that can be quickly reheated in the microwave, stove top or toaster oven.  Quiche cups, frittata, and turkey/fennel sausage patties were key players when I planned ahead.  But it is possible to overload on quiche, believe it or not.  Quinoa thrown into the mix adds excitement (and a fun texture) back to my breakfast routine.

In a bit of poor planning I discovered I did not have enough quinoa to make Kristin's full recipe from Iowa Girl Eats.  But it halved easily enough.  I omitted the additional egg whites and stuck with whole eggs.  And I used a standard muffin tin instead of the Kristin's mini tins.  As a result, I needed to extend the baking time a bit.

But I was set for a few days of breakfast, with surprising little hands-on time.

adapted from Iowa Girl Eats

yields 6 Quinoa Cups

The Ingredients:
1 cups cooked quinoa (about 3/4 cup uncooked)
2 eggs
1 small zucchini, shredded
1/2 cup shredded sharp cheddar cheese
2 oz diced ham
2 Tbsp parsley, chopped
1 Tbsp Parmesan cheese
1 green onions,thinly sliced
salt and pepper to taste

The Process:
Preheat the oven to 350 degrees. In a large bowl combine all of the ingredients and whisk together until well combined.   Lightly butter or oil a standard-size muffin tin.  Spoon mixture into the tin, bringing the mixture level to the tin's lip.  Bake for 25-30 minutes, or until the edges of the cups are golden brown. Let cool for at least 5 minutes before removing from the tin.

The Review:
These truly were heaven sent for a non-morning person such as myself,  The day after making them, I had something to look forward to that I knew would fill me up without needing much time.  Granted, the quinoa cups were much, much better fresh out of the oven.  After a night in the fridge they lost that beautiful crispness to their browned edges.  But I'll take a warm, albeit slightly soggy breakfast over toast or cold cereal any day.

The filling combination here is classic.  Ham and Cheddar.  But the recipe is in no way limiting.  Spinach, mushroom and Gruyere may be my next batch.  Turkey sausage and Swiss?   Tomato, olive and feta?  So many wonderful flavor combinations.  The quinoa and eggs provide a near perfect canvas for these flavors, with the quinoa added a welcome pop of texture.

enjoy!

Saturday, March 3, 2012

Roasted Chili and Pork Empanadas


I was in a bind.  I run into this problem every time the word potluck is tossed about.  A friend was having a gathering and asked we bring a dish to pass.  My reputation in the kitchen is beginning to precede me.  I wanted to offer something stellar.  But I was also feeling lazy and didn't want to make a special trip to the store or put much effort into concocting an awe-inspiring dish.  Something saliva inducing was still required. Or at least palatable.  Desserts are easy...potlucks seem overwrought with cookies, bars and cupcakes.  So I wanted to bring something savory.  But easy to eat.  Serious board game playing was likely to occur and few things clutter up playing space like dinner plates. 

So the solution?  Empanadas.  Have you noticed how many cultures have savory meat pies in their repertoire? Italian calzones, Cornish pasties, Indian samosas, Spanish empanadas...heck, even hot pockets...

I picked empanadas for the broad appeal of the ingredients.  Honestly, really the biggest difference between all of these hand pies is the seasoning and sauce.  I guess I was in more of a tex-mex mood.  I've made pasties and samosas before.  Plus I already had everything on hand.  I used leftover roasted pork loin; but ground beef, shredded chicken, or rice and beans could just as easily work.  Given my impatience with pie pastry, that I did purchase instead of making my own from scratch.  I'm getting better, but Pillsbury still makes a better pie crust than I do...

the recipe is my own

yields 20-24 empanadas

The Ingredients:
1 onion, diced
2-3 cloves of garlic, minced
1- 4 oz can fire-roasted chilies
2 tsp cumin
1 Tbsp chili powder
1/2 tsp dried oregano
2 cups cooked pork loin, finely chopped
6 oz Monterrey jack cheese, shredded
1/3 cup sour cream
salt and pepper to taste
1 recipe for a double pie crust
1 egg, beaten

The Process:
 In a large skillet over medium high heat, saute the onions and garlic until the onion is tender, about 5-7 minutes.  Add the chilies, cumin, chili powder.  Stir until well combined and cook for 2-3 minutes.  Add the meat.  Simmer until heated through, about 5 minutes.  Add the cheese and stir until melted.  Mix in  the sour cream.  Season to taste with salt and pepper.  Remove from heat.
Preheat the oven to 350.  Lightly grease 2 baking sheets and set aside.

Roll out the pie crust and cut out 3-inch rounds using a cookie cutter (I ended up using the screw top band from one of my canning jars...)  Re-roll the dough as necessary to make 20-24 rounds.

In the center of each dough round, mound a scant Tbsp of filling.  Dip your finger in water and dampen the edges of the dough round. 
Carefully fold one side of the dough over the filling.  Line up the edges of the dough and press gently.  Crimp the edge with the tines of a fork to seal the empanada shut.  Place on a baking sheet.  Repeat with the remaining dough rounds and filling.  You will most likely have some filling left over.

 Using a pastry brush, brush a little beaten egg onto each empanada.  Bake for 20-25 minutes, or until the empanadas puff slightly the crust is golden brown.  Serve warm.


The Review:
Considering I used leftovers and pre-made pie crust, these empanadas were a breeze to make.  They looked absolutely stunning...beautiful puffed and rounded crusts, carefully crimped edges, glistening egg glaze, steaming and flavorful filling...I would make these again in a heart beat.  And it appears our friends would gladly partake of them again given the chance.  Filling possibilities are endless.  And the size is perfect for snacking and sharing.  For an entree-sized meat pie, a larger round with more filling would be easy enough to do...and I suspect they would freeze well for future quick meals.


Tuesday, February 21, 2012

Garbanzos with Chorizo and Spinach

Beans and pork is a tried and true combination much loved across most of the country.  The possibilities are virtually  endless once you've moved beyond the backyard barbeque pinto beans and bacon.   This dish is much more stew like, with chunks of tender potato, ample bean and a healthy dose of smokey chorizo.  Wilted spinach added towards the end helps endow a sense of health and good eating.  And the best part?  The entire entree can be dished up in about thirty minutes.

I highly recommended the smoked Spanish-style of chorizo for this dish, though the raw nutmeg chili infused Mexican style will work as well.  I opted for Palacios mild versions...hot sausages are also available.

adapted from A recipe in Men's Health, December 2011

servers 4

The Ingredients:
1/2 Tbsp olive oil
2 links Spanish-style chorizo, chopped
1 large onion
2-4 cloves of garlic, minced
1/4-1/2 tsp red pepper flakes
1 tsp paprika (preferably pimenton)
2 Tbsp tomato paste
1 lb yukon or russet potatoes, cut into 1/2 inch cubes
2 bay leaves
1 1/2 to 2 cups chicken or vegetable stock
2- 14 oz cans garbanzo beans, drained and rinsed
salt and pepper to taste
8 cups baby spinach

The Process:
Heat the oil in a large pot or saucepan over medium heat.  Add the chorizo and saute until lightly browned, about 5 minutes.  Remove from the pant and set aside.

Add the onion, garlic, red pepper, and paprika to the pot and cook until the onion begins to caramelize.  Stir in the tomato paste and cook for another 2-3 minutes or until the paste evenly coats the onions.  Add the stock, potatoes, and bay leaves.  Reduce to a simmer and cook until the potatoes are tender, about 10 minutes.

Add the Garbanzo beans and cook for another 5 minutes or until beans are heated through.  Season to taste with salt and pepper.  Remove the bay leaves and add the cooked chorizo and the baby spinach. Continue to cook until the spinach is wilted.

The Review:
Upon beginning to saute the chorizo, I would have thought the end result would be a greasy mess due to the red slick of fat that coated the saucepan. instead of the rich, smokey dish ultimately served up.  The meat was not a substantial part of the meal, quantity wise (though you could easily double or triple the amount if you are a huge fan of this Iberian treat) but it infuses smokey and slightly spicy nuances in every bite.  The potatoes and chickpea both lend a wonderful soft and velvety texture, but with enough difference to keep you from getting bored.  The contrast of something firm or with a little more bite was missing, but not by much.  The flavors more than make up for what the texture front may lack.  And the spinach...eight cups seems like a lot until the bunch cooks down.  The beautiful flecks of green amidst the deep red sauce made for an incredibly picturesque dish.  However, this one is so tasty you may polish it off before the camera had a chance.  Leftovers were just as wonderful the next day.

Monday, January 30, 2012

Slow Cooker Kalua Pork

Aloha!  We are well in winter's grasp.  The cold bores on the soul, even as the days began to slowly lengthening again.  To combat the winter blues, Ross and I hosted a luau for several friends and co-workers.  The center piece to most Luaus is a succulent pig, wrapped in ti leaf, buried in an underground oven and roasted for several hours.  The ground is far to frozen for us to make our own imu, and ti leaf is hard to come by in Minneapolis, but I was pleased to find both slow cooker and oven roasted versions of this Hawaiian treat.

Adapted from various sources


The Ingredients:
6 lb pork shoulder roast (butt roast)
1  to 1 1/2 Tbsp liquid smoke
1 1/2 Tbsp Hawaiian black (lava) or red (alaea) sea salt


The Process:
Pierce the roast all over with a sharp knife tip.  Rub with salt.  Place in a 6 qt slow cooker and drizzle with liquid smoke.  Cover and cook for 16 to 20 hours, turning once.

To prepare for serving, remove the roast from the slow cooker to a large serving bowl.  Using two forks, shred the meat.  Add enough of the cooking liquid to moisten the meat.

The Review:
For several hours, my entire house smelled like Hilshire Farms L'tle Smokies.  Over time the smell diminished to a meaty aura that permeated the kitchen walls.

Of all of the dishes served at the Luau, this smokey, tender pork was the star.  After 12 hours the meat was already falling apart at the slightest touch.  At 16 it was succulent beyond belief.  The liquid smoke did an amazing job at simulating the smokey flavor of the traditional ipa...though nothing can truly replace that earth smoked taste.

No additional seasoning was needed, though a squirt of sriracha found its way onto a few plates.  Six pounds went a long way...feeding nearly fourteen people in all with a good bit for leftovers.  When the ground thaws we may consider digging a pit in the backyard and hosting a traditional luau.  But in the meantime, this was a wonderful substitute.

Monday, January 9, 2012

Gingered Pork and Pineapple

Another chilly January day and little desire to lift a finger to cook.  Once again our slow cooker comes to the rescue.  After the enormous crown roast we tackled during Christmas, one would think we'd be tired of pork by now.  And to a point we are...you can only reheat leftovers with BBQ sauce, or fry the meat up with chili and onion so many times.  In a departure from BBQ sandwiches and spicy fajitas, may I present gingered pork with pineapple.

This sweet Asian-inspired dish shares similar flavors with the Chinese take-out  favorite: sweet and sour pork.  Only without the soggy  breading were force ourselves to endure when the delivery person finally arrives. 

adapted from BHG's Biggest Book of Slow Cooker Recipes

serves 6-8

The Ingredients:
2 lbs boneless pork shoulder
2 Tbsp cooking oil
3/4 cup chicken broth
3 Tbsp quick-cooking tapioca
3 Tbsp low-sodium soy sauce
3 Tbsp oyster sauce
1 inch fresh ginger, finely minced
1 - 15 oz can pineapple chunks, juice reserved
4 medium carrots, cut into 1/2- inch slices
1 large onion, cut into 1 - inch pieces
1 - 8 oz can slice water chestnuts, drained
1 1/2 cups fresh snow pea pods
3 cups hot cooked rice

The Process:
Trim the fat from the pork.  Cut the pork into 1 - inch pieces.  In a large skillet, heat the oil over medium-high heat. Add the pork and brown.  Drain off fat, remove from heat and set aside.

In a 4 qt slow cooker, combine the broth, tapioca, soy sauce, oyster sauce, ginger and pineapple juice reserved from the can of pineapple chunks.  Add carrots, onion and pork.  Cover and cook on low for 6 to 8 hours or high for 3 to 4 hours.

Prior to serving, if using the low setting turn up to high.  Stir in pineapple chunks and pea pods.  Cover and cook an additional 10 to 15 minutes or until pea pods are tender-crisp.  Serve over warm rice.

The Review:
This dish was surprisingly reminiscent of La Choy's canned chow mein...in a good way...and without the crispy noodles.  The sauce had a lovely suggestion of sweetness without being cloying.  The pork,  though a tad dry (in a slow cooker...imagine that) practically fell apart.  The carrots offered a soft bite to compliment the snow peas pleasant crunch.  Despite having almost tripled the amount of ginger from the cookbook's original recipe, the zesty flavor was increbily mellow, verging on undetectable.  Though that could be the remnants of my cold limiting my palate.  Despite that, our entire kitchen was perfumed in its spicy aroma though.

I'd imagine this dish would work equally as well with chicken.

Monday, December 26, 2011

Pork Crown Roast with Cherry Apple Stuffing

Christmas dinner, more so than Thanksgiving, calls out for grand presentation.   Growing up, no centerpiece on our family table seemed more grand than the crown roast.  A glistening ring of pork, each bone tipped with a quaint paper or foil cap...stuffing mounded and golden brown on top.  It seems so elegant.  So much time and care to craft something so magnicifent...

Despite not having many people over--no family up to visit, and friends off celebrating with their own-- I was bound and determined to make a glorious end to this first year of food blogging.  I went to a local butcher and ordered the roast.  Cooking the beast would be challenge enough; I wasn't prepared to trim, bind and french the loin myself.  The smallest cut I could procure was a 16 rib roast...weighing in at nearly 11 lbs.  Ross and I were going to eat like kings for days!

adapted from the BHG Cookbook

serves 12-16


The Ingredients: 
1 pork rib crown roast (12 to 16 ribs)
3/4 cups water
1/2 cup dried tart cherries
1/2 tsp instant chicken bouillon granules
1 stalk celery, diced
1 small onion, finely chopped
2 Tbsp butter
4 cups dry bread cubes (6 to 7 slices)
1 medium apple, chopped
1/4 tsp ground sage
salt and pepper to taste

The Process:
Preheat oven to 325

Trim the fat from the roast, or ask your butcher to do that for you.  Place the roast, bone tips up, on a rack in a shallow roasting pan.  Sprinkle the cavity and outer edges with a generous pinch of salt. Make a ball of foil and press it into the cavity to hold it open as it cooks.  Wrap the bone tips with foil.  Roast in preheated oven for 1-1/2 hours.

Meanwhile prepare the stuffing.  In a small bowl stir together hot water, cherries and chicken bouillion.   Let stand for 5 mintues.  Do not drain.

In a small skillet sautee the celery and onion in butter until tender and translucent, but not browned.

In a large mixing bowl, toss together bread cubes, apple and sage.  And the cherry mixture and sauteed onions.  Toss gently until bread cubes are moistened.  Season with salt and pepper to taste.  Add additional 1/4 cup of water or stock for a moister stuffing.

After 1 1/2 , remove roast from oven.  Remove the foil from the roast cavity.  Loosely pack stuffing into the center of the roast.   Cover stuffing loosely with foil.  Place any remaining stuffing in a lightly greased casserole.  Bake the stuffed roast an additional 45 to 60 minutes for a 6 lb roast or for 75 to 90 minutes for a 8-10 lb roast, or until a meat thermometer inserted at the thickest part of the roast registers 160. 

Add the casserole of stuffing to the oven for the last 45 minutes to heat through.

Remove roast from oven, cover with foil and let stand for 15 minutes.  This allows the juices to settle and redistribute throughout the roast.

To serve, spoon the stuffing out of the roast's cavity.  Slice the roast between each rib, and remove any cording used to bind the roast.


The Review:
Because our roast weighed in much heavier than the BHG's 5-6 roast, I needed to alter the cook time accordingly.  The lower heat and longer cook time did not dry out the meat in the slightest, though the stuffing may have suffered a bit from over doneness. 


The meat was tender, juicy and rich in its own pork flavors.  A thick band of beautiful white loin meat was attached to each rib, dripping with juices.  Just enough meaty goodness clung to the base of each rib to justify us gnawing on the bones like rabid dogs.  For as elegant as the roast looks, in the end, its' hard to eat while maintaining such refinement!  The sweet and tart stuffing complimented the roast well, but could have used a bit more salt and seasoning.  I do think the stuffing cooked in the casserole suffered of dryness.   I'd opt for a different bread than our multi-grain next time.  Perhaps a mixture of white, wheat, sourdough and rye.

The roast itself looks intimidating when first un-boxed.  In all honesty, this lovely (and pricey) piece of pork was no more of a challenge than a Thanksgiving turkey.