Showing posts with label sweets. Show all posts

Monday, April 2, 2012

Classic Vanilla Ice Cream


Happy birthday to me!  My man is a smart one.  When I birthday rolled around a while back, not only had he been paying attention to my endless wish list of kitchen gadgets, he chose the ones that would benefit him and our friends the most.  Well, truth be told, any kitchen gadget is the gift that keeps on giving in our household.  If you show up, you are likely to be fed...

Enter the ice cream maker.

I pondered for quite some time about which concoction to tackle first.  So many wonderful ice creams, sorbets, gelatos and yogurts danced in my head.  And with our weather turning to summer in no time flat, chilly treats are certainly called for.

It seems only proper that the inaugural scoop be a classic vanilla.

David Lebovitz has many a wonderful recipe.  I felt confident heading to him for advice after perusing the little recipe book that came with the maker.  But I was stymied to see so much egg added to what he called an ice cream.  Call me a purist.  Call me a snob.  I adore custards and ice creams equally, but I was raised by a woman who took great pride in being a car hop at Zarder's in Milwaukee.  We had the differences between custard and ice cream drilled into us at a very young age...

So no egg.  Just cream, whole milk, sugar and vanilla.  I did follow Lebovitz's advice about using both vanilla bean and vanilla extract.

adapted from the Cuisinart recipe book included with the maker
 and David Lebovitz's classic vanilla ice cream recipe (sans egg)

yields about 5 cups

The Ingredients:
1 cup whole milk
Pinch of salt
3/4 cup  sugar
1 vanilla bean, split lengthwise
2 cups heavy cream
1 tsp pure vanilla extract

The Process:
In a medium saucepan over medium heat combine the whole milk, salt and sugar, stirring until the sugar is dissolved.  Scrape the seeds from the vanilla bean into the milk with a paring knife, then add the bean pod to the milk. Bring to a simmer, cover, remove from heat, and infuse for one hour.

After one hour, remove the vanilla pods* from the steeped milk.  Whisk in the heavy cream and vanilla extract.  Cover and chill in the refrigerator for 1 to 2 hours, or preferably overnight.

To make the ice cream, set up the ice cream maker, add the cream mixture and prepare according to the manufacturers instructions.  Once the ice cream reaches a soft serve consistency (about 20-30 minutes in my ice cream maker) transfer the mixture to a 5-6 cup container and freeze for an additional 2 hours. 

*keep the pods for other uses.  Rinse the pods of the cream mixture and allow them to dry out completely. Store in an air tight container to use in other recipe later on.  Or bury the pods in a jar of granulated sugar to impart a wonderful vanilla essence to the sugar.  Use the sugar in future baking to add an extra hint of vanilla to cookies, cakes and more.   They may also be submerged in a high proof flavorless alcohol (a high quality vodka or everclear) to create a vanilla extract.  The flavor will not be as potent as that of a whole bean, seeds still intact...but even the pod will impart a large amount of flavor to the alcohol.  Allow to sit for at least two weeks, shaking every few days, before use.  Use as you would regular vanilla extract.

The Review:
Breyer's has long been my favorite provider of classic ice cream flavors.  This was incredibly close to that pure ice cream ideal.  It was not as rich, creamy or heavy as the various custard varieties out there.  Nor was this ice cream lighter than air as some of the more adulterated varieties of ice cream (but I'm also not keen on adding hfcs, guar gun, carrageenan, mono and diglycerides or any other number of unpronounceable additive to my ice cream to achieve that artificially creamy quality...)

But pure simple vanilla flavor with a wonderfully smooth texture was dished up.  The vanilla flavor was beyond compare to other vanilla ice creams I've tried.  David Lebovitz has something going with the use of vanilla bean AND extract.  I did splurge and use Mexican vanilla extract.  Though I know the run of the mill McCormick vanilla beans I used were not the best quality out there.

Still amazing.  I look forward the other more involved ice cream concoctions that will come out of this birthday present!

Sunday, March 25, 2012

Apple Pie Waffles with Cinnamon Whipped Cream and Pie Crust Crumb

Sunday morning waffles strike again!  I've been toying with the concept of an apple waffle for a while.  The waffle itself didn't seem too much of a challenge.  I knew I wanted a buttermilk or yeast base.  Finely chopped apples and a touch of cinnamon would provide the essential flavors.  Applesauce has long been used as a substitute for oil in baking...adding yet another layer to the waffles.  

But they needed something more.  Inspiration came in the form of Milk Bar Mondays.  Several fellow food bloggers have taken on the challenge of baking their way through Christina Tosi's Momofuku Milk Bar Cookbook.  As a result, one morning my news feed was filled with this:


It was divine.  It was decadent.  It had layers of apple pie filling and pie crust crumb.  I had my inspiration to take the apple pie waffles to the next level.  

Apple waffle.  Sauteed apple topping.  Cinnamon Whipped Cream.  And a sprinkling of pie crust crumb.  

I almost went as far as to add a drizzle of homemade caramel sauce as well...but let's not get too carried away!

A huge thank you to Audra, Cassie, Erin, Krissy Nicole and Jacqueline for baking up the lovely concoction that pushed this Sunday morning waffle just a little bit further.

Pie crust crumb and apple pie filling adapted from the Momofuku Milk Bar Cookbook
Waffle and whipped cream recipes are my own.

yields 8-10 eight inch waffles 

The Ingredients:
for the pie crust crumb:
1/2 cup all purpose flour
2 tsp granulated sugar
1/4 tsp kosher Salt
3 Tbsp unsalted butter, melted
1 1/2 tsp water
For the apple pie filling:
juice of 1 lemon
2 medium granny smith apples
1 Tbsp unsalted butter
2/3 cup light brown sugar, tightly packed
1/2 tsp ground cinnamon
1/4 tsp kosher salt

for the waffles:
3 cups all-purpose flour
1 Tbsp baking powder
1 tsp baking soda
1 tsp salt
1/3 cup brown sugar
1/2 tsp cinnamon
1/2 cup applesauce
3 Tbsp unsalted butter, melted
4 large eggs
1 teaspoons vanilla extract
2 1/2 cups buttermilk
1 apple, peeled and diced

for the cinnamon whipped cream:
1 cup heavy whipping cream
1 Tbsp sugar
1/2 tsp ground cinnamon

The Process:
for the pie crust crumb:
Heat the oven to 350 degrees F

In a small bowl combine the flour, sugar, and salt until well mixed.  Cut in the butter with a fork, pastry cutter or your fingers. Add water and blend until the mixture starts to come together in small clusters.

Spread the clusters on a parchment lined baking sheet  Bake for 25 minutes, checking halfway through baking to stir and break up larger crumbs.  The crumbs will be golden brown and still slightly moist to the touch. Set aside to cool.


When completely cool, transfer the crumb to a small serving dish.

for the apple pie filling:
Fill a medium bowl halfway with cold water and add the lemon juice. Peel the apples and cut into bite size chunks (quarter, then cut each quarter into thirds). Add the apples to the lemon water as they are cut to retard browning and to keep the apples pert.

In a medium saucepan over medium-high heat, combine the butter, brown sugar, cinnamon and salt. Stir until the butter is melted. Drain the apples and add them to the saucepan. Bring the mixture to a gentle boil, stirring to coat the apples. Reduce the heat to low and simmer the apples gently for 5 to 10 minutes, or until the apples are tender and the sauce has thicken.  

Transfer to a serving bowl and set aside.

for the cinnamon whipped cream:
In a chilled bowl combine whipping cream, sugar and cinnamon.  Beat with chilled beaters on medium speed until soft peaks form.  Set aside in the fridge until ready to serve.


for the waffles:
Preheat the oven to 200.  Preheat and lightly oil the waffle iron according to the manufacturers directions.

In a large mixing bowl sift together the flour, sugar, baking powder, baking soda, cinnamon and salt.  

In a medium bowl whisk together the eggs, buttermilk, applesauce, butter and vanilla.  Add the wet to the dry, stirring until just incorporated.

Gently fold in the diced apple, stirring until the apple is just distributed.  Do not over mix.

Ladle the batter into the waffle iron (mine uses a little over 1/2 cup of batter per waffle) and cook according to the waffle iron manufacturers directions. Transfer waffles to rack in oven to keep warm and crisp. Make more waffles in same manner.

to assemble:
Place a waffle on each plate, spoon about 1/4 cup of apple pie filling on top. Dollop a generous spoonful of whipped cream on top. Sprinkle with crumb. Devour.

The Review:
Wow. With a post this long already, I'd hate to keep you from what ended up being an absolutely amazing breakfast. Go. Enjoy.

Saturday, February 25, 2012

Chocolate Cream Cheese Brownies

The first time I read over this recipe I did a double take.  And a third look just be sure I read it right.  Eighteen tablespoons of butter?  Five eggs?  And that's only one layer.  A ribbon of chocolate cheesecake hides between the layers of decedent brownie.  And to top it all off, a thin layer of semi-sweet chocolate is added, just in case there wasn't enough chocolate.

I still haven't replaced my electric mixer and the just thought of beating cream cheese and butter in such large quantities sent a spasm through my wrist.  And the recipe would use up the last of my sugar.  But I was not going to let that stop me.  I apologize profusely to any readers who may be observing lent by giving up sweets or chocolate.  I couldn't pass this dessert up. 

adapted from a recipe at cooking.com

makes 48 brownies

The Ingredients:
for the filling:
1 cup bittersweet or semi-sweet chocolate, chopped
1/4 cup heavy cream
8 oz cream cheese, room temperature
1 egg
2 tsp flour

for the brownies:
18 Tbsp unsalted butter, room temperature
1 1/2 cups sugar
5 eggs
1 tsp vanilla extract
1/4 tsp almond extract
1 1/2 cup all purpose flour
3/4 cup unsweetened cocoa powder
1/4 tsp baking powder

for the topping:
2 cups semi-sweet chocolate, finely chopped

The Process:
for the filling:
Slowly melt half of the chocolate with the heavy cream in a double boiler or in the microwave.  Stir until smooth and allow to cool.  Meanwhile, in a medium bowl cream together cream cheese and egg until fluffy.  Slowly pour in chocolate mixture and blend until well combine.  Stir in the remaining chocolate and flour and mix well.  Chill in the refrigerator until ready to use.


for the brownie:
Preheat the oven to 350

Butter a 9 x 13 baking dish and set aside.

In a large bowl with an electric mixer (or by hand) cream together the butter and sugar until fluffy.  Beat in the eggs, one at a time, blending thoroughly before the next addition.  Add the vanilla and almond extracts.

In medium bowl sift together flour, cocoa powder and baking powder.  Gently blend the dry ingredients into the wet until just combined.


To assemble:
Spoon half of the brownie batter into the prepared baking dish.  Smooth into an even layer.  Spread the cream cheese layer evenly over the brownie batter.  Spoon the remaining batter on top as evenly as possible and gentle spread to cover.

Bake in the preheated oven for 35 minutes or until a toothpick inserted in the center comes out clean.

As soon as the brownies come out of the oven , sprinkle the chopped chocolate evenly over the surface.  Allow to rest for five minutes or until the chocolate begins to melt.  Gently spread the soft chocolate into a thin, smooth layer.

Allow the bars to cool completely.  Cut into approximately 1 1/2 inch squares.

The Review:
This recipe yields 48 brownies for a reason.  These are rich and ridiculously dense.  The consistency is more fudge like than cake.  And I certainly am not complaining!   Left overnight in the fridge the layered decadence became even more smooth and dense.  A little taste goes a long, long way.

The only frustration I had with this recipe was the same I have with most layered recipes...getting the layers smooth and even.  The first layer was a breeze.  A spatula does quick work of the spreading the thick batter.  The second layer was an almost pourable consistency, so a few passes was all I needed to smooth it over the first layer.  The third...well there in lies the challenge.  Because the batter was so thick I needed to spoon it on top.  The second layer did not provide enough friction for the top and spreading became more about evenly distributing the brownie batter than creating a smooth consistent layer.  The forth and final layer did a good job of covering any cracks and fissures left by the less than satisfactory job I did on the layers below. The end result created an undulating ribbon of cream cheese filling that was thick in some areas, thin in others.

Considering how chocolatey these are, I doubt anyone will even notice if the layers turn out uneven...

Tuesday, February 14, 2012

Haupia

Happy Valentine's Day!  Tired of boxed chocolates and red velvet cupcakes that seem to be the Valentine's Day staple? This coconut pudding is a wonderfully light and tropical alternative.  While traditionally chilled and then cut into squares to serve, individual haupia can be prepared in heart shaped ramekins.  Or for the more ambitious, cut the chilled pudding into heart shapes for your sweet heart.  Orchids make a beautiful garnish.

adapted from the Luau recipe at Aloha Friends Luau

Serves 8 to 10

The Ingredients:
12 ounces chilled coconut milk
1 1/2 cups water
1/2 cup + 2 T. sugar
1/2 cup + 2 T. cornstarch


The Process:
Combine all ingredients in saucepan and stir over medium heat until thickened. Lower heat and cook for ten minutes, stirring constantly to avoid lumping or burning. Pout into 8x8 inch dish and chill until set, about 2 hours.  Cut haupia into squares & serve. 

The Review:
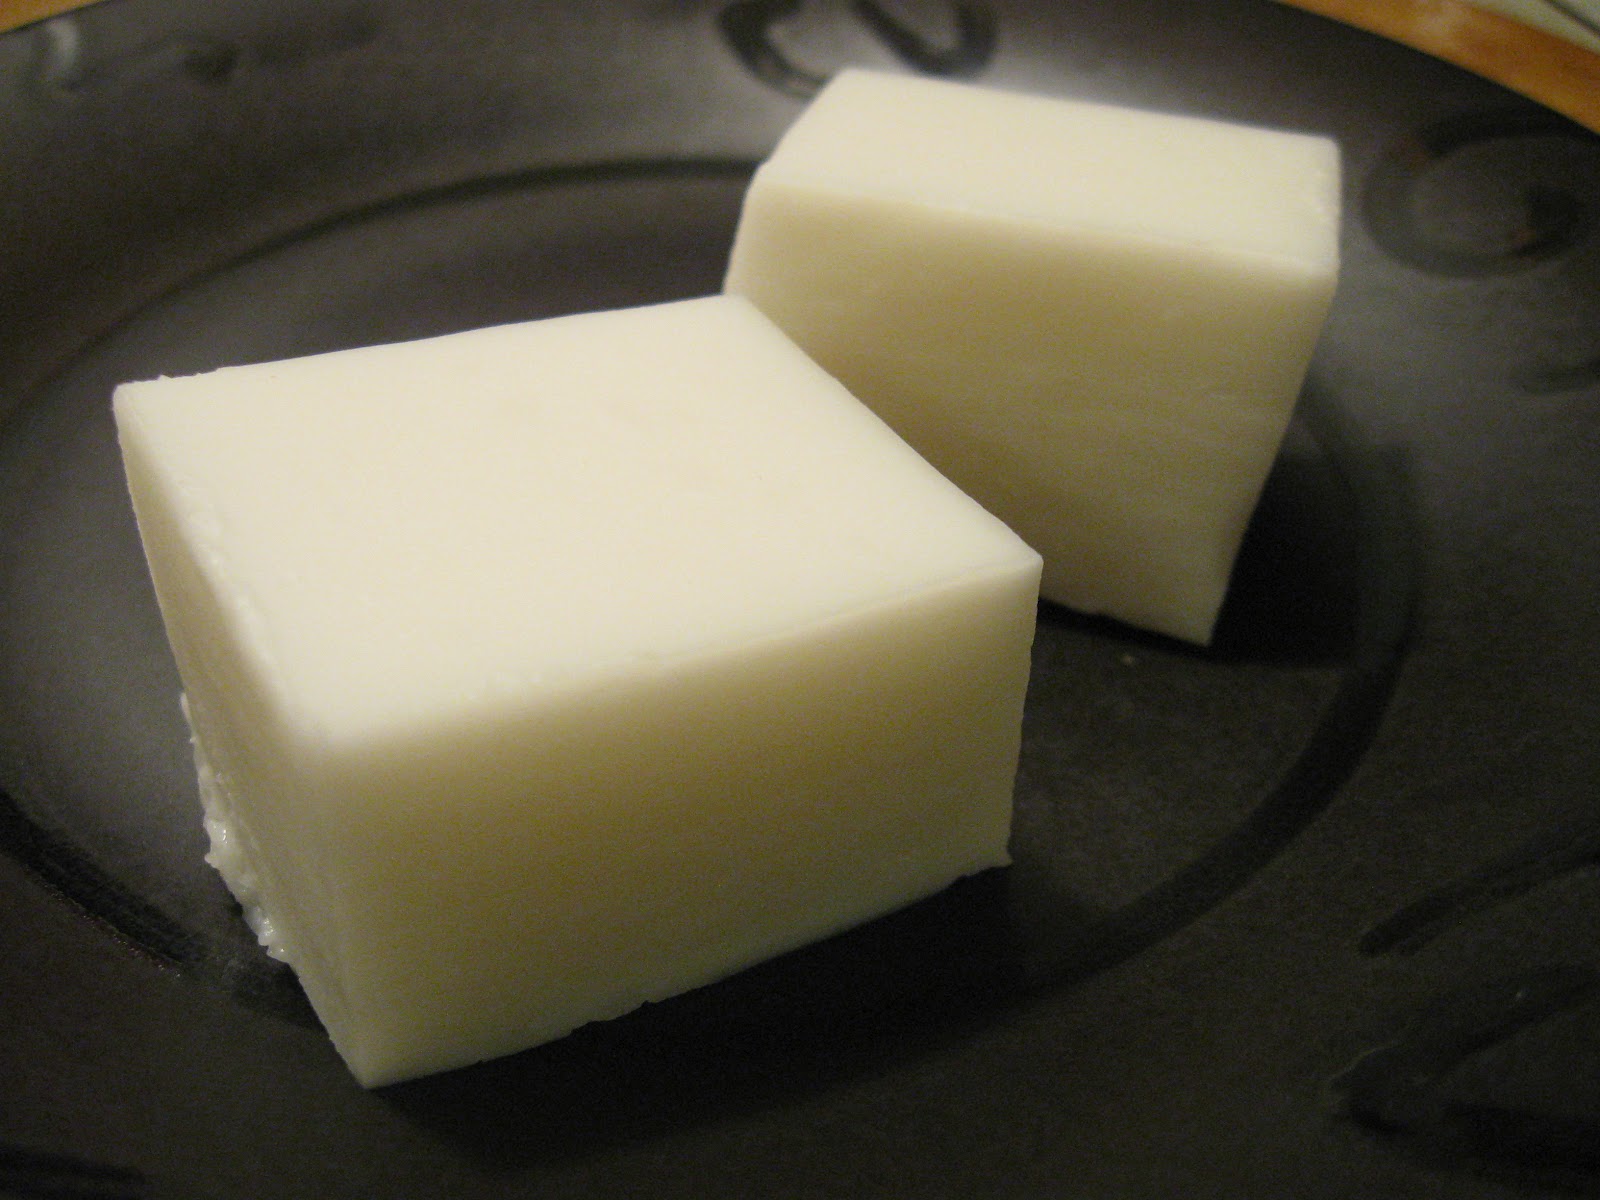
Haupia turned out to be the sleeper of all the treats laid out before us at the luau.  At first most people avoided it, given its gelatinous appearance and slight resemblance to tofu.  Those that bit into the unremarkable white cubes were greeted with a sweet coconut flavor and a smooth velvety texture.  Guest's eye list up with wonder.  Word quickly spread and the unassuming dessert became a quick favorite.  With the short ingredient list, and easy preparation, this dessert is quick to become an impressive offering for guests.

Monday, January 23, 2012

Homemade Toffee

Thank you, Audra, for sharing this family recipe!  Toffee has long been one of my favorite sweets.  Especially when coated in chocolate.  As a belated holiday treat, I made up a batch of this to share with my family in Madison.


Adapted from Audra's recipe at the Baker Chick

Yields: toffee for days, but still never quite enough...

The Ingredients:
1 lb butter, unsalted
2 cups dark brown sugar
1 1/2 lb. confectioner's chocolate
1/2 - 3/4 cup blanched almonds, ground

The Process:
Line a rimmed cookie sheet with foil or parchment paper.  Set aside.

In large saucepan, combine butter and brown sugar.   Mix using a wooden spoon until the sugar dissolves.  Stir occasionally (not often...just enough to keep the sugar from burning) until the syrup reaches just over 275 on a candy thermometer. Keep the syrup at 275 for about a minute longer. Pour immediately into cookie sheet. Gently shake the sheet to spread the toffee evenly over the entire surface.

After cooling slightly blot with a paper towel to pick up any excess oil.

Meanwhile melt half of the chocolate in a double boiler over medium heat or in the microwave in a microwave safe bowl for 30 seconds to a minute at a time until smooth and fluid

Pour the chocolate over hardened syrup. Spread evenly over the surface and sprinkle with half of the ground almonds.

Cool until chocolate is firm, flip and repeat the process on the other side.  Break into pieces to serve.

The Review:
Holy cow, why have I never made this sooner!   With toffee like this, I may never touch a heath bar again.  Buttery ad sweet.  Smooth chocolate paired with the snap of the toffee.  And aside from the wait time as the chocolate set up, the candy went together without any hassle.  Pure heaven!

Saturday, January 21, 2012

Peppermint Bark

Happy belated holidays! Given our family's conflicting schedules our holiday gatherings tend to be a bit belated.  To get back in the holiday spirit I turned a nostalgic peppermint treat that seems to have made a come back.


adapted from...really? I need a recipe to melt chocolate and layer chocolate?

yields about 3lbs


The Ingredients:
1 1/2 lbs milk chocolate
1 1/2 lbs white chocolate or white confectioner's coating
2 tsp canola oil
2 tsp peppermint extract
crushed peppermints (about 20 mini candy canes)

The Process:
Prepare a rimmed baking sheet by lining with parchment paper or aluminum foil.  Smooth out any wrinkles and set aside.

Coarsely chop the milk chocolate and add to a double boiler placed over medium low heat.  Stir frequently.  As the chocolate begins to melt, stir in 1 tsp of canola oil (the oil can be omitted.  It is added to help the chocolate maintain an appealing luster after it hardens, in lieu of attempting to temper the chocolate.  More experienced candy makers may choose to temper instead).  Continue to stir frequently until chocolate is melted and smooth.  Pour the chocolate into the prepared baking sheet and gently spread with a spatula.  Gently shake the sheet to smooth. Cool at room temperature or refrigerate until completely hardened, about 1 hour.
   
Place the white chocolate and the remaining 1 teaspoon canola oil in a double boiler over medium low heat, stirring frequently until smooth. When the chocolate is melted, stir in the peppermint extract.  Ladle or pour the white chocolate directly over the semisweet chocolate layer; spread evenly and spread quickly.  The white chocolate will begin to melt the chocolate underneath.  Shake the pan gentle to help distribute the layers.  Sprinkle the crushed candy over the top and gently press into the soft white chocolate surface. Refrigerate until completely hardened. Remove from pan; break into small pieces to serve. 

The Review:
The quality of the chocolate makes all of the difference.  You can use white confectioner's coating for the top layer, but the result will be more waxen and sickly sweet.  I usually despise white chocolate, and find the only thing that makes it palatable is the cocoa butter.  White confectioner's glaze, while an inexpensive alternative, does not have said cocoa butter...but to each their own.  There is something incredibly nostalgic about using Ambrosia chocolate.  Maybe it's a Milwaukee thing...


Regardless of what chocolate you choose, when mixing chocolate and peppermint you really cannot go wrong.  Some people swear by round peppermints often offered with the check at restaurants as their crushed candy preference.  My peppermint candy of choice is Spanlger's mini candy canes.  


Regardless, the little bit I had set aside for us to not give away as gifts was consumed in a heartbeat.  With the simplicity of the recipe, I'll be sure to  make this again next year.

Sunday, December 25, 2011

Cranberry Crumble Bars

Need a brief reprieve from all that sugar.  Icing laden sugar cookies, candy studded gignerbread and sugar dusted snikcerdoodles seem to dominate many a holiday table.  Very the smell of the confections is enough to send you into a sugar coma! 

These bars offer a slight break from the holiday hyperglycemia.  They are rich and buttery, slightly sweet and topped with a wonderfully tart cranberry layer. 

adapted from Smitten Kitchen via The Baker Chick.

Yields 24 bars

The Ingredients:
1 cup granulated sugar
1 tsp baking powder
3 cups all-purpose flour
1 cup cold unsalted butter (2 sticks or 8 ounces)
1 egg
1/4 tsp salt
Zest of one orange
2 Tbsp fresh squeezed orange juice
4 cups fresh cranberries
1/2 tsp cinnamon
2/3 cup white sugar
4 tsp cornstarch

The Process:
Preheat the oven to 375. Generously grease a 9×13 inch pan.

In a medium bowl, whisk together sugar,  flour, and baking powder. Mix in salt and orange zest. Use a fork or pastry cutter to blend in the butter and egg.  The  dough will be very crumbly. Press half of dough into the prepared pan.

In another bowl, stir together the 2/3 cup sugar, cornstarch and orange juice and cinnamon. Gently fold in the cranberries. Sprinkle the cranberry mixture evenly over the crust. Crumble remaining dough over the cranberries.

Bake in preheated oven for 30-40 minutes, or until top is slightly brown. Cool completely before cutting into squares.

The Review:
I brought these along with me to a friend's family gathering on Christmas Eve.  Everyone who tried the bars absolutely loved them!  The bars come together very quickly and were consumed almost as fast.  The crust and topping is  very basic and almost short bread like.  The crumbliness of it frustrated me at first, but these were far less stressful to make than the endless rolling and cutting of sugar cookies.

I imagine the simple buttery flavor of the dough would lend itself well to other fruit combinations.  Smitten Kitchen recipe original recipe used blueberries.  I imagine a raspberry,  bourbon peach, cardamom plum or lingonberry apple would be equally divine!

Saturday, December 17, 2011

Molasses Caramels

After my first few batches of honey caramels, I was on a role and looking for yet another variation.  Using the same cooking process and sugar/syrup/dairy ratio I tried my hand at maple caramels.  Something went horribly awry and I end up with a buttery granulated mess (which was salvaged to make many a cup of hot buttered rum over the next few days..)  I'm still not sure what went wrong. 

Back to square one.  So I tried molasses instead. 

The recipe is my own.

Yields approximately 60 one-inch caramels
 
The Ingredients:
1 1/2 cup granulated sugar
1/2 cup molasses
1 cup heavy cream
4 Tbsp salted butter
Salt to taste

And a CANDY THERMOMETER!

The Process:
Prepare an 8 x 8 pan by lining with aluminum foil or parchment paper and greasing generously with butter.  Do NOT use wax paper...the heat from the caramel will melt the wax paper to the candy.

Set a  large non-reactive pot set over medium-high heat.  Add the sugar and molasses to the pot and allow to dissolve, stirring or shaking the pot just enough to melt all of the sugar granules.  Continue to cook without stirring until the sugar and molasses dissolve into a bubbling liquid and the liquid just begins to smoke, but is not burning.

While the sugar caramelizes, heat the cream to a simmer in a medium saucepan.

Once the sugar and molasses reaches the level of caramelization you desire, cut in the butter, one piece at a time and stir gently until each piece has melted.  Carefully whisk in the warmed cream.  This stops the sugars from caramelizing.

At this point add additional salt to taste...to sample the molten liquid dip a spoon into the caramel and very quickly dip it into cold water to cool. 

Clip the candy thermometer to the edge of the pot.  Cook the mixture slowly until the temperature reaches 246 for soft caramels or 250 for firmer caramels. 

Pour the hot caramel into the prepared baking pan and allow to cool to room temperature.  Once cool, remove the caramel block from the pan, peel off the parchment or foil and cut into one inch squares.  Wrap in wax paper or cellophane. 

The Review:
These make a very rich, deeply-flavored, wonderfully colored caramel.  I am very partial to the flavor of molasses--there is something very nostagic about it--so I had a hard time boxing them up to ship away.  The slight bitterness of the molasses cuts the sweetness of the sugar so the end result isn't as cloyingly and tooth-achingly sweet as some caramels can be. 

Caramelizing the sugar can be a bit of a pain given how dark the molasses is.  If you aren't certain how far to heat your sugar and molasses in the first stage, try caramelizing the sugar with just a bit of water, cooking it to your desired amber hue and then stirring in the molasses.  An even richer layer of flavor rewards this extra step.

Honey Caramels

Candy making scares the bejesus out of me.  And corn syrup is often shunned in my kitchen.  Taken together it appeared homemade caramels were not to be in my near future.  However, after hearing about success after success from several friends who took the dive into candy making, I thought it was time.  This recipe is a lot simpler than I anticipated and uses not one ounce of the dreaded corn syrup.  Someday, when I am much more ambitious, I want to try several batches of these side by side using different varieties of honey...orange blossom, clover, buckwheat,  wildflower...

adapted from recipes at Brooklyn Farmhouse and Food on the food, with some extra help from Chez Pim

Yields approximately 60 one-inch caramels


The Ingredients:
1 1/2 cup granulated sugar
1/2 cup honey  (I used orange blossom)
1 cup heavy cream
4 Tbsp salted butter
Salt to taste

And a CANDY THERMOMETER!

The Process:
Prepare an 8 x 8 pan by lining with aluminum foil or parchment paper and greasing generously with butter.  Do NOT use wax paper...the heat from the caramel will melt the wax paper to the candy.

Pour the sugar and honey into a large non-reactive pot set over medium-high heat.  Allow the sugar and honey to dissolve, stirring or shaking the pot just enough to melt all of the sugar granules.  Continue to cook without stirring until the liquid caramelizes into a deep rich brown color.

While the sugar and honey caramelizes, heat the cream to a simmer in a medium saucepan.

Once the sugar and honey reaches the color you want, cut in the butter, one piece at a time and stir gently until each piece has melted.  Carefully whisk in the warmed cream.  This stops the sugars from caramelizing.

At this point add additional salt to taste...to sample the molten liquid dip a spoon into the caramel and very quickly dip it into cold water to cool. 

Clip the candy thermometer to the edge of the pot.  Cook the mixture slowly until the temperature reaches 246 for soft caramels or 250 for firmer caramels. 

Pour the hot caramel into the prepared baking pan and allow to cool to room temperature.  Once cool, remove the caramel block from the pan, peel off the parchment or foil and cut into one inch squares.  Wrap in wax paper or cellophane. 

The Review:
I'm in love.  The honey flavor certainly shines through. Though from subsequent batches I noticed that the less time you allow the sugars to caramelize, the more prominent the honey flavor.  Sugars not richly caramelized will have the crisp, clean and almost astringent honey flavor.  Sugar allowed to darken more mellows out and blends into the deeper caramel flavor with just a hint of honey flavor.  It is incredibly fun to play around with.

And while the caramels may be quick to make and eating the a bit of heaven...wrapping them is like a little bit of purgatory.  I'd recommend pre-cutting all of your wrappers while waiting for the caramels to cool and enlisting the help of a friend.

Saturday, December 3, 2011

Black Bean Turtle Brownies

My intern is leaving!  For several months he has shared same workshop and helped to keep me sane.  In honor of his last day, and as a thank you to all of the hard work done during the last three months, I crafted this spin on a recipe he first introduced me to....black bean brownies.

This gluten free, protein laden sweet is topped with toasted pecans, slathered in homemade caramel and drizzled with high quality chocolate.  If you couldn't sell others on the original black bean brownie, this version may be the key to winning them over.

adapted from my intern's recipe.

yeilds one pan (12 to 16 brownies)

The Ingredients:
for the brownie
1 - 15 oz can of black beans (preferably low or no sodium)
1/3 cup agave syrup
1/4 cup sugar substitute (truvia or splenda)
3 Tbsp vegetable oil
1/3 cup cocoa powder
1 tsp instant coffee
1 tsp baking powder
1 tsp vanilla extract
pinch of salt
3 eggs

for caramel:
1/2 cup honey
1/2 cup granulatewd sugar
2 Tbsp unsalted butter
1/4 cup heavy cream
1/4 tsp vanilla
1/4 tsp salt


for the topping:
1 cup toasted pecan, coarsely chopped
8 oz semi-sweet or dark chocolate

The Process:
Preheat the oven to 350.

Drain the black beans and rinse thoroughly. Add beans to a food processor and blend on high until a smooth puree is formed. Transfer to a large bowl. Whisk in agave, sugar substitute, oil, cocoa powder, instant coffee, baking powder vanilla extract and salt, and blend until just combined. Gently beat in the eggs, one at a time. The batter will be runnier compared to other brownie batters. Fold in chocolate chips. Pour the batter into a lightly greased, 8 x 8 inch baking pan.

Bake in preheated oven 30-35 minutes until the brownies begin to pull away from the side of the pan and a toothpick inserted in the center comes out clean. Set aside to cool.

While the brownies bake, prepare the caramel.  Warm the heavy cream in a saucepan to a gentle simmer ans set aside.  Melt the butter over medium heat in a heavy bottomed saucepan. Add the honey and sugar. Stir over medium heat until the sugar has mostly dissolved.Turn the heat to medium low. Using a candy thermometer cook the mixture over medium-low heat, stirring occasionally, until the mixture reaches the firm ball stage about 246.  Remove from heat and slowly stir in the cream and vanilla.  Allow to cool slightly.

While the brownies and caramel cool, toast the pecans in the preheated oven for 10-12 minutes.  Stir frequently...these can burn quickly if left unattended.  Sprinklr toasted pecans evenly over the brownies.   Pour the still warm caramel over the top of the pecan and gently spread into an even layer using a spatula.  Melt the chocolate in the micorwave or with a double boiler.  Spread over top of caramel.  Allow the brownies to completely cool, allowing the chocolate to set.

The Review:
Those who weren't easily fooled by health food parading as brownie couldn't get enough of these!  The pecans, homemade caramel, and chocolate gave the brownies just enough naughtiness to be indulgent and forgave the fact they were full of fiber and protein.  My gluten-free co-workers loved that they could share in this treat.  The pastry chef among them claimed he would friend me on facebook for the sole purpose of getting this recipe.  And the intern for whom the brownies were made claimed they were better than his...a true honor seeing as he was the one to provide the original recipe.  

Seriously.  Try these brownies already!

Friday, November 4, 2011

Caramel Apple Pie

Have you been to the Baker Chick?  You should, particularly if  you have a sweet tooth.  Audra's recipes are classic, classy and served up with a twist of her own and a marvelous smile.  Her photos are stunning and her anecdotes will lighten your day.  This recipe was inspired by her passion for salted caramels and a gorgeous crop of apples I had sitting on my counter.  Unlike traditional apple pies, there is no need to add butter or sugar to the pile filling.  The caramel sauce will provide all of the buttery sweetness you need.

Caramel sauce from Audra's Banana Caramel Brownie recipe at the Baker Chick
The pie recipe is my own


The Ingredients:
For the caramel:
6 Tbsp butter
3/4 cup sugar
1/2 cup heavy cream
1/2 tsp vanilla extract
1 tsp kosher salt

For the pie:
1 recipe for a single crust pastry
6-8 apples, peeled, cored and sliced (about 4 cups)
1 Tbsp lemon juice
1 Tbsp corn starch
1 tsp cinnamon

For the topping: 
1/2 cup packed brown sugar 
1 stick butter, soft 
1 cup all-purpose flour
1/2 cup old-fashioned oatmeal

The process:
For the caramel sauce:

Melt the butter in a heavy sauce pan over medium-high heat.  Add the sugar and stir frequently until sugar is a golden brown.  As soon as the sugar reaches the desired color and starts to smoke, remove it from the heat.  Carefully whisk in the cream, it will bubbly up and produce a lot of steam.  Slowly add the vanilla and salt.  Allow the caramel to cool while you prepare the crust, filling and crumb topping.

Preheat the oven to 350

While the caramel sauce cools, combine the apples, lemon juice, corn starch and cinnamon in a large bowl.  Toss to coat and set aside.


Prepare the crumb topping by combining the softened butter, brown sugar and flour with clean fingers or the tines of a fork until a coarse crumb forms.  Mix in the oatmeal and set aside.


Roll out the pastry and line in a 9 inch pie pan.  Mound the apple filling into the crust.  Drizzle the cooled caramel sauce on top.  Evenly spread the crumb top over the filling.  Bake the pie uncovered for 50-60 minutes until the filling is bubbly and the crumb top is lightly browned.  Allow to cool to almost room temperature before serving.

The Review:
I've tried this sauce on many other occasions and the flavor and richness is astounding.  However, in this recipe it doesn't quite seem to hold its own.  As a sauce it turns out to be a but too thin and unstable for this type of baked good.  The pie was amazing, don't get me wrong, but where I was hoping for a rich burnt sugar flavor and rich caramel thickness, I was rewarded with a sweet and buttery ooze of apple filling.  


The pie needs to cool off substantially for the caramel sauce to set up again.  If you are impatient the pie with reward you with a soupy sea of filling pouring all over your serving plates.  (The lovely slice pictured above was taken the next day...after the pie had been in the fridge overnight).  


I absolutely loved the crumb topping, though.  The whole pie was marvelous, but this topping will lead me to try this pie again...perhaps using Audra's candy caramel recipe next time in lieu of the sauce.

Sunday, September 18, 2011

Black Bean Brownies

Wait. Say what? Black beans? In a dessert? That was my initial reaction when my intern and I were discussing a multitude of amazing baked goods we wanted to try. I had no doubt these gluten-free, high fiber, high protein brownies would hit a high note with some people. I just couldn't believe the end result would be as chocolaty divine as he made them out to be. So I set out to find out for myself.

adapted from a recipe as described by my intern

yields one pan (about 12-16 brownies)

The Ingredients:
1 - 15 oz can of black beans (preferably low or no sodium)
1/3 cup agave syrup
1/4 cup sugar substitute (truvia or splenda)
3 Tbsp vegetable oil
1/3 cup cocoa powder
1 tsp instant coffee
1 tsp baking powder
1 tsp vanilla extract
pinch of salt
3 eggs
8 oz chocolate chips, or semi-sweet chocolate, chopped

The Process:
Preheat the oven to 350.

Drain the black beans and rinse thoroughly. Add beans to a food processor and blend on high until a smooth puree is formed. Transfer to a large bowl. Whisk in agave, sugar substitute, oil, cocoa powder, instant coffee, baking powder vanilla extract and salt, and blend until just combined. Gently beat in the eggs, one at a time. The batter will be runnier compared to other brownie batters. Fold in chocolate chips. Pour the batter into a lightly greased, 8 x 8 inch baking pan.

Bake in preheated oven 30-35 minutes until the brownies begin to pull away from the side of the pan and a toothpick inserted in the center comes out clean. Cool slightly before serving.

The Review:
Don't be fooled. Something is afoot...these aren't your fudge-y, Betty Crocker variety of brownie. But I bet most people would be hard pressed to put their finger on what really is different about these brownies.

In batter form the flavor of the legumes is still present, but as the brownies baked the chocolate aroma took over. Out of oven the counterfeit brownies looked denser and darker than typical boxed brownie mixes, but still had an airy, cake-like appearance. They were moister than most, and just as prone to crumbling as other brownies we've had.

The major difference any of us could deceiver was a slightly mealy texture, but not in a bad way. It made for a brownie that was smooth and almost dissolved in your mouth. The chocolate was rich, but mellower than in other chocolate brownies. Overall they had a richer, more earthy taste. Had I not known, I never would have guessed that the key ingredient was black beans. I certainly would not have been able to tell they were made without flour.

Unlike other gluten-free brownie recipes, these were actually cake-like. Most gluten-free brownies and flourless cakes I've tried in the past had a wonderfully dense and fudge-like texture. While good in their own regard, I was pleased that this black bean version offered a more airy alternative.

Try these out on some fellow unsuspecting brownie connoisseurs. I'd love to hear what their impressions were...and if any were able to guess the secret.

For the health nuts among you, here is the approximate break down compared to Betty Crocker's fudge brownies:

Betty: ____________ Black Bean:
170 calories ________ 155 calories
9g fat_____________ 7.9 g fat
90 mg sodium _______80 g sodium
65 mg potassium_____ 109 mg potassium
23 g carbs __________20 g carbs
16 g sugar __________12.3 g sugar
less than 1 g fiber_____ 2.3 g fiber
1 g protein _________3.2 g protein

Wednesday, September 14, 2011

Stone fruit jam with cardamom


Growing up, I remember small jars of rich red-colored jam sealed with paraffin wax nestled in our refrigerator door. My grandmother made pints of plum jam every year and shared the bounty with the family. At first the tree in her backyard provided all of the fruit she needed. After the tree withered away, she continued the tradition by hunting down that specific variety of plum. Sadly, the recipe passed away with her.

In her memory, I wanted to concoct a stone fruit jam of my own. While I vividly remember how her cheery, wax-topped jars looked, I barely recollect the flavor. So I am on my own... However a generous pile of plums, apricots, nectarines and one lone peach remained from a recent family BBQ. I squirreled these summer gems home and created this heavenly jam in hopes of beginning a jam tradition of my own

the recipe is my own

yields approximately 4 one pint jars.

The Ingredients:
10-12 assorted stone fruits (about 8 cups chopped)
I used about 6 small plums, 2 nectarines, 3 apricots, and 1 peach
1 stick of cinnamon, about 4"
2 black cardamom pods
6 green cardamom pods
6 whole cloves
6 cups sugar
1/4 cup lemon juice

The Process:
Wash and rinse the fruit thoroughly. Do not soak. Remove stems and pits from the fruit and dice. Measure into large saucepan. Add sugar, lemon juice and whole spices.

Over medium high heat, bring to a boil while stirring constantly. Continue to boil until mixture thickens and the temperature reaches 220 on a candy thermometer. Test the jam's consistency by spooning a little onto a cold saucer and chill for a few minutes in the fridge. If adequately set it should wrinkle and feel firm.

Remove saucepan from heat and skim off any foam. Remove cinnamon stick, cardamom pods and cloves. Fill sterile jars with jam, leaving 1/4-inch head-space. Gently stir to remove air bubbles. Wipe the rims of the jars clean and top with lids, screwing them finger tight (not TOO tight). Submerge filled jars in a water bath of boiling water and boil for 5-7 minutes (process times may vary by elevation).

Remove from water bath and allow to cool undisturbed for 12-24 hours.

If properly processed the jam will remain good for several months, though the flavor will diminish after a year.

The Review:
The spicy aroma that filled my kitchen as the jam bubbled on the stove top was absolutely divine! The warm spices of cinnamon, cardamom and clove turned out to be the perfect flavor compliment. I could barely wait until the next day to try the jam on a batch of freshly baked biscuits. Pure heaven for breakfast! I had to restrain myself from eating the jam straight from the jar.

The stone fruit jam gelled up much better than my first peach jam attempt. While I prefer my jams and jellies slightly soft and soupy, those preferring a more solid spread may want to add pectin to their saucepans full of fruit.

This jam may not be grandma's, but I'm sure she would approve. And now I have four rosy jars of summer to see me through our cold, snowy winters.

Sunday, August 14, 2011

Simple Stuffed French Toast


This morning I found myself with a leisurely amount of time to make breakfast along with a mostly untouched loaf of white- than-white bread, store-brand version of Wonderbread and a mason jar full of a friend's amazing homemade jam (courtesy of the fruit trees in her yard and the rest of summer's amazing bounty). Stuffed French toast was in the works...

This incarnation is far less fussy than many of the cream cheese, fruit jam and challah bread varieties out there. Really, mine were just glorified jam sandwich made from what my pantry had on hand. The homemade jam truly made up for the weak, flimsy bread I ended up using...

The recipe is my own. Though true inspiration is due to my friend Marcy and her amazing jam.

Serves 3

The Ingredients:
6 slices of bread
2-3 Tbsp jam of your choice
2 large eggs
1/4 cup milk
1 Tbsp sugar
1/4 tsp cinnamon
1/2 tsp vanilla
1-2 Tbsp butter
powdered sugar for dusting

The Process:
Spoon a scant Tbsp of jam on three of the slices of bread and spread within the edge of the crust, but not completely to it. Top each slice with a second to create a simple jam sandwich.

Whisk the eggs, milk, cinnamon and vanilla together and pour into a shallow bowl. Dip the jam sandwich into the egg mixture, coating both sides.

In a large skillet or griddle melt the butter over medium heat. Add the egg coated sandwiches and fry for 2-3 minutes on each side. Add more butter as needed.

Serve warm with a dusting of powdered sugar.

The Review:
This breakfast was the perfect way to showcase an amazing homemade jam without much fuss. I would, however, upgrade to a heartier bread next time around. But still, this was a nice twist on a tried and true traditional French toast. Though this stuffed version comes no where near the amazing guava stuffed version served at the Wailana Coffee House in Honolulu.

Tuesday, August 9, 2011

Pineapple Coconut Muffins


The nostalgia of two years spent in Hawaii hangs thick upon our home as of late. I've been pining for sunny, non-scorching days and cool ocean breezes for several weeks. Pineapples beckon and tease from the produce aisle. I finally succumbed. The fruit has been taunting me from the kitchen counter ever since.

Tonight in a mood to bake, I dug up a coconut pineapple quick bread recipe. Several actually. Annalise's muffin recipe at And Now for Something Completely Delicious won out for two reason. One, she used fresh pineapple. Two, she added rum.

If you like pina coladas...

adapted from Annalise's recipe (for the original check here...my recipe is below)

makes 12 muffins

The Ingredients:
1 cup all purpose flour
1/2 cup whole wheat flour
1 tsp baking soda
1/4 tsp salt
6 Tbsp + 2 Tbsp brown sugar
1/2 cup + 2 Tbsp unsweetened, flaked coconut
3 egg whites
2/3 cup sour cream
1/2 cup unsalted butter, melted
1 Tbsp rum
1 1/4 cup fresh pineapple, finely diced almost to the point of mincing

The Process:
Preheat the oven to 375 and line a muffin pan with paper liners.

Spread the coconut in a thin layer on a baking sheet and toast in the oven for 3-5 minutes. Allow to cool.

In a medium bowl, combine the flours, baking soda, 6 Tbsp sugar salt and cooled coconut. In a large bowl whisk together sour cream, egg whites, melted butter, and rum. Fold in the pineapple. Gently stir the dry ingredients into the sour cream mixture until just combined. Do not overmix.

Fill the muffin liners 3/4 of the way full. Combine the remaining 2 Tbsp of brown sugar and 2 Tbsp of coconut. Sprinkle about 1 tsp of the brown sugar mixture over the muffins.

Bake for 20-25 minutes or until a toothpick inserted into the center of a muffin comes out clean. Cool on wire rack. Serve warm.

The Review:
These were delectable served slightly warm and with a generous spread of honey butter made by a friend. Though in all honesty the muffins were so moist and flavorful, they hardly needed any accompaniment. I'm glad I doubled the coconut from Annalise's original recipe, as well as toasting it before hand. With the sweetness of the fresh pineapple, the coconut may have been otherwise lost.

A sprinkling of chopped macadamia nuts would have pushed these muffins to en even higher level of tropical ecstasy.

With the cool evening breeze wafting through the kitchen windows and the pineapple smell still lingering, I could almost imagine I was back in Honolulu. Almost....

Sunday, August 7, 2011

Cheesecake Stuffed Strawberries


A few days ago, Ross directed my attention to another sweet recipe he wanted me to try. I perused the recipe and was amused to see that the filling was the same one I used (sans the juice and zest) for the cranberry phyllo baskets I had made a few weeks back. So really, these are cream cheese stuffed, not cheesecake. But they are so heavenly on a summer day I doubt anyone will care what you call them...

adapted from Nutmeg Nanny's recipeLink
makes about 2 -3 dozen depending on the size of your berries

The Ingredients:
1 lb large strawberries
8 oz cream cheese, softened
3-4 Tbsp powdered sugar
1 tsp vanilla extract (or lemon juice)
Graham cracker crumbs

The Process:
Rinse strawberries and cut around the top. Remove the hull and clean out inside with a paring knife if necessary. If you want to stand your strawberries upright slice a bit off the bottom. Once strawberries are prepped set aside.

Combine cream cheese, powdered sugar and vanilla with a mixer or by hand. Spoon the cream cheese mixture into a piping bag and fill strawberries. Once strawberries are filled dip the top in graham cracker crumbs.

My Modifications:

As per Nutmeg Nanny's suggestion, I dipped the bottom tip of the strawberry in chocolate. I had wanted to use white chocolate, but for whatever reason, as soon as the chocolate reached that smooth melted stage it immediately disintegrated in to a grainy mixture before I could dip a single berry. Milk chocolate to the rescue...

If you wish to dip the berries, I recommend doing this after preparing the strawberries, but before filling them. After dipping, set the strawberries upright on parchment paper and chill in the fridge for 15 to 20 minutes prior to filling.

The Review:

What seemed like a large quantity of dessert disappeared in mere minutes among four people. You can imagine the guilt felt by all parties for devouring the gems with out reservation...

But it's mostly fruit, right?

Sunday, July 31, 2011

Audra's Margarita Cupcakes


A huge thank you to Audra of the Baker Chick for this recipe. After a full day of packing and moving heavy boxes, I wanted to provide all of the friends who helped us move with a summertime "adult" sweet. Truth be told...I sort of planned the house warming around the thought of making these alcoholic cupcakes.

In an ideal world, these tequila filled and frosted gems would have been coupled with Audra's mojito cupcakes. Unfortunately, the kitchen became so beastly hot with all of the other cooking going on that I could only tolerate keeping the oven on for one batch of cupcakes.

Perhaps next time....

Adapted from Audra's recipe at The Baker Chick

The Ingredients:
The cupcake:
3 cups all-purpose flour
1 Tbsp baking powder
½ tsp salt
1 cup (2 sticks) unsalted butter, room temperature
2 cups sugar
4 large eggs, room temperature
3 limes, zested and juiced
½ tsp vanilla extract
1 cup buttermilk

The Filling
1/2 lb fresh strawberries, washed and hulled
1 lime, zested and juiced
1/2 cup tequila
2 Tbsp sugar

The Frosting:
1 cup non-hydrogenated shortening
1 cup (2 sticks) unsalted butter, slightly chilled
4 cups powdered sugar
1/3 cup strawberry tequila filling

The Process:
For the cupcakes:
Preheat the oven to 325˚ F. Line two cupcake pans with paper liners.

In a medium bowl, combine the flour, baking powder and salt; whisk to blend. In a large bowl, cream together the butter and sugar until light and fluffy. Blend in the eggs one at a time, mixing well after each addition and scraping down the sides of the bowl as needed. Beat in the lime zest, lime juice and vanilla. Slowly mix in the dry ingredient a third at a time, alternating with the buttermilk. Beat each addition just until incorporated.

Divide the batter between the prepared cupcake liners, filling each about three quarters full. Bake 20-24 minutes, or until a toothpick inserted in the center comes out clean. Let cool in the pan 5-10 minutes, then transfer to a wire rack to cool completely.

For the filling:
In a blender or a food processor, add the strawberries, lime juice, tequila and sugar. Puree the mixture until there are no chunks of strawberry. Set aside.

Once the cupcakes have completely cooled, use a small paring knife to cut a cone out of the top of each cupcake. Remove the cut-out cake and spoon a tablespoon of strawberry puree into each cupcake. Replace the top part of the cone, cutting the tip to leave room for the filling. For alternative filling methods, check out the photo laden tutorials on Annie's Eats.

Prepare the frosting
in a large mixing bowl: cream together the shortening and butter on high until well mixed and fluffy. Add the powdered sugar one cup at a time alternating with a tablespoon at a time of the Strawberry puree. Mix until the frosting is thick and creamy, like the consistency of ice cream. Spread or pipe on cupcakes With a teaspoon, sprinkle some coarse sugar around the edge of the cupcake and top with a lime wedge.

My Modifications:
Were nearly non-existent...I was so excited to try these cupcakes out as is. My cupcakes lacked the sugar rim and were not nearly as photogenic as Audra's; however, they all disappeared in a heartbeat.

The Review:
I think these were the biggest hit of our house warming, and well worth reheating the entire kitchen to prepare. The tequila packed quite a punch when the cupcakes were freshly filled and frosted, but after chilling about 30 minutes, the booze was much more subdued and the strawberry flavor truly shown through. I loved the citrus-y hint of lime in the cake.

I had wanted to accompany these cupcakes with Audra' mojito ones as well, for a truly relaxing and booze end to a long day of move heavy boxes. However, one batch of cupcakes heated up our kitchen almost more the I could bear. Of course it doesn't help that our moving day was a balmy 90+ degrees...

Saturday, July 16, 2011

Penuche Fudge


If you haven't visited the blog Good Graces, what ever is keeping you? Mary Catherine's blog is everything a food blog should be...wit, whimsy, sarcasm and sweetness all playing supporting roles to some of the richest recipes and most touching bits of storytelling you may ever encounter. Her posts are always a treat to read. And her food insights...heavenly.

Traditional penuche, as well as Mary Catherine's recipe, call for brown sugar. With our pending move, my pantry is absent this usual staple...but never fear, molasses and granulated sugar make a fair substitute, as the recipe below reflects.

Thank you for this marvelous idea!

adapted from her penuche frosting recipe at Good Graces.

The Ingredients:
1 stick of butter
1 cup granulated sugar
2-3 Tbsp molasses
1/4 cup milk
2-3 cups powdered sugar
1/2 cup toasted pecans or walnuts, coarsely chopped

The Process:
Melt the butter in a small sauce pan over medium heat. Stir in the sugar and molasses (or one cup of brown sugar) until well combined. Boil gently for a minute or two and slowly stir in the milk. Return the mixture to a boil and remove from heat to cool slightly. Once cool and no longer bubbling (about 10-15 minutes) whisk in the powdered sugar until you reach a desired consistency. Stop here for an amazing frosting.

For a decedent fudge, butter an 8 x 12 inch pan (or 9 x 13 pan for a thinner fudge) and sprinkle with about half of the chopped nuts. Whisk a little more powdered sugar into the penuche to create a slightly thicker consistency. Spoon the penuche into your pan. Sprinkle with the remaining nuts, gently pressing them into the fudge with a spatula. Swirl the top with a bit of a flourish and chill until set, about 1 hour.

I dare you to wait that long...

My Modifications:
You truly must read Mary Catherine's original post.

Have you yet? Good.

My major modification as I mentioned above was substituting granulated sugar and molasses for brown sugar. Sacrilege to the traditionalist, I know!

A plethora of penuche fudge and frosting recipes exist if this one doesn't tickle your fancy. Some add vanilla and corn syrup, some use sweetened condensed milk, some follow a more traditional fudge format, some are sheer blasphemy. All I'm sure are a delight.

The Review:
Unlike most powdered sugar based frosting I've tried, this did not have the same cloyingly sweet quality. Oh, never fear. It will certainly sate your sweet tooth. But the almost artificial and slightly taste I've come to associate with powdered sugar was thankfully absent.

The fudge was smooth and rich, perhaps a bit grainy where the sugar had not fully dissolved. And completely and uttering decadent.