Showing posts with label Dairy. Show all posts

Friday, November 28, 2014

Spiced Cheesecake with Black Currant Sauce

This cheesecake is the last recipe of my Thanksgiving collaboration with Boom Island Brewing Company. Every holiday season the brewery releases a Belgian holiday brew, dubbed Yule. Yule is a potent beer...upwards of 12%-13% ABV. A Belgian dark strong ale is probably the closest style one could use to describe it. Each year this holiday treat is brewed with a different fruit. This year...black currant.

To match the richness of the boozy backbone and rich malt, I felt a cheesecake was appropriate. The spices are a nod to the holiday season...cinnamon, allspice, and nutmeg. And the gingersnap crust of course! The topping I opted for a black currant jam (far easier to find than fresh or frozen black currants this time of year) to tie into the fruit undertones of this beer. Raspberries, blackberries or blueberries would be equally as welcome.

This cheesecake was a treat to come up with. I hope you enjoy it as much as we did!

The recipe is my own

serves 10-12

Ingredients
for the crust
• 25-30 gingersnap cookies (2 cups finely ground)
• ½ tsp ground cinnamon
• 5 Tbsp unsalted butter, melted
• 2 Tbsp brown sugar
• ¼ tsp salt

for the filling
• 24 oz cream cheese, softened
• ½ cup sugar
• ½ cup brown sugar, packed
• 4 eggs, lightly beaten
• 1 ½ cups sour cream
• 1 tsp ground cinnamon
• ½ tsp ground nutmeg
• ¼ tsp of allspice
• ½ tsp salt

for the topping
• 1 cup black currant jam

Preparation
• Preheat oven to 350°F
• Place gingersnap cookies in a food processor. Cover and process until the cookies are the texture of very coarse sand. Add butter, brown sugar salt, and cinnamon. Process until well combined. Transfer mixture into a lightly greased 9-inch spring form pan. Using the smooth bottom of a glass, press the crumbs down into the base and 1-inch up the sides. Refrigerate for 10 minutes. Once chilled, place spring form pan on a baking sheet and bake until crust is fragrant and set, about 10 minutes.
• In a mixer with a paddle attachment, cream together the sour cream, cream cheese and sugars until smooth and free of lumps, 1-2 minutes. Add eggs, one at a time, beating until just combined. Stir vanilla, spices and salt. Pour into crust.
• Lower oven temperature to 325°F. Set the cheesecake on a baking sheet and bake for 60-65 minutes, or until the center is mostly set, but still jiggles slightly. Remove from oven and allow to cool in the spring form pan for 30 minutes. Chill in the refrigerator, loosely covered, for at least 4 hours. Carefully run a knife around edge of pan to loosen. Unmold and transfer to a cake plate.
• Spread a thin layer of currant jam over the top of the cheesecake. Enjoy!

Sunday, August 3, 2014

Summer Squash and Cauliflower Gratin

The zucchini are beginning to overwhelm us! Thankfully this recipe makes quick use of the summertime abundance. In a pinch, this gratin can sub for the more common potato variety. It's not quite the same...it lacks that smooth velvety texture of its starchy cousin. But I trust this dish will be just as welcome.

The leftovers were equally welcome at breakfast, topped with a poached egg.

adapted from Relishing It

serves 6

The Ingredients:
1 1/4 pounds zucchini or summer squash (2-3 medium), coarsely grated
1 medium head cauliflower
2 Tbsp olive oil
1 yellow onion, chopped
2 Tbsp butter
2-3 garlic cloves, minced
2 Tbsp all-purpose flour
1/2 cup milk
1/4 cup heavy cream
2/3 cup grated Parmesan, divided
1 Tbsp fresh rosemary, finely chopped
3 Tbsp fresh parsley, finely chopped

The Process:
Sprinkle the grated squash with a generous pinch of salt. Transfer to a cheesecloth lined colander to drain. Set aside for 15-20 minutes.

Preheat the oven to 375 degrees F

Cut the cauliflower into florets. Working in batches, add to a food processor and pulse until the cauliflower resembles coarse pebbles. Set aside.

Heat the oil in a large skillet set over medium high heat. Add the onions and sautee until fragrant and tender, 4-5 minutes. Add the garlic and sautee and additional 1-2 minutes. Add the chopped cauliflower. Gather up the zucchini in the cheesecloth, forming a bundle. Wring out as much liquid as possible. Add the zucchini to the skillet. Cook the vegetables for 7-8 minutes, or until slightly tender.

Meanwhile, melt the butter in a medium saucepan over medium heat. Stir in the flour, making a thick paste. Allow to cook 1-2 minutes. Add the milk and cream, whisking until no lumps remain. Stir in half of the Parmesan, the rosemary and parsley. Season with salt and pepper. Reduce heat and simmer 2-3 minutes or until slightly thickened.

Layer the vegetable mixture into a lightly oiled 9 x 13 baking dish. Pour the cream mixture over the top. Bake, uncovered, for 20 minutes. Top with remaining Parmesan and bake an additional 10-15 minutes, or until the cheese has melted and is beginning to brown.

Serve hot.


Friday, June 6, 2014

Saison Ricotta

I know, I know. I am on a saison kick at the moment. I have no regrets.

With an excess of whole milk on hand, as well as a stellar home-brewed saison, the time seemed appropriated to revisit ricotta. I've made this simple cheese several time before, once with goats milk, once with buttermilk in lieu lemon juice or vinegar. Most frequently, I turn the curd into paneer. But not once have I incorporated beer.

The difference is flavor is definitely there. The beer isn't shy, offering up a bready base with a hoppy, herbal bite.

The biggest surprise I had with this version was how much the milk mixture frothed up as I heated it this time around. The curd that resulted was very fine, not at all like the plump tender curds from the buttermilk version. As a result, the ricotta took much, much longer to drain than I would normally like. I also substantially reduced the amount of vinegar the original recipe called for. I've had luck with 1 Tbsp per 4 cups of dairy without any problems. 3 Tbsp per 4 cups dairy seemed a bit excessive. I wanted the flavors of the beer to come through, not the tang of the acid.

As I had plans to turns this batch into gnocchi later in the week, I hung the ricotta to drain for over two hours before storing it. A half an hour should suffice to remove most of the liquid, and yields a creamier, spreadable cheese.

adapted from Jackie Dodd's recipe at TheBeeroness.com

yields about 1 pound

The Ingredients:
6 cups whole milk
2 cups heavy cream
2/3 cup, plus 1/4 cup saison, divided
1 tsp salt
1/4 cup apple cider vinegar or lemon juice

The Process:
Line a sieve with several layers of cheesecloth or muslin and set aside.

Pour the milk, cream, salt and 2/3 cup beer into a large non-reactive saucepan with a heavy bottom.  Heat slowly over medium high heat, stirring the milk constantly to prevent scorching.  Bring to mixture to 190 and remove from heat.

Gently stir in the vinegar and remaining 1/4 cup beer. After a minute or so curds will begin to form and clump on the surface.  Allow the mixture to rest for about 5 minutes. Gently stir to encourage the curds to separate from the whey.  Stir infrequently at this point...over stirring will break up the curds too much and yield a drier ricotta.

Once the curds appear to have fully separated, ladle the cloudy liquid (whey) through the cloth lined sieve, working slowly to avoid breaking up the curd.  Once most of the whey has been ladled out of the pot, carefully pour the rest of the curd/whey mixture through the sieve.  Allow most of the liquid to drain.  Once the moisture is cool enough to handle, gather the edges of the cloth together to form a bag.   Thread a dowel or the handle of a wooden spoon through the knot and suspend the bag over a pot or the sink.  Allow to slowly drip drain for at least 15 minutes, and up to two hours.  Resist the urge to press the ricotta.

Place in an air tight container and store in the refrigerator.

Tuesday, May 6, 2014

Beer Ice Cream


I've been tinkering around with beer ice cream for a while. How incredibly rude to not have shared this goodness until now.

One of my favorite beers to use is a Belgian dubbel ...rich and malty with hints of toffee, figs, and plums coupled with those intoxicating yeasty esters and phenolics of banana and clove. In this instance I opted for one of our lovely local breweries in Minneapolis, Boom Island Brewing Company, and their Hoodoo Dubbel.


But don't let my recommended favorite prevent you from playing around. Any malt forward beer will work. Think stouts and porters, Scottish ales, browns, bocks, and milds. Moderate alcohol levels are preferred. Too low and the ice cream can freeze rock solid. Too much and you have soft serve on your hands (not necessarily a bad thing). An ABV in the 6%-9% range is ideal. Don't let that prevent you from using your favorite barleywine, wee heavy, Russian imperial stout or old ale though...but plan reducing the full amount of beer down, or using less beer overall to ensure the ice cream firms up.

Avoid hoppy beers...the bitterness is intensified when the beer is reduced. But rest assured, I am working on a way to turn your favorite IPA into a frozen treat. It may or may not involve actual hops in addition to the beer...

Adapted from America's Test Kitchen

yields about 1 quart

The Ingredients:
12 oz malt forward beer, divided
1 tsp vanilla
1/2 to 3/4 cup sugar
3 egg yolks
1/8 tsp salt
2 cups heavy cream

The Process:
In a medium saucepan over medium-high heat, add 10 oz of the beer, reserving the remaining 2 oz. Reduce to about half, stirring to prevent the beer from foaming up. Combine the reduced beer to the reserved 2 oz. Add the vanilla and set aside to cool.

Set up an ice bath of cold water and ice in a large bowl. Set fine mesh strainer over a medium-sized bowl and position into the ice bath. Set aside.

In a clean, medium saucepan, whisk together the egg yolks, sugar and salt until smooth. Whisk in the cream until well combined. Set over medium-low heat and cook, stirring constantly, until the custard begins to thicken. Keep the stovetop low and continue gently stirring to avoid inadvertently making scrambled eggs. Bring the custard up to 180 F and promptly remove from heat.

Carefully strain the custard through the fine mesh strainer into the bowl set over the ice bath. Pour slowly...you don't want to capsize the custard into the ice bath below. Whisk in the reduced beer. Allow the custard to cool to room temperature, stirring periodically. Remove from the ice bath, cover, and let chill in the refrigerator for at least 8 hours, preferably overnight.

Using an ice cream maker, freeze the chilled base according to the manufacturer's directions. Transfer the ice cream to a 1.5 qt container and allow to set in the freezer for an additional 24 hours.

Friday, May 2, 2014

IPA Spiked Chicken Tikka Masala


Tikka Masala is no stranger in our household. I've made this dish, and enough of its Indian relatives to whip it up with nothing more than a cursory glance at a ghee stained recipe. The amount of ginger and garlic often varies. Sometimes I use a serrano pepper to two of a kick of heat, other time a subtle touch of chili powder. Fresh and canned tomatoes alternate depending on my mood and the seasons (there are few things sadder than a "tomato" in the middle of a Midwestern winter).

So why does this warrant another visit to this blog...a blog that attempts to chronicle my culinary adventures as I test new waters?

In a word,

Beer.

Ross had requested tikka masala when I asked for dishes to round out our week of dinners. As if by fate, the day before I had planned on our Indian feast, the Beeroness posted a yogurt and ale marinaded grilled chicken. The similarities between her chicken and the marinade for my chicken tikka were uncanny. These long lost cousins were only divided by a mix up of spices and the addition of beer. The discover was enough to revisit and modify this favorite.

I hope you enjoy this dish as much as we did.

Inspired and adapted from The Beeroness, The Pioneer Woman, and my tried and true tikka masala recipe courtesy of Monica Bhide

serves 4

The Ingredients:
for the chicken and marinade
1 1/2 lb boneless, skinless chicken breasts, cubed
3/4 cup Greek yogurt
1/2 cup IPA
1 Tbsp garam masala
1/2 tsp chili powder
1/2 tsp smoked paprika
2 cloves garlic, minced
1-inch thumb of ginger, minced

for the Tikka Masala
3 Tbsp unsalted butter
1 medium red onion, finely diced
3 cloves of garlic, minced
1 inch thumb of ginger, minced
1 serrano pepper, finely diced
1 Tbsp garam masala
1/4 tsp turmeric
1 - 15 oz can petite diced tomatoes
2 Tbsp tomato paste
1 cup heavy cream
2 large handfuls of spinach, coarsely chopped 
1/4 cup IPA
salt to taste

for the Basmati rice
1 cup basmati rice
2 Tbsp unsalted butter
1/2 tsp turmeric
1/2 tsp salt
2 cups vegetable broth or water
1/2 cup frozen peas

The Process:
for the marinade
In a large bowl or gallon-sized zip top bag, combine the yogurt, IPA, and spices. Mix well. Add the cubed chicken and stir to coat. Cover and refrigerate 6-8 hours.

for the Tikka Masala:
Pre-heat the broiler.

Remove the chicken from the marinade. Thread onto metal skewers and arrange on an oiled cooling rack set over a foil lined baking sheet. Broil the chicken, 10" from the heat source, 5-7 minutes per side or until the chicken is beginning to char and juices run clear. Set aside.

Meanwhile, prep the rice:
In a medium saucepan, combine the butter, rice, turmeric, salt, and broth. Bring to a boil and stir until the butter has melted. Reduce to a low simmer and cover, cooking 30-35 minutes or until rice is tender and most of the liquid is absorbed.

Back to the Tikka Masala:
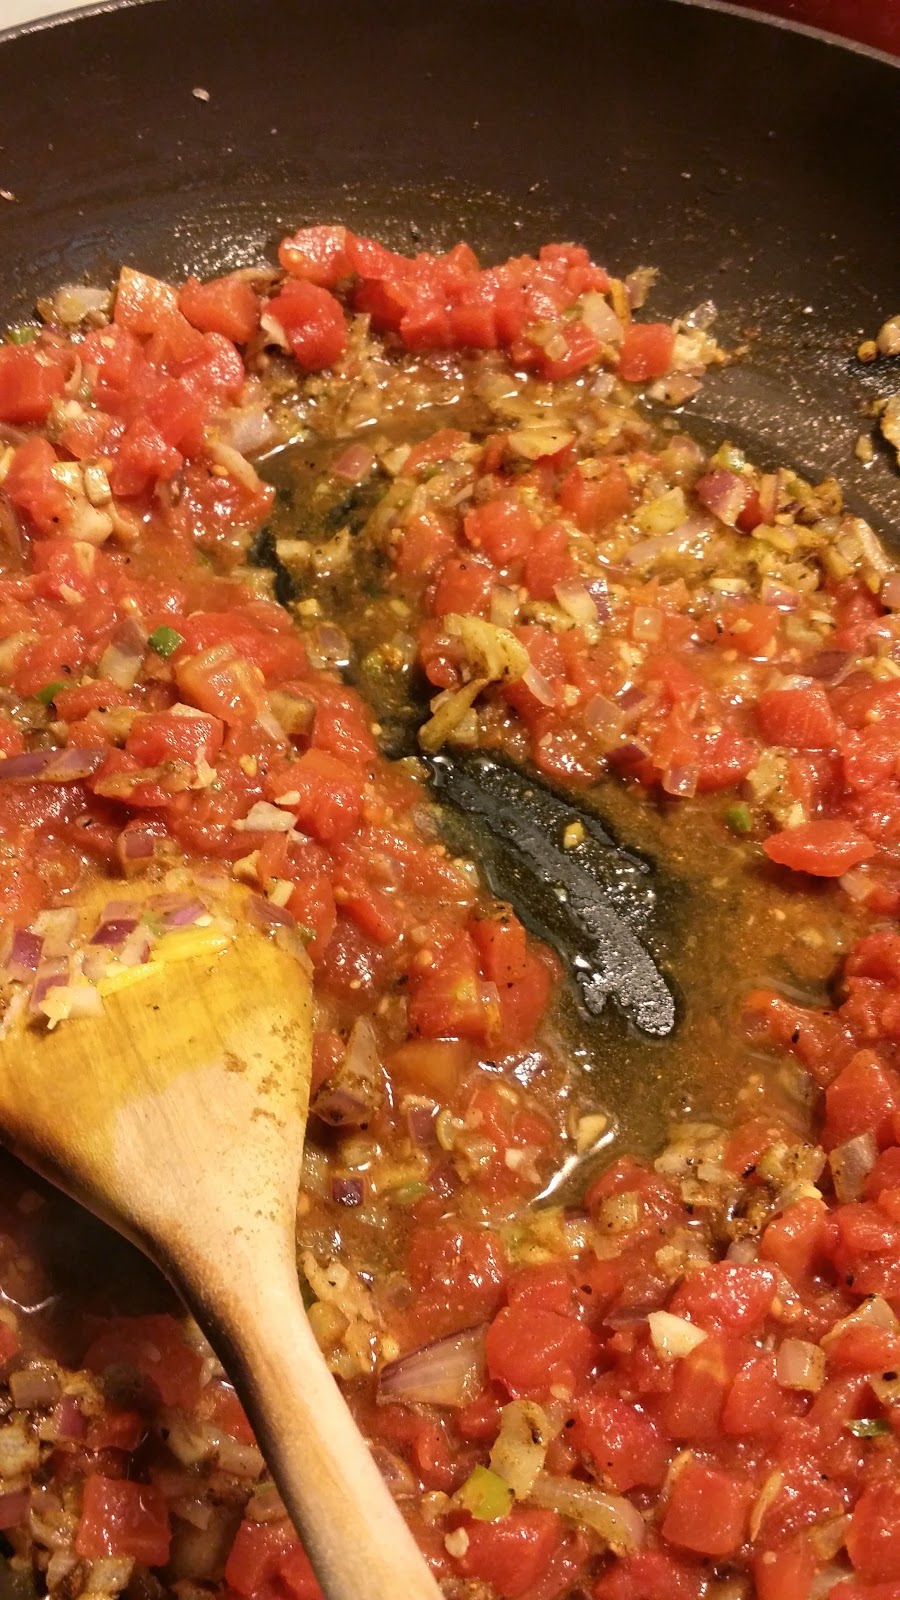
Melt the butter in a large skillet set over medium-high heat. Add the onion, ginger, garlic and serrano pepper. Sauté until fragrant and the onion is translucent, 6-8 minutes.
Add the spices and stir until fragrant, about 30 seconds. Add 1 tsp of salt, the diced tomato and the tomato paste. Simmer on medium low for about 5 minutes.

Whisk in the heavy cream and return to a simmer.

Remove the cooked chicken from the skewers and stir into the sauce. Cover and simmer until the chicken is heated through.

Stir in the chopped spinach and simmer until the spinach wilts. Remove the tikka masala from heat and stir in the 1/4 cup IPA. Adjust salt and seasoning to taste.

Prior to serving, stir 1/2 cup peas into the basmati rice. Spoon pea-studded rice onto each plate and top with tikka masala

Wednesday, July 10, 2013

Plum Semifreddo


Dear lord, the heat!  After the torrential rains of late June, the sunny skies are a blessing, but how I wouldn't love to be on a lake most days right now!  A vacation to slightly cooler, Northwesternly climates is just around the bend.  So in the meantime we make due with some chilly desserts to beat the heat.  A batch of beer ice (recipe coming soon, I swear...) left me with several egg whites to use up.  And this semifreddo recipe had just happened to catch my eye a few days earlier.

I have a soft spot in my heart for plums and plum jams.  For years, Gramma made the most amazing jam out of fruit from her backyard.  The nostalgia was worth the brief time standing over that simmering fruit in a scalding hot kitchen.

Everything comes together wonderfully quick; the rest is all self control as the dessert freezes.  With its healthy dose of heavy cream and sugar, this dessert is by no means light, but the texture will deceive you.  This semifreddo is a cloud spike with ribbons of tart plum. 

adapted from bon appetit

serves 8

The Ingredients:
1 1/2 pounds red plums, pitted and cut into chunks
1 black cardamom pod, crushed
1 cup sugar, divided
Kosher salt
3 large egg whites
1/2 teaspoon vanilla extract
1 cup chilled heavy

The Process:
Mist a 9x5-inch loaf pan with nonstick spray and line with plastic wrap, leaving a generous overhang on all sides. Chill until ready to use.


Combine plums, cardamom, 1/3 cup sugar, and a pinch of salt in a medium saucepan. Cover and cook over medium heat, stirring occasionally, until plums release their juices, about 5 minutes. Uncover and cook until plums soften and start to fall apart, 6–8 minutes longer. Let cool slightly. 

Purée the plum mixture in a blender or with an immersion blender until very smooth. Strain through a fine-mesh sieve into a medium bowl, pressing on solids to extract as much pulp as possible. Chill. Set aside 1 cup purée for serving.  The rest will be folded into the semifreddo.

Whisk egg whites, a pinch of salt, and remaining 2/3 cup sugar in a double boiler or a medium heatproof bowl set over a saucepan of simmering water (do not let bowl touch water). Heat, whisking constantly, until sugar is dissolved and mixture is warm to the touch, about 4 minutes. Remove bowl from saucepan. Add vanilla and, using an electric mixer or stand mixer with the whisk attachment set on high speed, whisk until mixture is tripled in volume, glossy, and completely cool, about 10 minutes.
 

In  another medium bowl whip the chilled cream until soft peaks form. Fold 1/3 of whipped cream into the  egg whites mixture until just combined. Fold in remaining whipped cream until just combined. Fold in plum purée, leaving large streaks throughout mixture.  The mixture will continue to mix and marble when poured in to the loaf pan. 

Transfer mixture to prepared pan and smooth top. Fold plastic wrap overhang over top and freeze until firm, at least 8 hours.

Unwrap semifreddo and using plastic overhang, gently lift from pan. Invert and slice into 1" portions.

Spoon reserved plum puree over top and serve


Friday, June 7, 2013

Savory Bread Pudding with Rapini and Prosciutto

Breakfast for dinner?  Certainly!  But this dish is also a twist on what is typically thought of as dessert. Perhaps the end result is more strata than bread pudding.  But with as inexpensive, yet full of flavor dish is, that seems like a minor detail worth overlooking...

adapted from Bon Appetit

serves 4-6

The Ingredients:
1 Tbsp olive oil
2-3 cloves of garlic, minced
1/2 tsp crushed red pepper
1 medium bunch rapini, cut into 1 inch pieces
2 tsp kosher salt
1/2 tsp ground black pepper
6 large eggs
1/2 cup heavy cream
1 cup milk
1 large baguette, torn into 1 inch pieces (about 8 cups)
1/2 cup + 2 Tbsp grated Parmesan
6-8 thin slices of prosciutto

The Process:
Preheat the oven to 350.  Butter a casserole or baking dish and set aside.

Add the oil to a large skillet set over medium heat.  Add the garlic and pepper flakes, stirring until fragrant, about 1 minute.  Add the rapini and cook, stirring frequently, until the wilted.  Allow to cool slightly.

In a large bowl, whisk together the eggs, cream, milk salt and pepper.  Add the rapini, bread and 1/2 cup Parmesan.  Toss to coat.  Spread the mixture into the prepared baking dish.  Evenly place the prosciutto over the top and sprinkle with remaining Parmesan.

Bake, uncovered, until the pudding is puffed, beginning to brown and is set in center, about 50 minutes.

Serve warm.

Friday, April 19, 2013

Martha Stewart's Scalloped Potatoes

Ham dinners wouldn't be complete without a side of scalloped or au gratin potatoes.  I've had mixed luck with these dishes in the past.  Often, towards the end of baking the sauce will begin to clump or congeal instead of keeping its creamy consistency.  The lack of flour and short boil in milk helps resolve these problems in this version.

Almost any cheese will work as well, though I opted to stick with this mild Gruyere.  I love the slightly funky smell of the cheese, and the slight nuttiness it offers.  Gruyere isn't quite as pungent as Swiss, it melts and browns beautifully, and the flavor blends right into the smooth, creamy base.

Recommended beer pairing: a funky saison or spicy witbier.  The Gruyere in the potatoes has a distinct nuttiness that is complimented by the crisp wheat backbone and spicy yeast character of these beers.  Saisons will often lend a grassy or hay-like finish, while the witbier leans towards coriander and citrus spice.  The crispness of both will help cut through the richness of all of that cream...

adapted from Martha Stewart

serves 10-14

The Ingredients:
3 pounds Yukon  potatoes
1 small onion, thinly sliced
3 cups milk
2 cloves of garlic, minced
3 Tbsp butter, softened
Coarse salt and freshly ground black pepper
1 cup heavy cream
5 ounces Gruyere cheese, grated


The Process
Preheat oven to 325.

Peel the potatoes and slice them paper thin.

In a large saucepan set over high heat, combine the sliced potatoes, onion and garlic. Bring to a boil, and immediately reduce heat to low.  Cover and simmer until potatoes are tender, about 3 minutes

Place a colander over a large bowl and drain the potatoes, reserving about 2 cups of the milk.

Rub a 9 x 13 baking dish with 1 Tbsp butter. Arrange sliced potatoes and onions in the baking dish, sprinkle generously with  pepper. Dot with remaining 2 Tbsp of butter.  Pour the reserved milk and heavy cream over the top.  Sprinkle evenly with Gruyere.  

Bake, uncovered, until cheese toasts to a deep golden brown, the potatoes are tender and sauce has thickened, about 80 to 90 minutes. Remove from oven and allow to cool slightly before serving.

Saturday, March 23, 2013

Broccoli Stuffed Tilapia


 Here fishy, fishy, fishy...

Yup.  Still on a seafood kick.  Fish this time.  Though I still daydream about those scallops....

This dish came together much more easily than I first anticipated.   I opted for tilapia mostly for economy, but sole, flounder or orange roughy would work equally as well.  Don't like fish?  Use the filling with chicken instead.

adapted from Better Homes and Gardens

serves 4

The Ingredients:
4 - 4 oz tilapia fillets
1 cup frozen broccoli, thawed
1 egg, beaten
2/3 cup bread crumbs
1 green onion, minced
1 clove of garlic, minced
1/2 tsp dill
1/4 cup grated Parmesan
8 oz cream cheese, divided
2 Tbsp milk
2 Tbsp dry white wine

The Process:
Preheat the oven to 350

Rinse the fillets and pat dry.  Place between two layers of parchment paper and lightly pound to an even thickness, about 3/8-inch. 

Coarsely chop the broccoli and combine with the egg, bread crumbs, onion, garlic, dill, Parmesan  and half of the cream cheese.

 Spoon one quarter of the filling mixture onto the end of each fillet. 

Roll up the fillet, securing with a toothpick if necessary.  Repeat with the remaining fillets.  Arrange the rolls in a baking dish. 

Bake, uncovered, for 30 to 35 minutes, or until the fish flakes easily

Meanwhile, combine the remaining cream cheese and milk in a small saucepan set over medium heat.   Heat and whisk until smooth.  Stir in the white wine. Season with salt and pepper.

Serve sauce over stuffed fillets.

Thursday, February 21, 2013

Smoked Salmon Chowder


A dear friend and roommate brought us back a wonderful Christmas present from her trip out to see family in Washington and Vancouver.  Smoked salmon.  I was elated!  And had to refrain from ripping open the package and devouring every morsel on spot.

After my initial thrill,  my mind jumped to a rich soup: creamy and tinged with that smokey essence, tender lumps of potato simmered with flaky bits of salmon.  Oh how I wish that gorgeous piece of smoked fish had lasted a tad longer!

adapted from Epicurious

serves 4 generously

The Ingredients:
1 Tbsp olive oil
3 medium leeks, thoroughly rinsed and chopped
1 garlic clove, minced
1 large russet potato, peeled and cubed
1 large stalk celery, chopped
1/2 tsp kosher salt
1/2 tsp freshly ground black pepper
1/2 tsp thyme
2 cups vegetable broth
1 Tbsp dried pulverized tomato skin
2 cups milk
8 ounces smoked salmon, flaked
1/2 cup heavy cream

The Process:
In a large, heavy-bottomed saucepan, heat the oil over low heat.  Add the  leeks and garlic; sautee until tender and fragrant, about 5 minutes.  Add the potato and celery, and stir until coated with oil.  Add the salt, pepper, and thyme.  Pour in the broth and simmer the mixture until the potatoes are tender, about 15 minutes.

Stir in the tomato skin and milk, add the salmon.  Simmer the soup until the salmon and milk is heated through.  Do not let the mixture come to boil, lest the milk separate.  Whisk in the heavy cream.

Sprinkle with additional thyme and cracked pepper.

Saturday, December 29, 2012

Pumpkin Coconut Cheesecake Bars with a Coconut Pecan Crust


The title is a mouthful.  The bars are an even more delightful mouthful.  Decadent and silky.  Not overly sweet.  In my mind it brought together the best of Indian cuisine and Southern comfort food.  Spicy, warm, sweet and silken. 

The inspiration from this came from a Facebook conversation with a friend on Christmas Eve.  I needed to bake something.  ANYTHING.  I've been slammed with work from three shows.  That, coupled with the usual Holiday chaos has left me with precious little time to cook, let alone enjoy it.

My friend suggested pie.  After a quick perusal of my pantry I discovered pumpkin puree, coconut milk, pecans and flaked coconut.  Back around  Thanksgiving I had thought about making pumpkin cheesecake bars.  The discovery of the coconut milk teased for a twist...

Cobbled together from recipes at Taste of Home, Alida's Kitchen, and Alaska from Scratch

yields 12 servings

The Ingredients:
For the crust:
1 cup flour
1/3 cup brown sugar
1 cup toasted pecans, finely crushed
5 Tbsp butter, softened
1/3 cup flaked coconut
1/2 tsp ginger

for the filling and topping:
11 ounces light cream cheese
1/3 cup light sour cream
1/2 cup granulated sugar
1 Tbsp cornstarch
1 teaspoon vanilla extract
2 eggs
6 oz coconut milk
1/2 cup pumpkin puree
1 Tbsp brown sugar
1/2 tsp ginger


The Process:
for the crust: 
Preheat the oven to 350

In a large bowl, combine flour and brown sugar. Cut in butter until the mixture resembles coarse crumbs. Stir in the pecans, coconut and ginger.  Reserve about 3/4 cup of the mixture for the topping.

Firmly press the remaining mixture into the bottom and slightly up the sides of a greased 8 inch square baking pan.  Bake for 12- 15 minutes or until golden brown. Remove from the oven and allow to cool.

for the filling:
Lower to the oven temperature to 325

In a large bowl cream together the cream cheese, sour cream, sugar, corn starch and vanilla until smooth.  Add eggs, and beat on low until combined.  Stir in the coconut milk.

Pour 3/4 cup of the filling into a small bowl. Whisk in the pumpkin, brown sugar and ginger.

Pour the coconut filling over the cooled pecan crust.  Gently dollop the pumpkin filling  over the top.  

Smooth into an even layer, or if desired, gently swirl the pumpkin into the coconut with the tip of a knife for a marbled effect.  Sprinkle with reserved crust.

Bake the bars fro 35-40 minutes or until the filling is mostly set, but still slightly jiggly in the center.  Cool to cool to room temperature.  Refrigerate for at least two hours or preferably over night.

Thursday, December 27, 2012

Cinnamon Raisin Bread Pudding with Bourbon Sauce

Bread pudding may be Ross' kryptonite.  When we go out to eat, we usually forgo dessert, either for economy or due to a full belly.  However, if bread pudding is on the menu, all bets are off.

I like mine a little more custard-y.  Ross prefers his a little more bread-y.  Either way, dot it with a generous helping of fruit--whether it be diced or fresh--and a healthy splash of booze of some sort and we are in heaven.

This version is buttery and rich--not too custard-y, but certainly not dry.  Feel free to change up the breads and fruits.  Sourdough and peach?  Oooo...maybe next time...

adapted from recipes from 1001 Recipes (edited by Martha Day), Paula Dean, Chef Point Cafe

serves 8 to 10

The Ingredients:
for the pudding:
1 lb loaf of cinnamon raisin bread, day old and cubed
2 apples, peeled, cored and diced
3 eggs
2 cups milk
1 cup heavy cream
1/2 cup sugar
1 Tbsp bourbon
1 tsp vanilla extract
3 Tbsp unsalted butter, divided
1/3 cup brown sugar

for the sauce:
1 cup of sugar
1/2 cup butter (1 stick)
1 egg, beaten
1 tsp vanilla extract
1/4 cup bourbon

The Process:
Preheat the oven to 350.

Generously butter a 9 x 13 baking dish using 1 Tbsp butter.  Toss the cubed bread with the diced apples.  Add the bread to the prepared dish.

In a large bowl, whisk together the eggs, milk, cream, sugar, bourbon and vanilla.  Pour the egg mixture over the bread.  Gently press the bread down into the mixture to make sure it is soaked. Allow to rest for ten minutes.

In a small bowl, combine the remaining butter and brown sugar until it resembles coarse crumbs. Set aside.

Cover the bread mixture with aluminum foil. Place the covered baking dish in a deep pan. Pour water into the deep pan until it comes about halfway up the covered baking dish. Bake for 1 hour.  Uncover, dot with brown sugar mixture and bake an additional 15 minutes. Serve warm with sauce.

for the sauce:
Whisk together the granulated sugar, butter, egg, and vanilla in a saucepan over medium heat until the sugar has dissolved.  Add bourbon and simmer for about 10 minutes. Drizzle over warm pudding, reserving the rest on the side.


Sunday, December 23, 2012

Snow Day Cocoa

Nothing beats a hard day of shoveling like coming in to hot cup of cocoa.

Growing up, hot cocoa had a special place in my heart.  Come fall, I would trek out to the chilly soccer fields to watch my brother kick the ball around with his team mates.  That early in the morning nothing fended off the cold quite like a cup of cocoa.  Even a cup of cocoa made from a pouch with hot water.

Mom always upped the ante.  After a cold day of shoveling or playing we would often come in to a pot of rich cocoa on the stove.  Thank you Hersey's.

This cocoa ups the ante a notch further.

Adapted from Hersey's cocoa recipe

The Ingredients:
1/3 cocoa powder
1/2 cup vanilla scented sugar*
1/3hot water
1/4 tsp salt
1/8 tsp cinnamon
dash of corriander
1/2 tsp vanilla extract
3 cups milk
1 cup heavy cream


The Process:
Combine the cocoa, sugar, salt, cinnamon and coriander in a medium saucepan.  Slowly stir in the hot water and mix until well combined.  Bring the temperature to a boil over medium high heat.

Reduce the temperature to low.  Whisk in the cream, milk, and vanilla extract  Stir until heated through.  Label into mugs and garnish with marshmallows or whipped cream, if desired.. 

*stick a pod or two of spent vanilla bean in a jar full of granulated sugar.  Add more sugar as you use it up.  The vanilla pods will keep fragrant for months

Tuesday, November 20, 2012

Creamy Carrot and Potato Soup


Winter=Soup.  Well, that's not quite true.  I'll make soup year round without batting an eye.  But the cold weather does seem to beg for a hot, sustaining bowl of soup.

One of my favorite parts about soup, aside from eating it, of course, is the realiativley simple prep.  After slicing, dicing and a little bit of sauteeing, you walk away to let the conction simmer.  I'm left with anywhere from half an hour to half a day to work, do chores (oh god, the endless dishes....) or more often than not, waste time online.  Whatever did we do before facebook, pinterest and blogger?  Ugh.  No wonder I was far more productive in high school and college...

This soup does not simmer for long, but is the perfect use for the massive quantities of potatoes and carrots we recently received from our CSA...a 45 pound box of storage veggies will go a long way.  I'm eager to try out other veggie combinations using this recipe as a basis.  Parsnips and sweet potatoes?  How about that rutabaga?  Or even those turnips.  Imagine the color of a bit of shredded beet...

The carrots feature in the flavor of the soup, and also help provide a rich golden cream color.  The potatoes cook down a bit to provide a creamy consistency.  The soup is just as wonderful made vegan...use vegetable stock in lieu of chicken stock, omit the milk and cheese, and substitute the Worcestershire for shoyu, miso or any assortment of other herbs to add that earthy funk.  

It's a filling soup without being heavy.  If you care for something richer, switch out the milk for cream and run a bit of the soup through a food processor.  A bit more potato, and a little less broth will also get you closer to a chowder consistency.  For the fall/winter limbo we seem to be in , I found this soup to be the perfect balance of sustaining and light.  Maybe when the snow finally comes, I'll break out the heavy cream...

adapted from MyKitchenAddition

serves 6-8


The Ingredients:
2 Tbsp  olive oil
1 medium onion, diced
1 stalk of celery, diced
2 cloves of garlic, minced
1 1/2 lbs russet potatoes, peeled and shredded
1 lb carrots, peeled and shredded
1-2 sprigs fresh thyme
1/2 tsp dried oregano
6 cups chicken or vegetable broth
1 1/2 cups milk
2 Tbsp Worcestershire sauce
4 oz sharp cheddar cheese, shredded
Kosher salt
Freshly ground black pepper

The Process:
Heat the oil in a heavy-bottomed 3-quart pot.  Add the onions, garlic and celery and saute until the onions are tender and slightly translucent. 

Add the potatoes, carrots and herbs, and saute 2-3 minutes more.  Stir in the broth.  Bring the mixture to a boil, reduce to a simmer and cook for 20-30 minutes or until the potatoes are tender.

Slowly add in the milk and Worcestershire sauce and stir until heated through, about 5 minutes.  Remove the pot for the heat and sprinkle the cheese on top.  Stir until the cheese has melted as is evenly incorporated.  Season with salt and pepper to taste.

Wednesday, October 17, 2012

Boozy Vanilla French Toast

This recipe is so stellar I've tried it twice over all ready.  

You can thank Jackie at the Beeroness.  I adore her so....

As per usual, I attempted to track down her beer recommendation, but only with moderate success.  She based the French toast on Stone's Vanilla bean Smoked Porter. 

 Ross and I hit up our favorite local liquor store and their stellar craft brew selection.  We were mildly let down.  On hand was a bottle of Stone's Smoked Porter, but not the vanilla bean edition.  (after poking around a little more I discovered this same porter was also brewed with chipotle...oh the fiesta we could have!)

I grabbed the bottle, my mind a whirl about how to up the vanilla essence without detracting from the smoky beer notes.  Lost in thought, I almost passed up the vanilla imbided beer sitting next to the porter...Abita's Vanilla Doubledog...a 25th anniversary beer based on their Turbo dog.  I almost squirreled the beer away to enjoy by myself, french toast be damned!

I'm glad I didn't

Each beer offered a unique taste, and I am wary to pick a favorite.  You'll have to decide for yourself. The Stone offered a deeper more rounded flavor...calling to mind campfires and toasted marshmallow.  The Abita was a sweeter variation.

adapted from the Beeroness

serves 6-8

The Ingredients
1 cup milk
2/3 cup porter or dark ale with caramel notes
1/2 cup vanilla sugar*
3 eggs
1 1/2  tsp vanilla extract**
2 tbs butter (plus additional as needed)
1 large loaf of crusty Italian bread, cut into 1 inch thick slices


*vanilla sugar is simply sugar that has shared a container with a vanilla bean or two.  cooking with vanilla pods, instead of tossing the spent pod, I allow it to dry and then stick into an mason jar full of sugar.  Within a few days the sugars takes on a wonderfully rich vanilla flavor

**if you do happen to find a beer with vanilla essence, reduce the extract to 1 tsp.  


The Process
Heat a large skillet over medium high heat, and add enough oil or butter to well coat the surface.

In a large bowl, whisk together the milk, beer, sugar, eggs and vanilla.

One at a time, dip the bread into the batter, thoroughly coating both sides.  Add to the skillet and fry, flipping once,  until golden brown, (2-3 minutes per side).  Keep warm in a pre-heated oven and repeat with remaining bread.  Serve warm.   With Bacon.

    Tuesday, August 7, 2012

    Eggless Blackberry Boy Bait


    I love alliteration, don't you?

    I know. I know...egg-less doesn't fit in with the beautiful bounty of b's.  But it is the reason I first came upon the recipe.  You see, I had an itty-bitty box of breathtaking blackberries and nary a use for them.  They had been glowing, at their peak of ripeness.  I couldn't let these beauties go to waste.

    Only, I didn't have any eggs.  Nada.  Zilch.  Ross made frequent offers to run to the store at 9 pm to gather what I lacked, but I vehemently refused.  We had planned our grocery shopping for the next day and I refused to let him make the extra trip for one ingredient.  I was determined to find an egg-less dessert. 

    And I had wonderful success courtesy of the husband and wife team at Chef In You.

    So what is a boy bait?  From what I've gathered among various sources, a 15 year-old girl submitted a butter-loaded blueberry cake a Pillsbury bake-off in 1954.  She dubbed it boy bait for its ability to lure in the opposite sex.  I'd go so far as to say this cake could lure in almost anyone.  It won second place.  To what?  I'm not sure.  Pillsbury's website is sadly lacking any reference to boy bait..

    The treat is reminiscent of blueberry muffins--indeed it is traditional made with blueberries--but baked up in a single layer, allowed to cool and cut into squares.  This version earns its egglessness thanks to the addition of yogurt.  But all of the buttery goodness remains...

    adapted from recipes at the Chef In You and Smitten Kitchen

    serves 12+

    The Ingredients:
    2 cups all-purpose flour + 1 tsp
    1 Tbsp baking powder
    1 tsp salt
    1 cup unsalted butter (2 sticks), room temperature
    3/4 cup brown sugar
    1/4 cup granulated sugar
    1 cup yogurt
    3/4 cup milk
    1 tsp vanilla extract
    1 cup fresh blackberries
    1/4 cup cinnamon-sugar

    The Process:
    Preheat the oven to 350.  Butter a 9 x 13 baking pan and dust with flour.

    Whisk together the flour, baking powder, and salt in a medium bowl.  Set aside.

    In a large bowl, cream together the butter and sugars, beating until fluffy, about 3-4 minutes.  Beat in 1/2 cup of the yogurt, 1/4 cup of the milk and the vanilla.  Fold in 1/3 of the flour mixture.  Add the remaining yogurt and mix well.  Fold in another third of the flour, followed by the remaining milk.  Add the remaining flour and mix until just combined.

    Toss 1/2 cup of the blackberries with 1Tbsp of flour. Gently fold the berries into the batter.  Spread the batter evenly into the prepared pan.  Distribute the remaining berries over the batter.  Sprinkle with cinnamon sugar. 

    Bake for 45-50 minutes or until a toothpick inserted into the center comes out clean.

    Cool in the pan for at least twenty minutes.  Remove the cake from the pan to a serving tray and allow to cool completely (if you can!)  The cake will be far easier to slice once cool. 

    The Review:
    My first attempt at this recipe was incredibly tasty.  But I did a very stupid thing.  Instead of using the 9x13 pan recommended, I reached for my 9-inch cake pan.  The batter filled the pan almost to the brim.  I feared an overflow and placed a cookie sheet on the rack below, lest the cake ooze all over the bottom of my oven.  I had to add nearly 15 minutes to the bake time.  The toothpick came out clean. 
    The toothpick test deceived me.

    The center of the cake quickly collapsed into a pile of nearly raw batter.  You can barely tell from the photos.  We still enjoyed it.  Well...most of it...

    Attempt no. 2 was a much bigger success. My husband insists this treat is laced with crack...


    Saturday, July 28, 2012

    Very Veggie Spinach Dip

    For me, a summertime snack usually involves some sort of dip.  Hummus, salsa, spinach dips, sour cream or yogurt based concoctions, peanut butter, oozy-cheesey goodness...it doesn't really matter.

    Nor am I too terribly picking about what I use to scoop up the dip.  I know most days I should be reaching for the fresh veggies or whole grain pita.  But let's face it, sometimes chips are in order.

    I had chips in mind when I came across the inspiration for this spianch dip.  But after trying it, I was completely content with big bowl of blanches veggies to enjoy this with.  It seemed to be a crowd pleaser across the board...regardless of our guests' snacking preferances

    Adapted from recipes at Knorr's and Peas & Crayons

    yeilds about 2 cups

    The Ingredients:
    6  cups fresh spinach, coarsely chopped
    1 large zucchini, grated
    1 pkg vegetable soup mix
    1 cup Greek yogurt (or strained plain yogurt)
    1 cup sour cream
    2-3 scallions, diced


    The Process:
    Zap the spinach in the microwave for 3 minutes.  Stir and return to the micorwave for an additional 2 minutes.  Allow to cool.  Drain off any liquid and squeeze dry. 

    In a large bowl, combine the spinach with the remaining ingredients.  Stir until well combined.  Transfer to a serving bowl, cover and chill for 2 hours to allow the flavors to develop.

    Serve with chips or veggies of your choosing.


    The Review:
    I adore spinach dips.  Doubly so if the spinach is fresh.  Something about the stringy consistency of many frozen variety of spinach out there always throws me a little.   Frozen will work in a pimch here...use 9-10 oz but be sure to thaw and drain teh leafy greens really well!

    Overall the dip was a huge hit with everyone that tried it.  If you can be patient enough to let the dip sit for more than 2 hours, even better.  After chilling the veggie loaded concoction seemed to reach it's peak of flavor once it hit room temperature (and that certainly didn't take long given the toasty summer we've been having!)

    Have you noticed how cream-based vegetable concoctions--coleslaw, cucumber salads and the like--have a tendency to weep and pool the liquid over time? This dip surprised me, especially considering the water heavy zucchini shredded into the mix.  The next day very little liquid had separated out.  It didn't last much longer for us to find out if it would.

    Most of our guests at the evening BBQ gobbled the dip up with nothing more than basic salty potato chips.  Ross preferred the heartier tortilla chips as his vehicle of choice.  Me?  Carrots and snow peas, surprisingly...though I did have my fair share of salty potato rounds as well.

    Veggie soup mixes are a staple in my pantry for slow cooker roasts and stews...I'm surprised it took me this long to try it in a dip...the recipe is right on the package after all!

    Sunday, July 22, 2012

    Ina Garten's Creamy Cucumber Salad


    Growing up, cucumbers didn't appear in our fridge very often.  When they did we'd often find them sliced and lightly salted in a bowl on the counter a few days later.  As a kid, I loved to sneak a slice or too.  Cool, salty, crisp.  Inevitably little fingers would snitch another.  And another.  We knew our mom was waiting for the cucumbers to weep enough to mix up her classic creamy cucumber salad.  By the time we were done, there was barely enough cucumber left for one serving.  But I don't ever remember being reprimanded.  I think she enjoyed the lightly salted slices just as much as we did.

    Beyond the cucumber, onion and sour cream, I have no idea how my mom prepared that summer time favorite.  I suspect if I got her to talk me through the recipe the result would read "a dollop of this,  a dash of that."  Sometimes those are the best recipes.

    Perhaps I should have picked her brain before searching online for another creamy cucumber salad.  I found one at foodnetwork which seemed acceptable.  But as with other attempts of Ina Garten's recipes, I greatly reduced the amount of salt and dressing used.  The dish is good.  Not Mom's, but still good....

    adapted from Ina Garten's recipe at foodnetwork.

    serves 8-10

    The Ingredients:
    2 lbs cucumbers (2-3 medium), thinly sliced
    1 small onion, thinly sliced
    kosher salt
    1 1/3 cups Greek yogurt
    1/3 cup sour cream
    1 Tbsp white wine vinegar or lemon juice
    1/3 cup fresh dill, finely chopped
    pepper to taste

    The Process:
    Combine the onions and cucumbers in a large sieve or colander.   Generously sprinkle with salt.  Toss to coat.  Place the colander over a bowl and set in the refrigerator to drain for 4 hour or over night...the longer the cucumbers can weep, the less soupy the salad will be in the long run.  Discard any liquid that collects in the bowl.  Pat the cucumber and onions dry, removing some of the excess salt.  Set aside

    In a large bowl, whisk together the Greek yogurt, sour cream, vinegar and dill.  Add the cucumber and onions; toss to coat.  Season with pepper and salt to taste.  Refrigerate for at least one hour prior to serving to allow the flavors to mingle.  Serve chilled.

    The Review:
    Wow, Ina.  This recipe after modification was near perfect.  Highly reminiscent of my mother's.  I cannot imagine how soupy the dish would have been had I not cut back on the the quantity of yogurt and sour cream her recipe called for.  More tzatziki than salad, I suppose.

    Nit picking aside, this was indeed a close recollection of mom's classic summer dish.  Cool.  Refreshing.  Pack with crunch, yet mellow and creamy.  It is a perfect accompaniment to spicier grilled dishes...serving as a palette cleanser.

    The was not a favorite of many at our BBQ, however.  Those who tries it enjoyed it.  But a lot was left over at the end of the day.  And it is not a salad that keeps particularly well.  The next day the leftovers had wept a salty pool of cucumber tears...even after having drained them a full 6 hours before assembling the salad.  Draining off some of the liquid we found the cucumbers still maintained some of their crunch.  Only the flavor was not as wonderful as it had been the day before.

    No wonder my mom made the dish one cucumber at a time...

    Wednesday, July 18, 2012

    Bobby Flay's Creamy Coleslaw

    Coleslaw is tricky for a crowd.  Everybody has their favorite.  Sometimes it's a vinegar base.  Some prefer a creamy dressing.  Traditional green cabbage?  Or a cacophony of color with purple cabbage and carrots?  How about a touch of fennel for that slight anise touch?  Shredded or chopped?

    So many options!  There is no way to please them all.  So what do I do in times like this?  Make something I want.  After all, I will be the one stuck with any leftovers after the picnic or potluck is over.

    My favorite?  Creamy classic cabbage slaws with just of bit of carrots for color.  I prefer my veggies shredded...chopped salads seem to get too soggy too quickly.  The favorite coleslaws of my youth were KFC (of all places...a rare treat in our family) and my mom's.  I don't have either recipe, but this one from Bobby Flay hit that nostalgic flavor high.

    I blame the celery salt...

    adapted from Bobby Flay's recipe at foodnetwork.com

    The Ingredients:
    1 medium green cabbage, finely shredded
    2 large carrots, finely shredded
    1 medium fennel bulb, thinly sliced (optional)
    3/4 cup mayonnaise
    2 Tbsp sour cream
    2 Tbsp onion, grated
    2 Tbsp sugar, or to taste
    2 Tbsp white vinegar
    1 Tbsp dry mustard
    2 tsp celery salt
    Salt and freshly ground pepper to taste


    The Process:
    Combine the shredded cabbage and carrots in a large bowl. In a separat4e medium bowl, whisk together the mayonnaise, sour cream, onion, sugar, vinegar, mustard and celery salt.  Pour the dressing over the vegetables and toss to coat.  Add more salt, pepper, or sugar to taste,  if desired.

    The Review:
    I suspect one reason coleslaw remains so popular at picnics is the ease with which the dish comes together and the relatively low cost for a huge amount of salad.  I'm guilty for making it on both accounts.

    We had a beautiful head of cabbage in our CSA box this week.  And the temperatures had been for too warm to warrant cooking with it.  This slaw was cool and refreshing...bonus points for not being overly dressed, either.  Nothing seems to ruin a good cabbage as much as a soupy slaw.  Two days later, while the colors were not as vibrant, the coleslaw still packed plenty of crunch.

    And I do truly maintain that the key to this recipe is the celery salt.  Most people couldn't quite place it, but once they knew, it made perfect sense.

    Tuesday, May 8, 2012

    Caramel Ice Cream


    A another huge thanks to Audra at the Baker Chick for drawing my attention to yet another amazing recipe.  She makes no secret about her love of salty caramel concoctions.  My affair with salted caramel is a little more closeted.  But this recipe needs to have its praises sung.

    The caramel ice cream is also my first attempt at the more decadent, thicker custard-style ice cream.  In addition to the richer consistency, the custard-style has the benefit of leaving me with several egg whites on hand.  A pavlova or meringue may be in the future.

    adapted from Gourmet's and  David Lebovitz's recipes via the Baker Chick

    yields about 5 cups

    The Ingredients:
    For Caramel Praline:
    1/2 cup sugar
    3/4 teaspoon sea salt, such as fleur de sel

    For the Ice Cream Base:
    1 1/4 cups sugar, divided
    2 cups heavy cream, divided
    1/2 tsp flaky sea salt
    1/2 tsp vanilla extract
    1 1/4 cup whole milk
    4 egg yolks

    The Process:
    for the caramel praline:
    Line a baking sheet with aluminum foil, lightly misted with cooking spray.  Set near at hand.

    In a medium heavy-bottomed saucepan, sprinkle the sugar in an even layer.  Heat the sugar over medium-high heat until the edges begin to melt. Use a heatproof utensil to gently stir the liquefied sugar from the bottom and edges towards the center.  Continue to gently stir toward the center, until all of the sugar has dissolved. Once the sugar becomes a deep amber color and begins to smoke, immediately remove from heat and sprinkle with salt.  Do not stir.  Pour the liquified sugar onto the prepared baking sheet.  Tilt and swirl the baking sheet to coax the liquid into a thin and (mostly) uniform layer.  Set aside to harden and cool. Once cool, peel the hardened candy off of the foil,  place  a large bag and crush into tiny bits by hand or with a rolling pin.

    for the ice cream base
    Distribute 1 cup sugar evenly over the bottom of a large heavy bottomed saucepan over medium-high heat, stirring with a fork to heat sugar evenly, until it starts to melt, then stop stirring and cook, swirling skillet occasionally so sugar melts evenly, until it is dark amber.

    Add 1 1/4 cups cream (caramel violent bubble and steam, and will seize up).  Cook, stirring, until all of caramel has dissolved. Stir.  And stir some more.  The lump of caramel will dissolve eventually. Transfer to a bowl and stir in sea salt and vanilla. Cool to room temperature.

    Meanwhile, Add milk, remaining cream, and remaining sugar to a small, heavy saucepan.  Over medium high heat, bring the mixture just to a boil  stirring occasionally.

    Lightly whisk eggs in a medium bowl.  Add half of the hot milk mixture in a slow stream, whisking constantly. Pour back into saucepan and cook over medium heat, stirring constantly with a wooden spoon, until custard thickens and coats back of spoon (do not let boil, you don't want scrambled eggs in your ice cream!). Pour custard through a fine sieve into a large bowl.  Add the cooled caramel and stir until well dissolved.

    Chill custard for  3-6 hours or preferably overnight.   Freeze custard in ice cream maker according to manufacturers directions.  After 10-15 minutes, add the praline pieces. Continue to freeze as per your ice cream maker.  Transfer to an airtight container overnight to further freeze the custard.

    The Review:
    Izzy's ice cream has an incredible following here in the Twins Cities.  Their salty caramel is one of the hottest sellers...wonderfully and richly sweet with that divine burnt sugar taste.  Yet with a surprising burst of salt to off set the sweet sweet ice cream.

    Sadly I have never tried Izzy's salted caramel.

    If this homemade ice cream is any resemblance of Izzy's, no wonder the flavor is so popular!  It was so rich; one scoop a serving was more than enough to sate a sweet craving.  The praline bits added a wonderful bit of crunch.  Dulce de leche comes to mind.  It is pure bliss...