Showing posts with label sugar. Show all posts

Wednesday, December 17, 2014

Chocolate Lace Sandwich Cookies (Brussels)


Photo by Heather Hanson 
 

Beligan beers and chocolate are a favorite pairing of ours, especially a dubbel. When I came across this recipe, I was sure I had a treat on my hands. Do the cookies look familiar? They do bear a striking resemblance to a popular brand-name cookie named after the capital of Belgium. It seemed only fitting to pair them with a Belgian style beer!

These cookies are one of the more challenging ones I've made to date. The first batch turned out perfectly: an even golden brown, beautiful lacing, wonderfully crisp. Only they had melded into one large cookie. The second batch, I had halved the recipe, but forgot to halve the flour, resulting in a very different, albeit tasty, cookie. The third batch I rolled instead of dropped and as a result the cookies didn't spread as thin as they should have. The fourth batch burned. Once they start to caramalized, they brown quickly! The fifth batch finally yielded something close to the desired result, but nothing nearly as pretty as the ones at Two Peas. But they tasted wonderful.

So what did I learn?

3/4 tsp is really 3/4 tsp. Any larger you risk one giant cookie as they meld together.

Space them FAR apart. I ended up making 10 per sheet to give the cookies ample room to spread.

Drop the dough, don't roll it. Rolling compressed the batter and the cookies did not spread evenly thin. The edges burn before the center was done as a result.

Mix the sugars and butter well before adding the dry ingredients. The dough comes together very fast anyway, so not point in rushing by trying to throw everything into the same bowl as once. You'll achieve that wonderful brittle like texture if you dirty that extra bowl.

Parchment paper or silpats are a must.

Watch the cookies closely during the last 4-5 minutes of baking. Once they spread, they caramelize fast. Be prepared to yank them out the oven the moment they look uniformly golden.

And over course, enjoy! Even the accidents were incredibly tasty!
 

Recipe adapted from Two Peas and Their Pod

Yields 20 sandwich cookies

Ingredients
  • 1/3 cup melted butter
  • 2 Tbsp heavy cream
  • 2 Tbsp light corn syrup
  • 1 tsp vanilla extract
  • ½ cup granulated sugar
  • ½ cup flour
  • ½ cup old-fashioned oats
  • ½ tsp cinnamon
  • ¼ tsp baking powdered
  • pinch of salt
  • 2 oz dark chocolate, melted

Preparation
  • Preheat the oven to 375 degrees F
  • Line several baking sheets with parchment paper. Set aside.
  • Whisk together the butter, cream, corn syrup, and vanilla extract. Beat in the sugar until smooth.
  • In a separate bowl, combine the flour, oats, cinnamon, baking powder and salt. Slowly mix the flour mixture into the butter mixture until just combine.
  • Drop dough by the scant teaspoon onto the prepared baking sheets, leaving at least 3 inches between cookies. They will spread a lot as they bake. 10-12 cookies per sheet is ideal.
  • Bake for 8-10 minutes, checking after the 6 minute mark. Remove them when they are a deep amber on the edges and golden brown in the center. The cookies will begin to brown very quickly once they spread.
  • Allow to cool slightly on the baking sheets and then transfer cookies to a wire rack to cool completely. They will crisp up as they cool.
  • Pair up cookies of similar size and shape. Spread one cookie with a thin layer of melted chocolate. Top with the second cookie, gently pressing together. Repeat with remaining pairs.

Thursday, December 11, 2014

Viennese Pecan Crescents


Christmas cookie season is upon us! I am working again with Boom Island Brewing Company to pair up these festive treats with each of their beers. But even if you aren't a beer person, these cookies are sure to please. Buttery shortbread, rich pecans and a healthy dusting of powdered sugar...what's not to love!  The shaping of these cookies is a tad tedious, but worth the extra time. And after these cookies are baked, they freeze beautiful so you can happily enjoy them throughout the holiday season.

Recipe adapted from Gale Gand

Yields about 5 dozen cookies

Ingredients
  • 1 c unsalted butter, softened
  • ¾ c sugar
  • 1 tsp vanilla extract
  • 2 ½ c all-purpose flour
  • 1 c finely ground pecans
  • powdered sugar for coating

Directions
  • Cream together the butter, sugar, and vanilla and beat until fluffy. Gradually add the flour and nuts and mix until just combined. The dough with be very crumbly.
  • Shape the dough into tiny crescents using about 2 tsp of dough for each cookie. Place on an ungreased sheet pan in rows, leaving 1 inch in between. Chill the cookies for at least one hour.
  • Preheat oven to 350 degrees F.
  • Bake about 12 to 15 minutes, or until the edges begin to brown.
  • Allow cookies to cool slightly and then dredge in powdered sugar to coat.

Friday, July 11, 2014

Pecan Meringue Cookies


Have you made much ice cream or custard this summer? This simple meringue cookie will help use up some of those egg whites.

adapted from Elise Bauer's recipe on Simply Recipes

yields about 2 dozen cookies

The Ingredients:
1 cup whole pecans
3 egg whites, brought to room temperature
pinch of salt
1 cup of granulated sugar
1 tsp white vinegar

The Process
Preheat the oven to 250 degrees F. Place pecans in an oven proof dish and bake until lightly toasted, about 10 minutes. Using a blunt object, smash pecans until broken into small pieces. Set aside.

Increase the oven temperature to 300.

Add egg whites to the bowl of a stand mixer with the whisk attachment. Add salt. Whisk the eggs on low, gradually increasing the speed until frothy and soft peaks begin to form, about 2 to 3 minutes.

Increase the speed to medium-high, and slowly add the sugar 2 Tbsp at a time. Allow each addition to thoroughly combine before adding the next. Continue to whisk the eggs and sugar for a 2-3 minutes. Add the vinegar to the bowl. Increase speed to high and whisk until the mixture is glossy and stiff peaks form, 4-5 minutes.

Gently fold in the pecan pieces. Drop by heaping teaspoons onto parchment lined baking sheets.

Place the baking sheet in the preheated oven, close the door and turn the oven OFF. Leave them in the oven overnight to dry. In the morning the cookies should be crisp on the outside, but light and airy on the inside. If they are a little marshmallowy or chewy on the inside in the morning, allow them dry out for a few more hours.

Store at room temperature in an air tight container.

Tuesday, May 6, 2014

Beer Ice Cream


I've been tinkering around with beer ice cream for a while. How incredibly rude to not have shared this goodness until now.

One of my favorite beers to use is a Belgian dubbel ...rich and malty with hints of toffee, figs, and plums coupled with those intoxicating yeasty esters and phenolics of banana and clove. In this instance I opted for one of our lovely local breweries in Minneapolis, Boom Island Brewing Company, and their Hoodoo Dubbel.


But don't let my recommended favorite prevent you from playing around. Any malt forward beer will work. Think stouts and porters, Scottish ales, browns, bocks, and milds. Moderate alcohol levels are preferred. Too low and the ice cream can freeze rock solid. Too much and you have soft serve on your hands (not necessarily a bad thing). An ABV in the 6%-9% range is ideal. Don't let that prevent you from using your favorite barleywine, wee heavy, Russian imperial stout or old ale though...but plan reducing the full amount of beer down, or using less beer overall to ensure the ice cream firms up.

Avoid hoppy beers...the bitterness is intensified when the beer is reduced. But rest assured, I am working on a way to turn your favorite IPA into a frozen treat. It may or may not involve actual hops in addition to the beer...

Adapted from America's Test Kitchen

yields about 1 quart

The Ingredients:
12 oz malt forward beer, divided
1 tsp vanilla
1/2 to 3/4 cup sugar
3 egg yolks
1/8 tsp salt
2 cups heavy cream

The Process:
In a medium saucepan over medium-high heat, add 10 oz of the beer, reserving the remaining 2 oz. Reduce to about half, stirring to prevent the beer from foaming up. Combine the reduced beer to the reserved 2 oz. Add the vanilla and set aside to cool.

Set up an ice bath of cold water and ice in a large bowl. Set fine mesh strainer over a medium-sized bowl and position into the ice bath. Set aside.

In a clean, medium saucepan, whisk together the egg yolks, sugar and salt until smooth. Whisk in the cream until well combined. Set over medium-low heat and cook, stirring constantly, until the custard begins to thicken. Keep the stovetop low and continue gently stirring to avoid inadvertently making scrambled eggs. Bring the custard up to 180 F and promptly remove from heat.

Carefully strain the custard through the fine mesh strainer into the bowl set over the ice bath. Pour slowly...you don't want to capsize the custard into the ice bath below. Whisk in the reduced beer. Allow the custard to cool to room temperature, stirring periodically. Remove from the ice bath, cover, and let chill in the refrigerator for at least 8 hours, preferably overnight.

Using an ice cream maker, freeze the chilled base according to the manufacturer's directions. Transfer the ice cream to a 1.5 qt container and allow to set in the freezer for an additional 24 hours.

Tuesday, April 15, 2014

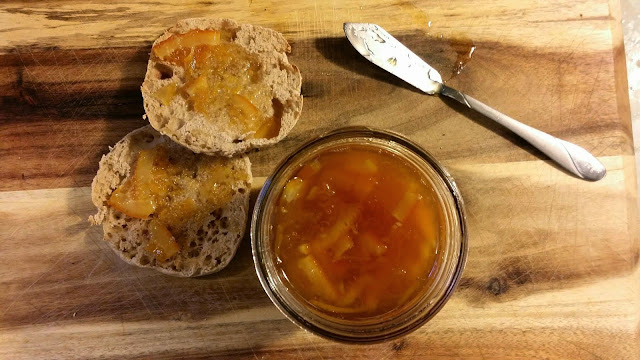
Hefeweizen Marmalade

Stir a little bit of booze into your breakfast! A marmalade has been on my "to create" list for a while now. The arrival of the Beeroness' cookbook finally prompted me to plough ahead. The chance to add beer or bourbon to a recipe is usually all the motivation I need.

Jackie recommends a hefeweizen, preferably one with notes of citrus and clove. A witbier, traditionally brewed with corriander and orange peel, would compliment the marmalade nicely, but I fear the more subtle beer notes would get lost among the sugar and citrus. Serve that one alongside for a lovely food pairing instead. Many pale ales will fit the bill, especially those with strong citrus notes. A saison would add a twist of spice. Steer clear of any uber hoppy beers, as the extensive boiling times may make for a very bitter marmalade.

I opted for Widmer's Hefe

recipe adapted from The Craft Beer Cookbook by Jacqueline Dodd

yields about 2 pints

The Ingredients:
2 - 12 oz bottles hefeweizen
1 lb (about 2) navel oranges
4 1/2 cups granulated sugar
1 Tbsp whole cloves
1/2 lemon, juiced and zest finely grated

The Process:
Thoroughly scrub the oranges. Using a mandolin or a very sharp knife, slice the oranges into 1/8-inch rounds. Remove and discard any seeds as you go. Stack the slices and cut into quarters or sixths.

Wrap the cloves in a cheesecloth bundle tied with kitchen twine.

In a large, heavy-bottomed saucepan, add the beer, oranges, sugar, and clove packet. Bring the mixture up to a simmer (about 190°F). Simmer for 5 minutes. Cover, remove from heat and let stand overnight.

Remove and discard the clove packet. Bring the mixture to a gentle simmer, about 180°F, and maintain for 1 1/2 to 2 hours. The orange rind should be tender and begin to turn transculent. After 2 hours, add the lemon juice and zest. Return the mixture to a gentle simmer, between 185°F and 200°F, for 20-30 minutes.

Place a small plate in the freezer.
Bring the orange mixture to full boil, and stir continually, until it reaches about 222°F.  Test the readiness of the marmalade by placing a teaspoon of the mixture onto the chilled plate and allowing it to sit for 30 seconds. Tilt the plate. The mixture should be a soft gel that moves slightly and will wrinkle when touched. If mixture is thin and runs easily, continue to boil until the marmalade reaches the gel stage.
Ladle into sterile jars, leaving 1/4-inch head-space. Gently stir to remove air bubbles. Wipe rims of jars clean and top with lids, screwing them finger tight (not TOO tight). Submerge filled jars in a water bath of boiling water and boil for 5-7 minutes (process times may vary by elevation).

Remove from water bath and allow to cool undisturbed for 12-24 hours.

Wednesday, February 6, 2013

Classic Lemon Bars

Apparently there was a fairly large sporting event last Sunday.  I must have missed it.  Ross and I spent most of the day in the car driving back to Minneapolis from Milwaukee.  And then for some reason I was hit with the incredible need to bake dessert, but nothing too sweet.  The smooth slightly tart flavor of these lemon bars hit the spot perfectly.

I love the light buttery crust...practically melt in your mouth.  Layered with a custard of the perfect balance of tart and sweet.  These bars really should be my go to dessert on a bad day.  I always have the ingredients on hand and they take so little to whip up.

You don't really mess with a classic.

Recipe of courtesy of Taste of Home

yields 9 bars

The Ingredients:
for the crust:
1 cup flour
1/4 cup powdered sugar
1/2 cup salted butter, softened

for the filling
2 eggs
1 cup sugar
2 Tbsp flour
1/2 tsp baking powder
2 Tbsp lemon juice
1 tsp lemon zest

additional powdered sugar for dusting

The Process:
In a medium bowl, cut the butter into the flour and powdered sugar until the mixture resembles course crumbs.  Press into an un-greased 8 x 8 inch baking dish.  Bake for 20 minutes or until golden brown.

Meanwhile, whisk the eggs and sugar together until smooth.  Add the flour, baking powder, juice and zest.  Stir until just combined.  Pour the filling over the baked crust.  Bake uncovered for 20-25 minutes, or until the filling is set and beginning to brown.

Transfer the pan to a wire rack to cool.  Cut into bars and dust with powdered sugar just prior to serving.

Sunday, January 13, 2013

Beer Pretzel Toffee


Last year I fell in love with Audra's family toffee recipe.  Though that isn't difficult to do.  Heath bars have long been a guilty pleasure of mine on a bad day.

And then Jackie upped the ante by throwing beer and pretzels into the mix.  I dare you not to try this.

Adapted from thebeeroness.com

The Ingredients:
for the toffee
1 lb salted butter
2 cups dark brown sugar
1 cup ale*

for the topping:
12 oz bittersweet baker's chocolate
4 oz ale
2 cups crushed pretzels

I highly recommend Third Street Brewery's Sugar Shack or Langunita's Brown Shugga' if you can find them.

The Process:
Line a cookie sheet with parchment paper and set aside. 

In a large heavy-bottomed pot over high heat add the brown sugar, butter and ale.  Use a much much bigger pot than you feel you need, the syrup will triple in volume. Stir until the mixture starts to boil. Allow to boil untouched until the mixture reaches about 230 degrees. Stir occasionally, scraping down the sides of the pot until the syrup reaches 290 degrees. It may start to smell like burning.  Don't panic, it is burnt sugar.  Let it reach 290.  Pour the hot syrup onto the prepared cookie sheet.  Shake gently to help the toffee spread into an even layer and allow to cool.

Coarsely chop the baker's chocolate and add to a large bowl. In the microwave, using 20 to 30 second increments, heat the beer until hot but not boiling. Pour the hot beer over the chocolate  and stir until well combined and melted.

Pour the chocolate over the cooled toffee and smooth out in an even layer. Sprinkle the crushed pretzels over the chocolate.  Gently press the pretzel bits into the chocolate.   Chill until the chocolate has set, about 1 hour. Cut into pieces.

Sunday, August 5, 2012

Bacon Jam

Yes.  You read that right.  Bacon.  Jam.  As in spreadable bacon.

Oh...and there is beer in there mix as well.

yields one pint jar

adapted from The Beeroness


The Ingredients:
12 oz bacon (8-10 strips)
4 cloves of garlic, minced
1/2 cup onion
8 oz amber ale
1/4 cup apple cider vinegar
3/4 cup brown sugar

In a large saucepan or dutch oven, fry the bacon until crispy.  Work in batches as necessary.  Alternatively, you can bake or microwave the bacon to the desired level of crispness.  Remove the bacon from the pan and blot off any excess drippings.  Allow to cool and then roughly chop. Reserve about 1 Tbsp of the bacon drippings and discard the rest.  

Add the dripping to the  pot along with the onions.   Cook the onions over medium-high heat until the onions become translucent and tender, about 3 minutes. Add the garlic and stir for about 30 seconds. Slowly add the amber ale and vinegar, scraping the bottom of the pot to deglaze.  Add  the brown sugar and the bacon.  Reduce the heat to simmer a simmer and cover, keeping the lid slightly tilted or offset to allow steam to escape.  Stir occasionally and cook until the mixture is  reduced to a thick and syrupy consistency, about 45-60 minutes. Transfer to a food processor and pulse until a coarse paste is formed.

Serve at room temperature.

Will keep in the refrigerator for about two weeks...if it lasts that long...

The Review:
There will be skeptics.  Let them be suspicious.  It will leave far more of the salty, meaty, slightly sweet and boozy wonderfulness all for you...

We tried it on burgers.  We tried it on biscuits.  We refrained from eating it by the spoonful.

Friday, July 20, 2012

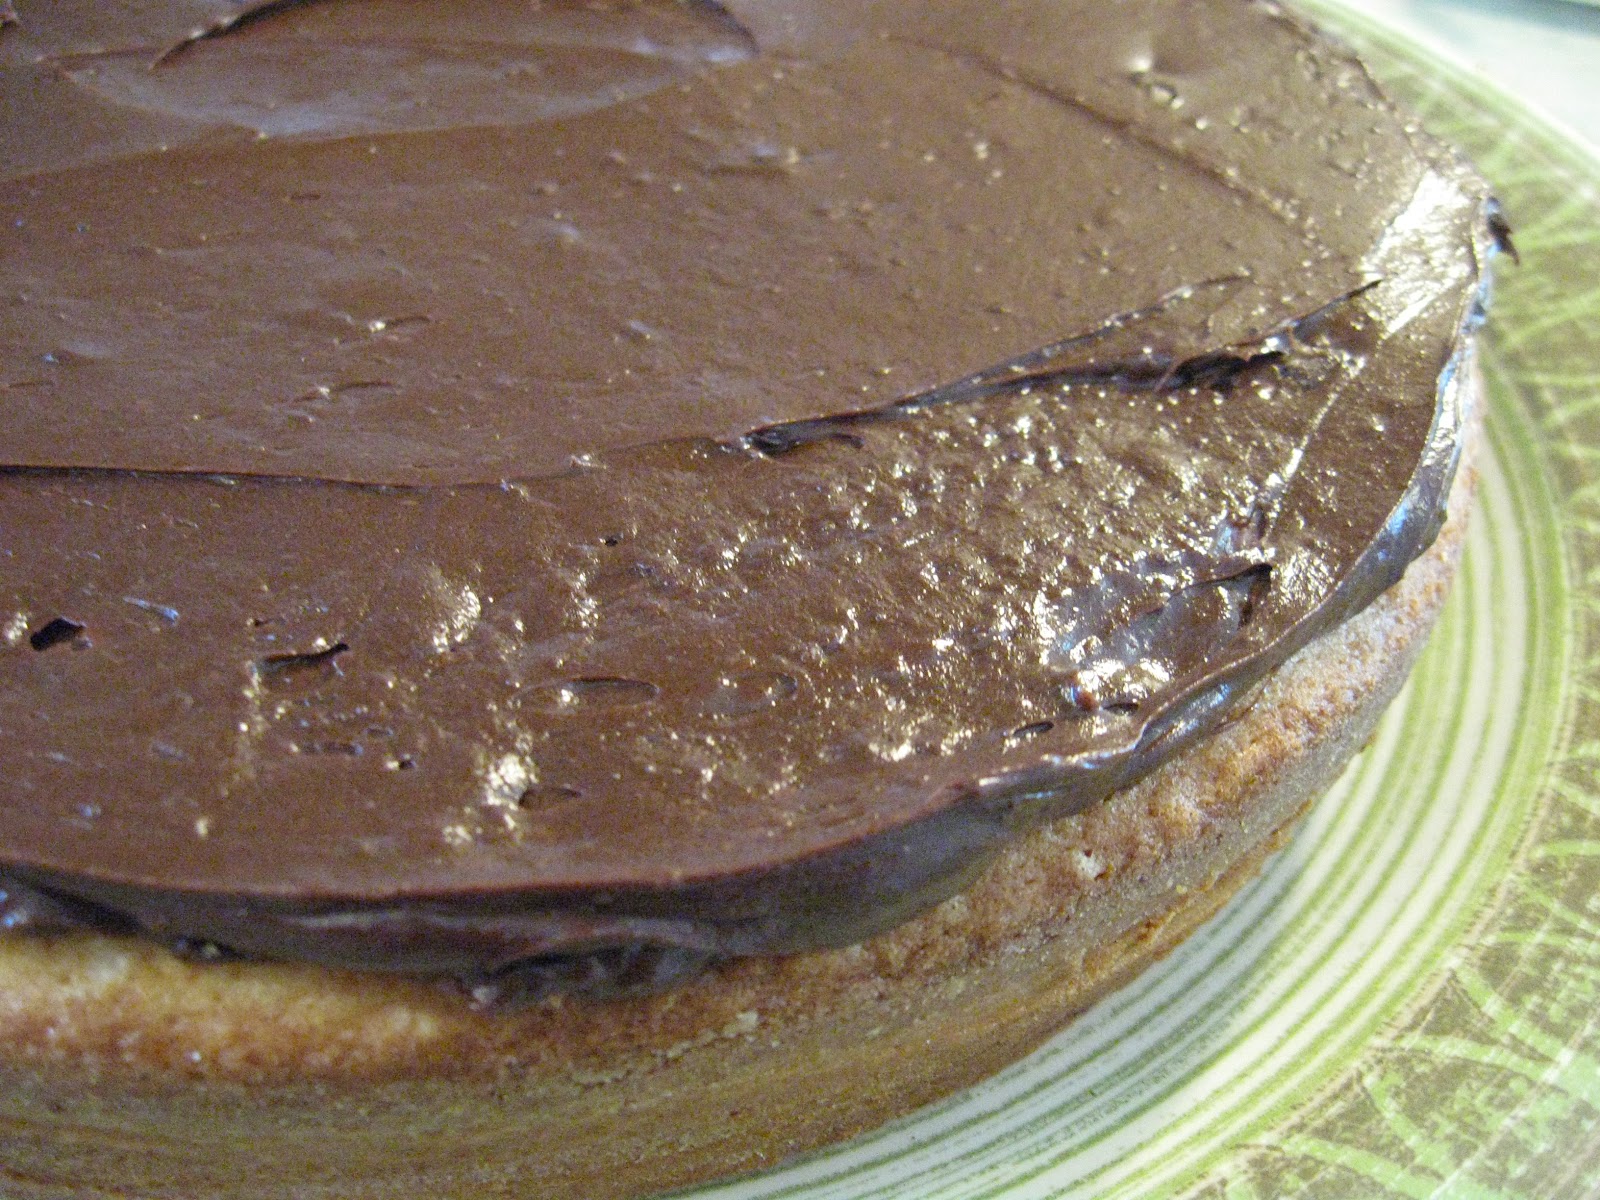
Classic Yellow Cake with Chocolate Frosting


What sort of dessert do you request on your birthday?  For me, the cake of choice was usually yellow with chocolate frosting.  Apparently great minds think alike.  After much poking and prodding Ross finally requested a specific dessert.  Low and behold, it was the classic yellow cake with chocolate frosting.

I knew any old box mix would not do the big day justice (sorry Betty Crocker and Pillsbury!)  The cake had to be made from scratch.  Thankfully a post from Liz at the Skinny Chick Can Bake caught my eye.

Holy heaven, is this cake a winner!

adapted from Martha Stewart via That Skinny Chick Can Bake

yields one 2-layered cake

The Ingredients:
for the cake

1 1/2  cups all-purpose flour
1 1/2  cups cake flour 
1 Tbsp baking powder
1/2 tsp salt
1 cup unsalted butter ( 2 sticks), room temperature
1 3/4 cups sugar
4 eggs
2 tsp vanilla
1 1/4 cups milk


for the frosting:
1 lb semi-sweet chocolate, chopped
6 Tbsp cocoa powder
6 tablespoons boiling water
1 1/2 cups unsalted butter (3 sticks),  room temperature
1/2 cup powdered sugar
1 tsp vanilla
The Process:
for the cake:
Preheat the oven to 350.  Butter two 9-inch cake pans.  Line the bottom with parchment paper.  Butter the parchment and dust the entire pan with flour.  Set aside. 
In a medium bowl sift together the flours, baking powder and salt.  Set aside.
In a large bowl cream together the  butter and sugar until fluffy and well combined, about 4 minutes.  Beat in the eggs one at a time, making sure each is well incorporated before adding the next.  Mix in the vanilla.
With the mixer set to low, add one third of the flour at a time, alternating with the milk.  Mix well after each addition.
Divide the batter between the two prepared pans.  Bake in the preheated oven for 30-35 minutes or until a toothpick inserted into the center of the cake comes out clean.  
Allow to cool in the pans for 10 minutes.  Invert the pan to remove the cake from the pans and peel off the parchment paper.   Allow to cool completely on wire racks.
for the frosting:
In a large microwaveable bowl, melt chocolate in microwave, stopping and stirring at 30 second increments until the chocolate is melted and smooth.  Set aside to cool to room temperature, about 15 minutes...do not skip the cooling, especially on a hot day.  The frosting will not be a spreadable consistency otherwise.

Whisk the cocoa powder into the boiling water until smooth.

In a large bowl, cream together the butter and powder sugar until fluffy, about 2-3 minutes.  Beat in the vanilla.  Add cooled chocolate and mix until well combined.  Add cocoa mixture and beat until the desired consistency is achieved.  

Assemble and frost the cake as desired.

The Review:
Ross had the privilege of sampling as I mixed everything.  It was his cake after all.  I had to ensure it would meet his approval.  Upon sampling the batter he exclaimed, is that the frosting! It's so good!"  The wheels are churning for later.  Has anyone ever attempted a cake batter frosting before?

The cake itself baked up beautiful and sat eagerly awaiting it's chocolatey covering.  

Here I ran into a few problems.  The recipe as written is not the problem in the slightest.  The problem stemmed from the sheer quantity of butter on a sweltering July day.  No amount of cooling outside of the refrigerator was going to keep the frosting from turning soupy during my feeble attempts at frosting (I'm getting better, but man, what I wouldn't give for an off set spatula!)

The problem I ran into with chilling the ingredients between steps was it cooled off TOO fast.  Rock hard to soupy to rock hard again.  I managed.  And the cake looked stunning in the end.  The finish beauty hung out in the fridge until the big moment.  I broke 4 candles trying to poke the candles into the chilled frosting.  30 candles ablaze, the frosting wasn't so stiff anymore!

But even better than the look of the cake was the taste. Having sampled along the way, I warned people about the sugar bomb they were about to partake in.  Only a few heeded the warning.  Everyone loved it.  There was nary a crumb left.  Only it is truly, very rich and very sweet.  A little bit goes a long way.

Next time...cupcakes...

Some of us need the built in portion control.
 

Tuesday, May 8, 2012

Caramel Ice Cream


A another huge thanks to Audra at the Baker Chick for drawing my attention to yet another amazing recipe.  She makes no secret about her love of salty caramel concoctions.  My affair with salted caramel is a little more closeted.  But this recipe needs to have its praises sung.

The caramel ice cream is also my first attempt at the more decadent, thicker custard-style ice cream.  In addition to the richer consistency, the custard-style has the benefit of leaving me with several egg whites on hand.  A pavlova or meringue may be in the future.

adapted from Gourmet's and  David Lebovitz's recipes via the Baker Chick

yields about 5 cups

The Ingredients:
For Caramel Praline:
1/2 cup sugar
3/4 teaspoon sea salt, such as fleur de sel

For the Ice Cream Base:
1 1/4 cups sugar, divided
2 cups heavy cream, divided
1/2 tsp flaky sea salt
1/2 tsp vanilla extract
1 1/4 cup whole milk
4 egg yolks

The Process:
for the caramel praline:
Line a baking sheet with aluminum foil, lightly misted with cooking spray.  Set near at hand.

In a medium heavy-bottomed saucepan, sprinkle the sugar in an even layer.  Heat the sugar over medium-high heat until the edges begin to melt. Use a heatproof utensil to gently stir the liquefied sugar from the bottom and edges towards the center.  Continue to gently stir toward the center, until all of the sugar has dissolved. Once the sugar becomes a deep amber color and begins to smoke, immediately remove from heat and sprinkle with salt.  Do not stir.  Pour the liquified sugar onto the prepared baking sheet.  Tilt and swirl the baking sheet to coax the liquid into a thin and (mostly) uniform layer.  Set aside to harden and cool. Once cool, peel the hardened candy off of the foil,  place  a large bag and crush into tiny bits by hand or with a rolling pin.

for the ice cream base
Distribute 1 cup sugar evenly over the bottom of a large heavy bottomed saucepan over medium-high heat, stirring with a fork to heat sugar evenly, until it starts to melt, then stop stirring and cook, swirling skillet occasionally so sugar melts evenly, until it is dark amber.

Add 1 1/4 cups cream (caramel violent bubble and steam, and will seize up).  Cook, stirring, until all of caramel has dissolved. Stir.  And stir some more.  The lump of caramel will dissolve eventually. Transfer to a bowl and stir in sea salt and vanilla. Cool to room temperature.

Meanwhile, Add milk, remaining cream, and remaining sugar to a small, heavy saucepan.  Over medium high heat, bring the mixture just to a boil  stirring occasionally.

Lightly whisk eggs in a medium bowl.  Add half of the hot milk mixture in a slow stream, whisking constantly. Pour back into saucepan and cook over medium heat, stirring constantly with a wooden spoon, until custard thickens and coats back of spoon (do not let boil, you don't want scrambled eggs in your ice cream!). Pour custard through a fine sieve into a large bowl.  Add the cooled caramel and stir until well dissolved.

Chill custard for  3-6 hours or preferably overnight.   Freeze custard in ice cream maker according to manufacturers directions.  After 10-15 minutes, add the praline pieces. Continue to freeze as per your ice cream maker.  Transfer to an airtight container overnight to further freeze the custard.

The Review:
Izzy's ice cream has an incredible following here in the Twins Cities.  Their salty caramel is one of the hottest sellers...wonderfully and richly sweet with that divine burnt sugar taste.  Yet with a surprising burst of salt to off set the sweet sweet ice cream.

Sadly I have never tried Izzy's salted caramel.

If this homemade ice cream is any resemblance of Izzy's, no wonder the flavor is so popular!  It was so rich; one scoop a serving was more than enough to sate a sweet craving.  The praline bits added a wonderful bit of crunch.  Dulce de leche comes to mind.  It is pure bliss...

Tuesday, April 24, 2012

Deceivingly Delicious Dry Rub and Mop Sauce


Get put the grill, smoker or broiler pan.  This dry rub and mop sauce was nearly life changing.  In my naive youth, my concept of BBQ was a rack of ribs or half a chicken served slightly charred, a little smokey and slathered in a heavy sweet red sauce.  Now I still enjoy a good squirt of Sweet Baby Rays at a family BBQ, but I've since learned that you needed smoother a good piece of meat...but you do need to compliment it.

the recipe is my own

yields enough rub and mob for 2 racks of ribs

Ingredients:
dry rub
1 tsp granulated garlic
1 tsp onion powder
1 tsp chili powder
1/2 tsp cinnamon
1/2 tsp cumin
1/2 tsp parika
1/2 tsp thyme
1 tsp ground pepper
1 Tbsp kosher salt
2 Tbsp brown sugar

mop sauce
1/3 cup cider vinegar
1/3 cup apple cider
1/3 cup brown sugar
2 Tbsp Dijon style mustard
1 Tbsp granulated garlic
1/2 tsp ground ginger


The Process:

For the rub, combine all of the ingredients in a small bowl and mix until well combined.  Apply the rub to chicken, beef or pork prior to grilling or broiling.

For the mop, in a medium bowl, whisk together all six ingredients until well combined.  Brush over the meat periodically while grilling or broiling.  Serve remaining mop on the side.

The Review:
Easy peasey.  Mix, rub, grill, mop, flip, grill, mop, serve.  Almost any cut of meat will work with this rub and mop combination.  Though I crafted it with lighter meat, particularly pork ribs and split chicken in mind.  I fear the mop may be a tad sweet for some beef cuts.  I'll rise to that challenge when I come to it.

In the rub, the cumin was the dominating flavor, but not too overpowering.  I personally adore cumin and prefer it over the go-to cayenne and chili powder...adds more depth without the heat.  But maybe that's not your cup of tea.  Maybe you need more chili powder.  Or perhaps turmeric is you thing.  Go for it.

While the rub laid an amazingly flavorful groundwork for the ribs, the mop elevated to mouth watering heights.  The brown sugar and apple cider was just sweet enough to cut through the dripping fat, and caramelize into was can only be described as meat candy.  Usually those charred little bits on the end are long ignored.  Not so here.  Meat candy I tell you.  The ginger warmed it up and complimented the sweetness.  And who doesn't love a bit of garlic.

With a mob and dry rub as flavorful as these, who needs to use BBQ sauce.  Not a single condiment was added to the dinner plates as we devoured the ribs and licked our fingers clean.   Baby back ribs were a huge success.  Next time around the chicken comes up to bat...


Tuesday, March 27, 2012

Clementines Confites

A while back I stumbled upon the most riveting story of young love, gluttonous gourmandise, deep longing and a touching hint of guilt. It was the story of one woman's first experience with clementines confites.  The story was a wonderfully bittersweet ode to the syrupy sweet recipe to follow. I have been day dreaming about these perfect orange globes ever since...with only my mind's eye to fuel the obsession, having never tasted them before.  The blog story was my first encounter with the candied fruit.  So finally, just over two weeks ago, the perfect little citrus spheres started their long and sweet journey in my kitchen.

To make my life easier, and because I largely use grams and liters when I'm dying fabric at work, I stuck with metric measures.  The recipe detailed below is for one pound, or approximately 454 grams, of fruit.  Scale the recipe up or down accordingly...keeping the ratios of fruit, sugar, and honey the same.  I found the exact amount of water didn't matter so much as long as there was enough liquid to keep the fruit fully submerged. 

Need a hand with the math?  Shoot me a message...I'll gladly help you out.

Adapted from Lucy's recipe at Lucy's Kitchen Notebook

yields 1 lb/454 grams of candied joy

The Ingredients:
Day One
454 grams clementines
500 grams sugar
200 grams honey
water

Every Other Day Through 2 weeks
an additional 100 grams of sugar*

The Process:
Day One:
Pick the firmest, ripest fruit.  Scrub thoroughly to remove any dirt, waxes or impurities, leaving the skin completely intact.  With a long thin needle or a fine skewer, pierce each fruit deeply all over.  Liberally.  When you believe the fruit as been stabbed enough, pierce it another several dozen times. 

Select a large saucepan that will comfortably fit the fruit in a single layer.  Add the fruit and fill the saucepan with enough water to cover the fruit by 1 inch.  Bring the water to a boil, reduce heat ans simmer for 15-20 minutes.  The fruit should still be firm to the touch.  Using a tongs or slotted spoon, remove the fruit to a large, deep non-reactive (i.e. stainless steel or glass) bowl or jar. 

Add the 500 grams of sugar and 200 grams of honey to the liquid in the saucepan.  Stir to dissolve the sugar and bring the syrup to a rolling boil.   Promptly remove from heat.  Pour the hot syrup over the clementines, weighing them down with a plate if necessary to keep them fully submerged.

Loosely cover the bowl with plastic wrap and let sit undistributed for two days.

Every Other Day:
Remove the clementines from the bowl and transfer the syrup to a saucepan.  Add 100 grams of sugar to the syrup.  Bring to a rolling boil, remove from heat, pour over the clementines loosely cover and let sit for another 2 days.  Repeat this process every 2 days,  adding 100 grams of sugar to the liquid each time for two weeks.  The liquid will thicken and reduce slightly with each addition.  After two weeks has passed, transfer the clementines to a jar cover with their syrup and store in a cool dry place.  They will keep for as long as a year, getting better with age.

*all in all approximately 1200 grams or 2.6 pounds of sugar will be needed per pound of fruit

The Review:
Anticipation can be a blessing and a curse.  Your mouth waters at the thought of biting into a concoction after lovingly tending to it over the course of several days.  Sometimes the anticipation is just enough to whet the appetite, and the final product is beyond the expectations...all of the time and energy spend making each bite all the more rewarding.

Sometimes the anticipation builds and build and builds until it reaches a crescendo that the end result just doesn't life up to.  No amount of justifying or reasoning can bring the dish up to level it failed to reach in your mind.  Each bite becomes bittersweet.  You want so badly to love it, after everything that went into it, but no...expectations had been built up too high...

So where did these sugared citrus fall?  Right in the middle.  The first bite yielded a surprising bit of tart from the peel...not quite the candied peel flavor I was expecting.  The flavor was excellent.  Subtle orange without being overly sweet, despite the vast amount of sugar.  The texture, oh the texture....

This is where the treat failed.  Perhaps is was the variety of clementines.  The market is sadly overrun every year with tiny orange beauties boasting seedless enjoyment, ease of peeling and even sweeter flavors.  As the fruits as thus "perfected" they become genetic shadows of what they had been.  The insides had pulled back from the peel and had almost a dry feel...the pulp and flesh having shriveled slightly allowing the membranes to dominate.  None of the bitterness usually found in the membranes and pith was present, but the texture was a surprising let down.

I do attribute that largely to the fruit.  More time should have been spend on selecting the heaviest, firmest and most fragrant of the bunch.  The batch should have been started almost immediately...the four days on the counter may have allowed them to dry out too much before their sugar bath began.

But where else did this recipe succeed?  In the syrup, hands down.  After filling the jars with enough syrup to cover the fruit I still had nearly a quart of the golden liquid left.  It had a wondrous honey like consistency and a divine, yet subtle citrus flavor.  So far the syrup has paired well stirred into jasmine tea in lieu of honey, drizzled on top of star fruit and kiwi to compliment their tartness and added to oatmeal for a touch of sweetness.

The uses seem endless...the basis for glazes and marinades for meats, in place of simple syrup in cocktails, to top off ice cream, or to lightly sweeten frosting, filling or whipped creams...perhaps just by the spoonful...


I plan on letting the orange gems age a while longer before I exact the next one from the jar.  But in the meantime a little drizzle of the that syrup...

Sunday, March 25, 2012

Apple Pie Waffles with Cinnamon Whipped Cream and Pie Crust Crumb

Sunday morning waffles strike again!  I've been toying with the concept of an apple waffle for a while.  The waffle itself didn't seem too much of a challenge.  I knew I wanted a buttermilk or yeast base.  Finely chopped apples and a touch of cinnamon would provide the essential flavors.  Applesauce has long been used as a substitute for oil in baking...adding yet another layer to the waffles.  

But they needed something more.  Inspiration came in the form of Milk Bar Mondays.  Several fellow food bloggers have taken on the challenge of baking their way through Christina Tosi's Momofuku Milk Bar Cookbook.  As a result, one morning my news feed was filled with this:


It was divine.  It was decadent.  It had layers of apple pie filling and pie crust crumb.  I had my inspiration to take the apple pie waffles to the next level.  

Apple waffle.  Sauteed apple topping.  Cinnamon Whipped Cream.  And a sprinkling of pie crust crumb.  

I almost went as far as to add a drizzle of homemade caramel sauce as well...but let's not get too carried away!

A huge thank you to Audra, Cassie, Erin, Krissy Nicole and Jacqueline for baking up the lovely concoction that pushed this Sunday morning waffle just a little bit further.

Pie crust crumb and apple pie filling adapted from the Momofuku Milk Bar Cookbook
Waffle and whipped cream recipes are my own.

yields 8-10 eight inch waffles 

The Ingredients:
for the pie crust crumb:
1/2 cup all purpose flour
2 tsp granulated sugar
1/4 tsp kosher Salt
3 Tbsp unsalted butter, melted
1 1/2 tsp water
For the apple pie filling:
juice of 1 lemon
2 medium granny smith apples
1 Tbsp unsalted butter
2/3 cup light brown sugar, tightly packed
1/2 tsp ground cinnamon
1/4 tsp kosher salt

for the waffles:
3 cups all-purpose flour
1 Tbsp baking powder
1 tsp baking soda
1 tsp salt
1/3 cup brown sugar
1/2 tsp cinnamon
1/2 cup applesauce
3 Tbsp unsalted butter, melted
4 large eggs
1 teaspoons vanilla extract
2 1/2 cups buttermilk
1 apple, peeled and diced

for the cinnamon whipped cream:
1 cup heavy whipping cream
1 Tbsp sugar
1/2 tsp ground cinnamon

The Process:
for the pie crust crumb:
Heat the oven to 350 degrees F

In a small bowl combine the flour, sugar, and salt until well mixed.  Cut in the butter with a fork, pastry cutter or your fingers. Add water and blend until the mixture starts to come together in small clusters.

Spread the clusters on a parchment lined baking sheet  Bake for 25 minutes, checking halfway through baking to stir and break up larger crumbs.  The crumbs will be golden brown and still slightly moist to the touch. Set aside to cool.


When completely cool, transfer the crumb to a small serving dish.

for the apple pie filling:
Fill a medium bowl halfway with cold water and add the lemon juice. Peel the apples and cut into bite size chunks (quarter, then cut each quarter into thirds). Add the apples to the lemon water as they are cut to retard browning and to keep the apples pert.

In a medium saucepan over medium-high heat, combine the butter, brown sugar, cinnamon and salt. Stir until the butter is melted. Drain the apples and add them to the saucepan. Bring the mixture to a gentle boil, stirring to coat the apples. Reduce the heat to low and simmer the apples gently for 5 to 10 minutes, or until the apples are tender and the sauce has thicken.  

Transfer to a serving bowl and set aside.

for the cinnamon whipped cream:
In a chilled bowl combine whipping cream, sugar and cinnamon.  Beat with chilled beaters on medium speed until soft peaks form.  Set aside in the fridge until ready to serve.


for the waffles:
Preheat the oven to 200.  Preheat and lightly oil the waffle iron according to the manufacturers directions.

In a large mixing bowl sift together the flour, sugar, baking powder, baking soda, cinnamon and salt.  

In a medium bowl whisk together the eggs, buttermilk, applesauce, butter and vanilla.  Add the wet to the dry, stirring until just incorporated.

Gently fold in the diced apple, stirring until the apple is just distributed.  Do not over mix.

Ladle the batter into the waffle iron (mine uses a little over 1/2 cup of batter per waffle) and cook according to the waffle iron manufacturers directions. Transfer waffles to rack in oven to keep warm and crisp. Make more waffles in same manner.

to assemble:
Place a waffle on each plate, spoon about 1/4 cup of apple pie filling on top. Dollop a generous spoonful of whipped cream on top. Sprinkle with crumb. Devour.

The Review:
Wow. With a post this long already, I'd hate to keep you from what ended up being an absolutely amazing breakfast. Go. Enjoy.

Saturday, March 17, 2012

Irish Cream Sandwich Cookies

Happy St Patrick's Day!  With all of the heavy corned beef and root vegetables dished up today, alongside dark stouts, and generous pours of whiskey, I was in need of something with a touch of sweet to cut through all of the richness. The now ubiquitous Guinness cupcakes would be far, far too heavy...and given their currently popularity these last years, the chance of someone bringing over a dozen or so was very, very high.

When Meghan posted these Bailey's sugar cookie sandwiches, I was pretty sure I had found the perfect dessert option.  Lightly, slightly sweet, gone in a few bites and still kissed with booze.

Adapted from Meghan's  recipe at Buttercream Blondie 

yields three dozen 2-1/2 inch sandwich cookies and three dozen mini shamrock cutouts.


The Ingredients:
for the cookies
2 sticks unsalted butter, room temperature
1 1/2 cups sugar
1 egg
1 egg yolk
1 tsp vanilla extract
4 cups flour
1 Tbsp baking powder
1/2 tsp salt
1/2 cup Baileys Irish Cream

for the filling:
2 sticks unsalted butter, room temperature
2 1/2 cups powdered sugar
6 Tbsp Irish Cream
1-2 tsp instant espresso powder

optional:
gel frosting
green sprinkles


The Process:
for the cookies:
In a large bowl cream together the butter and sugar until light and fluffy.  Add the egg and egg yolk and mix until smooth. Mix in vanilla extract.


Sift the flour, salt, and baking powder together in a second bowl.  Add the flour to the butter, alternating with the Irish cream.  Mix until just combined. 

Gather the dough into a ball and wrap in plastic wrap.  Chill for at least one hour, or overnight.

Roll out the dough and cut out 72 two and a half-inch circles.  Gather and re-roll dough as necessary.  Set aside half of the cookies.  In the remaining half, cut a small shamrock out to of the center, using an 1 1/2" shamrock cutter.  Reserve the shamrocks.

Arrange the cookies on several baking sheets, spacing them at least one inch apart.  Chill for at least 30 minutes before baking to help the cookies keep their shape.

Preheat the oven to 350.  Bake the solid circle for 12-13 minutes, rotating the baking sheets 180 degrees about halfway through baking.  Start checking them after 10 minutes.  Bake the cut-outs and shamrocks for 7-10 minutes, turning 180 degrees halfway through baking.  The cookies are done once they have puffed slightly and the edges turn a light gold.

Remove cookies to a cooling rack.

Allow to cool completely before assembling.

for the filling:
Cream together the butter and sugar, adding the a little sugar at a time to avoid a powdered sugar cloud. Dissolve the instant coffee into the Bailey's and whisk into the filling along with the vanilla extract.

Assemble the cookies:
Once the cookies are completely cool, pipe the gel icing around the shamrock cut-out and sprinkle with green sanding sugar.  Match up each circle to a shamrock cut-out as close in size as possible.  Spread about 1 tsp of filling onto the circle and gently press the cut-out on top.  For the shamrocks, spread with a scant amount of filling and sprinkle with sanding sugar.

Chill until ready to serve.

The Review:
This is a cookie that is greater than the sum of it's parts.  The sugar cookie is, well a sugar cookie.  Sort of sweet, but not really that exciting by itself.  Even with the Bailey's.  For one reason or another, this cookie dough was more of a challenge than other's that I've tried.  But I also abhor rolling out sugar cookies and pie crusts.  It's a wonder I keep making them sometimes...

The filling on the other hand...I could have eaten that up with a spoon.  The filling softened the cookies ever so slightly as the evening progressed...these are a cookie that better with age.  And they were quite a hit with everyone who came over.

The perfect end to a salty Irish-American dinner...

Friday, March 9, 2012

Blood Orange Cake with Honey Whipped Cream


Or "how Samantha makes things much more difficult than they need to be."

About a month ago Audra at the Baker Chick posted a wonderful blood orange yogurt cake.  It sounded simply amazing and ridiculously easy to whip together.  The simplicity of the recipe was built around the 6 oz container of yogurt.  All of the other ingredients were measured using this container.  Easy peasy.   No need for measuring utensils.  Just a 3:2:1 ratio. Oh...and self rising flour.

Well...

I use yogurt a lot.  I have long ago given into purchasing the large tubs of plain yogurt instead of individual serving sizes.  So no 6 oz container to conveniently measure out my other ingredients.   To make matters more complicated, yogurt isn't sold by volume...it's sold by weight.  How to figure the volume of the other ingredients?

Ugh.  This is where the obsessive compulsive fabric dyer in me took over.  On a daily basis I convert units of measure and compare ratios to ensure the fabric I dye is consistent from one batch to the next.  Math.  Math everywhere.  This ratio of weight to volume was right up my alley...frustrating as it was.

After poking around I found that a cup of yogurt weighs roughly 8.6 oz...so 6 oz by weight of yogurt would be about 0.69 cups by volume.  (WHY do we use oz for weight and volume...things needn't be this complicated).  Multiplied by the units conveniently listed in Audra's recipe and voila...the measures listed below...within a few teaspoons...

Okay...I'll stop with the math.  Seriously...buy a 6oz container of yogurt...it will make the process so much easier!

Second problem...I don't have self rising flour.  Thankfully that's an easy enough fix.  Self rising flour is just boring old flour with salt and baking powder already mixed in..roughly 1 1/4- 1 1/2 tsp of baking powder and 1/2 tsp of salt per cup of flour. 

Now...I finally had a recipe.  And a bit of a headache from making things harder than they need to be.  This cake is certainly worth it.  And please do visit Audra's site to see the much less migraine-inducing method of measuring.

adapted from Sylvia Bors recipe via Audra at TheBakerChick

yields one 9-inch singe layer cake

The Ingredients:
for the cake
6 oz yogurt (or 1/2 cup + 2 Tbsp)
2 blood oranges, both juiced, one zested
1/2 cup + 2 Tbsp safflower oil or vegetable oil
2 eggs
2 cups all purpose flour
1 1/4 cup sugar
2 1/2 tsp baking powder
1/2 tsp salt

for the frosting:
1 cup whipping cream
1 tablespoon honey


The Process:
Preheat the oven to 350

In a large bowl, whisk together the yogurt,  orange juice, and oil.  Beat the eggs in one at a time until incorporated.  In a separate bowl sift together sugar, flour, baking powder and salt.  Mix the dry ingredients into the yogurt mixture, one third at a time, mixing thoroughly after each addition.

Lightly oil a 9" cake pan and line with parchment paper.  Pour the batter into the pan and smooth the top.  Bake for 30-35 minutes.  Reduce the oven temperature to 325 and bake an additional 10-20 minutes, depending on the oven.

Remove cake from pan and allow to cool completely.

While the cake cools, in a chilled bowl whisk the honey into the whipped cream.  Beat the cream until stiff peaks form.  Spread onto the cooled cake.

The Review:
After the headache of math and measuring I was almost immediately rewarded with the most amazing smells...lightly citrus and wonderfully cakey...

But my oven is finicky.  The center of the cake did not seem to want to set.  At the end of the full 20 minutes after dropping the temperature to 325 the toothpick finally came out clean...and the edges a little browner than I'd like.  I may have to bake the cake at 325 for the duration next time...or split the batter between two pans...

My cake mounded a lot in the center.  I suspect this may have to do with using fresher baking powder and all purpose flour in lieu of self rising flour whose leavening has been sitting for god knows how long.  The height didn't bother me in the slightest.  I may have obsessed a bit about the math, but not having a level cake.  Meh.

The flavors are so simple and clean.  And not overly sweet.  The whipped frosting was the perfect topping, creamy and ever so slightly sweet, without weighing down the cake or overpowering the citrus with cloying sweetness.   I'd love to try the cake again.  Perhaps with lemon.  And almond extract.  Or if I get really ambitious...layers...

I confess...I had some for breakfast.  Judging from the bit of frosting missing this morning I take it the cat did too...

It is that good.