Showing posts with label honey. Show all posts

Tuesday, June 10, 2014

"Zesty Italian" dressing

No, no. I am well aware that this in no way resembles a classic Italian dressing...with its lovely simplicity of oil and vinegar. 

But a fit of summer nostalgia had me craving the Italian pasta salad you see at every grocery market deli and every summer picnic. You know the one? Rotini dotted with red pepper, olives, occasionally pepperoni and mozzarella and SWIMMING in "zesty Italian" dressing.  The dressing is key to the pasta salad. Only I didn't have any. I am not one prone to buying many oil and vinegar dressings, given how easy they are to make at home. This Kraft knock off is no different, and you probably already have most of these ingredients on hand. 


 Yields about 1 1/2 cups

The Ingredients:
1 cup high quality extra virgin olive oil or canola oil
1/4 cup white wine vinegar
2 Tbsp red wine vinegar
2 large cloves of garlic,minced
2 Tbsp shallots, finely diced
2 Tbsp red bell pepper, finely diced
2 tsp Dijon mustard
2 tsp honey
1/2 tsp parsley
1/2 tsp dried oregano
1/4 tsp dried marjoram
1/4 tsp thyme
1/4 tsp basil
Pinch of red pepper flakes
salt and pepper to taste

The Process:
Combine all of the ingredients in a 1 - pint sized jar. Cover and shake vigorously until thickened and well combined. Alternative, whisk all of the ingredients in a bowl, or give a whirl with an immersion blender.

Wednesday, April 10, 2013

Sweet Ginger Soba Noodles with Shrimp


Shrimp, soba noodles and a delectable sauce.  Quick, simple and absolutely packed with flavors.  When I first read over the recipe, I had my reservations about the amount of scallions compared to the amount of liquid in the sauce.  In the end it came together beautifully.  

adapted from Reem Rizvi recipe at Simply Reem

serves 3-4


The Ingredients:
for the sauce:
1 1/2 cup scallions, diced
2 Tbsp ginger, minced
1/4 cilantro, chopped
1 Tbsp sesame oil
2 Tbsp grapeseed oil
1 Tbsp soy sauce
2 Tbsp rice wine vinegar
2 Tbsp honey
1 tsp black pepper
1 tsp crushed red pepper

for the pasta
12-16 large shrimp, raw and thawed if frozen
1 large broccoli stalked, juilienned
1 carrot, juilienned
9 oz soba noodles
2 Tbsp sesame seeds

The Process:
Whisk together all of the sauce ingredients in a medium bowl.  Adjust soy sauce, honey and pepper flakes to taste.  Cover and set aside for 10-15 minutes.

Cook the soba noodles according to package directions.  Set aside.

Heat about 2 Tbsp sesame oil a large skillet set over high heat.  Add the shrimp and sear until browned and opaque, 2-3 minutes per side.  Set aside.

In a small skillet, dry roast the sesame seeds until toasted.

In a large bowl, toss together the noodles, juilienned vegetables and sesame seeds.  Top with shrimp.  Serve warm or cold.


Monday, December 3, 2012

Hefeweizen Honey Rolls

As a home brewer an beer aficionado, it hardly seems appropriate for Thanksgiving to came and go without some dish using beer.   At first I thought I'd skip the rolls. I already had quite a bit of cooking on my plate.   As the day drew closer I agreed that perhaps some frozen rolls could find their way onto our table.  It wasn't until Jackie at the Beeroness posted her hefeweizen rolls that I know there was no way around it.  I was going to be baking my own rolls.

And I couldn't have been happier about it.

I've heard from more than one source that powder milk creates an incredibly tender roll.  It is the secret to Portuguese sweet bread.  And the beer, aside from adding a bit of flavor, aides in the leavening.  These rolls are so worth it.  You may want to pull them out for more than the occasional holiday.

Adapted from Jackie at  thebeeroness.com

The Ingredients:
1/2 cup heavy cream
1/4 oz active dry yeast
5 cups bread flour
1/4 cup dry milk powder
1/4 tsp salt
2/3 cup beer
4 eggs
4 Tbsp honey
4 Tbsp butter, softened

for the glaze:
4 Tbsp butter, melted
1 tsp honey
1/2 tsp coarse salt

The Process:
In a microwave safe dish, heat the cream in 20 second increments until it is about 110 degrees. Add the yeast and set aside until foamy, about 5 minutes

In a medium bowl sift together the flour, salt and dry milk powder. Add the cream and the beer, mix until just combined.  Add the eggs one at a time, mixing thoroughly between additions.  Add the honey and butter and stir until combined. Turn the dough out onto a clean work surface and knead for 10-12 minutes or until the dough is smooth and elastic and no longer sticky.

Coat the inside of large bowl with oil. Form the dough into a ball place in the bowl. Cover the bowl tightly with plastic wrap and allow to rise in a warm room until doubled in size.

Turn out the down onto a clean work surface and knead lightly for about 1 minute.

Cut the dough in half, then cut each half in again to form 4 equal sized pieces. Cut each piece in half to create 8 equal sized pieces. Cut in half again to create 16 dough balls.

Roll each piece of dough into balls, place into a baking dish with a bit of space between each roll.  Cover and allow to rise until about doubled in size.

Heat oven to 400 (the perfect time is right after the turkey has been removed to rest)

Combine the melted butter and honey. Brush the top of the rolls with honey butter mixture, sprinkle with salt.

Bake at 400 for 12-15 minutes until golden brown.


Saturday, November 24, 2012

Honey-Spiced Roast Turkey with Apple Pecan Stuffing


How to prepare the bird is usually the first challenge to any Thanksgiving feast.  If you are even having turkey that is...

A few years back, when the holiday looked as though it was just to included Ross and myself, we opted to try pheasant.  That was an interesting experiment.

This year we were blessed with a visit from my mother and brother, as well as a dear friend of ours from Hawaii who has been spending the last few months in Michigan.  Along with our roommate, we created quite the hodge podge group.  Turkey was a must.  And as word of my cooking enthusiasm has spread, the ante was upped slightly.  All of the classics needed to be present, but a twist was needed.

So back to the bird.  I've brined before with much success.  In fact it may be my favorite way to prep a turkey, but it does require a little more fore thought than simple defrosting the bird usually entails.  So no brine this year.

I love the combination of nuts and fruit in my stuffing.  That is what caused the recipe to first catch my eye.  Once I read through and discovered the sweet and spice glaze on the bird, I was sold.  Most ingredients were staples in my pantry and no fancy culinary tricks or techniques would be needed.

Do keep an eye on the turkey during the last two hours.  The honey causes the skin to brown very quickly, even when loosely covered.  In the end, never uncovered ours and it was still finished nearly an hour earlier than estimated.

It was surprisingly moist and tender, throughout.

adapted from pillsbury.com

serves 12

The Ingredients:
for the turkey
12- to 15-lb turkey, thawed
1/3 cup honey
3 Tbsp butter, melted
1 Tbsp chili powder
3/4 tsp ground allspice
3/4 tsp ground cumin

for the stuffing:
1/4 cup butter
1 small onion, diced
1 stalk of celery, diced
2-3 sprigs of fresh thyme
2-3 sprigs fresh sage
1/2 cup pecan pieces, toasted
1 medium apple, chopped (1 cup)
4-5 cups dried bread cubes
1 1/3 cups apple juice

The Process:
Heat oven to 325°F. 

In a small bowl, combine the honey, butter and spices until well blended.  Starting at back opening of turkey, gently separate skin from turkey breast, using fingers. Try not to puncture the skin over the breast.   Brush half of the honey mixture over turkey breast under skin.  Reserve remaining honey mixture for later.

In large heavy bottomed pot , melt 1/4 cup butter over medium-high heat. Add the onion and celery, thyme and sage. Saute until onion is tender, about 5 minutes.  Add the apple and pecans, cooking another 2-3 minutes.Add the bread crumbs and stir in the apple juice until the stuffing is just moistened.  Remove from heat.  Remove the sage and thyme sprigs.  Allow the stuffing to cool before stuffing the turkey.
  
Gently stuff the neck area.  Pull the neck skin over the opening and secure with a skewer or toothpick.   Loosely pack the stuffing into the cavity, do not over stuff...the stuffing will expand during cooking.  Twist the wing tip back under the bird and secure the legs, if desired.  Place turkey, breast side up, on rack in shallow roasting pan.  Loosely tent foil over the turkey.

Roast for 4 to 5 hours (or about 20 minutes per pound).   Uncover the turkey and brush with the remaining honey mixture.   Roast for an addition 30 minutes or until a thermometer reads 180°F and juices run clear. Drumsticks should move easily when lifted or twisted.

Place turkey on warm platter; cover with foil to keep warm. Let stand at least 15 minutes for juices to set.  Carve.

Spoon out the stuffing and serve separately.


Sunday, October 21, 2012

Ginger Cardamom Chicken Marinated with Pumpkin Ale


This recipe was served alongside yesterday's curried squash as part of a beer paring assignment.  While the curry was stellar on its own, I rarely turn up the opportunity to actually COOK with the beer.  Upping the ante a bit for the homework, I incorporated the beer of choice directly into the recipe.

Brooklyn's Post Road Pumpkin Ale:

The beer has a wonderful spice aroma that I wanted to play up in the chicken.  As the poultry was paired with a curry for dinner, I opted to keep the spice palate fairly tight.  Instead of using  broader more complex flavor of the garam masala blend used in the curry, I choose to focus on the cardamom and ginger.  The beer does not contribute much flavor, but played a key role in tenderizing the meat.  In the end the flavor was fairly simple...only a subtle hint of spice with a warmth from the ginger...but it was by far one of the juiciest and most tender boneless, skinless chicken breast recipes I've tried to date.

I used whole cardamom pods in this recipe, but feel free to substitute the ground spice instead.  Start with 1 1/2 tsp and adjust to your liking.

the recipe is my own

serves 4-6

The Ingredients:
2 lbs boneless, skinless chicken breasts
3 cloves garlic, minced
2 - inch knob of fresh ginger, minced
1 black cardamom pod
6-8 green cardamom pods
2 tsp salt
1 Tbsp honey
2 Tbsp oil
2 Tbsp lemon juice
10 oz pumpkin ale

The Process
Dry roast the caradmom pods in a small skillet over high heat, until lightly toasted and very fragrant, about 2 minutes.  Set aside to cool.

Once cool, coasrely crush with the side of a knife or with a mortar and pestle.  Combine all of the marinade ingredients into a gallon-sized zip-top bag.  Add the chicken.  Refridgerate and allow to marinate for at least 1 hour (mine bathed in the beer for almost seven).

Preheat the broiler or grill.  Remove the chicken from the marinade, discard the marinade.  Grill the chicken for 10-15 minutes, or until no longer pink, turning once (internal temperature should read 170F).  Serve.


Saturday, June 30, 2012

Crunchy Honey Garlic Chicken Breasts


This recipe is another treat that has been floating around on pinterest for some time.  Sadly, every time I tried to click through to the original post I was directed to an error.  After a bit of snooping, I found the recipe at the blog Rock Recipes.  The site boasts to be "one of Canada's best food blogs."  I may have to spend a little more time on that blog to see what other gems out neighbors to the north may be offering!

adapted from Rock Recipes

serves 6-8

The Ingredients:
4 large, boneless skinless chicken breasts, split in half

for the breading:
1 1/2  cup flour
2 Tbsp ground ginger
1 1/2 tbsp ground nutmeg
1 1/2 Tbsp paprika
1 Tbsp salt
1 Tbsp black pepper
2 tsp ground thyme
2 tsp ground sage
1 tsp cayenne pepper

for the egg wash
3 eggs
6  tbsp water

for the honey garlic sauce:
2 Tbsp sesame oil
3 – 4 cloves garlic, minced
3/4 cup honey
1/4 cup soy sauce
1 tsp ground black pepper
 

The Process:
Place each chicken cutlet between two pieces of waxed paper or plastic wrap. Starting in the center and working out to edges, pound lightly with the flat side of a meat mallet until the chicken is an even 1/2" thickness.

In a shallow bowl large enough to accommodate the chicken, whisk together the the eggs and water.  In a large bowl sift together all of the breading ingredients.

Dip the chicken in the flour  mixture, coating evenly. Then dip into the eggwash. Return the chicken to the flour mixture, turning to ensure even coverage and gently pressing the breading into the egg wash.  Set aside and repeat with the remaining chicken.

Heat about 1/2" of oil in a large skillet over medium-high heat.  Working with 2-3 chicken pieces at a time, gently set the cutlets in the oil and fry gently until golden brown, 4-5 minutes per side.  Remove the chicken to paper towels to drain and then set in an oven preheated to 200 to stay warm.  Cook the remaining chicken in the same fashion.

for the garlic honey sauce:
Heat the sesame oil in a small saucepan set over medium-high heat.  Add the garlic and saute until tender and fragrant.  Add the honey, soy sauce and pepper; simmer for 5-10 minutes.

to serve:
Plate the chicken and generously drizzle with garlic honey sauce.

The Review:
Holy Mother of...

This dinner was originally supposed to be served to 4, accompanied by rice and stir fried snap peas.  Somehow the company expanded to 8.  The recipe comfortable fed us all...though we were all licking our plates by the end.

Adult chicken mcnuggets.  I'm not sure why this recipe evokes the comparison.  The breading was joyously crunchy, even after a brief rest in the oven.  I had worried they would become soggy if not served immediately.  Not the case.  The meat...tender and juicy and made even more amazing by the spice blend that blanketed it.  The nutmeg dominated the flavors, but in pleasant way...still allowing the pepper, ginger, sage and thyme to come through.  

The sauce though.  Oh the sauce!  It stole the show.  Tasting frequently as I added the honey, I stopped at 3/4 of a cup instead of the 1 cup the original recipe asked for.  And still I found it quite sweet.  But paired with the peppery and ginger laced chicken...

Maybe that's why my mind wandered to the childhood fast food favorite...tender nuggets of chicken coated in a peppery breaded, fried to perfection and drenched in glorious honey.  

But multiplied beyond compare. 

While all of the company that joined us this evening gladdened my heart, I was disappointed to discover that meant no leftovers.  

Ah well.  I suppose that means I will have to make this again...

Monday, June 25, 2012

Asian Salad with Ginger-Soy Marinated Chicken


salad is my own
dressing adapted form epicurious
chicken and marinade adapted from  allrecipes.com

serves 4-6

The Ingredients:
for the chicken
4 boneless skinless chicken breasts
1/4 cup soy sauce
1 Tbsp sesame oil
2 Tbsp honey
1 Tbsp fresh ginger, minced
2 cloves garlic, minced

 for the salad:
4 cups mixed Asian greens (arugula, red mustard and mizuna)
2 cups spinach
1/2 medium red pepper, thinly sliced
1 broccoli crown, cut into florets
1 carrot, juilianned
2-3 potato onions or scallions, sliced
handful of pea tendrils
1 cup snow peas, cut diagonally 
1 - 6 oz can mandarin oranges, drained
peanuts

for the dressing:
1/4 cup soy sauce
2 Tbsp rice vinegar
2 Tbsp vegetable oil
1 Tbsp Asian sesame oil
1 Tbsp Dijon mustard
1 Tbsp finely grated peeled fresh ginger
1 Tbsp honey or agave syrup
1 tsp  red pepper flakes

The Process:
For the chicken
Trim any fat from the chicken, rinse and pat dry.  Place chicken in a resealable gallon-sized bag or shallow dish.  In a medium bowl, whisk together the soy sauce, oil, honey, ginger and garlic.  Pour the marinade over the chicken and refrigerate for 30 minutes to 2 hours.

Preheat the oven to 350.  Place the chicken in a shallow baking dish and bake for 30-35 minutes.  Remove from oven and allow to cool.

for the dressing: 
Combine all of the ingredients and whisk well.

for the salad:
In a large salad bowl combine the first eight ingredients, reserving the mandarin oranges and  peanuts.  Drizzle about half of the dressing over the salad and toss to coat.  Slice the cooled chicken into thin coins and layer over the salad.  Top with mandarin orange and peanuts.  Drizzle with remaining dressing.


The Review:
This is a salad to knock all fast food and chain restaurant varieties out of the park.  The chicken was so juicy and tender, even after is had cooled.  Burst of sweet peas or oranges, the crunch of carrots and peanuts, the peppery bite of the asian greens mellowed out by the vibrant spinach.  Every bite brought a new and complex play of flavors and textures.  The chicken easily could have starred in a meal of its own.  But the same could honestly be said of the greens as well.  The dressing brought every thing together...a touch of salt and sesame...

All of us were quite sad to reach the bottom of the salad bowl.

Thursday, April 12, 2012

Honey Kissed Hot Cross Buns


When I was little, perhaps 6 or 7, my sister traveled to Denver for the Suzuki Institute.  She was already quite the violin player.  My parents brought me along for the ride, though I didn't play anything at that point.  So what is a 6 year old to do at a huge music gathering like this while her big sister hones her string playing prowess?  Well, pick up the penny whistle of course!

Of all the things that I experienced that week, the little ditty they taught us to play on the penny whistle stuck with me (well, that and memories of hiding in the basement of a strange building as a huge tornado descended  into downtown Denver...that was quite a year).

Hot cross buns, 
hot cross buns.
One a penny,
two a penny, 
hot cross buns

I remember that song so well, but I cannot recall ever actually eating a hot cross bun.   This Easter season I wanted to give these spicy rolls a shot...and further improve my rapport with yeast.   This recipe is loaded with diced dried fruit well beyond the scope of traditional raisins.  Brushed with honey straight out of the oven they have the most heavenly glow!  Perfect for that Easter Brunch!  Even if it is celebrated a few days late...

adapted from Hester's recipe at Alchemy in the Kitchen

yields 12 buns

The Ingredients:
3 1/2 cups bread flour
1 tsp salt
3/4 tsp ground cinnamon
1/4 tsp allspice
1 tsp grated orange zest
7 g dry active yeast  (1/4 oz package)
1 Tbsp olive oil
1/2 cup mixed dried fruit (apricots, apples, prunes, figs, etc) finely diced
1/3 cup raisins, currants or dried cranberries
1/4 cup honey
1 1/4 cup milk
1 large egg

for the cross:
3 Tbsp flour
2 Tbsp water

for the glaze:
1 Tbsp honey

The Process:
 Into a large bowl combine the flour, salt, cinnamon, allspice, yeast, olive oil, and dried fruit. Mix well.

Pour the milk into a small saucepan over medium heat.  Whisk in the honey and stir until dissolved.  Warm the milk to between 80 to 95.

Make a well in the center of the flour mixture and add the beaten egg, and about half the milk. Slowly add the remaining milk, stirring and folding to completely moisten the flour.  The dough should start to pull away from the sides of the bowl. 

Turn the dough out onto a lightly floured surface, adding more flour as necessary.  Knead for 8 to 10 minutes until the dough is smooth and no longer tacky. Form into a ball and place in a lightly oiled bowl.  Cover and allow to rise until double in size, about 90 minutes

After the dough has risen, turn it out onto a lightly oiled work surface.  Divide the dough in half, and half again to form four equal portions.  Gently pull each portion into a log, about 2 inches in diameter and 6 inches long.  Using a sharp knife or kitchen shears, cut each portion into 3 equally pieces.  Roll each portion into a ball, trying to pull the dough taunt on one side.  

Line a baking sheet with non-stick baking parchment.  Place the buns on the sheet, spacing about 1 1/2-inch apart.  Gently push down to flatten, ever so slightly.  Cover the buns with cling wrap and allow to rise undisturbed until doubled, about one hour.

To make the paste for the cross, in a small ziploc bag combine the flour and water.  Massage the bag until a uniform paste is formed.  

Preheat the oven to 375.

When the buns have doubled in size, remove the cling wrap.  Snip a corner off of the ziploc bag containing the flour paste (the less you snip off, the finer a point you will have for piping). Carefully pipe a cross over the top of each bun. 

 Place the buns in the oven and bake for 12 to 15 minutes or until golden brown. Transfer the buns to a cooling rack and immediately brush them with warmed honey.

The Review:
Warm, welcoming and just kissed with sweetness!  Just the look of these is a far cry from the royal icing laden varieties sold at the supermarkets during the spring.  It is almost a pity they are only sold around the Easter season.  They make the perfect breakfast roll..spicy, studded with fruit and not terribly sweet.  The yeasty smell tempted us the entire drive to our friends as we took a batch along for Easter dinner.  Paired with ham?  Heavenly.  But these buns are certainly sinful in their own rite.

Thursday, March 15, 2012

Multigrain Bread Extraordinaire

One of my goals for this, the second year of my blog, was to attempt more yeast leavened baked goods.  More specifically, breads.  I have a love/hate relationship with yeast.  I love the tang it gives to beers and breads.  I marvel at how this simple organism can create such complex flavors as it breaks down sugars and carbs.  To date, our beer brewing adventures have yielded one successful batch after another.  But on the bread front...

Cinnamon rolls, monkey breads, sticky buns...all of those seemingly complicated (at least as far as assembly is concerned) yeast-based baked goods turned out well.  For my first true attempt at bread last year I opted for what seemed like a much simpler, more straightforward bread...the baguette.  It failed miserable.  The dough did not want to rise a second time.  It finally doubled up enough to justify baking it.  Into the oven three loaves went.

What came out I would hesitate to call bread.  The sticks of dough were ghastly pale, not the scrumptious golden brown I anticipated.  It was very toothsome...almost to the point of tooth shattering.  Never had I encountered a crust that rock solid.  Once I managed to chisel my way through the yeasty armor, no tender crumb but lifeless dry mass greeted me.

The bread was not even fit for bread crumbs or stuffing.  Not even the birds would touch it.

Needless to say, I've put off trying my hand at a loaf of bread for a long time because of those anemic baguettes.

But I made a resolution, and I can't put off attempts at bread too much longer.  I had originally planned to start simple again...a white or wheat.  But I opted to make a bread I would want eat, and I'm not really a white bread kind of girl.

After thumbing through Peter Reinhart's Bread Baker's Apprentice, I found a loaf a step up from basic white and wheat sandwich breads: Multigrain Extraordinaire.  The part of the recipe that called to me was the multigrain soak...three grains with many available substitutes.  The recipe below details the combination of grains I used; but millet, amaranth, buckwheat, triticale flakes, wheat bran, and rolled wheat are options as well.

adapted from Peter Reinhart's The Bread Baker's Apprentice

yields one 2-pound loaf

The Ingredients:
for the soaker (prepared the night before)
3 Tbsp quinoa
3 Tbsp rolled oats
1 Tbsp wheat germ
1 Tbsp coarse cornmeal
1/4 cup water, room temperature

for the dough
2 cups high-gluten or bread flour
1 cup whole wheat flour
3 Tbsp brown sugar
1 1/2 tsp salt
1 Tbsp instant yeast
3 Tbsp cooked brown rice
1 1/2 Tbsp honey
1/2 cup buttermilk
3/4 cup water, room temperature


optional topping
1 Tbsp sesame or poppy seeds

The Process:
for the soaker
The day before making the bread, combine the quinoa, wheat germ, rolled oats, coarse cornmeal and water in a small bowl.  The water will just moisten the grains.  Cover the bowl with plastic wrap and allow to rest overnight at room temperature.

for the bread:
In a 4-qt bowl sift together the flours, brown sugar, salt and yeast.  Add the brown rice, soaker, honey, buttermilk and water.  Stir until all of the ingredients form a ball...adding water a few drops at a time if any flour remains on the bottom of the bowl.

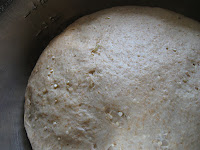
Sprinkle the work surface with flour and turn out the dough.  Knead by hand for 12 to 15 minutes, sprinkling with extra flour as needed.  The dough should be soft and pliable, tacky but not sticky.  Form the dough into a ball and place in a lightly oiled a bowl.  Mist lightly with oil.  Cover with plastic wrap.

Allow the dough to ferment a room temperature for 90 minutes or until roughly double in size.


Remove the dough from the bowl.  On a lightly floured work surface shape the dough into a 6 by 10 inch square.  Starting with the short side, gently fold the dough onto itself, squaring the edges to form the loaf. Place in a lightly oiled metal loaf pan with the seam down.  Mist the loaf with water and sprinkle the  sesame or poppy seeds on top.  Lightly mist with oil.  Loosely cover the loaf pan with plastic wrap.

Proof the loaf for approximately 90 minutes or until roughly double in size.  The dough should crest fully above the top of the pan by almost an inch at the center.

Preheat the oven to 350.

Place the loaf on the middle rack in the oven, and bake for 20 minutes.  Rotate the pan 180 degrees and continue to bake for an additional 20-40 minutes, or until the bread registers between 185 and 190 on a thermometer and sounds hollow when lightly thumped.

Once finished baking, immediately remove loaf from pan and allow to cool and a wire rack for at least one hour prior to slicing, preferable two.  This allows additional moisture to evaporate, the starches to settle and prevents the loaf from appearing under-baked or soggy.

The Review:
Success! Not a raving, stop the press sort of success, but a huge step towards no longer fearing yeast. 

The starter was an interesting technique.  Most of the grains were very much intact when the time came to start the dough.  The scent of the quinoa was by far the most prominent.  Even overpowering the yeast as the bread fermented and proofed.  At least until the bread stating baking.  Then the kitchen was filled with that welcoming warm scent of nostalgia and a hundred visits to the bakery with Mom or Grandma.

What was surprising was that all of the grain, short of the quinoa, broke down and dispersed thoughout the dough.  I was expected a grain flecked loaf of health and was instead treated with a fluffy and tender treat.  The little kernels of quinoa were the only discernible texture.

The crust was a little thicker and crisper than I would have liked...making it a bit hard to saw through the first slice.  But the crust succumbed to the bread knife and yeilded the soft interior...still warm after two hours of cooling. 

The grains offered a light nutty flavor.  I'd love to experiment with the other grains to see what additional flavors can be coaxed out.  Nuttiness was accented by the wonderful sweetness of the honey and brown sugar.  The bread was divine sliced and slathered with sweet cream butter.  It was just as wonderful for dinner, serving as the base for a hearty BLT of thick cut bacon.


Monday, January 2, 2012

Hot Toddy

I seem to be ushering in the New Year with an awful head cold.  The last few nights of sleep of been more like fitful naps interspersed with an inability to breathe, a stiff neck and a scratchy throat.  While modern medicine has blessed us with a plethora of cough syrup, decongestants, expectorant and pain killers, nothing quite beats the hot toddy when it comes to easing the suffering. 

the recipe is my own, based on a preferance for whiskey and a favorite ginger honey cold concotion

yields about 4 servings


The Ingredients:
3 cups water
l lemon, washed and sliced
3-4  inch length of ginger root, peeled and minced
1/4 cup of honey, plus extra to taste
2 inch piece of cinnamon
10-12 whole cloves
8 oz whiskey


The Process:
In medium saucepan, combine the water, lemon, ginger, honey, cinnamon and cloves.  Bring water to a gentle boil, reduce heat and simmer for 15 to 20 minutes (or longer for a stronger flavor).

To serve pour 2 oz of whiskey in four mugs.  Add about 3/4 of a cup of the lemon-ginger tea.  Sweeten with additional honey to taste.  Serve piping hot with a lemon wedge.


The Review:
At the moment, my nose doesn't feel as raw, nor my throat as sore, so something must be true of the healing powers of ginger, lemon and honey. Ginger has a history of treating medical ailments, from settling stomachs, to easing sore throats.  It supposedly has anti-inflammatory and immune system boosting properties that make it especially helpful in warding off the common cold.  Honey's anti-septic qualities (among other benefits) help ward off bacteria while it soothes, in addition to sweetening you concation.  The lemon adds a boost of vitamin c along with its antibacterial, antiviral, and immune-boosting powers.  And the whiskey?  Well, when you're stressed out and aching all over, a little bit of booze can go a long way to relaxing you...long as you don't over do it.

The steam helps clear the nose while sipping on the hot concoction.  The spices are always a joy to inhale when your sense of smell comes back around.

Use a favorite whiskey.  But even without the alcohol, this hot drink goes a long way to soothe mind and body.

Saturday, December 17, 2011

Honey Caramels

Candy making scares the bejesus out of me.  And corn syrup is often shunned in my kitchen.  Taken together it appeared homemade caramels were not to be in my near future.  However, after hearing about success after success from several friends who took the dive into candy making, I thought it was time.  This recipe is a lot simpler than I anticipated and uses not one ounce of the dreaded corn syrup.  Someday, when I am much more ambitious, I want to try several batches of these side by side using different varieties of honey...orange blossom, clover, buckwheat,  wildflower...

adapted from recipes at Brooklyn Farmhouse and Food on the food, with some extra help from Chez Pim

Yields approximately 60 one-inch caramels


The Ingredients:
1 1/2 cup granulated sugar
1/2 cup honey  (I used orange blossom)
1 cup heavy cream
4 Tbsp salted butter
Salt to taste

And a CANDY THERMOMETER!

The Process:
Prepare an 8 x 8 pan by lining with aluminum foil or parchment paper and greasing generously with butter.  Do NOT use wax paper...the heat from the caramel will melt the wax paper to the candy.

Pour the sugar and honey into a large non-reactive pot set over medium-high heat.  Allow the sugar and honey to dissolve, stirring or shaking the pot just enough to melt all of the sugar granules.  Continue to cook without stirring until the liquid caramelizes into a deep rich brown color.

While the sugar and honey caramelizes, heat the cream to a simmer in a medium saucepan.

Once the sugar and honey reaches the color you want, cut in the butter, one piece at a time and stir gently until each piece has melted.  Carefully whisk in the warmed cream.  This stops the sugars from caramelizing.

At this point add additional salt to taste...to sample the molten liquid dip a spoon into the caramel and very quickly dip it into cold water to cool. 

Clip the candy thermometer to the edge of the pot.  Cook the mixture slowly until the temperature reaches 246 for soft caramels or 250 for firmer caramels. 

Pour the hot caramel into the prepared baking pan and allow to cool to room temperature.  Once cool, remove the caramel block from the pan, peel off the parchment or foil and cut into one inch squares.  Wrap in wax paper or cellophane. 

The Review:
I'm in love.  The honey flavor certainly shines through. Though from subsequent batches I noticed that the less time you allow the sugars to caramelize, the more prominent the honey flavor.  Sugars not richly caramelized will have the crisp, clean and almost astringent honey flavor.  Sugar allowed to darken more mellows out and blends into the deeper caramel flavor with just a hint of honey flavor.  It is incredibly fun to play around with.

And while the caramels may be quick to make and eating the a bit of heaven...wrapping them is like a little bit of purgatory.  I'd recommend pre-cutting all of your wrappers while waiting for the caramels to cool and enlisting the help of a friend.