Showing posts with label sauces and dips. Show all posts

Wednesday, November 26, 2014

IPA Cranberry Sauce

photo by Heather Hanson

Nix the canned cranberry sauce this year and make this homemade sauce using your favorite IPA! IPAs can become even more bitter when boiled or reduced, so I chose add it at the end. This late addition allows the more delicate hops flavors and aromas to shine through. IPAs with citrus, floral or tropical fruit notes work best with the tart cranberries. Please celebrate responsibly. The alcohol does not cook out of this one. While there is not enough beer included to get anyone tipsy, do take care to inform guests that alcohol is included in the dish.

the recipe is my own

serves 6-8

Ingredients

  • 1 – 12 oz package fresh or frozen whole cranberries
  • ¾ cup water
  • ¾ cup sugar
  • 2 tsp orange zest
  • ½ cup IPA

Preparation
  • In a medium saucepan over medium-high heat combine the water and sugar. Bring to a boil, stirring until the sugar is dissolved.
  • Add the cranberries and orange zest. Reduce heat to medium-low and simmer until the berries burst and the sauce is thickened, about 20 minutes.
  • Remove from heat and stir in the beer. 
  • Serve warm or chill until ready to serve.

Friday, September 5, 2014

Chocolate Milk Stout BBQ Ribs with Mole Spice Rub


Chocolate, beer and barbecue don't seem like an obvious pairing, but trust me on this one. Do you like mole sauce? How about chocolate milk stout? dark roasty beers have an affinity for roasted and grilled meats. Stouts and Porters also love chocolate. See? The combination isn't so crazy after all.

These ribs are brilliant on the grill, if you are a master at the low and slow. They are equally as tasty slow roasted in the oven.

The recipe is my own

serves 4

The Ingredients:
1 rack (2 1/2-3 lbs) pork ribs

for the rub
1 1/2 tsp salt
1 1/2 tsp ground black pepper
1 1/2 tsp ancho chili powder
2 tsp brown sugar
2 tsp paprika
1 tsp cumin
1 tsp oregano
1 tsp cocoa powder
pinch cayenne pepper

for the sauce
2 cloves of garlic, minced
1 Tbsp oil
1 can tomato paste
1 cup chocolate milk stout
1/3 cup brown sugar
1 T cocoa powder
2 tsp paprika
1 Tbsp Ancho chili powder
1 tsp salt

The Process:
For the rub
Combine the spices.

Rub the mixture on both sides of ribs. Cover and let stand at room temperature for about 30 minutes.

for the sauce
Heat the oil in a medium saucepan over medium high heat. Add the garlic and saute until fragrant, about 2-3 minutes. Whisk the remaining ingredients into the saucepan. Bring to a boil, remove from heat and allow to cool. Refrigerate until ready to use.

for the ribs
Preheat the oven to 250 

Line a baking sheet with aluminum foil. Place the seasoned ribs on top. Brush with BBQ sauce and roast in the preheated oven, turning ribs and brushing with BBQ sauce every 30-45 minutes until fork tender, about 4 hours.

Allow to rest 10-15 minutes before serving

Serve with remaining Mole Stout BBQ sauce

Friday, August 15, 2014

Seared Pork Chops with Garlic Scape Chimichurri

One of my favorite parts of our CSA box is the garlic scapes. I love these elegant tender curls. Often I'll sautee them up like green beans. Or add them to a morning omelet with feta and whatever herbs tagged along in that week's box. But lately I've been coming across many scape pesto and chimichurri recipe and thought I'd give one a go.

I'd much rather grill these chops over an open flame than sear them in the pan, but the endless rain we've had this summer has put a damper on much of our grilling plans. Ah well, seared chops work in a pinch.

Pick thick-cut bone-in chops with a lot of marbling. Pork is a much leaner meat than beef and needs the extra fat, unless you want to end up with a tough and chewy chunk of meat. Rib chops...center cut of the loin...seem to grill up among the best. Thick cut helps keep them from drying out too quickly. And the bone? Well, honestly, I just enjoy gnawing the last bit of flavor off of the bone.

Enjoy!

adapted from The Brook Cook

serves 5

The Ingredients
for the chimichurri
1/4 cup fresh parsley, chopped
3 Tbsp fresh, chopped
3 Tbsp fresh cilantro, chopped
1 green onion, thinly sliced
4 to 6 garlic scapes, thinly sliced
1 Tbsp lemon juice
1 tsp kosher salt
1/8 teaspoon red pepper flakes
1/2 cup olive oil

for the chops
5 thick cut bone-in pork loin chops
generous pinch of salt and pepper
1 Tbsp oil

The Process
for the chimichurri
Combine the herbs, green onion, garlic scapes, lemon juice, salt, and red pepper flakes in a food processor. Purée. With the food processor still running, drizzle in the olive oil. Transfer to a bowl and set aside.

Chimichurri will keep in the fridge, covered, for up to a week.

for the chops
Generously season the chops with salt and pepper. Heat a large cast iron skillet over high heat. Add the oil and reduce heat to medium-high. Add the chops and sear 3 to 5 minutes, with out moving. Flip and cook until meat is just cooked through, about 3-4 minutes more.

Alternatively, grill the chops...searing 1-2 minutes per side over direct heat until a golden crust forms. Move the chops to indirect heat and cook an additional 4-5 minutes per side or until the internal temperature reaches 135-140 degrees F.

Let rest 5 minutes before serving. Serve topped with chimichurri.

Tuesday, July 22, 2014

Thyme-spiked Strawberry Rhubarb Muffins


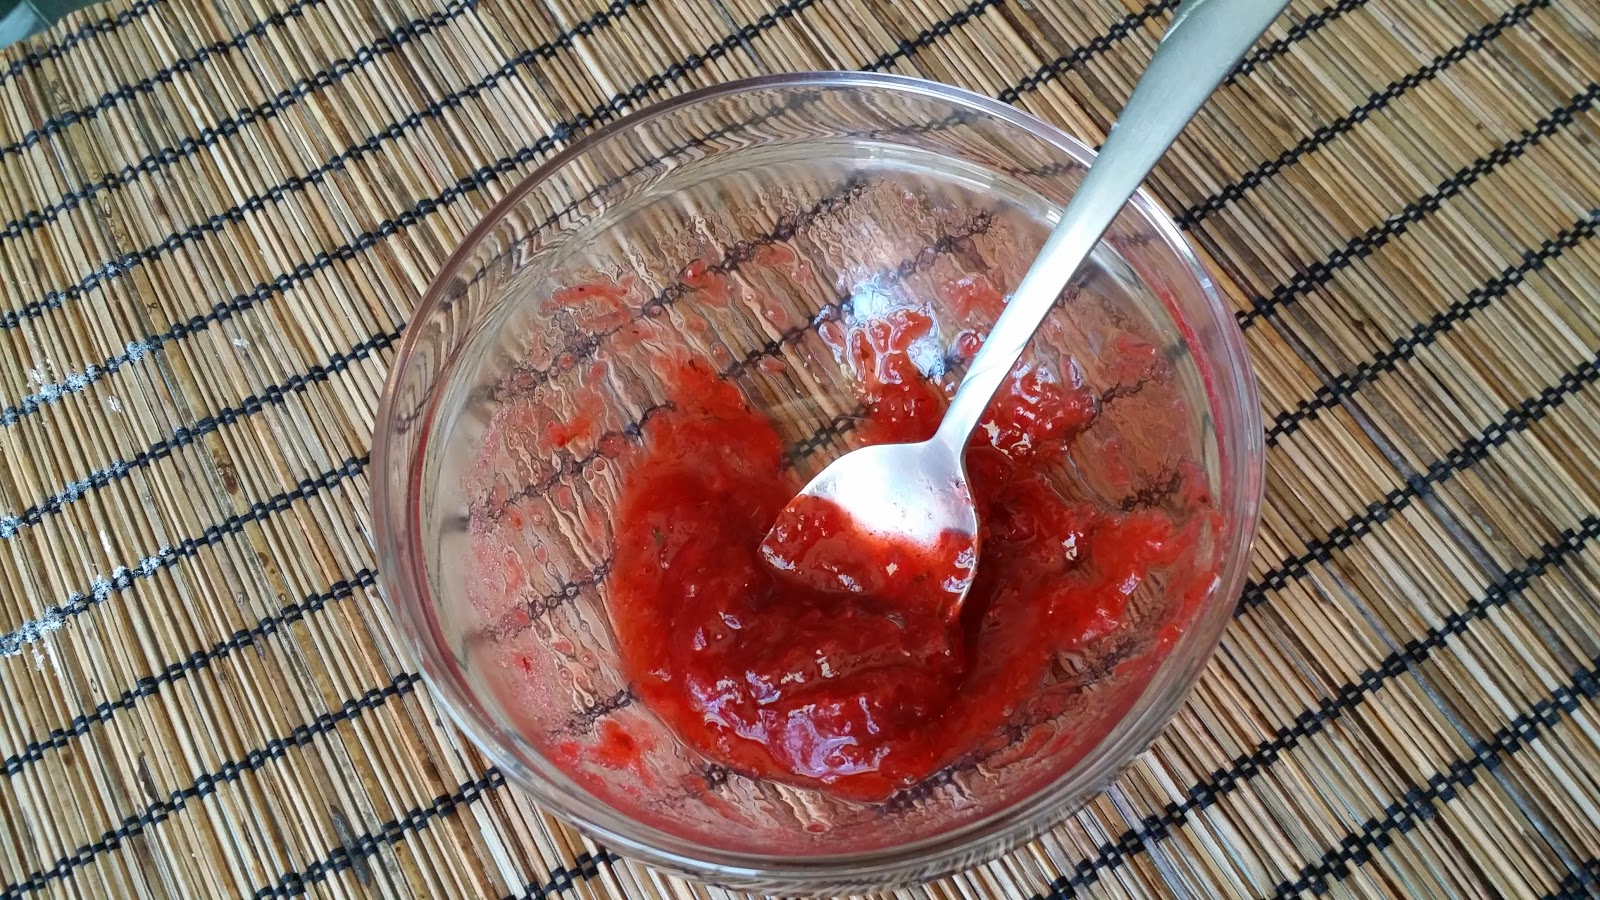
Oh, the early days of summer, how I adored your bounty of rhubarb and strawberries! Growing up, the bulk of rhubarb stalks from our backyard turned into a sauce with a bit of a twist...a packet of strawberry jello. Just a touch of sugar. But nostalgic as it is, fresh strawberries make the compote even better.

This recipe starts with a perfectly sweet, sour and savory compote dressed up with a bit of thyme. A dollop is spooned into each muffin tin along with the sweet, cakey batter. The oozing filling is the perfect touch to an already amazing strawberry-rhubarb muffin.

adapted from Kosher Camembert

yields 16 muffins

The Ingredients:
for the compote
1 1/4 cup diced rhubarb
1/2 cup diced strawberries
1/3 cup sugar
juice and zest of 1/2 a lemon
1/4 tsp dried thyme

for the muffins
2 cups of all purpose flour
1 cup granulated sugar
1 cup canola oil
4 eggs, slightly beaten
1/3 cup diced strawberries
1/2 cup diced rhubarb
1 tsp salt
1 tsp vanilla
2 tsp baking powder

The Process:
for the compote
In a medium saucepan over medium high heat, combine the rhubarb, strawberry, sugar, and lemon.
Stir well and bring to a boil. Reduce heat to medium, and continue to cook for about 15 minutes, stirring occasionally. Gently mash any remaining fruit pieces with a fork. Allow to cool to room temperature.

for the muffins
Preheat the oven to 350 degrees F.  Lightly oil a muffin tin.

In a large mixing bowl, Whisk together the flour, sugar, baking soda, and salt. Add the oil, vanilla, fruit, and eggs. Stir until just combined.

Spoon 2-3 Tbsp of batter into each muffin cup. Top with a healthy dollop of compote.
Divide the remaining batter between the muffin cups, filling no more than 2/3 full.

Bake 20-25 minutes, or until a toothpick inserted into the center comes out clean.

Friday, June 20, 2014

Spent Grain Falafel with Tzatziki

In my wanderings to perfect a spent grain dog biscuit recipe, I stumbled across a new website. The Brooklyn Brew Shop. The site itself is for a home brew supply shop, but one section is solely devoted to cooking with spent grain. Home brewing can generate a fair amount of leftovers once the wort has been siphoned off.  When we've brewed a 5-gallon batch of beer in the past, there was typically too much grain leftover for us to use. Most of it would be destined for the compost. However, with this new discovery comes much, much more inspiration and motivation.

So when should I brew my next beer to ensure another insurgence of spent grain? And, oh, which recipes to try first?

adapted from The Brooklyn Brew Shop

serves 4

The Ingredients:
for the tzatziki 
1/2 cucumber, peeled, seeded, and finely diced
1 cup Greek yogurt
2 cloves of garlic, minced
2-3 mint leaves, minced
1/4 tsp salt
1 1/2 tsp olive oil
1 tsp red wine vinegar

for the falafel
2 -14 oz can garbanzo beans, rinsed and drained
1 cup spent grain, wet
1 egg
1/2 cup fresh parsley, finely chopped
1/4 cup fresh mint, finely chopped
3 scallions, finely chopped
2 cloves of garlic, minced
1/2 tsp salt
1/2 tsp pepper
1/2 tsp cumin
juice of 1/2 lemon

The Process:
for the tzatziki
Place the cucumber in a clean towel or several layers of cheesecloth. Squeeze as much of the liquid from the cucumber as you can.

Combine the cucumber, yogurt, garlic, mint, salt, oil, and vinegar in a medium bowl and stir to combine. Cover and refrigerate until ready to use.

for the falafel
Preheat the oven to 375

Lightly grease two baking sheets and set aside.

Pulse the garbanzo beans in a food processor until a coarse paste forms.

Transfer to a large bowl and add remaining ingredients. Mix until well combined.

Roll mixture into 1" balls and arrange on the prepared baking sheets. Bake for 20 to 25 minutes or until golden brown, flip halfway through.

Serve with tzatziki.

Friday, June 13, 2014

Beer Ricotta Gnocchi with Lemon-Thyme Browned Butter Sauce

Remember I few days ago when I made the saison ricotta? Get ready to make another batch for this recipe!

I love how the beer carried through to the end of the recipe. The bready, boozy notes were still there. To keep the flavors light and bright, I wanted a simple sauce, so I turned to a browned butter base. Browned butter and sage is a common accompaniment to gnocchi. To brighten the sauce and change it up a bit, I opted to add lemon and thyme. Part of me hoped the citrus and herbs would mimic the hop flavors that were lost in the gnocchi. The end result was wonderful.

Gnocchi recipe adapted from The Splendid Table
Sauce recipe adapted is my own

serves 4

The Ingredients:
for the gnocchi
1 lb saison ricotta, drained
3/4 cup to 1 cup flour, plus more for rolling
1 egg
1 tsp salt
1 Tbsp melted butter
1/4 cup grated Parmesan
pinch of nutmeg
pinch of black pepper

for the sauce
6 Tbsp unsalted butter
1/4 tsp dried thyme
1 Tbsp lemon juice
1/2 tsp salt
1 tsp honey
 
The Process:
In a large bowl combine the ricotta, flour, egg, butter, Parmesan, salt, nutmeg and pepper. Gently knead with your hands until a sticky dough forms, added additional flour as needed. Cover and chill for one hour.

Divide the dough into four. On a lightly floured surface, roll each quarter out into a 1/2 inch to 3/4 inch round log, about 18 inches long. Cut into 1-inch pieces. Arrange the gnocchi on a lightly floured sheet, leaving space between. Cover and chill at least 1 hour, or up to 2 days.

To cook, bring 6 cups of salted water to a boil. Working in batches, cook the gnocchi for 3-4 minutes, until they float to the surface. Gently scoop them out of the cooking liquid with a slotted spoon, transferring to a serving bowl. Keep warm.

for the sauce:
Cut the butter into pieces. Melt in a small heavy-bottomed skillet over medium-low heat. Simmer butter until golden brown in color, about 5 minutes. Remove the skillet from heat and immediately add lemon juice, salt, thyme, and honey, swirling to blend.  The butter will foam up when the liquid is added.

Pour half of the sauce over gnocchi and gently toss to coat. Divide among four plates and drizzle with remaining sauce.

Serve sauce immediately.

Thursday, July 4, 2013

Apple and Kohlrabi Salad with Roasted Strawberry Balsamic Vinaigrette

Vegetables are coming out of our ears!  I absolutely adore taking on the challenge of a full CSA share for two people, but even when most lunches consist of huge leafy salads, a full share can be a bit much to swallow.

This week we were treated to a wonderful treat though...4 pints of the juiciest, brightest red strawberries.  Last season had been so miserably dry that the farm's berries didn't stand a chance.  This year, with the ridiculous amounts of rain pouring through, the berries are bursting.  A good portion have already been frozen for later use.  What berries haven't already been devoured made it into this salad.  The mixed greens and kohlrabi were also courtesy of our CSA.

The inspiration for the vinaigrette came from a visit to a local oil shop where I sampled the most amazing 25 year aged balsamic vinegar.  It was so wonderfully sour, rich, earthly and sweet I could have eaten it with a spoon.  Alongside stood several other tuns full of rich balsamic and fruit blends.  I couldn't decide.  Start simple and with the basics.  High quality balsamic vinegar has ruined me...

And the combination of apple and kohlrabi has been bouncing around in my head for a while.  I hope you enjoy it as much as I did.

The recipe is my own

serves 4

The Ingredients:
8-10 ripe strawberries
1 Tbsp diced shallot
2 Tbsp olive oil
2 Tbsp balsamic vinegar
1/4 tsp salt
1 small Granny Smith apple
1 cup water
1 Tbsp lemon juice
1 medium kohlrabi
4 cups mixed greens

The Process:
Preheat the oven to 400

Pick out the 4 smallest, ripest strawberries, and set aside.  Hull the remaining berries.  Place cut side down on a lightly greased pan.

 Roast to 10-12 minutes or until the berries are soft and juice is beginning to seep.

In a large glass, combine the shallot, oil, vinegar, salt and roasted strawberries.  Puree with an immersion blender until completely smooth.  Strain through a sieve to remove any pulp and seeds.  Set aside.

Combine the water and lemon juice and set aside.

Halve and core the apple.  Thinly slice into wedges and place in the lemon water.  Peel the kohlrabi and similarly slice into thin wedges.

Toss the mixed greens with half of the vinaigrette.
 Divide greens among four salad plates.  Arrange 1/4 of the apple and kohlrabi in a fan shape on each plate.  Using the reserved strawberries, cut four or five thin slices with a paring knife lengthwise through the berry, leaving slices attached just below the hull.  Gently fan out the slices.  Place the berry garnish on each plate.  Drizzle with remaining dressing

Wednesday, June 19, 2013

Vietnamese Pork Chops

Meat.  Summer.  Grill.

And of course.  Rain.

So a slight change of plans.  These thick-cut marinaded pork chops would have been phenominal on the grill, but with the 20 minute windows of sunshine we seem to have been experiencing, the skillet will have to do.

And the marinade reduced into a dipping sauce?  Amazing.

adapted from Bon Appetit

serves 2

The Ingredients:
2 - 1" inch thick cut pork chops (about 1 lb)
1/2 shallot, minced
2 Tbsp packed brown sugar
2 Tbsp fish sauce
1 Tbsp rice vinegar
1/2 tsp ground pepper
olive oil
salt to taste
lime, quartered

The Process:
Whisk together the shallot, brown sugar, fish sauce, vinegar and pepper.  Pierce the pork chops all over, place in a zip top bag and pour the marinade over.  Seal and marinate for 20 minutes at room temperature, or chill 4 hours to overnight

Remove chops and reserve marinade.  Generously salt the chops with salt.  Heat the oil in a large skillet over medium high heat.  Sear, until browned and cooked through, about 4 minutes per side.  Remove from skillet, cover to keep warm and allow to rest for about 9 minutes

While the chops rest, add the reserved marinade to a small saucepan.  Bring to a boil and cook until reduced until about 1/4 cup.

Serve chops with reduced marinade and lime wedges.


Wednesday, May 1, 2013

Fig and Belgian Dubbel Reduction

Move over wine.  It is time to share the culinary platform.  Meet the Belgian dubbel.

This recipe, as with my previous pancake post, was nudged--nay--pushed along by a recent class on cooking with beer taught by Sean Paxton.  The idea had been stewing for a while, largely thanks to the quantity of time I seem to spend at Boom Island Brewing Company during their sample room hours.  It is hard not to get excited about food and beer when you can talk directly to the people whose passion creates that lovely beverage in hand.  Using beer in lieu of wine for a reduction had come up many a time during these visits to the brewery.

This recipe is sort of a trial run for a future dinner.  I have grandiose plans for this sauce.  Tonight, it was served over dredged and seared boneless chicken thighs.  But mark my words...as soon as I have the time to head to one of our nicer meat markets or co-ops, duck breast will be featured prominently.

The beer of choice for the reduction was Boom Island's Hoodoo.  To date, they do not distribute outside of Minnesota.  But do not despair...several great Belgian dubbels are available through out the country.  Chimay Premiere, Westmalle Trappist Dubbel, Goose Island Pere Jacques and Ommengang Abbey Ale are all excellent brews to try this with.

To bring out a bit more of the dark fruit sweetness, and cut an potential bittering from the cooking process, I opted to saute up the shallots with an equal amount of dried fig.  The thought had crossed my mind to soak the figs first in some of the dubbel...or perhaps even bourbon.  But baby steps, baby steps.

The sauce is my no means sweet, so much as rich.  I was initially surprised by the amount of unami in the sauce as I sampled though out.   I am really looking forward to playing around with this reduction again.

the recipe is my own

yields enough sauce for about 4 entrees

The Ingredients:
1 Tbsp olive oil
1 small shallot, finely diced (about 1/3 cup)
4-6 small dried figs, finely diced (about 1/3 cup)
1/3 cup beef stock
2/3 cup Belgian dubbel
3 Tbsp butter, cut into cubes
1 Tbsp fresh thyme, minced
salt and pepper to taste

The Process:
In a medium saucepan, or the skillet used to sear your protein, heat the oil over medium heat.  Add the shallots and figs and saute until the shallots are translucent and beginning to caramelize.

 Splash a little of the beef stock into the pan and deglaze.  Add the remaining stock and the beer to the pan.  Raise the heat to medium high and simmer the mixture until reduced by half, about 15 minutes.  

At this point for a smoother, thinner sauce, strain the mixture through a fine sieve. Return the liquid to the pan and discard the shallots and figs.

For a thicker, richer sauce, puree a portion of the mixture with an immersion blender and return to the saucepan.

Add the butter and thyme, stirring until the butter has melted.  Season with salt and pepper to taste.

Serve over protein of your choice.


Wednesday, March 6, 2013

Creamy Pesto Shells with Peas and Cherry Tomatoes


At times the winter seems never ending.  The cold seeps into every nook and cranny.  Grey skyline blends with the grungy white horizon in a seamless canvas of nothing.  Spring will come.  It will...the days are already lengthening.

But at times I can feel that strong Midwestern resolve and hopefulness weaken.  Times such as that call for carbs and comfort.  And something bright and green.

Rooting through my freezer trying to come up with something quick and easy that wasn't ramen or spaghetti with tomato sauce, I stumbled across a few quart-sized bags of green bliss. Arugula pesto whirled up in those sweltering dry days of summer when the leafy bitterness was coming out of my ears.  Bite and bright and perfect for tonight...

pesto recipe courtesy of Driftless Organics
the rest is my own devising

serves 4

The Ingredients:
for the sauce
3-4 cloves of garlic
1 cup chopped arugula, lightly packed
1/4 cup slivered, blanched almonds, toasted
2 Tbsp Parmesan cheese, grated
3 Tbsp olive oil
2 Tbsp butter
1/2 cup milk
4 Tbsp cream cheese
salt and pepper to taste

for the pasta
1 lb small or medium shells
2 cup peas, thawed if previously frozen
1 pt cherry or grape tomatoes, halved

The Process:
Combine the garlic, arugula, almonds, and Parmesan in a food processor and pulse into a coarse paste. Add oil in a thin stream while the processor is going.  Season with salt and pepper to taste. Set aside.

Boil the pasta according to package directions, drain and set aside.

Add the butter and milk to a medium saucepan set over medium-high heat.  Once the butter has melted, add the freshly made pesto and stir until well blended.  Cut in the cream cheese, a little at a time and stir until melted and well combined. 

Transfer the strained pasta to a serving bowl.  Add peas and tomatoes.  Drizzle with the creamy pesto and toss until well coated.  Serve hot.

Monday, January 7, 2013

Silly Simple Aioli


I made sweet potato fries.  But I failed to have my favorite condiment on hand for dipping.  Thank you, Internet, for coming to the rescue.

This is a quick and dirty aioli.  Most of you probably have these items on hand already.  And you needn't worry about raw eggs or egg yolks, so long as you are okay with store variety mayonnaise.

Adapted from Epicurious

yields about 1/3 cup

The Ingredients:
1 fat garlic clove, minced
1 Tbsp olive oil
1/4 cup mayonnaise
1 1/2 tsp lemon juice
salt to taste.

The Process:
In a small bowl mash the garlic with olive oil.  Whisk in the mayonnaise and lemon juice until well incorporated.  Season with salt to taste.  Serve chilled.

Friday, October 19, 2012

Tempting Tomato Sauce

The tomatoes are here! The tomatoes are here! Well...were here.  During that long break I took I was blessed with several pounds...POUNDS...of tomatoes from our CSA farm.   In the end I believe I handled nearly one hundred pounds of the bright red fruit.  Sixty pounds of romas were crushed, canned and put up for the winter.  Several beefsteaks and heirlooms were sliced up and enjoyed with just a drizzle of oil and a sprinkle of salt and pepper.  A creamy tomato bisque graced our dinner table another evening.  But still the tomatoes kept coming. 

My fall back became to roast them with garlic, peppers and onions and blend the mixture into an wonderfully rich sauce.   I got into the habit of slicing up as many tomatoes I had to fill up two baking dishes.   Whatever vegetables I deemed worthy would join the  mix...usually onions, peppers, once or twice a carrot.  The occasional small eggplant. Maybe some zucchini.  Herbs I played fast and loose with too.  And the wine?  Usually a dry white, but a red occasionally made a nice change of pace.  And in the end I stopped bothering with that whole seeding and skinning business.  The immersion blender blade did a fair job of getting the skins stuck up in it, so I never bothered trying to strain out the few that didn't managed to get jammed.  And the seeds?  Well, I'm lazy and the texture and flavor they added didn't bother me in the slightest.  The only thing I made certain to do was salt it well.  I had a tendency to go a little to easy on the salt early on...

 I believe I needn't worry about open a store bought jar of sauce for many, many more months...

adapted from Alton Brown

yields about 4-5 cups

The Ingredients:
15-20 fresh tomatoes.  Romas work best
1 onion, diced
1 red pepper, diced
6-8 cloves of garlic, crushed
1/4 cup olive oil
several sprigs of thyme
several fresh basil leaves
salt and pepper
1 cup dry white wine

The Process:
Preheat the oven to 350.  Slice the tomatoes in half lengthwise and cram into two 9x13 inch pans.  Divide the onions, peppers garlic and herbs evenly between the two pans.  Drizzle with oil and sprinkle with herbs, salt and pepper.

Bake in the pre-heated oven for about two hours.  Increase the oven temperature to 400 and bake an additional thirty minutes. 

Scrap the roasted tomatoes and veggies into a large stock pot along with the wine.  Heat over medium-high heat, bringing to a gentle simmer.  Cook, stirring continually, for 10 minutes.  Blend to a puree using an immersion blender directly in the pot, or transfer to a food processor and blend until smooth.  Season to taste with addition salt and pepper.

Serve immediately with your favorite pasta, ladle into plastic to freeze for later, or jar and process in a pressure cooker to preserve in the pantry.

Tuesday, August 21, 2012

Holy Homemade Hummus!


I have been meaning to make hummus for ages.  Store bought varieties are a staple of my lunches...with veggies, on pita, sometimes with pretzels or chips.  I adore every variety I've tried...plain, garlic loaded, spicy.  With olives or roasted red pepper.   The only thing that bothered me was a slightly artificial acidic flavor that nagged every brand I'd ever purchased.  I suspected the only solution was to make my own.


adapted from Cook Eat Live Vegetarian


yields about 1 1/2 cups

The Ingredients:
1 - 14 oz can garbanzo beans
3-4 Tbsp tahini
2-3 cloves of garlic
3-4 Tbsp lemon juice
1/4 tsp salt
oil, cumin and paprika to serve

The Process:
In a large bowl, thoroughly rinse the garbanzo beans, gently squeezing and rubbing the beans together to loosen the skins.   Skin the loosened skins off the top of the water.

Transfer the beans to a medium sauce pan.  Add just enough water to cover.  Bring the water to a boil, reduce heat and simmer the beans for about 12-15 minutes, or until soft.

Drain the chickpeas, reserving about 1/4 cup of the liquid.   Rinse, again while gently rubbing together to loosen and remove any remaining skins.  This may sound incredible tedious, but the extra step yields an extra creamy end product!

Transfer the beans to a food processor.  Add the tahini, garlic, lemon juice and salt.  Process until smooth, adding reserved liquid 1 Tbsp at a time until the desired consistency is achieved. 

Spoon the hummus to a serving dish.  Drizzle with olive oil and sprinkle with cumin and paprika.  Serve with pita, veggies or chips.

The Review:
I made this to enjoy with lunch.  I almost sat down with the entire batch and a spoon...it's that good...

Homemade pitas to follow!

Tuesday, July 24, 2012

A Trio of Beer BBQ Sauces

Ross just turned thirty.   Pretty traumatic.  I crossed that line a little while back myself and found the best source of comfort is to surround yourself with good friends.  We did just that, by throwing a backyard BBQ.  Our tiny Weber grill cannot hold that many burgers or brats at one time, but that wasn't going to stop me from throwing together a  few barbeque sauce options for the poultry offerings.

Those of you who know us or who've read along for a while are away of our beer obsession.  Ross has been home-brewing for well over a year now.  We had three brews on hand for his party...a honey kolsch, a raspberry wheat and a Belgian-style blonde.  It was only fitting that the sauces follow in suit.

So for your next BBQ I present to you three sauces:

Root beer BBQ sauce adapted from Michele's Woman Cave
Stout Sriracha BBQ Sauce courtesy of the Beeroness
Carolina Mustard and Ale sauce inspired by recipes at beerbeque and yummly


ROOT BEER BBQ SAUCE
yields about 1 1/2 cups
 
The Ingredients:
1 cup root beer (Sprecher or other brewed options work really well)
1 cup ketchup
1/4 cup molasses
2 Tbsp brown sugar
1/2 tsp garlic powder
1/2 tsp onion powder
1/4 tsp red pepper flakes (or more to taste)

The Process:
Whisk together all of the ingredients in a medium saucepan over medium heat until well combined.  Simmer for 20-30 minutes, stirring occasionally until sauce is reduced by about 1/3.  Chill until ready to use.

Keeps refrigerated in sealed jar for 2-3 weeks.


STOUT SRIRACHA BBQ SAUCE
yields about 1 1/2 cups


The Ingredients:
1 Tbsp olive oil
4 cloves of garlic, minced
1/2 cup soy sauce
2/3 cup ketchup
2 tbs Worcestershire sauce
1 - 2 tsp sriracha
2 tsp smoked paprika
1 cup Stout (such as Guinness or Bear Republic Big Bear Black Stout)
1/3 cup brown sugar
1 tsp onion powder

The Process:
 Heat the oil in a medium saucepan over medium-high heat.  Add the garlic and saute until tender and fragrant, abut 1 minute.  Whisk in the remaining ingredients.  Simmer until thickened, 15-20 minutes, stirring occasionally.  Chill until ready to use.

Keeps refrigerated in a sealed jar for 2-3 weeks.


CAROLINA MUSTARD ALE SAUCE
yields about 2 cups

The Ingredients:
 1 cup mustard
2 Tbsp honey
3 oz beer (of the malty variety)
2 Tbsp apple cider vinegar
3 Tbsp brown sugar
1/2 tsp Worcestershire sauce
1/2 tsp garlic powder
1/4 tsp cayenne pepper (or more to taste)
salt and pepper to taste

The Process:


Whisk together all of the ingredients in a medium saucepan over medium heat until well combined.  Simmer for 20-30 minutes, stirring occasionally until sauce is reduced by about 1/3.  Chill until ready to use.

Keeps refrigerated in sealed jar for 2-3 weeks.


The Review:
 The root beer sauce was the clear winner among our friends, though I was partial to the deeper flavor and heat of the stout sriracha sauce.  The mustard seemed to be a more acquired taste.  We tried all three with wonderful success on grilled chicken. 

After the birthday BBQ, the rest of the root beer sauce found its way into a crockpot full of shredded chicken.  The meat was incredibly juicy, and dripping with sauce.  The root beer does shine through, even withthis much meat.  Though the overall flavor note is sweet, with just a spicy hint of ginger.

The Stout sriracha yielded a much deeper color and a much richer flavor.  Straight out of the jar, the BBQ sauce had a potent amount of heat.  Once slathered on the chicken, though, all of the flavors mellowed out, without one standing out among the others.  You probably wouldn't know there was beer in the sauce if you hadn't bee told.


The mustard sauce is still awaiting its second trial.  A glorious cut of pork butt roast is currently thawing on our counter for dinner.  A mustardy sauce seems only fitting...

But really, can you go wrong with any home made barbeque sauce?


Monday, July 2, 2012

Arugula and Garlic Scape Pesto

Enough with the arugula, please!  Every week for the past month we've been blessed with an incredibly large bag of the peppery greens.  But there's only some much of it I can handle!  Our farm has promised this to be the last bunch (for a while, if not for the season).  The ridiculously hot and dry weather that part of the state has been dealing with resulted in the arugula all coming ready far before expected.

This batch, this possible last bundle, was full of large mature leaves even more fragrant then baby greens we'd been treated to earlier.  Taking the farm's suggestion, I turned this last bunch into a pesto. 

recipe courtesy of Driftless Organics

yields about 2 cups

The Ingredients:
1 cup garlic scapes  cut into 1" pieces
 2 cups chopped arugula, lightly packed
1/2 cup almonds, toasted
1/4 cup Parmesan cheese, grated
1/2 tsp salt
freshly ground pepper
1/3 cup olive oil

The Process:
Combine everything but the oil in a food processor and pulse into a coarse paste. Add oil in a thin stream while the processor is going. Store in an air-tight container in the fridge for up to a week or freeze.

The Review:
Now that you have that bright green concoction, how do you use it?  First I tried a spoonful and was wowed by how the usually subtle flavor of the scapes came forward.

Next we tired is tossed with pasta.  A little bit of pesto went a very long way.  The flavor was bright and grassy...rounded out with the rich, but not overwhelming garlic.


How else?  Straight up with fresh veggies.  Not bad...but the strong flavor of the pesto was a bit much for the delicate red pepper and snap peas.  WAY too peppery served with raw radish, but worth the try.

Spread on buttered bread and broiled?  Amazing.

Mixed with a bit of cream cheese and scooped up with celery...a much better alternative with raw veggies than served straight up.

So many ways...so many things to try.

I'm a little disappointed I didn't start making pesto with the arugula earlier!

Saturday, June 30, 2012

Crunchy Honey Garlic Chicken Breasts


This recipe is another treat that has been floating around on pinterest for some time.  Sadly, every time I tried to click through to the original post I was directed to an error.  After a bit of snooping, I found the recipe at the blog Rock Recipes.  The site boasts to be "one of Canada's best food blogs."  I may have to spend a little more time on that blog to see what other gems out neighbors to the north may be offering!

adapted from Rock Recipes

serves 6-8

The Ingredients:
4 large, boneless skinless chicken breasts, split in half

for the breading:
1 1/2  cup flour
2 Tbsp ground ginger
1 1/2 tbsp ground nutmeg
1 1/2 Tbsp paprika
1 Tbsp salt
1 Tbsp black pepper
2 tsp ground thyme
2 tsp ground sage
1 tsp cayenne pepper

for the egg wash
3 eggs
6  tbsp water

for the honey garlic sauce:
2 Tbsp sesame oil
3 – 4 cloves garlic, minced
3/4 cup honey
1/4 cup soy sauce
1 tsp ground black pepper
 

The Process:
Place each chicken cutlet between two pieces of waxed paper or plastic wrap. Starting in the center and working out to edges, pound lightly with the flat side of a meat mallet until the chicken is an even 1/2" thickness.

In a shallow bowl large enough to accommodate the chicken, whisk together the the eggs and water.  In a large bowl sift together all of the breading ingredients.

Dip the chicken in the flour  mixture, coating evenly. Then dip into the eggwash. Return the chicken to the flour mixture, turning to ensure even coverage and gently pressing the breading into the egg wash.  Set aside and repeat with the remaining chicken.

Heat about 1/2" of oil in a large skillet over medium-high heat.  Working with 2-3 chicken pieces at a time, gently set the cutlets in the oil and fry gently until golden brown, 4-5 minutes per side.  Remove the chicken to paper towels to drain and then set in an oven preheated to 200 to stay warm.  Cook the remaining chicken in the same fashion.

for the garlic honey sauce:
Heat the sesame oil in a small saucepan set over medium-high heat.  Add the garlic and saute until tender and fragrant.  Add the honey, soy sauce and pepper; simmer for 5-10 minutes.

to serve:
Plate the chicken and generously drizzle with garlic honey sauce.

The Review:
Holy Mother of...

This dinner was originally supposed to be served to 4, accompanied by rice and stir fried snap peas.  Somehow the company expanded to 8.  The recipe comfortable fed us all...though we were all licking our plates by the end.

Adult chicken mcnuggets.  I'm not sure why this recipe evokes the comparison.  The breading was joyously crunchy, even after a brief rest in the oven.  I had worried they would become soggy if not served immediately.  Not the case.  The meat...tender and juicy and made even more amazing by the spice blend that blanketed it.  The nutmeg dominated the flavors, but in pleasant way...still allowing the pepper, ginger, sage and thyme to come through.  

The sauce though.  Oh the sauce!  It stole the show.  Tasting frequently as I added the honey, I stopped at 3/4 of a cup instead of the 1 cup the original recipe asked for.  And still I found it quite sweet.  But paired with the peppery and ginger laced chicken...

Maybe that's why my mind wandered to the childhood fast food favorite...tender nuggets of chicken coated in a peppery breaded, fried to perfection and drenched in glorious honey.  

But multiplied beyond compare. 

While all of the company that joined us this evening gladdened my heart, I was disappointed to discover that meant no leftovers.  

Ah well.  I suppose that means I will have to make this again...

Friday, April 20, 2012

Jerked Chicken Skewers and Cantaloupe Dipping Sauce


Ross is to blame thank for this recipe.  I found myself with a Friday evening with both of us off and no immediate plans.  Dinner dates at home often result.  So when I asked what he'd like me to make, and we remembered the chicken breasts in the freezer, he promptly requested Caribbean.  Rather than just dust the chicken with Jerk seasoning I hunted down this marinade.  And voila!

Added bonus, this recipe gave us the extra incentive to finally break down and buy a grill.  Grilling season is upon us after all!


Adapted Bob Marley's Restaurant, recipe posted at Foodnetwork

The Ingredients:
for the marinade:
1 onion, finely chopped
2 scallions, finely chopped
2 tsp fresh thyme leaves
1 tsp salt
1 Tbsp brown sugar
1 tsp ground allspice
1/2 tsp ground nutmeg
1/2 tsp ground cinnamon
1 dried red chili, finely ground (or 2 Scotch bonnet peppers)
1 tsp ground black pepper
3 Tbsp soy sauce
1Tbsp olive oil
1 Tbsp cider vinegar

for the skewers:
2 pounds chicken breast, cut into large cubes
bamboo skewers
1 1/2 cups water
1/2 cup lime juice

for the dipping sauce:
one quarter of a cantaloupe, peeled, seeded and cubed
1/2 cup sour cream
1/2 cup mayonnaise
1 Tbsp cider vinegar
1 tsp Dijon mustard
1 clove garlic, minced
1/2 tsp salt
pinch of cayenne pepper

The Process:
for the marinade: 
In a medium bowl, whisk together all of the marinade ingredients (or puree in a blender or food processor until well combined.) Place the chicken in a large freezer bag.  Pour the marinade over the chicken.  Marinate in the refrigerator for at least 4 hours, preferably overnight.

to prepare and cook the chicken skewers:
At least 2 hours before grilling, soak the bamboo skewers.  Combine 1 1/2 cups of water and 1/2 cup of lemon or lime juice in a pint glass.  Place the skewers in the glass to soak

Prepare the grill or preheat the broiler.

Thread 4-5 cubes of chicken onto each soaked skewer. Discard the marinade.  Grill or broil the skewers for 2-3 minutes per side.  Serve immediately with dipping sauce.

for the dipping sauce:
Combine all of the ingredients in a blender and puree until smooth.   Season with addition cayenne or salt to taste.  Chill until ready to serve. 

The Review:
 In the darken light it became harder and harder to see how our skewers were doing on the grill.  Some came off a little blackened.  But that's okay, right?  It is jerk chicken after all.  But even with the generous charring suffered on some, the chicken remained tender and incredibly flavorful.

I adore marinades and spice blends such as this one.  A little kick of spice.  A hint of sweet.  A burst of salt.  And just a touch of sour.  So many layers of flavor!  Serve along grilled pineapple...pure bliss.

The sauce was the big surprise though.  I didn't have cucumbers, but a gorgeous cantaloupe was sitting off to the side in my kitchen.  Cucumber melon combinations are so common...if the compliment each other so well, why not try subbing one for the other.  The result was surprisingly successful.  The creamy and slightly tart base suggested a tziziki, but the sweetness of the cantaloupe, along with a subtle earthiness (it is known as musk melon for a reason) created something completely unique.  The recipe made quite a lot, and it doesn't keep very long in the fridge before it begins to separate (there is a LOT of water in the melon...)  Maybe three days.  And this is a sauce much better the first day. Try to make up only as much as you think you can use.


Sunday, February 19, 2012

Butternut Squash Gnocchi with Garlic Leek Sauce

That butternut squash has been staring at me forlornly for far too long.  It deserved better than to rest on the counter.  Remembering fondly the lovely, pillow-y dumpling I made out of sweet potatoes well over a year ago, I convinced myself the squash would be happy in that form.  Over the course of three days I worked on the gnocchi.  Baking the squash one day.  Making the dough and forming the gnocchi the next.  Waiting for the third day for the dish to come together.  I had very high hopes.  The dish was anticipated all week.

 For some reason, my biggest frustration with gnocchi isn't the amount of time it takes, but coming up with a sauce pairing.  Cream sauces seemed to heavy.  Brown butter sauce, too common.  I wanted something light and mellow...maybe a bit tart...to compliment what I suspected would be a sweeter gnocchi.  Leeks and white wine were on hand.

Did the combination work out?

Serves 4-6

Gnocchi recipe adapted from Bon Apetit, October 2010
Sauce recipe is my own

The Ingredients:
for the gnocchi
1 small butternut squash, about 1 lb
1 Tbsp olive oil
1 large russet potato, peeled and quartered
1/2 cup finely grated Parmesan cheese, divided
1 large egg, beaten
1 teaspoon salt
1 3/4 cups all purpose flour, plus additional for rolling

for the sauce
2 Tbsp unsalted butter
2 Tbsp olive oil
 2 large leeks, trimmed and cleaned
1 shallot
3-4 cloves of garlic, minced
1/2 cup chicken stock
1 Tbsp dry white wine
1 Tbsp fresh parsley
salt and pepper to taste

The Process:
for the gnocchi
Preheat oven to 400°F. 

Cut squash in half lengthwise and discard seeds. Pierce the skin of the squash in several places with a sharp knife and place cut sides down on an oiled baking sheet.   Roast until squash is very tender and skin begins to blister and brown, about 1 1/2 hours. Let rest until cool enough to handle. Scoop the flesh from squash into a food processor and puree until smooth. Transfer to medium saucepan.  Simmer over medium heat until juices evaporate and puree thickens, stirring constantly. The goal is to rid the squash of as much liquid as possible. Cool. Measure out one cup of puree.

Meanwhile, cook potato in medium saucepan of boiling salted water until very tender, about 20 minutes. Drain. While potato is warm, press through potato ricer into medium bowl. Cool completely. Measure two cups  riced potato.

Mix squash, potato, Parmesan cheese, egg, and salt in large bowl. Gradually add the flour, kneading gently into mixture in bowl until dough holds together and is almost smooth. If dough is excessively sticky, add more flour one Tbsp at a time. The dough should be smooth, but tacky.  Too much flour with result in a tough dumpling.  Turn dough out onto floured surface; knead gently but briefly just until smooth. Flatten the dough into a circle and divide into eight equal wedges.

Line 2 large rimmed baking sheets with parchment sprinkled lightly with flour. Working with one dough segment at a time, roll dough out on floured surface to about 1/2-inch-thick rope. Using a well floured knife, cut rope crosswise into 3/4- inch pieces. Gently roll each gnocchi along back of fork tines dipped in flour to make ridges on one side. Transfer gnocchi to baking sheets. Repeat with remaining dough. Cover loosely with plastic wrap and chill at least 1 hour. 

At this point the shaped gnocchi may be frozen for latter use.  Loosely cover the baking sheets and set in the freezer for 1-2 hours.  Gently transfer the frozen gnocchi to freezer bags.  To prepare, proceed directly to cooking directions below...DO NOT THAW!

Working in 2 batches, cook gnocchi in large pot of boiling salted water until very tender, 15 to 17 minutes--gnocchi will float to surface when almost cooked through. Using slotted spoon, transfer gnocchi to warmed dinner plates

for the sauce
In a large  skillet, heat the olive oil and butter. Add the leeks, shallots and garlic and saute over medium heat, stirring occasionally, until leeks softened and are just beginning to brown, about 10 minutes. Add the chicken stock, whit4e wine and parsley.  Bring mixture to a gentle simmer fro 5 to 7 minutes. Transfer the mixture to a blender and puree until smooth. Season with salt and pepper to taste.

To serve
Transfer cooked gnocchi to warmed serving plates and drizzle with leek sauce.  Sprinkle with Parmesan or fresh parsley if desired

The Review:
So back to the question.  Did the combination work out?  No.  The sauce was stunning.  A beautiful mild green hue.  Subtle onion flavor with a slight sweetness.  A hint of garlic.  The cleaning bite of the wine.  I had to stop myself from licking the utensils clean while I worked. 

But did it pair well with the gnocchi?  Barely.  The gnocchi were completely overpowered by the sauce.  Bland by comparison, they became the vehicles that supported the flavorful green accompaniment instead of being complimented center stage.

The gnocchi themselves?  After such a build up all week and the amount of time put into them, I was let down.  Even trying a frozen batch a few days later with a basic brown butter sauce seemed bland and a hair on the doughy side.  Perhaps I didn't measure well enough...or hadn't cooked down the squash enough.  But to devote so much time to a dish that is at best lackluster is a huge disappointment.  Will this be the end of my gnocchi attempts?  Of course not.  Eventually I figure out the right balance that creates the perfect airy and delicate morsel.  Maybe by then I can come up with a better pairing as well.  Or I could leave well enough alone.  Most recipes must use browned butter for a reason...

Saturday, January 7, 2012

Seafood Enchiladas


 Once in a blue moon I'll find myself in a Mexican restaurant (granted, often as far from "Mexican" as Minnesota is from our Southern border).  On these rare occasions I'll find my hopes raised at the thought of a tortilla wrapped around succulent little bits of shrimp, crustaceans and mollusks in a creamy sauce.  Inevitably those hopes are dashed as my fork pries out flakes of imitation crab and bits of anemic shrimp, with little else.

These enchiladas are a step in the right direction.  The end result is directly related to the quality and variety of seafood you put into them.  I opted for crab, shrimp, scallops and john dory fillets.  But salmon. lobster and many other varieties of flaky fish would serve nicely.

adapted from a recipe at Betty Crocker

serves 4-6

The Ingredients:

2 Tbsp butter
1 medium onion, chopped 
2 cloves garlic, minced
3 Tbsp all-purpose flour
1 3/4 cups chicken, fish or vegetable stock
8 oz sour cream
1 1/2 cups shredded Mexican cheese blend (monterey jack, cheddar, queso quesadilla and asadero)
1 can (4.5 oz)  chopped green chiles, undrained
8 oz small scallops, raw
8 oz salad shrimp, raw
2  fillets john dory or other firm white fish, raw
1/2 cup crab meat, cooked and flaked or 2 - 6 oz cans, drained
8 - 8 inch flour tortillas
Diced tomato, avocado and cilantro for garnish


The Process:
Preheat oven to 350.

In 2-quart saucepan, melt butter over medium-high heat. Add onions and garlic and saute for 3 to 4 minutes, stirring frequently, until softened. Stir in flour and stir until blended with butter. Add broth and heat to boiling, stirring frequently to remove any lumps.  Reduce heat to a simmer.  Add scallops, shrimp and fish fillets and poach until the fish begins to flake and the shrimp and scallops turn opaque, about 5 minutes.  Remove the seafood to a medium bowl and cover to keep warm.
  
Add sour cream to the saucepan and cook about 2 minutes, stirring constantly, until sauce is thickened. Remove from heat. Stir in cheese until melted. Stir in chiles.

In 13x9-inch (3-quart) glass baking dish, spoon 1 cup of the cheese sauce over bottom. Set aside.

Add 1 cup of the cheese sauce to the reserved seafood. Stir to combine, gently breaking up the fish fillets.  Add the crab meat and stir to combine.  Spoon about 1/2 cup seafood mixture onto each tortilla. Roll up tortillas; place seam sides down on sauce in the baking dish. Pour remaining sauce over enchiladas.

Cover baking dish with foil. Bake 30 to 35 minutes or until bubbly.  Serve warm with tomatoes, avocado and cilantro.


The Review:
These enchiladas were a wonderful change of pace from the underwhelming varieties sold at tex-mex chains, as well as a richer alternative to the tried-and-true ground beef versions smoothered in a tomato based sauce.  Ross opined that, well incredibly good, these are a little too rich to replace our favorite beef and garlic ones when an enchilada craving hits.


The sauce was rich and mild, with a lovely seafood flavor due to using the base being used to poach the seafood.  During the cooking process, I sampled the sauce throughout and was in love with its velvety texture and subtle heat from the canned chilies.  So it was a bit of a surprise that the seafood flavors dominated the end result, almost completely masking the chilies.   A second can of chilies or hotter variety may be called for next time around, should I want a peppier sauce.


Two enchiladas easily provided four gut stuffing entrees. But given how rich these plump enchiladas are, served up with rice and a salad I'm sure you could stretch the serving size to eight people. 

Thursday, October 6, 2011

Miso Glazed Eggplant


I love eggplant but often find myself in a rut over how to prepare it. The Mediterranean standbys grow old and a bit to familiar. But while flipping through one of Ross' Men's Health magazine, an article jumped out about dressing up your veggies. Asian condiments and a hot broiler seemed a good fix for the eggplant rut.

adapted from "A Meat Lover's Guide to Vegetables" in Men's Health, October 2011

The Ingredients:
1 medium eggplant, cut lengthwise into 1/2 inch slices
2 Tbsp shiro (white) miso
1 Tbsp honey
1/2 Tbsp rice wine vinegar
1/2 Tbsp soy sauce

The Process:
Preheat the broiler.

Lightly brush both sides of the eggplant slices with vegetable or olive oil Line a baking sheet with foil and arrange the slices in a single layer.

Combine the miso, honey, vinegar, and soy sauce along with a dash of pepper. Whisk until well blended. Brush the sauce on the exposed sides of the slices.

Broil the eggplant 6 inches from the heat until the sauce is caramelized, about 3-4 minutes. Flip the slices, brush with exposed sides with sauce and broil 3-4 minutes more.

Remove the eggplant to a serving platter and brush with remaining sauce before serving.

The Review:
I adored the miso glazed salmon I tried a few months back. The fish had a lovely balance of sweet, salty and umami. The eggplant, though, lacked something. The funk of the miso seemed to overpower the honey and soy sauce instead of blending with it. The sauce didn't seem to caramelize as promised, so much as brown and burn. And while I have enjoyed many silky or meaty textures of eggplant, depending upon how prepared, this incarnation seemed almost slimy.

Next time perhaps the smaller Japanese eggplants are in order. And a bit more tweaking with the sauce ratio. There is always room for improvement, and never a failure without the chance for later success.