I have a slightly hard time calling these muffins. Zucchini muffins should be sweet and spiced, right? Like carrot cake and pumpkin bread and other vegetables parading around in baked good form. Yes, they are shaped like muffins. And certainly they fit the baked goods mold. But the savory factor throws me. Apparently cornmeal muffins are acceptable, but these? My brain is trying to tell me, no, these are biscuits. But they are far to moist and tender to be biscuits.
And I will make them again.
adapted from Chilly Frosting
yields 12 muffins
The Ingredients
1 ½ cup all-purpose flour
1½ tsps baking powder
1 tsp baking soda
1 tsp salt
½ tsp freshly ground pepper
1/2 cup milk
3 Tbsp vegetable oil
2 eggs
1 large or 2 small zucchini, grated (about 1 1/2 cups)
1 cup crumbled feta cheese
The Process:
Preheat the oven to 350 degrees F.
Lightly oil a miffin tin, or line with paper liners.
In a large bowl combine the flour, baking powder, baking soda, salt and pepper.
In a second bowl, whisk together the milk, oil and eggs. Add the wet ingredients to the dry and mix until just combined.
Fold the zucchini and feta into the batter.
Spoon the batter into the prepared muffin tin, filling about 2/3 full.
Bake for 18-20 minutes or until a toothpick inserted into the center of a muffin comes out clean.
Remove from oven and cool for 5 minutes. Remove muffins from tin to a cooling rack to cool completely.
Enjoy!
Seize the food! A new year's resolution to experiment with 100 new recipes in the coming year.
Showing posts with label brunch. Show all posts
Friday, September 19, 2014
Tuesday, August 26, 2014
Banana Pepper, Kale and Summer Squash Frittata
CSA veggies make for some of the best breakfasts! This recipe seems like a lot of produce. And it is. But most of the vegetables cook down quite a bit and are mixed up with just enough egg to hold the whole thing together.
A word of caution on using banana peppers...some a ridiculously hot, others are quite mild. You really won't know until you try a bite, so don't toss a whole pepper or two into the frittata willy-nilly. Wearing gloves is recommended when dealing with any spicy pepper. At the very least, be sure to thoroughly wash your hands prior to touching your face. Pepper spray is incredibly effective for a reason...
adapted from a recipe courtesy of Driftless Organics
serves 2
The Ingredients:
1 1/2 Tbsp butter, divided
2 cloves of garlic, minced
1/2 summer squash, coarsely grated
1 banana pepper, coarsely chopped
2-3 leaves of kale, stems removed and leaves coarsely chopped
3 eggs, beaten
1 1/2 tsp fresh thyme
salt and pepper to taste
1/4 cup feta, crumbled
The Process:
Preheat the broiler and adjust the oven rack to about 4" below.
Melt 1 Tbsp of the butter in a 8" cast iron skillet set over medium heat. Add the garlic and squash and cook for 2-3 minutes. Add the banana pepper and satuee an additional minute. Add the kale and thyme, cook until the kale is just beginning to wilt. Add the remaining butter and swirl to coat the pan.
Pour in the eggs, swirling the pan to distrubute them evenly. Reduce heat to low and cook 2-3 minutes, or until the edges have begun to set. Sprinkle with feta and place under the broiler.
Broil until the top of the frittata is set and is begining to brown, 3-4 minutes.
Allow to cool slightly before serving.
A word of caution on using banana peppers...some a ridiculously hot, others are quite mild. You really won't know until you try a bite, so don't toss a whole pepper or two into the frittata willy-nilly. Wearing gloves is recommended when dealing with any spicy pepper. At the very least, be sure to thoroughly wash your hands prior to touching your face. Pepper spray is incredibly effective for a reason...
adapted from a recipe courtesy of Driftless Organics
serves 2
The Ingredients:
1 1/2 Tbsp butter, divided
2 cloves of garlic, minced
1/2 summer squash, coarsely grated
1 banana pepper, coarsely chopped
2-3 leaves of kale, stems removed and leaves coarsely chopped
3 eggs, beaten
1 1/2 tsp fresh thyme
salt and pepper to taste
1/4 cup feta, crumbled
The Process:
Preheat the broiler and adjust the oven rack to about 4" below.
Melt 1 Tbsp of the butter in a 8" cast iron skillet set over medium heat. Add the garlic and squash and cook for 2-3 minutes. Add the banana pepper and satuee an additional minute. Add the kale and thyme, cook until the kale is just beginning to wilt. Add the remaining butter and swirl to coat the pan.
Pour in the eggs, swirling the pan to distrubute them evenly. Reduce heat to low and cook 2-3 minutes, or until the edges have begun to set. Sprinkle with feta and place under the broiler.
Broil until the top of the frittata is set and is begining to brown, 3-4 minutes.
Allow to cool slightly before serving.
Labels:
30 minute meal,
breakfast,
brunch,
CSA,
eggs,
feta,
Kale,
south beach phase 1,
squash,
thyme
Tuesday, August 12, 2014
Pineapple Coconut Bread Pudding
Some weekends call for dessert as breakfast. Feel free to give this one a try! The trickiest part of the recipe was making the caramel sauce from scratch. I've master many a batch of caramel and the process still keeps me on my toes a little bit. If you're too wary, a jar of the ice cream topping will do just as well. No one needs that high a level of anxiety first thing in the morning after all. The rest of the dish comes together in a pinch, though a decent chunk of time is needed to bake the pudding. This may not be the recipe for a house hold full of early risers...maybe brunch would be more appropriate. And really, who doesn't enjoy brunch.
The original recipe called for a fair amount of sugar in ADDITION to the caramel sauce. Really, between the sweet bread, the sauce and the sweet fruity flavors, this bread pudding really does not need the extra sweetness. However...adding in that extra coconut and sprinkle of nuts on top give the dish a wonderful boost.
pudding adapted from What's Cooking, Love?
sauce adapted from Sally's Baking Addiction
serves 8
The Ingredients
for the caramel sauce:
1/2 cup sugar
3 Tbsp butter, cut into 4-6 pieces
1/4 cup heavy cream
1/2 tsp salt
for the pudding
1 lb day old Portuguese Sweet Bread (such as King's Hawaiian)
4 eggs, slightly beaten
1 - 14 oz can coconut milk
2/3 cup crushed pineapple, with juice
1 tsp vanilla
1/2 cup flaked coconut, toasted
1/4 cup chopped macadamia nuts, toasted (optional)
The Process:
for the sauce
Place a medium heavy-bottomed saucepan over medium-high heat. Add the sugar and heat, stir occasionally using a rubber spatula. The sugar will begin to clump and melt. Once the all of the sugar melts and forms a thick amber-colored syrup, add the butter, one piece at a time, stirring until completely. Be careful...it will sputter.
Once the butter has been combined, slowly drizzle in the cream, again being careful of sputtering. Allow to boil for 1 minute. Remove from heat and stir in the salt. Transfer to a heat proof dish and allow to cool.
for the pudding:
Preheat the oven to 350 degrees F.
Cut the bread into 1-inch cubes.
In a large bowl, whisk together the eggs, coconut milk, and vanilla. Add the cubed bread and toss to coat. Set aside for 5-10 minutes to allow the bread to soak up the egg mixture.
Lightly grease a 9 x 9 inch baking dish. Layer half of the bread mixture into the bottom of the dish. Drizzle with half of the caramel sauce and layer the flaked coconut on top. Top with the remaining bread mixture. Drizzle with remaining caramel sauce and sprinkle the pudding with toasted macadamia nuts (if desired).
Bake, uncovered for 35-40 minutes, or until the pudding is set and slightly puffed. Remove from oven and allow to cool slightly before serving.
Top with additional caramel sauce if desired.
The original recipe called for a fair amount of sugar in ADDITION to the caramel sauce. Really, between the sweet bread, the sauce and the sweet fruity flavors, this bread pudding really does not need the extra sweetness. However...adding in that extra coconut and sprinkle of nuts on top give the dish a wonderful boost.
pudding adapted from What's Cooking, Love?
sauce adapted from Sally's Baking Addiction
serves 8
The Ingredients
for the caramel sauce:
1/2 cup sugar
3 Tbsp butter, cut into 4-6 pieces
1/4 cup heavy cream
1/2 tsp salt
for the pudding
1 lb day old Portuguese Sweet Bread (such as King's Hawaiian)
4 eggs, slightly beaten
1 - 14 oz can coconut milk
2/3 cup crushed pineapple, with juice
1 tsp vanilla
1/2 cup flaked coconut, toasted
1/4 cup chopped macadamia nuts, toasted (optional)
The Process:
for the sauce
Place a medium heavy-bottomed saucepan over medium-high heat. Add the sugar and heat, stir occasionally using a rubber spatula. The sugar will begin to clump and melt. Once the all of the sugar melts and forms a thick amber-colored syrup, add the butter, one piece at a time, stirring until completely. Be careful...it will sputter.
Once the butter has been combined, slowly drizzle in the cream, again being careful of sputtering. Allow to boil for 1 minute. Remove from heat and stir in the salt. Transfer to a heat proof dish and allow to cool.
for the pudding:
Preheat the oven to 350 degrees F.
Cut the bread into 1-inch cubes.
In a large bowl, whisk together the eggs, coconut milk, and vanilla. Add the cubed bread and toss to coat. Set aside for 5-10 minutes to allow the bread to soak up the egg mixture.
Lightly grease a 9 x 9 inch baking dish. Layer half of the bread mixture into the bottom of the dish. Drizzle with half of the caramel sauce and layer the flaked coconut on top. Top with the remaining bread mixture. Drizzle with remaining caramel sauce and sprinkle the pudding with toasted macadamia nuts (if desired).
Bake, uncovered for 35-40 minutes, or until the pudding is set and slightly puffed. Remove from oven and allow to cool slightly before serving.
Top with additional caramel sauce if desired.
Tuesday, July 16, 2013
Strawberry and Blueberry Muffins with a Streusel Topping
Our CSA continues to delight us with more berries than we can keep up with! While I love the thought of frozen berries to enjoy later this year once the summer bounty diminishes, it seems such a shame to not use up as many as possible while at their peek of freshness. With a double batch of berries in hand, I could think of no better idea than to play around with a few muffin mixtures.
The end result is a hodge podge of three recipes I tinkered with. The batter is thick, almost the consistency of co
okie dough. At first I found this a bit frustrating, particularly when I attempted to fill the muffin tin. But in the end the thick batter resulted in muffins evenly studded with fruit, instead of a mess of berries submerged at the bottom.
A sprinkle of sugar spiked with lemon zest makes a bright wonderful topping, but I am a sucker for a good streusel. Nothing really beats the Better Homes and Gardens version...
Inspired by Alton Brown, Confessions of a Baking Queen the BHG cookbook and Smitten Kitchen
The Ingredients:
for the muffins
5 Tbsp unsalted butter, room temperature
1/3 cup sugar
1 large egg
1/3 cup greek yogurt
1/2 cup milk
1/2 tsp lemon zest
1 tsp vanilla extract
1 cup all purpose flour
3/4 cup cake flour
2 tsp baking powder
1/2 tsp baking soda
1/4 tsp salt
3/4 cup sliced or quartered strawberries
1/2 cup blueberries
for the topping
1/4 cup flour
1/4 cup brown sugar
1/2 tsp cinnamon
3 Tbsp butter
The Process:
preheat the oven to 380
Line a 12 ct muffin tin with paper liners or generously mist each cup with cooking spray.
In a large bowl, cream together the sugar and butter until fluffy. Beat in the egg until well combined. Mix in the yogurt, milk, vanilla and zest.
In a medium bowl, sift together the flours, baking powder, baking soda, and salt. Mix in half of the dry into the wet until well combined. Sift in the remaining dry ingredients in to batter, until just mixed. Fold in the berries.
For the topping, in a small bowl combine the flour, brown sugar and cinnamon. Cut in the butter until the mixture resembles coarse crumbs. Set aside.
Using an ice cream scoop or two spoons, fill the cups of the muffin tin approximately 3/4 full. Sprinkle with topping.
Bake for 20-25 minutes, or until a toothpick inserted in the center comes out clean, rotating the pan once while baking.
Transfer to a baking rack to cool.
The end result is a hodge podge of three recipes I tinkered with. The batter is thick, almost the consistency of co
okie dough. At first I found this a bit frustrating, particularly when I attempted to fill the muffin tin. But in the end the thick batter resulted in muffins evenly studded with fruit, instead of a mess of berries submerged at the bottom.
A sprinkle of sugar spiked with lemon zest makes a bright wonderful topping, but I am a sucker for a good streusel. Nothing really beats the Better Homes and Gardens version...
Inspired by Alton Brown, Confessions of a Baking Queen the BHG cookbook and Smitten Kitchen
The Ingredients:
for the muffins
5 Tbsp unsalted butter, room temperature
1/3 cup sugar
1 large egg
1/3 cup greek yogurt
1/2 cup milk
1/2 tsp lemon zest
1 tsp vanilla extract
1 cup all purpose flour
3/4 cup cake flour
2 tsp baking powder
1/2 tsp baking soda
1/4 tsp salt
3/4 cup sliced or quartered strawberries
1/2 cup blueberries
for the topping
1/4 cup flour
1/4 cup brown sugar
1/2 tsp cinnamon
3 Tbsp butter
The Process:
preheat the oven to 380
Line a 12 ct muffin tin with paper liners or generously mist each cup with cooking spray.
In a large bowl, cream together the sugar and butter until fluffy. Beat in the egg until well combined. Mix in the yogurt, milk, vanilla and zest.
In a medium bowl, sift together the flours, baking powder, baking soda, and salt. Mix in half of the dry into the wet until well combined. Sift in the remaining dry ingredients in to batter, until just mixed. Fold in the berries.
For the topping, in a small bowl combine the flour, brown sugar and cinnamon. Cut in the butter until the mixture resembles coarse crumbs. Set aside.
Using an ice cream scoop or two spoons, fill the cups of the muffin tin approximately 3/4 full. Sprinkle with topping.
Bake for 20-25 minutes, or until a toothpick inserted in the center comes out clean, rotating the pan once while baking.
Transfer to a baking rack to cool.
Friday, June 7, 2013
Savory Bread Pudding with Rapini and Prosciutto
Breakfast for dinner? Certainly! But this dish is also a twist on what is typically thought of as dessert. Perhaps the end result is more strata than bread pudding. But with as inexpensive, yet full of flavor dish is, that seems like a minor detail worth overlooking...
adapted from Bon Appetit
serves 4-6
The Ingredients:
1 Tbsp olive oil
2-3 cloves of garlic, minced
1/2 tsp crushed red pepper
1 medium bunch rapini, cut into 1 inch pieces
2 tsp kosher salt
1/2 tsp ground black pepper
6 large eggs
1/2 cup heavy cream
1 cup milk
1 large baguette, torn into 1 inch pieces (about 8 cups)
1/2 cup + 2 Tbsp grated Parmesan
6-8 thin slices of prosciutto
The Process:
Preheat the oven to 350. Butter a casserole or baking dish and set aside.
Add the oil to a large skillet set over medium heat. Add the garlic and pepper flakes, stirring until fragrant, about 1 minute. Add the rapini and cook, stirring frequently, until the wilted. Allow to cool slightly.
In a large bowl, whisk together the eggs, cream, milk salt and pepper. Add the rapini, bread and 1/2 cup Parmesan. Toss to coat. Spread the mixture into the prepared baking dish. Evenly place the prosciutto over the top and sprinkle with remaining Parmesan.
Bake, uncovered, until the pudding is puffed, beginning to brown and is set in center, about 50 minutes.
Serve warm.
adapted from Bon Appetit
serves 4-6
The Ingredients:
1 Tbsp olive oil
2-3 cloves of garlic, minced
1/2 tsp crushed red pepper
1 medium bunch rapini, cut into 1 inch pieces
2 tsp kosher salt
1/2 tsp ground black pepper
6 large eggs
1/2 cup heavy cream
1 cup milk
1 large baguette, torn into 1 inch pieces (about 8 cups)
1/2 cup + 2 Tbsp grated Parmesan
6-8 thin slices of prosciutto
The Process:
Preheat the oven to 350. Butter a casserole or baking dish and set aside.
Add the oil to a large skillet set over medium heat. Add the garlic and pepper flakes, stirring until fragrant, about 1 minute. Add the rapini and cook, stirring frequently, until the wilted. Allow to cool slightly.
In a large bowl, whisk together the eggs, cream, milk salt and pepper. Add the rapini, bread and 1/2 cup Parmesan. Toss to coat. Spread the mixture into the prepared baking dish. Evenly place the prosciutto over the top and sprinkle with remaining Parmesan.
Bake, uncovered, until the pudding is puffed, beginning to brown and is set in center, about 50 minutes.
Serve warm.
Thursday, May 16, 2013
Pea Pancakes with Herbed Yogurt and Prosciutto
Spring has finally sprung! With our ridiculously long winter, it may be a few more weeks before we begin to see some truly fresh produce. In the meantime, I am perfectly content making due with a few frozen pantry essentials.
This meal is incredibly light, but surprisingly filling. It makes an wonderfully refreshing dinner on a warm day as well as an invigorating brunch or breakfast. The sweet peas compliment the tangy herbed yogurt and salty prosciutto so well...each bite added more layers of flavor than the last. Who said pancakes can't be savory?
adapted and embellished from Bon Apetit
serves 4
The Ingredients:
for pancakes:
1 tsp salt
3 large eggs
1 cup cottage cheese
1/4 cup flour
2 Tbsp oil
2 scallions, thinly sliced
1 cup peas, thawed if frozen
for the yogurt:
1/2 cup Greek yogurt
2 small sprigs fresh dill, chopped (1-2 Tbsp)
1 small bunch fresh chives, chopped (2-3 Tbsp)
to serve:
1 green onion, thinly sliced
8 paper thin slices of prosciutto
The Process:
for the yogurt:
In a small bowl, whisk together the yogurt and herbs. Cover and chill for at least 20 minutes.
for the pancakes:
Combine the salt, eggs, cottage cheese, flour and oil in a food processor or blender and pulse until smooth. Transfer batter to a medium bowl and fold in the peas and green onions.
Heat a large, lightly-oiled skillet over medium heat. Working in batches, pour a scant 1/4 cup of batter into the skillet making 4-inch rounds and cook until bubbles form on top, 3-5 minutes. Flip and cook an additional 2 minutes or until the middle is set. Remove cakes from heat and keep warm. Repeat with remaining batter.
Serve with herbed yogurt, prosciutto and sliced green onion.
This meal is incredibly light, but surprisingly filling. It makes an wonderfully refreshing dinner on a warm day as well as an invigorating brunch or breakfast. The sweet peas compliment the tangy herbed yogurt and salty prosciutto so well...each bite added more layers of flavor than the last. Who said pancakes can't be savory?
adapted and embellished from Bon Apetit
serves 4
The Ingredients:
for pancakes:
1 tsp salt
3 large eggs
1 cup cottage cheese
1/4 cup flour
2 Tbsp oil
2 scallions, thinly sliced
1 cup peas, thawed if frozen
for the yogurt:
1/2 cup Greek yogurt
2 small sprigs fresh dill, chopped (1-2 Tbsp)
1 small bunch fresh chives, chopped (2-3 Tbsp)
to serve:
1 green onion, thinly sliced
8 paper thin slices of prosciutto
The Process:
for the yogurt:
In a small bowl, whisk together the yogurt and herbs. Cover and chill for at least 20 minutes.
for the pancakes:
Combine the salt, eggs, cottage cheese, flour and oil in a food processor or blender and pulse until smooth. Transfer batter to a medium bowl and fold in the peas and green onions.
Heat a large, lightly-oiled skillet over medium heat. Working in batches, pour a scant 1/4 cup of batter into the skillet making 4-inch rounds and cook until bubbles form on top, 3-5 minutes. Flip and cook an additional 2 minutes or until the middle is set. Remove cakes from heat and keep warm. Repeat with remaining batter.
Serve with herbed yogurt, prosciutto and sliced green onion.
Labels:
30 minute meal,
brunch,
cheese,
entree,
herbs,
onions,
peas,
south beach phase 3,
yogurt
Sunday, April 28, 2013
Coconut Brown Ale Pancakes with Coconut Cream and Toasted Macadamia Nuts
Back in college I was fortunate to be introduced to decent local and craft beers pretty early in my drinking history. Stevens Point Brewery was well established and well loved among the city and college. Back then the beer list was much smaller than the current selection, with Point Special and Amber being the best know of their flagship. And their sodas! They had just released their root beer; black cherry and vanilla cream were close on the horizon. My second experience with a dark beer, after Guinness of course, was a dunkel...part of their Augsburger line, sadly now defunct. Another favorite seasonal beer at the time was the Bock, not that I remember the beer so much as the event that surrounded it. Every spring, around the first weekend on March, Point hosted a pancake breakfast to celebrate the release. Pancakes made with Bock beer. Sadly, this brew has also been discontinued, but the Bock legacy lives on in the Steven Point Bock Run every spring.
I've been toying with a few beer pancake a recipes for a while now. However, an incredibly inspiring class taught by Homebrew Chef Sean Paxton finally pushed me to act.
The beer that inspired this recipe is a nut brown ale, infused with coconut--Koko Brown by Kona Brewing. This beer is becoming more and more readily available throughout the country. If a coconut brown ale is nowhere to be had, any brown ale would work, but do substitute coconut extract for the vanilla.
The browned butter and dry malt extract in the pancakes help to enhance the nutty quality of the ale, as do the toasted macadamia nuts sprinkled on top. To ramp up the coconut, without overpowering the pancake, I served the cakes up with toasted coconut and whipped coconut cream.
Textures are played up as well. The pancake is slightly thin, but still fluffy. The toasted nuts and flaked coconut offer a lovely crunch and the whipped coconut cream calls to mind the fluffy head of the beer.
Enjoy with the remaining Koko brown or a coffee stout.
The recipe is my own
yields about 12 pancakes
The Ingredients:
for the pancakes
1 cup flour
2 Tbsp brown sugar
2 Tbsp dry malt extract, dark
2 tsp baking powder
1/4 tsp salt
1 egg
1/2 tsp vanilla or coconut extract
1 cup coconut brown ale
3 Tbsp butter
for the crunchy topping
3 Tbsp macadamia nuts
1/4 cup flaked coconut, unsweetened
for the coconut cream
1 - 15 oz can full fat coconut milk (LITE DOES NOT WORK!!)
1/4 tsp vanilla extract
2 tsp sugar
The Process:
for the coconut cream
Place the unopened can of coconut milk in the refrigerator overnight.
Once chilled, open and spoon out the thick cream that has separated to the top. Reserve the liquid for another use.
In a chilled bowl, whip the coconut cream with the sugar and vanilla until light and fluffy, about 2 minutes. Keep chilled until ready to use.
For the topping:
Coarsely chop the nuts and flaked coconut. Place in a dry, ungreased skillet over medium heat and toast until fragrant and lightly browned, 3-5 minutes, stirring frequently. Remove from heat and set aside
For the Pancakes:
In a small saucepan set over medium heat, melt the butter and continue to cook, stirring occasionally, until it becomes golden brown in color with a nutty aroma. Remove from heat and set aside.
In a medium bowl, sift together the flour, dry malt extract, sugar and baking powder. In another bowl, whisk together the egg, vanilla and beer.
Add the liquid ingredients to the dry, mixing until just incorporated. Fold in the browned butter.
Grease a large skillet and preheat it over medium high heat. Spoon the pancake batter into the pan, using about 3 Tbsp- 1/4 cup per pancake. Cook until bubbles appear on the surface. Flip and cook until browned on the other side, about 2 minutes each side.
Serve warm with toasted topping and coconut cream.
Thursday, November 15, 2012
Orange and Currant Scones
The perfect scone is a rare thing in the United States. Nothing I've tried here can compare to the tea time reposes I tried in many a cafe and museum coffeehouse in London. Soft, slightly crumbly, tender with the slightest richness from the butter. Barely sweet. If nothing else, that is what I remember most vividly. They were never that sweet. But presented alongside a generous spoonful of coddled cream and lemon curd, or perhaps modestly served up with sweet butter and a tiny pot of jam, that hardly seemed to matter.
My scones don't come close, but to date this is the best recipe I've tried. My Scottish in-laws may not be that impressed. But someday, someday I will discover that ideal scone...
adapted from 1001 Recipes edited by Martha Day
yields 8 scones
The Ingredients:
2 1/2 cups all-purpose flour
1 1/2 Tbsp baking powder
1/4 cup sugar
1/2 tsp salt
10 Tbsp butter, diced
zest of one orange
1/2 cup currants
1/2 cup buttermilk
milk to glaze
The Process:
Preheat the oven to 425 and lightly flour a baking sheet or baking stone
In a large bowl, sift together the flour, baking powder, sugar, and salt. Add the butter. Using your fingers or a pastry cutter, rub and cut the butter into the flour until the mixture resembles coarse crumbs.
Gentle fold in the zest and currants. Gradually add in the buttermilk and stir until the flour is just moistened and a soft dough is formed.
Turn the dough out on to a flour surface and roll out into a 9-inch circle, about 1-inch thick.
Cut the circle into 8 equal wedges and transfer to the baking sheet or baking stone. Keep the circle intact with the cut edges touching. Brush the top of the dough with milk.
Bake for 12-15 minutes or until golden. Serve warm.
Saturday, October 27, 2012
"Pumpkin Beer" Pumpkin Bread
Fall very, very quickly encroached upon this part of the world. In a blink of an eye September...and soon now October... is over. I'm well behind in posting here. And for a brief while, we were also running behind on home brewing. But Life seems to have found a balance again...
Last year we brewed a pumpkin ale via an extract kit. The recipe provided alternative directions for brewing the beer with added mashed pumpkin. Still feeling like novices, Ross and I opted for the simpler route.
This year we upped the ante. Two extract kits were purchased. One we brewed as is. The second batch had the additions of mashed pumpkin and 3 more pounds of grain (that's quite a bit to steep in our 5 gallon pot!)
So far both worts appear much the same. The taste comparison in six weeks should be interesting.
After the wort was strained I was left with well over three cups of mashed pumpkin infused with barley notes from the boil. Rather than see that all go to waste, I'm made quick work of it...turning the pulp into two loaves of pumpkin bread.
The title is perhaps a wee bit misleading, as no actual beer was used in the making of this recipe. But, waste not, want not. Perhaps the next batch of pumpkin bread will enjoy a little leavening from our very own pumpkin brew.
Any pumpkin puree would do in the recipe.
adapted from Elise's recipe at Simply Recipes
yields two loaves
The Ingredients:
3 cups flour
2 cups sugar
1 cup oil
1/2 cup water
4 eggs, slightly beaten
2 tsp baksing soda
1 tsp cinnamon
1/2 tsp ginger
1/2 tsp ground cloves
1/2 tsp nutmeg
1 tsp salt
2 cups pumpkin puree
The Process:
Preheat the oven to 350. Throughly grease two 9x5x3 loaf pans and set aside.
In a large bowl, combine all of the ingredients and whisk by hand until well incorporated. (do not worry about over mixing if you are doing this by hand...it is a lot harder to do than you'd think!)
Bake for 50 to 60 minutes or until toothpick inserted in to the center of the loaf comes out clean.
Remove from oven and allow to cool at least thirty minutes before slicing.
Last year we brewed a pumpkin ale via an extract kit. The recipe provided alternative directions for brewing the beer with added mashed pumpkin. Still feeling like novices, Ross and I opted for the simpler route.
This year we upped the ante. Two extract kits were purchased. One we brewed as is. The second batch had the additions of mashed pumpkin and 3 more pounds of grain (that's quite a bit to steep in our 5 gallon pot!)
So far both worts appear much the same. The taste comparison in six weeks should be interesting.
After the wort was strained I was left with well over three cups of mashed pumpkin infused with barley notes from the boil. Rather than see that all go to waste, I'm made quick work of it...turning the pulp into two loaves of pumpkin bread.
The title is perhaps a wee bit misleading, as no actual beer was used in the making of this recipe. But, waste not, want not. Perhaps the next batch of pumpkin bread will enjoy a little leavening from our very own pumpkin brew.
Any pumpkin puree would do in the recipe.
adapted from Elise's recipe at Simply Recipes
yields two loaves
The Ingredients:
3 cups flour
2 cups sugar
1 cup oil
1/2 cup water
4 eggs, slightly beaten
2 tsp baksing soda
1 tsp cinnamon
1/2 tsp ginger
1/2 tsp ground cloves
1/2 tsp nutmeg
1 tsp salt
2 cups pumpkin puree
The Process:
Preheat the oven to 350. Throughly grease two 9x5x3 loaf pans and set aside.
In a large bowl, combine all of the ingredients and whisk by hand until well incorporated. (do not worry about over mixing if you are doing this by hand...it is a lot harder to do than you'd think!)
Bake for 50 to 60 minutes or until toothpick inserted in to the center of the loaf comes out clean.
Remove from oven and allow to cool at least thirty minutes before slicing.
Wednesday, October 17, 2012
Boozy Vanilla French Toast
You can thank Jackie at the Beeroness. I adore her so....
As per usual, I attempted to track down her beer recommendation, but only with moderate success. She based the French toast on Stone's Vanilla bean Smoked Porter.
Ross and I hit up our favorite local liquor store and their stellar craft brew selection. We were mildly let down. On hand was a bottle of Stone's Smoked Porter, but not the vanilla bean edition. (after poking around a little more I discovered this same porter was also brewed with chipotle...oh the fiesta we could have!)
I grabbed the bottle, my mind a whirl about how to up the vanilla essence without detracting from the smoky beer notes. Lost in thought, I almost passed up the vanilla imbided beer sitting next to the porter...Abita's Vanilla Doubledog...a 25th anniversary beer based on their Turbo dog. I almost squirreled the beer away to enjoy by myself, french toast be damned!
I'm glad I didn't
Each beer offered a unique taste, and I am wary to pick a favorite. You'll have to decide for yourself. The Stone offered a deeper more rounded flavor...calling to mind campfires and toasted marshmallow. The Abita was a sweeter variation.
adapted from the Beeroness
serves 6-8
The Ingredients
1 cup milk
2/3 cup porter or dark ale with caramel notes
1/2 cup vanilla sugar*
3 eggs
1 1/2 tsp vanilla extract**
2 tbs butter (plus additional as needed)
1 large loaf of crusty Italian bread, cut into 1 inch thick slices
*vanilla sugar is simply sugar that has shared a container with a vanilla bean or two. cooking with vanilla pods, instead of tossing the spent pod, I allow it to dry and then stick into an mason jar full of sugar. Within a few days the sugars takes on a wonderfully rich vanilla flavor
**if you do happen to find a beer with vanilla essence, reduce the extract to 1 tsp.
The Process
Heat a large skillet over medium high heat, and add enough oil or butter to well coat the surface.In a large bowl, whisk together the milk, beer, sugar, eggs and vanilla.
One at a time, dip the bread into the batter, thoroughly coating both sides. Add to the skillet and fry, flipping once, until golden brown, (2-3 minutes per side). Keep warm in a pre-heated oven and repeat with remaining bread. Serve warm. With Bacon.
Tuesday, August 7, 2012
Eggless Blackberry Boy Bait
I love alliteration, don't you?
I know. I know...egg-less doesn't fit in with the beautiful bounty of b's. But it is the reason I first came upon the recipe. You see, I had an itty-bitty box of breathtaking blackberries and nary a use for them. They had been glowing, at their peak of ripeness. I couldn't let these beauties go to waste.
Only, I didn't have any eggs. Nada. Zilch. Ross made frequent offers to run to the store at 9 pm to gather what I lacked, but I vehemently refused. We had planned our grocery shopping for the next day and I refused to let him make the extra trip for one ingredient. I was determined to find an egg-less dessert.
And I had wonderful success courtesy of the husband and wife team at Chef In You.
So what is a boy bait? From what I've gathered among various sources, a 15 year-old girl submitted a butter-loaded blueberry cake a Pillsbury bake-off in 1954. She dubbed it boy bait for its ability to lure in the opposite sex. I'd go so far as to say this cake could lure in almost anyone. It won second place. To what? I'm not sure. Pillsbury's website is sadly lacking any reference to boy bait..
The treat is reminiscent of blueberry muffins--indeed it is traditional made with blueberries--but baked up in a single layer, allowed to cool and cut into squares. This version earns its egglessness thanks to the addition of yogurt. But all of the buttery goodness remains...
adapted from recipes at the Chef In You and Smitten Kitchen
serves 12+
The Ingredients:
2 cups all-purpose flour + 1 tsp
1 Tbsp baking powder
1 tsp salt
1 cup unsalted butter (2 sticks), room temperature
3/4 cup brown sugar
1/4 cup granulated sugar
1 cup yogurt
3/4 cup milk
1 tsp vanilla extract
1 cup fresh blackberries
1/4 cup cinnamon-sugar
The Process:
Preheat the oven to 350. Butter a 9 x 13 baking pan and dust with flour.
Whisk together the flour, baking powder, and salt in a medium bowl. Set aside.
In a large bowl, cream together the butter and sugars, beating until fluffy, about 3-4 minutes. Beat in 1/2 cup of the yogurt, 1/4 cup of the milk and the vanilla. Fold in 1/3 of the flour mixture. Add the remaining yogurt and mix well. Fold in another third of the flour, followed by the remaining milk. Add the remaining flour and mix until just combined.
Toss 1/2 cup of the blackberries with 1Tbsp of flour. Gently fold the berries into the batter. Spread the batter evenly into the prepared pan. Distribute the remaining berries over the batter. Sprinkle with cinnamon sugar.
Bake for 45-50 minutes or until a toothpick inserted into the center comes out clean.
Cool in the pan for at least twenty minutes. Remove the cake from the pan to a serving tray and allow to cool completely (if you can!) The cake will be far easier to slice once cool.
The Review:
My first attempt at this recipe was incredibly tasty. But I did a very stupid thing. Instead of using the 9x13 pan recommended, I reached for my 9-inch cake pan. The batter filled the pan almost to the brim. I feared an overflow and placed a cookie sheet on the rack below, lest the cake ooze all over the bottom of my oven. I had to add nearly 15 minutes to the bake time. The toothpick came out clean.
The toothpick test deceived me.
The center of the cake quickly collapsed into a pile of nearly raw batter. You can barely tell from the photos. We still enjoyed it. Well...most of it...
Attempt no. 2 was a much bigger success. My husband insists this treat is laced with crack...
Labels:
baking,
blackberries,
blueberries,
breakfast,
brunch,
cake,
cinnamon,
Dairy,
vanilla,
yogurt
Wednesday, July 4, 2012
Yogurt Banana Muffins with Streusel Topping
This is not a healthy muffin. I know, I know! But it uses yogurt! Half the flour is whole wheat! It uses fruit and wheat germ! How can it not be healthy! Well...the stick of butter certainly doesn't help. Or the sugar. Never mind the fact that's it's mostly a carb bomb...
Okay, these may be a more healthful version than many out there...particularly among the pre-packaged varieties.
But don't be fooled. These aren't health food.
Know what, though? I don't care. They're still darn tasty.
I had started out with a recipe at food.com, but honestly was so taken aback by the amount of butter and sugar I almost started over with another recipe. Thus commenced a lot of tweaking. Less sugar...and using more brown sugar than granulated. Halving the amount of butter. Increasing the yogurt. Adding some spice. And a streusel topping. Still not a healthy muffin.
muffin recipe adapted from Sharon at food.com and BHG
topping adapted from the BHG Cookbook
yields 12 muffins
The Ingredients:
for the muffin:
4 Tbsp unsalted butter, room temperature
1/4 sugar
1/2 cup brown sugar
2 eggs
1 tsp vanilla extract
2/3 cup plain, unsweetened yogurt
1 cup ripe bananas, mashed (about 2-3)
3/4 cup white flour
3/4 cup whole wheat flour
1 Tbsp wheat germ
1 tsp baking soda
1/2 tsp salt
1/2 tsp cinnamon
The Process:
Preheat the oven to 400. Lightly grease a 12-count muffin tin (do not use baking liners...they will stick).
In a large bowl, cream together the butter, sugar, eggs and vanilla. Mash in the bananas and yogurt. In a separate bowl, sift together the flours, wheat germ, baking soda, salt and cinnamon.
Add the dry to the wet, mixing until just combined.
For the topping, combine the flour, brown sugar, and cinnamon. Cut in the butter until the mixture resembles coarse crumbs.
Pour the batter into the muffin liners, filling about 2/3 full. Sprinkle the streusel generously over the top. Bake for 15-20 minutes or until a toothpick poked in the center comes out clean. Cool in the tin for 5 minutes. Serve warm.
Okay, these may be a more healthful version than many out there...particularly among the pre-packaged varieties.
But don't be fooled. These aren't health food.
Know what, though? I don't care. They're still darn tasty.
I had started out with a recipe at food.com, but honestly was so taken aback by the amount of butter and sugar I almost started over with another recipe. Thus commenced a lot of tweaking. Less sugar...and using more brown sugar than granulated. Halving the amount of butter. Increasing the yogurt. Adding some spice. And a streusel topping. Still not a healthy muffin.
muffin recipe adapted from Sharon at food.com and BHG
topping adapted from the BHG Cookbook
yields 12 muffins
The Ingredients:
for the muffin:
4 Tbsp unsalted butter, room temperature
1/4 sugar
1/2 cup brown sugar
2 eggs
1 tsp vanilla extract
2/3 cup plain, unsweetened yogurt
1 cup ripe bananas, mashed (about 2-3)
3/4 cup white flour
3/4 cup whole wheat flour
1 Tbsp wheat germ
1 tsp baking soda
1/2 tsp salt
1/2 tsp cinnamon
for the streusel topping:
1/4 cup flour
1/4 cup brown sugar
1/2 tsp cinnamon
2 Tbsp unsalted butter
The Process:
Preheat the oven to 400. Lightly grease a 12-count muffin tin (do not use baking liners...they will stick).
In a large bowl, cream together the butter, sugar, eggs and vanilla. Mash in the bananas and yogurt. In a separate bowl, sift together the flours, wheat germ, baking soda, salt and cinnamon.
Add the dry to the wet, mixing until just combined.
For the topping, combine the flour, brown sugar, and cinnamon. Cut in the butter until the mixture resembles coarse crumbs.
Pour the batter into the muffin liners, filling about 2/3 full. Sprinkle the streusel generously over the top. Bake for 15-20 minutes or until a toothpick poked in the center comes out clean. Cool in the tin for 5 minutes. Serve warm.
The Review:
I won't say these are the best ever banana muffins out there. Far too many muffins already lay that claim, and I know I'm no pastry chef. But they are a favorite by far.
The muffin texture was unlike many a quick bread I've tried. It was less crumb and more bread like. Spongy and soft. Wonderfully moist. The banana flavor was not as strong as other banana breads. Which I personally loved.
These will be a regular use of those over ripe bananas from now on.
The muffin texture was unlike many a quick bread I've tried. It was less crumb and more bread like. Spongy and soft. Wonderfully moist. The banana flavor was not as strong as other banana breads. Which I personally loved.
These will be a regular use of those over ripe bananas from now on.
Sunday, May 6, 2012
Cornmeal and Ricotta Waffles
Several weeks have passed without a waffle Sunday. Far too much time. As schedules pick up, Ross and I are finding fewer and fewer weekends off together. The stars aligned and this past Sunday found a morning together again.
I came across this recipe a while ago, and tagged it for a later date. The combination was intriguing, but it wasn't until I tried my hand at homemade ricotta that this recipe drew my attention again.
adapted from Michael Mina's recipe at Food and Wine
The Ingredients:
1 1/2 cups ricotta cheese
2 cups milk
6 large eggs, separated
1/2 cup sugar
2 cups flour
1/2 cup cornmeal
1/Tbsp baking powder
1/4 tsp salt
1 stick unsalted butter, melted
The Process:
Preheat oven to 200 and heat up the waffle iron.
In a large bowl, whisk the ricotta with the milk, egg yolks and sugar. In a medium bowl, whisk the flour with the cornmeal, baking powder and salt. Whisk the dry ingredients into the ricotta mixture until combined. Stir in the melted butter.
In a separate mixing bowl with an electric beater, or by hand with a strong wrist action, whisk the egg whites until they hold soft peaks. Fold the whites gently into the waffle batter, until just combined. Do not over mix! The batter should retain as much air as possible from the whites.
Brush or mist the waffle iron lightly with oil and spoon batter into waffle iron, spreading quickly with a spatula to cover the entire griddle surface (amount varies depending on waffle iron, mine uses just over 1/2 a cup). Cook according to iron manufacturer’s instructions.
Transfer finished waffles to rack in oven to keep warm and crisp. Make more waffles in same manner.
Serve warm with toppings of your choice.
The Review:
One thing I've come to truly love about Waffle Sundays is the sheer variety of flavors out there. Is waffle is so similar, and yet so unique in their own right. Oh, the shape my be the same. And the general consistency. But some are lighter, some are denser. Some have a smooth, almost creamy center with a crisp exterior while others are more toothsome. Flavors very from yeasty to sweet to vanilla or cinnamon spiked. Filler abound: bacon, blueberries, nuts, or nothing at all. Some hold up to a mountain of toppings. Others are the perfect sponge for syrup.
And I love every single one of them. Some may be more successful than others. But each and every waffle Sunday has been a treat to look forward to.
SO where does this waffle fall? This variation was a little denser than most, with a bit pleasant grittiness from the cornmeal. It soaked up the syrup on a heart beat, yet only the lightest drizzle was needed to offset the light cornmeal flavor. Of course I added butter, but a silken buttery flavor was present even before the waffle was doused in toppings. It puffed and crisped wonderfully, and maintained it's crispness under the power of the syrup longer than some, but not quite long enough for my taste. Yet the interior was wonderfully moist.
All that sums up to mean these waffles will be amazing frozen for later and reheated in the toaster for a quick breakfast later this week.
And the ricotta? A creaminess was present, but if you didn't know the ricotta was there, you wouldn't be able to tell. I used homemade ricotta...this batch turned out a tad drier than the last ricotta, but the waffles did not suffer.
These may not be the healthiest of waffles, with 6 eggs and 1 stick of butter. But the fat and sugar is offset by a higher protein content than most other waffles. This is a waffle that will keep you fuller longer. And at a 6-8 waffle yield...you are only looking at about 1 egg per serving. The butter may be a bit excessive if you're watching the fat. Next time around I may swap out half the butter with applesauce.
Of course, with so many other waffles to choose from, who knows when I'll make it back around to this one!
Thursday, April 12, 2012
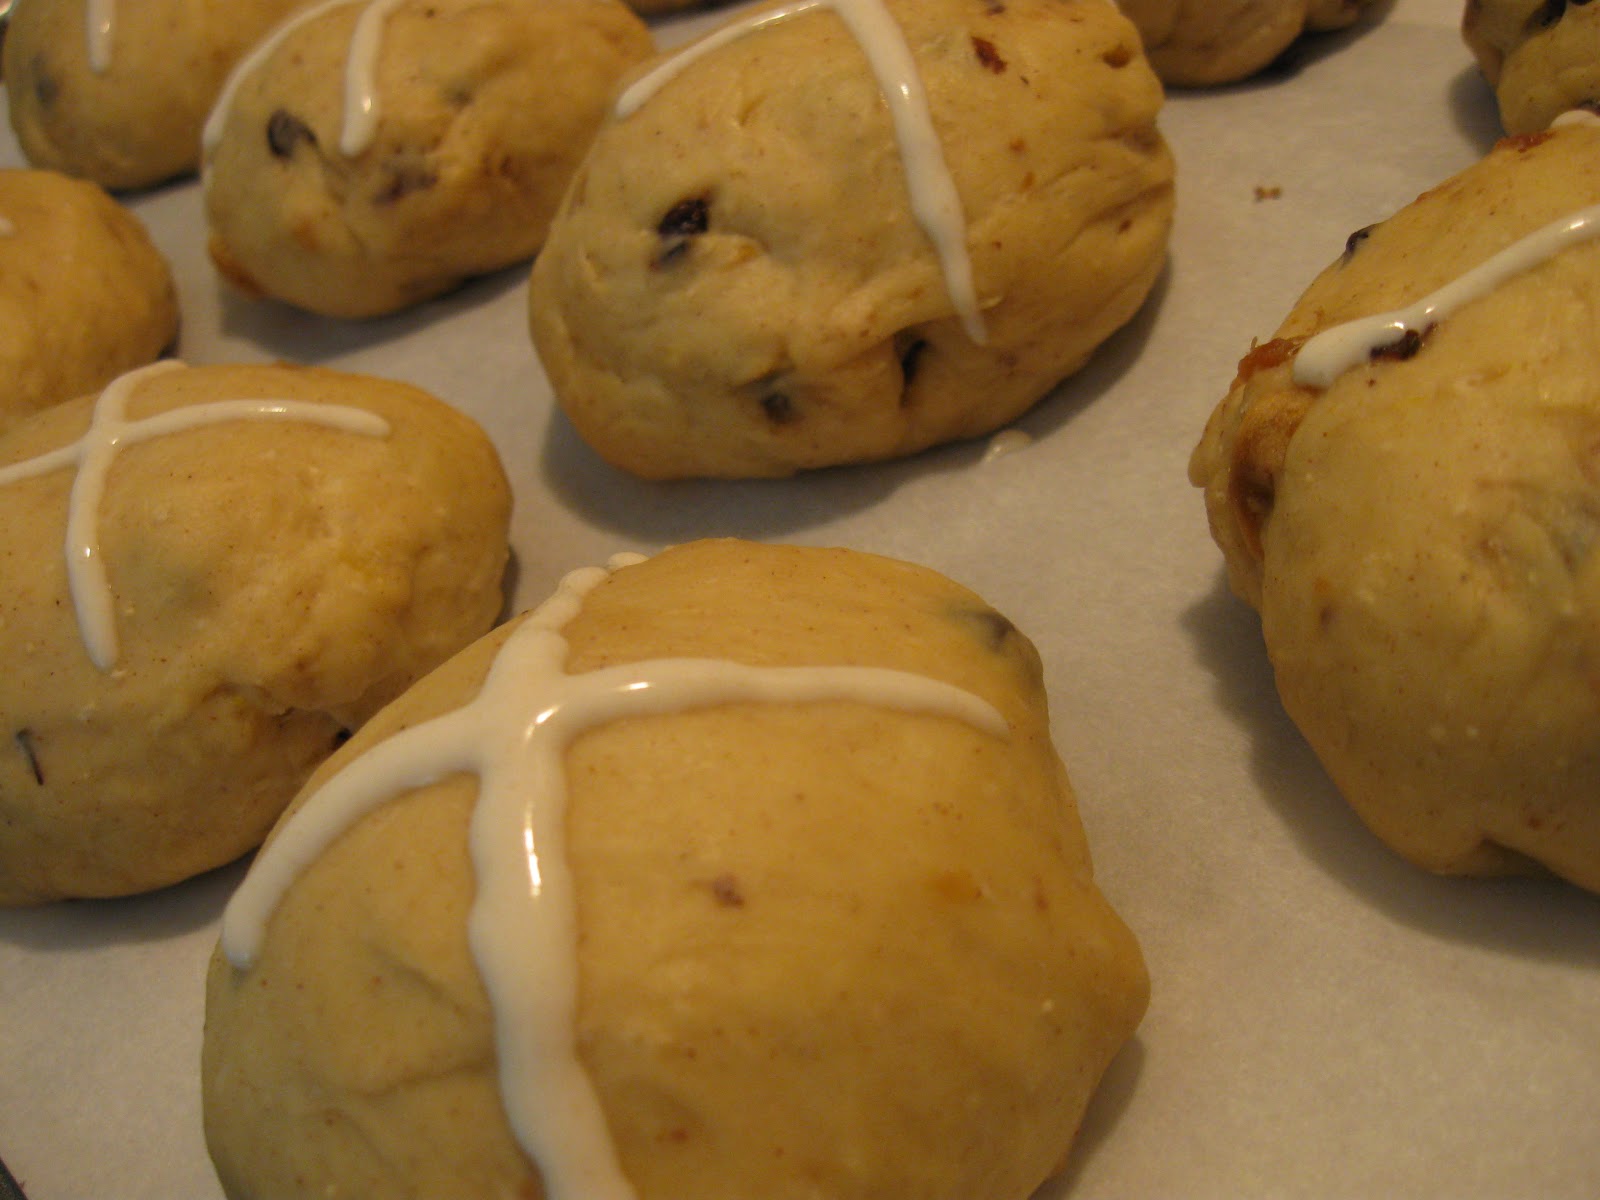
Honey Kissed Hot Cross Buns
When I was little, perhaps 6 or 7, my sister traveled to Denver for the Suzuki Institute. She was already quite the violin player. My parents brought me along for the ride, though I didn't play anything at that point. So what is a 6 year old to do at a huge music gathering like this while her big sister hones her string playing prowess? Well, pick up the penny whistle of course!
Of all the things that I experienced that week, the little ditty they taught us to play on the penny whistle stuck with me (well, that and memories of hiding in the basement of a strange building as a huge tornado descended into downtown Denver...that was quite a year).
Hot cross buns,
hot cross buns.
One a penny,
two a penny,
hot cross buns
I remember that song so well, but I cannot recall ever actually eating a hot cross bun. This Easter season I wanted to give these spicy rolls a shot...and further improve my rapport with yeast. This recipe is loaded with diced dried fruit well beyond the scope of traditional raisins. Brushed with honey straight out of the oven they have the most heavenly glow! Perfect for that Easter Brunch! Even if it is celebrated a few days late...
adapted from Hester's recipe at Alchemy in the Kitchen
yields 12 buns
The Ingredients:
3 1/2 cups bread flour
1 tsp salt
3/4 tsp ground cinnamon
1/4 tsp allspice
1 tsp grated orange zest
7 g dry active yeast (1/4 oz package)
1 Tbsp olive oil
1/2 cup mixed dried fruit (apricots, apples, prunes, figs, etc) finely diced
1/3 cup raisins, currants or dried cranberries
1/4 cup honey
1 1/4 cup milk
1 large egg
for the cross:
3 Tbsp flour
2 Tbsp water
for the glaze:
1 Tbsp honey
The Process:
Into a large bowl combine the flour, salt, cinnamon, allspice, yeast, olive oil, and dried fruit. Mix well.
Pour the milk into a small saucepan over medium heat. Whisk in the honey and stir until dissolved. Warm the
milk to between 80 to 95.
Make
a well in the center of the flour mixture and add the beaten egg, and
about half the milk. Slowly add the remaining milk, stirring and folding to completely moisten the flour. The dough should start to pull away from the sides of the bowl.
Turn the dough out onto a lightly floured surface, adding more flour as necessary. Knead for 8 to 10 minutes until the dough is smooth and no longer tacky. Form into a ball and place in a lightly oiled bowl. Cover and allow to rise until double in size, about 90 minutes
After
the dough has risen, turn it out onto a lightly oiled work surface. Divide the dough in half, and half again to form four equal portions. Gently pull each portion into a log, about 2 inches in diameter and 6 inches long. Using a sharp knife or kitchen shears, cut each portion into 3 equally pieces. Roll each portion into a ball, trying to pull the dough taunt on one side.
Line a baking sheet with non-stick
baking parchment. Place the buns on the sheet, spacing about 1 1/2-inch apart. Gently push down to flatten, ever so slightly. Cover the
buns with cling wrap and allow to rise undisturbed until doubled, about one hour.
To make the paste for the cross, in a small ziploc bag combine the flour and water. Massage the bag until a uniform paste is formed.
Preheat the oven to 375.
Place the buns in the oven and bake for 12 to 15 minutes or until golden brown. Transfer the buns to a cooling rack and immediately brush them with warmed honey.
The Review:
Warm, welcoming and just kissed with sweetness! Just the look of these is a far cry from the royal icing laden varieties sold at the supermarkets during the spring. It is almost a pity they are only sold around the Easter season. They make the perfect breakfast roll..spicy, studded with fruit and not terribly sweet. The yeasty smell tempted us the entire drive to our friends as we took a batch along for Easter dinner. Paired with ham? Heavenly. But these buns are certainly sinful in their own rite.
Sunday, April 8, 2012
Multigrain Buttermilk Waffles
A huge thank you to Audra from The Baker Chick and her mother for the inspiration for this recipe! A few weeks back, Audra posted a pancake recipe that would make her mother proud. Given my current obsession with my waffle maker, I was curious to see if the batter would waffle. Sadly, the batter as is didn't waffle so well. After some poking around, I came across a recipe of Martha Stewart's that uses a similar flour to buttermilk ratio. I thought I'd give it a try using Audra's multigrain base. Plus a few extra twists.
They are not quite as healthy, given the amount of butter added (I've already halved the amount Martha used, without any terribly ill effect). But the multigrain base is a wonderful change of pace from plain flour.
Inspired by The Baker Chick and adapted from Martha Stewart
yields 4-6 eight-inch waffles
The Ingredients:
2/3 cup rolled oats
2/3 cup cornmeal
2/3 cup whole wheat flour
1 Tbsp wheat germ
1 Tbsp flax meal
2 tsp baking powder
1 tsp baking soda
1/2 tsp salt
2 Tbsp sugar
2 cups buttermilk
2 eggs, separated
1/4 cup applesauce
4 Tbsp unsalted butter, melted
The Process:
Preheat oven to 200 and heat up the waffle iron.
In a food processor or blender mix the oats, cornmeal and whole wheat flour until finely ground. Transfer to a medium bowl and stir in the baking powder, baking soda, salt and sugar until well combined.
In a large bowl, whisk together buttermilk, egg yolks, and melted butter until smooth. Add the dry ingredients to the buttermilk mixture and whisk until just combined, do not overmix. There should still be some lumps in the batter. This will yield a much more tender waffle.
In a separate mixing bowl with an electric beater, or by hand with a strong wrist action, whisk the egg whites until they hold soft peaks. Fold the whites gently into the waffle batter, until just combined. Again, do not over mix! The batter should retain as much air as possible from the whites.
Brush or mist the waffle iron lightly with oil and spoon batter into waffle iron, spreading quickly with a spatula to cover the entire griddle surface (amount varies depending on waffle iron, mine uses just over 1/2 a cup). Cook according to iron manufacturer’s instructions.
Transfer finished waffles to rack in oven to keep warm and crisp. Make more waffles in same manner.
Serve warm with toppings of your choice.
The Review:
These waffles had the nuttiest flavor and most interesting texture to date. The myriad of grains provided a wonderful mouth-feel, the little flecks of grain made their presence known. Yet the waffles were soft and spongy throughout...a pillow made for sopping up whatever sweetness you poured on top. They didn't become soggy, per say. But I doubt they would hold up to any toppings heavier than syrup and butter. The exterior did not have that wonderful crispness. At least the first day. Frozen and re-heated in the toaster, the waffles achieved the best of both worlds.*
I suspect the lack of crispness was due to the use of applesauce. The applesauce is heavier and moister than the oil or butter typically used. I wanted to try to keep these on the healthier end, so had substituted 4 Tbsp of butter from the original recipe for 1/4 cup of applesauce. For a crisper waffle increase the butter to total 8 Tbsp (1 stick/ half a cup) or use 1/2 cup oil instead. An extra Tbsp or 2 or sugar may help as well.
As to flavor...the 1/4 tsp of cinnamon provided just the slightest hint of warmth to play off of the nuttiness of the grains. Feel free to add 1/2 tsp of vanilla, or any combination of baking spices to your preference.
These waffles, while not the best of those I've tried to date, were wonderful considering the health content of all of the grains included. Who says healthy waffle need taste like cardboard?
*Even though only two of us typically enjoy Sunday morning waffles, I have gotten into the habit making a full recipe and freezing the leftovers to eat for breakfast throughout the week. To freeze and reheat:
Allow the waffles to cool completely in a single layer...stacking the waffles may cause some to flatten or become dense. Once cool, portion out the waffles into single serving sizes and store in sandwich or quart size ziploc bags (we usually do 2 quarters of a waffle per bag...1 quarter fits nicely into each slot on out toaster). Label each bag with the waffle type and date (I make waffles almost every other Sunday...at times I'll have as many as 4 varieties in my freezer!) Freeze. Will keep for 2-3 months.
To reheat, toast in the toaster as you would any other freezer waffle. Instant homemade Eggos!
Sunday, March 25, 2012
Apple Pie Waffles with Cinnamon Whipped Cream and Pie Crust Crumb
Sunday morning waffles strike again! I've been toying with the concept of an apple waffle for a while. The waffle itself didn't seem too much of a challenge. I knew I wanted a buttermilk or yeast base. Finely chopped apples and a touch of cinnamon would provide the essential flavors. Applesauce has long been used as a substitute for oil in baking...adding yet another layer to the waffles.
But they needed something more. Inspiration came in the form of Milk Bar Mondays. Several fellow food bloggers have taken on the challenge of baking their way through Christina Tosi's Momofuku Milk Bar Cookbook. As a result, one morning my news feed was filled with this:
It was divine. It was decadent. It had layers of apple pie filling and pie crust crumb. I had my inspiration to take the apple pie waffles to the next level.
Apple waffle. Sauteed apple topping. Cinnamon Whipped Cream. And a sprinkling of pie crust crumb.
I almost went as far as to add a drizzle of homemade caramel sauce as well...but let's not get too carried away!
A huge thank you to Audra, Cassie, Erin, Krissy Nicole and Jacqueline for baking up the lovely concoction that pushed this Sunday morning waffle just a little bit further.
Pie crust crumb and apple pie filling adapted from the Momofuku Milk Bar Cookbook
Waffle and whipped cream recipes are my own.
yields 8-10 eight inch waffles
The Ingredients:
for the pie crust crumb:
1/2 cup all purpose flour
2 tsp granulated sugar
1/4 tsp kosher Salt
3 Tbsp unsalted butter, melted
1 1/2 tsp water
1/2 cup all purpose flour
2 tsp granulated sugar
1/4 tsp kosher Salt
3 Tbsp unsalted butter, melted
1 1/2 tsp water
For the apple pie filling:
juice of 1 lemon
2 medium granny smith apples
1 Tbsp unsalted butter
2/3 cup light brown sugar, tightly packed
1/2 tsp ground cinnamon
1/4 tsp kosher salt
2 medium granny smith apples
1 Tbsp unsalted butter
2/3 cup light brown sugar, tightly packed
1/2 tsp ground cinnamon
1/4 tsp kosher salt
for the waffles:
3 cups all-purpose flour
1 Tbsp baking powder
1 tsp baking soda
1 tsp salt
1/3 cup brown sugar
1/2 tsp cinnamon
1/2 cup applesauce
3 Tbsp unsalted butter, melted
4 large eggs
1 teaspoons vanilla extract
2 1/2 cups buttermilk
1 apple, peeled and diced
for the cinnamon whipped cream:
1 cup heavy whipping cream
1 Tbsp sugar
1/2 tsp ground cinnamon
The Process:
for the pie crust crumb:
Heat the oven to 350 degrees F
In a small bowl combine the flour, sugar, and salt until well mixed. Cut in the butter with a fork, pastry cutter or your fingers. Add water and blend until the mixture starts to come together in small clusters.
Spread the clusters on a parchment lined baking sheet Bake for 25 minutes, checking halfway through baking to stir and break up larger crumbs. The crumbs will be golden brown and still slightly moist to the touch. Set aside to cool.
When completely cool, transfer the crumb to a small serving dish.
for the apple pie filling:
Fill a medium bowl halfway with cold water and add the lemon juice. Peel the apples and cut into bite size chunks (quarter, then cut each quarter into thirds). Add the apples to the lemon water as they are cut to retard browning and to keep the apples pert.
In a medium saucepan over medium-high heat, combine the butter, brown sugar, cinnamon and salt. Stir until the butter is melted. Drain the apples and add them to the saucepan. Bring the mixture to a gentle boil, stirring to coat the apples. Reduce the heat to low and simmer the apples gently for 5 to 10 minutes, or until the apples are tender and the sauce has thicken.
Transfer to a serving bowl and set aside.
for the cinnamon whipped cream:
In a chilled bowl combine whipping cream, sugar and cinnamon. Beat with chilled beaters on medium speed until soft peaks form. Set aside in the fridge until ready to serve.
for the waffles:
Preheat the oven to 200. Preheat and lightly oil the waffle iron according to the manufacturers directions.
In a large mixing bowl sift together the flour, sugar, baking powder, baking soda, cinnamon and salt.
Preheat the oven to 200. Preheat and lightly oil the waffle iron according to the manufacturers directions.
In a large mixing bowl sift together the flour, sugar, baking powder, baking soda, cinnamon and salt.
In a medium bowl whisk together the eggs,
buttermilk, applesauce, butter and vanilla. Add the wet to the dry, stirring until
just incorporated.
Gently fold in the diced apple, stirring until the apple is just distributed. Do not over mix.
Ladle the batter into the waffle iron (mine uses a little over 1/2 cup of batter per waffle) and cook according to the waffle iron manufacturers directions. Transfer waffles to rack in oven to keep warm and crisp. Make more waffles in same manner.
Gently fold in the diced apple, stirring until the apple is just distributed. Do not over mix.
Ladle the batter into the waffle iron (mine uses a little over 1/2 cup of batter per waffle) and cook according to the waffle iron manufacturers directions. Transfer waffles to rack in oven to keep warm and crisp. Make more waffles in same manner.
to assemble:
Place a waffle on each plate, spoon about 1/4 cup of apple pie filling on top. Dollop a generous spoonful of whipped cream on top. Sprinkle with crumb. Devour.
The Review:
Wow. With a post this long already, I'd hate to keep you from what ended up being an absolutely amazing breakfast. Go. Enjoy.
Subscribe to:
Posts (Atom)