One of my favorite parts of our CSA box is the garlic scapes. I love these elegant tender curls. Often I'll sautee them up like green beans. Or add them to a morning omelet with feta and whatever herbs tagged along in that week's box. But lately I've been coming across many scape pesto and chimichurri recipe and thought I'd give one a go.
I'd much rather grill these chops over an open flame than sear them in the pan, but the endless rain we've had this summer has put a damper on much of our grilling plans. Ah well, seared chops work in a pinch.
Pick thick-cut bone-in chops with a lot of marbling. Pork is a much leaner meat than beef and needs the extra fat, unless you want to end up with a tough and chewy chunk of meat. Rib chops...center cut of the loin...seem to grill up among the best. Thick cut helps keep them from drying out too quickly. And the bone? Well, honestly, I just enjoy gnawing the last bit of flavor off of the bone.
Enjoy!
adapted from The Brook Cook
serves 5
The Ingredients
for the chimichurri
1/4 cup fresh parsley, chopped
3 Tbsp fresh, chopped
3 Tbsp fresh cilantro, chopped
1 green onion, thinly sliced
4 to 6 garlic scapes, thinly sliced
1 Tbsp lemon juice
1 tsp kosher salt
1/8 teaspoon red pepper flakes
1/2 cup olive oil
for the chops
5 thick cut bone-in pork loin chops
generous pinch of salt and pepper
1 Tbsp oil
The Process
for the chimichurri
Combine the herbs, green onion, garlic scapes, lemon juice, salt, and red pepper flakes in a food processor. Purée. With the food processor still running, drizzle in the olive oil. Transfer to a bowl and set aside.
Chimichurri will keep in the fridge, covered, for up to a week.
for the chops
Generously season the chops with salt and pepper. Heat a large cast iron skillet over high
heat. Add the oil and reduce heat to
medium-high. Add the chops and sear 3 to 5 minutes, with out moving. Flip
and cook until meat is just cooked through, about 3-4 minutes more.
Alternatively, grill the chops...searing 1-2 minutes per side over direct heat until a golden crust forms. Move the chops to indirect heat and cook an additional 4-5 minutes per side or until the internal temperature reaches 135-140 degrees F.
Let rest 5 minutes before serving. Serve topped with chimichurri.
Seize the food! A new year's resolution to experiment with 100 new recipes in the coming year.
Showing posts with label herbs. Show all posts
Friday, August 15, 2014
Friday, June 20, 2014
Spent Grain Falafel with Tzatziki
In my wanderings to perfect a spent grain dog biscuit recipe, I stumbled across a new website. The Brooklyn Brew Shop. The site itself is for a home brew supply shop, but one section is solely devoted to cooking with spent grain. Home brewing can generate a fair amount of leftovers once the wort has been siphoned off. When we've brewed a 5-gallon batch of beer in the past, there was typically too much grain leftover for us to use. Most of it would be destined for the compost. However, with this new discovery comes much, much more inspiration and motivation.
So when should I brew my next beer to ensure another insurgence of spent grain? And, oh, which recipes to try first?
adapted from The Brooklyn Brew Shop
serves 4
The Ingredients:
for the tzatziki
1/2 cucumber, peeled, seeded, and finely diced
1 cup Greek yogurt
2 cloves of garlic, minced
2-3 mint leaves, minced
1/4 tsp salt
1 1/2 tsp olive oil
1 tsp red wine vinegar
for the falafel
2 -14 oz can garbanzo beans, rinsed and drained
1 cup spent grain, wet
1 egg
1/2 cup fresh parsley, finely chopped
1/4 cup fresh mint, finely chopped
3 scallions, finely chopped
2 cloves of garlic, minced
1/2 tsp salt
1/2 tsp pepper
1/2 tsp cumin
juice of 1/2 lemon
The Process:
for the tzatziki
Place the cucumber in a clean towel or several layers of cheesecloth. Squeeze as much of the liquid from the cucumber as you can.
Combine the cucumber, yogurt, garlic, mint, salt, oil, and vinegar in a medium bowl and stir to combine. Cover and refrigerate until ready to use.
for the falafel
Preheat the oven to 375
Lightly grease two baking sheets and set aside.
Pulse the garbanzo beans in a food processor until a coarse paste forms.
Transfer to a large bowl and add remaining ingredients. Mix until well combined.
Roll mixture into 1" balls and arrange on the prepared baking sheets. Bake for 20 to 25 minutes or until golden brown, flip halfway through.
Serve with tzatziki.
So when should I brew my next beer to ensure another insurgence of spent grain? And, oh, which recipes to try first?
adapted from The Brooklyn Brew Shop
serves 4
The Ingredients:
for the tzatziki
1/2 cucumber, peeled, seeded, and finely diced
1 cup Greek yogurt
2 cloves of garlic, minced
2-3 mint leaves, minced
1/4 tsp salt
1 1/2 tsp olive oil
1 tsp red wine vinegar
for the falafel
2 -14 oz can garbanzo beans, rinsed and drained
1 cup spent grain, wet
1 egg
1/2 cup fresh parsley, finely chopped
1/4 cup fresh mint, finely chopped
3 scallions, finely chopped
2 cloves of garlic, minced
1/2 tsp salt
1/2 tsp pepper
1/2 tsp cumin
juice of 1/2 lemon
The Process:
for the tzatziki
Place the cucumber in a clean towel or several layers of cheesecloth. Squeeze as much of the liquid from the cucumber as you can.
Combine the cucumber, yogurt, garlic, mint, salt, oil, and vinegar in a medium bowl and stir to combine. Cover and refrigerate until ready to use.
for the falafel
Preheat the oven to 375
Lightly grease two baking sheets and set aside.
Pulse the garbanzo beans in a food processor until a coarse paste forms.
Transfer to a large bowl and add remaining ingredients. Mix until well combined.
Roll mixture into 1" balls and arrange on the prepared baking sheets. Bake for 20 to 25 minutes or until golden brown, flip halfway through.
Serve with tzatziki.
Tuesday, June 10, 2014
"Zesty Italian" dressing
No, no. I am well aware that this in no way resembles a classic Italian dressing...with its lovely simplicity of oil and vinegar.
But a fit of summer nostalgia had me craving the Italian pasta salad you see at every grocery market deli and every summer picnic. You know the one? Rotini dotted with red pepper, olives, occasionally pepperoni and mozzarella and SWIMMING in "zesty Italian" dressing. The dressing is key to the pasta salad. Only I didn't have any. I am not one prone to buying many oil and vinegar dressings, given how easy they are to make at home. This Kraft knock off is no different, and you probably already have most of these ingredients on hand.
Adapted from thekitchn and pennilessparenting.com
Yields about 1 1/2 cups
The Ingredients:
1 cup high quality extra virgin olive oil or canola oil
1/4 cup white wine vinegar
2 Tbsp red wine vinegar
2 large cloves of garlic,minced
2 Tbsp shallots, finely diced
2 Tbsp red bell pepper, finely diced
2 tsp Dijon mustard
2 tsp honey
1/2 tsp parsley
1/2 tsp dried oregano
1/4 tsp dried marjoram
1/4 tsp thyme
1/4 tsp basil
Pinch of red pepper flakes
salt and pepper to taste
The Process:
Combine all of the ingredients in a 1 - pint sized jar. Cover and shake vigorously until thickened and well combined. Alternative, whisk all of the ingredients in a bowl, or give a whirl with an immersion blender.
Sunday, July 7, 2013
Osso Buco Style Sea Bass with Herb Whipped Potatoes and Orange Gremolata
The seafood adventure continues! What started out as an attempt to enjoy more seafood at home has since tranformed into an all out culinary challenge. Each week, Ross picks a day to stop at the fish monger on his way home from work. Whatever strikes his fancy that day while perusing the tanks and ice trays is destined to become dinner. He'll text me what he picked up. And I have the thirty minute or so bus ride home to decide what to do with it...using only what we have at home at the time, cause ain't nobody got time for last minute grocery trips.
All week I was thinking fish and chips. In all the baked and breaded glory. Served with lemon garlic aioli. I couldn't shake that meal from my head. So what does Ross pick out? White Sea Bass. One of the firmest meatiest fillets out there. Such sacrilige to bread it up and bake it. This was a fillet that demanded a meaty treatment. No poaching or en papillote. No... it wanted to be seared, grilled, broiled, or...braised.
The cooking method eluded me at first after pondering the fish for a while. But the idea of a gremolata jumped into my head immediately. Several types of citrus awaited to be used up at home. But poaching was out of the question. And the charcoal grill would take to long to get going. After poking around for gremolata inspiration, I came across a halibut served osso buco style. The rich, salty tomato and veggie broth sounded like it would stand up to the meaty fillet. Spike with the bright gremolata? Sold. And I still was able to use up a portion of our CSA potatoes in the process.
adapted from Bon Appetit, via Epicurious.
serves 3
The Ingredeints:
for the "Osso Buco"
1 Tbsp olive oil
2 stalks celery, diced
2 medium carrots, diced
1/4 yellow onion, diced
2 cloves garlic, minced
1 Tbsp tomato paste
1/2 cup white wine
2 cups vegetable stock
1/2 tsp salt
1/2 cup crushed tomatoes w/ juices
juice of 1 orange
zest of 1/2 a lemon
2 Tbsp fish sauce
1/2 tsp crushed thyme
1 bay leaf
1 Tbsp olive oil
1 lb white sea bass, skin removed and cut into 3 portions
salt, pepper and cayenne
2 Tbsp balsamic vinegar
1 Tbsp butter
for the whipped potatoes
3/4 lb russet potatoes, peeled and quartered
3 cloves of garlic, halved
2 Tbsp salted butter
2 Tbsp chopped flat leaf parsley
1 Tbsp fresh rosemary, chopped
for the gremolata
2 Tbsp fresh flat leaf parsley
zest of 1 orange
2 cloves of garlic, minced
The Process:
Heat the oil in a large skillet over medium heat. Add the celery, carrots, onion and garlic. Saute, stirring frequently, until the veggies are tender and beginning to brown, about 7-10 minutes. Add the tomato paste and heat through, about 30 seconds. Add the white wine and simmer until reduced by about half, an additional 5-7 minutes.
Add the broth, crushed tomatoes, orange juice, salt, zest, fish sauce, thyme and bay leaf. Bring the mixture to a boil, reduce to a simmer and cook until the liquid is reduced by 1/3...about 40 minutes.
Meanwhile, bring a large saucepan of salted water to a boil and add the potatoes and garlic. Cook until tender, about 25 minutes.
For the gremolata, combine the zest, garlic and parsley. Mix thoroughly and set aside.
Preheat the oven to 350
In another pan, heat the remaining oil over medium high heat. Generously season the fillets with salt pepper, and cayenne. Sear the fillets until browned, about 2 minutes per side. Remove to a warm plate. Add the balsamic vinegar to the same pan and simmer for about 1 minute, reducing slightly. Add the vinegar to the vegetable sauce. Melt the butter into the sauce. Remove the bay leaf and transfer the mixture to a 9 x 13 baking dish. Set the fish on top. Bake, uncovered for 10 minutes, or until the flesh is opaque and flakes easily. Set aside to finish the potatoes.
Drain the tender potatoes, reserving some of the cooking liquid. Return to the potatoes to the pot along with butter and whip with an electric beater set to low, or mash by hand. Add reserved liquid by the Tbsp until the desired consistency is achieved. Stir in the herbs.
to serve:
Spoon 1/3 of the potatoes onto a dinner plate and spread out slightly. Top with one of the fillets and spoon the vegetable sauce over top. Garnish with a generous sprinkle of gremolata.
All week I was thinking fish and chips. In all the baked and breaded glory. Served with lemon garlic aioli. I couldn't shake that meal from my head. So what does Ross pick out? White Sea Bass. One of the firmest meatiest fillets out there. Such sacrilige to bread it up and bake it. This was a fillet that demanded a meaty treatment. No poaching or en papillote. No... it wanted to be seared, grilled, broiled, or...braised.
The cooking method eluded me at first after pondering the fish for a while. But the idea of a gremolata jumped into my head immediately. Several types of citrus awaited to be used up at home. But poaching was out of the question. And the charcoal grill would take to long to get going. After poking around for gremolata inspiration, I came across a halibut served osso buco style. The rich, salty tomato and veggie broth sounded like it would stand up to the meaty fillet. Spike with the bright gremolata? Sold. And I still was able to use up a portion of our CSA potatoes in the process.
adapted from Bon Appetit, via Epicurious.
serves 3
The Ingredeints:
for the "Osso Buco"
1 Tbsp olive oil
2 stalks celery, diced
2 medium carrots, diced
1/4 yellow onion, diced
2 cloves garlic, minced
1 Tbsp tomato paste
1/2 cup white wine
2 cups vegetable stock
1/2 tsp salt
1/2 cup crushed tomatoes w/ juices
juice of 1 orange
zest of 1/2 a lemon
2 Tbsp fish sauce
1/2 tsp crushed thyme
1 bay leaf
1 Tbsp olive oil
1 lb white sea bass, skin removed and cut into 3 portions
salt, pepper and cayenne
2 Tbsp balsamic vinegar
1 Tbsp butter
for the whipped potatoes
3/4 lb russet potatoes, peeled and quartered
3 cloves of garlic, halved
2 Tbsp salted butter
2 Tbsp chopped flat leaf parsley
1 Tbsp fresh rosemary, chopped
for the gremolata
2 Tbsp fresh flat leaf parsley
zest of 1 orange
2 cloves of garlic, minced
The Process:
Heat the oil in a large skillet over medium heat. Add the celery, carrots, onion and garlic. Saute, stirring frequently, until the veggies are tender and beginning to brown, about 7-10 minutes. Add the tomato paste and heat through, about 30 seconds. Add the white wine and simmer until reduced by about half, an additional 5-7 minutes.
Add the broth, crushed tomatoes, orange juice, salt, zest, fish sauce, thyme and bay leaf. Bring the mixture to a boil, reduce to a simmer and cook until the liquid is reduced by 1/3...about 40 minutes.
Meanwhile, bring a large saucepan of salted water to a boil and add the potatoes and garlic. Cook until tender, about 25 minutes.
For the gremolata, combine the zest, garlic and parsley. Mix thoroughly and set aside.
Preheat the oven to 350
In another pan, heat the remaining oil over medium high heat. Generously season the fillets with salt pepper, and cayenne. Sear the fillets until browned, about 2 minutes per side. Remove to a warm plate. Add the balsamic vinegar to the same pan and simmer for about 1 minute, reducing slightly. Add the vinegar to the vegetable sauce. Melt the butter into the sauce. Remove the bay leaf and transfer the mixture to a 9 x 13 baking dish. Set the fish on top. Bake, uncovered for 10 minutes, or until the flesh is opaque and flakes easily. Set aside to finish the potatoes.
Drain the tender potatoes, reserving some of the cooking liquid. Return to the potatoes to the pot along with butter and whip with an electric beater set to low, or mash by hand. Add reserved liquid by the Tbsp until the desired consistency is achieved. Stir in the herbs.
to serve:
Spoon 1/3 of the potatoes onto a dinner plate and spread out slightly. Top with one of the fillets and spoon the vegetable sauce over top. Garnish with a generous sprinkle of gremolata.
Thursday, May 16, 2013
Pea Pancakes with Herbed Yogurt and Prosciutto
Spring has finally sprung! With our ridiculously long winter, it may be a few more weeks before we begin to see some truly fresh produce. In the meantime, I am perfectly content making due with a few frozen pantry essentials.
This meal is incredibly light, but surprisingly filling. It makes an wonderfully refreshing dinner on a warm day as well as an invigorating brunch or breakfast. The sweet peas compliment the tangy herbed yogurt and salty prosciutto so well...each bite added more layers of flavor than the last. Who said pancakes can't be savory?
adapted and embellished from Bon Apetit
serves 4
The Ingredients:
for pancakes:
1 tsp salt
3 large eggs
1 cup cottage cheese
1/4 cup flour
2 Tbsp oil
2 scallions, thinly sliced
1 cup peas, thawed if frozen
for the yogurt:
1/2 cup Greek yogurt
2 small sprigs fresh dill, chopped (1-2 Tbsp)
1 small bunch fresh chives, chopped (2-3 Tbsp)
to serve:
1 green onion, thinly sliced
8 paper thin slices of prosciutto
The Process:
for the yogurt:
In a small bowl, whisk together the yogurt and herbs. Cover and chill for at least 20 minutes.
for the pancakes:
Combine the salt, eggs, cottage cheese, flour and oil in a food processor or blender and pulse until smooth. Transfer batter to a medium bowl and fold in the peas and green onions.
Heat a large, lightly-oiled skillet over medium heat. Working in batches, pour a scant 1/4 cup of batter into the skillet making 4-inch rounds and cook until bubbles form on top, 3-5 minutes. Flip and cook an additional 2 minutes or until the middle is set. Remove cakes from heat and keep warm. Repeat with remaining batter.
Serve with herbed yogurt, prosciutto and sliced green onion.
This meal is incredibly light, but surprisingly filling. It makes an wonderfully refreshing dinner on a warm day as well as an invigorating brunch or breakfast. The sweet peas compliment the tangy herbed yogurt and salty prosciutto so well...each bite added more layers of flavor than the last. Who said pancakes can't be savory?
adapted and embellished from Bon Apetit
serves 4
The Ingredients:
for pancakes:
1 tsp salt
3 large eggs
1 cup cottage cheese
1/4 cup flour
2 Tbsp oil
2 scallions, thinly sliced
1 cup peas, thawed if frozen
for the yogurt:
1/2 cup Greek yogurt
2 small sprigs fresh dill, chopped (1-2 Tbsp)
1 small bunch fresh chives, chopped (2-3 Tbsp)
to serve:
1 green onion, thinly sliced
8 paper thin slices of prosciutto
The Process:
for the yogurt:
In a small bowl, whisk together the yogurt and herbs. Cover and chill for at least 20 minutes.
for the pancakes:
Combine the salt, eggs, cottage cheese, flour and oil in a food processor or blender and pulse until smooth. Transfer batter to a medium bowl and fold in the peas and green onions.
Heat a large, lightly-oiled skillet over medium heat. Working in batches, pour a scant 1/4 cup of batter into the skillet making 4-inch rounds and cook until bubbles form on top, 3-5 minutes. Flip and cook an additional 2 minutes or until the middle is set. Remove cakes from heat and keep warm. Repeat with remaining batter.
Serve with herbed yogurt, prosciutto and sliced green onion.
Labels:
30 minute meal,
brunch,
cheese,
entree,
herbs,
onions,
peas,
south beach phase 3,
yogurt
Monday, May 13, 2013
Bacon Wrapped Trout with Chives, Tarragon and Dill
The presentation of a whole broiled fish is quite an impressive sight. Perhaps a little intimidating for some. Wrapped in bacon and you may even forget that dinner is staring at you with mouth a gap in a silent scream. But, oh is this fish so good...
The cavity of fresh, cleaned trout is the perfect way to infuse the fish with flavor from the inside. The bacon neatly holds everything together, while basting the fish with its salty fat. I tried a similarly ingenious thai twist on trout a while back, and had promised I wouldn't shy away from preparing whole fish in the future. I am looking forward to a plethora of other fresh herb combinations...and perhaps someday in the warm summer months ahead...a camp fire or grill.
Enjoy!
adapted from recipes at Bon Appetit and Epicurious
serves 2
The Ingredients:
2 whole trout 10-12 oz each, cleaned
1 Tbsp salt
1/4 tsp cracked pepper
1/4 tsp red pepper flakes
1/4 tsp garlic powder
1/4 tsp smoked paprika
2 small sprigs of fresh dill
1 small sprig of fresh tarragon
1 small bundle of chives
4 slices of lemon, about 1/8-inch thick
4-6 slices of bacon
The Process:
Preheat the broiler.
Line a broiler pan or shallow baking dish with foil.
In a small bowl, mix together the salt, cracked pepper, red pepper flakes, paprika and garlic powder.
Generously sprinkle the inside of the trout with the seasoning blend. Layer two lemon slices, one spring of dill, half of the tarragon and half of the chives in the cavity.
Repeat with the other trout. Wrap each trout with 2-3 slices of bacon.
Place the fish on the foil lined pan and broil, about 4 inches from the heat, for 7-9 minutes per side. The bacon and skin of the fish should be crispy and blistered, and the flesh of the fish should flake eaily.
Garnish with lemon and chopped chives.
Friday, February 15, 2013
Slow Cooker Juniper Chicken
Snowy, snowy days call for hot and hearty meals. A day like today last Sunday necessitates making the most out of what is already in the pantry, because there would be no "quick" drive to the grocery store for any last minute items. Thankfully, we had all of these items on hand. Including the juniper berries.
Remind me to pick up more before the first of March...I'll need them to brine our corned beef..
adapted from The Biggest Book of Slow Cooker Recipes
serves 4
The Ingredients:
2-3 slices of bacon
3-4 carrots, cut into 1/2 inch pieces
2 stalks celery, cut into 1/2 inch pieces
1 small onion, cut into quarters
4 large chicken thighs, skinned
1/4 cup dry red wine
1/2 cup chicken broth
2 Tbsp instant tapioca
1 sprig fresh rosemary
1 sprig fresh thyme
2 tsp juniper berries
salt and pepper to taste
1 cup frozen peas
2 Tbsp currant jelly
The Process:
Cook the bacon in a large skillet until crisp. Drain, crumble and set aside.
Layer the carrots, celery and onions along the bottom of a 3 1/2 to 5 qt crock pot. Place the chicken pieces on top. Sprinkle bacon, rosemary, thyme, juniper berries, salt and pepper over the chicken. In a small bowl, whisk together the wine, broth and tapioca. Pour over the chicken. Cook on low for 6-7 hours or on high for 3 to 3 1/2 hours.
Using a slotted spoon, transfer the chicken and veggies to a serving platter and keep warm. Add the peas to the crock pot and cook for 5 minutes, or until heated through. Whisk the jelly into the juices until smooth. Spoon the resulting sauce over the chicken.
Remind me to pick up more before the first of March...I'll need them to brine our corned beef..
adapted from The Biggest Book of Slow Cooker Recipes
serves 4
The Ingredients:
2-3 slices of bacon
3-4 carrots, cut into 1/2 inch pieces
2 stalks celery, cut into 1/2 inch pieces
1 small onion, cut into quarters
4 large chicken thighs, skinned
1/4 cup dry red wine
1/2 cup chicken broth
2 Tbsp instant tapioca
1 sprig fresh rosemary
1 sprig fresh thyme
2 tsp juniper berries
salt and pepper to taste
1 cup frozen peas
2 Tbsp currant jelly
The Process:
Cook the bacon in a large skillet until crisp. Drain, crumble and set aside.
Layer the carrots, celery and onions along the bottom of a 3 1/2 to 5 qt crock pot. Place the chicken pieces on top. Sprinkle bacon, rosemary, thyme, juniper berries, salt and pepper over the chicken. In a small bowl, whisk together the wine, broth and tapioca. Pour over the chicken. Cook on low for 6-7 hours or on high for 3 to 3 1/2 hours.
Using a slotted spoon, transfer the chicken and veggies to a serving platter and keep warm. Add the peas to the crock pot and cook for 5 minutes, or until heated through. Whisk the jelly into the juices until smooth. Spoon the resulting sauce over the chicken.
Friday, October 19, 2012
Tempting Tomato Sauce
The tomatoes are here! The tomatoes are here! Well...were here. During that long break I took I was blessed with several pounds...POUNDS...of tomatoes from our CSA farm. In the end I believe I handled nearly one hundred pounds of the bright red fruit. Sixty pounds of romas were crushed, canned and put up for the winter. Several beefsteaks and heirlooms were sliced up and enjoyed with just a drizzle of oil and a sprinkle of salt and pepper. A creamy tomato bisque graced our dinner table another evening. But still the tomatoes kept coming.
My fall back became to roast them with garlic, peppers and onions and blend the mixture into an wonderfully rich sauce. I got into the habit of slicing up as many tomatoes I had to fill up two baking dishes. Whatever vegetables I deemed worthy would join the mix...usually onions, peppers, once or twice a carrot. The occasional small eggplant. Maybe some zucchini. Herbs I played fast and loose with too. And the wine? Usually a dry white, but a red occasionally made a nice change of pace. And in the end I stopped bothering with that whole seeding and skinning business. The immersion blender blade did a fair job of getting the skins stuck up in it, so I never bothered trying to strain out the few that didn't managed to get jammed. And the seeds? Well, I'm lazy and the texture and flavor they added didn't bother me in the slightest. The only thing I made certain to do was salt it well. I had a tendency to go a little to easy on the salt early on...
I believe I needn't worry about open a store bought jar of sauce for many, many more months...
adapted from Alton Brown
yields about 4-5 cups
The Ingredients:
15-20 fresh tomatoes. Romas work best
1 onion, diced
1 red pepper, diced
6-8 cloves of garlic, crushed
1/4 cup olive oil
several sprigs of thyme
several fresh basil leaves
salt and pepper
1 cup dry white wine
The Process:
Preheat the oven to 350. Slice the tomatoes in half lengthwise and cram into two 9x13 inch pans. Divide the onions, peppers garlic and herbs evenly between the two pans. Drizzle with oil and sprinkle with herbs, salt and pepper.
Bake in the pre-heated oven for about two hours. Increase the oven temperature to 400 and bake an additional thirty minutes.
Scrap the roasted tomatoes and veggies into a large stock pot along with the wine. Heat over medium-high heat, bringing to a gentle simmer. Cook, stirring continually, for 10 minutes. Blend to a puree using an immersion blender directly in the pot, or transfer to a food processor and blend until smooth. Season to taste with addition salt and pepper.
Serve immediately with your favorite pasta, ladle into plastic to freeze for later, or jar and process in a pressure cooker to preserve in the pantry.
My fall back became to roast them with garlic, peppers and onions and blend the mixture into an wonderfully rich sauce. I got into the habit of slicing up as many tomatoes I had to fill up two baking dishes. Whatever vegetables I deemed worthy would join the mix...usually onions, peppers, once or twice a carrot. The occasional small eggplant. Maybe some zucchini. Herbs I played fast and loose with too. And the wine? Usually a dry white, but a red occasionally made a nice change of pace. And in the end I stopped bothering with that whole seeding and skinning business. The immersion blender blade did a fair job of getting the skins stuck up in it, so I never bothered trying to strain out the few that didn't managed to get jammed. And the seeds? Well, I'm lazy and the texture and flavor they added didn't bother me in the slightest. The only thing I made certain to do was salt it well. I had a tendency to go a little to easy on the salt early on...
I believe I needn't worry about open a store bought jar of sauce for many, many more months...
adapted from Alton Brown
yields about 4-5 cups
The Ingredients:
15-20 fresh tomatoes. Romas work best
1 onion, diced
1 red pepper, diced
6-8 cloves of garlic, crushed
1/4 cup olive oil
several sprigs of thyme
several fresh basil leaves
salt and pepper
1 cup dry white wine
The Process:
Preheat the oven to 350. Slice the tomatoes in half lengthwise and cram into two 9x13 inch pans. Divide the onions, peppers garlic and herbs evenly between the two pans. Drizzle with oil and sprinkle with herbs, salt and pepper.
Bake in the pre-heated oven for about two hours. Increase the oven temperature to 400 and bake an additional thirty minutes.
Scrap the roasted tomatoes and veggies into a large stock pot along with the wine. Heat over medium-high heat, bringing to a gentle simmer. Cook, stirring continually, for 10 minutes. Blend to a puree using an immersion blender directly in the pot, or transfer to a food processor and blend until smooth. Season to taste with addition salt and pepper.
Serve immediately with your favorite pasta, ladle into plastic to freeze for later, or jar and process in a pressure cooker to preserve in the pantry.
Tuesday, July 10, 2012
Sorrel Risotto
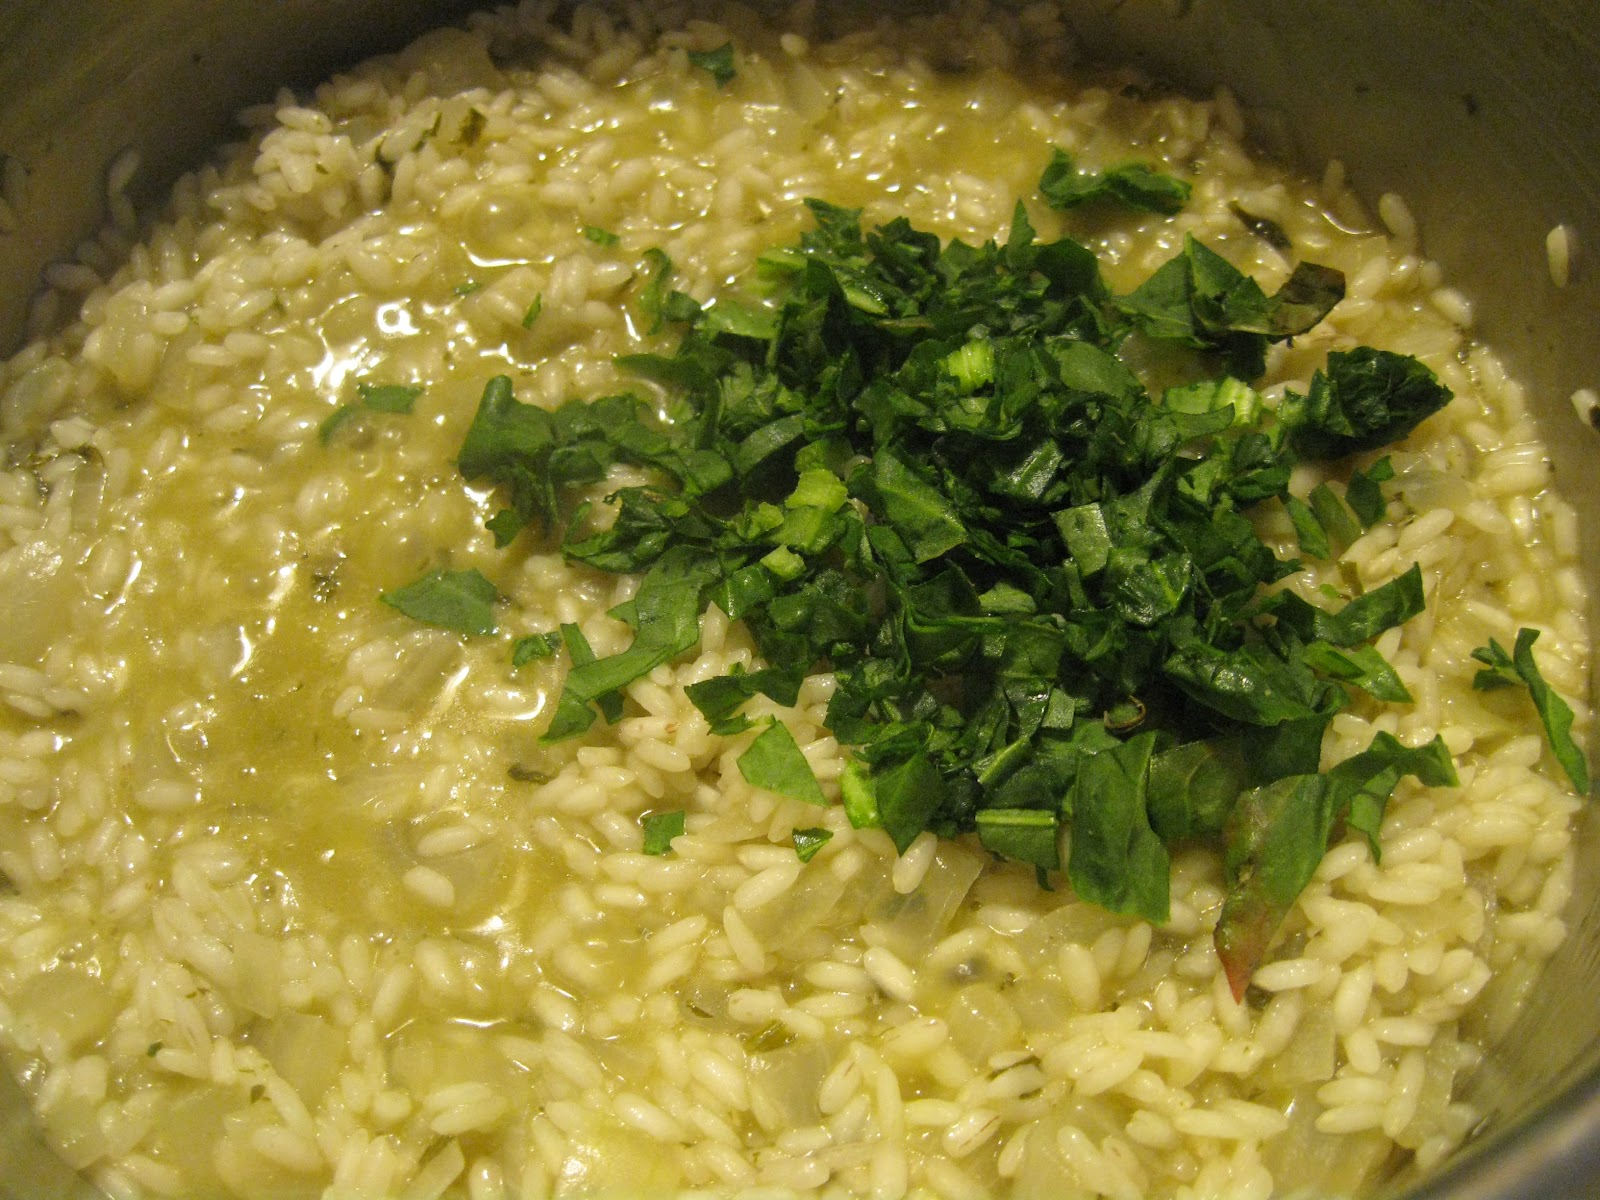
One interesting discovery...no mater how much sorrel I added, the bright green arrow-shaped leaves will cook down to nearly nothing. Nothing but flecks. You could have just srpinkle the dish with a smattering of dry herbs and it'll look all the same for it.
It make me curious to see how it fairs in a soup...
adapted from the basic risotto directions from Village Harvest
serves 6-8
The Ingredients:
4 Tbsp sorrel butter
2 Tbsp olive oil
1 medium onion
1 1/2 cups short grain rice, such as arborio
5 cup chicken or vegetable stock
1 bunch (10-12 leaves) of sorrel, minced
salt and pepper to taste
The Process:
Brown the onion in the oil and butter in a 2 qt saucepan over medium heat. Saute until the onion is tender and beginning to brown.
In another saucepan, bring the stock to a gentle simmer.
Add the rice to the onion, butter, oil mixture and stir until well coated. Add just enough stock to cover the rice. Bring to a simmer and stir frequently. As the rice absorbs the stock, add the remaining stock, one ladelful at a time...adding the next addition as the previous is absorbed.
One minute it's there...
After about half of the stock has been added, stir in the minced sorrel. Continue to add the stock as before, stirring frequently.
The next, it's gone.
Once the last of the stock has been absorbed, remove the risotto from the heat. Add salt and pepper to taste. Allow the risotto to rest for five minutes before serving.
The Review:
Remember the classic chicken rice a roni? Yeah. This is that. Only so much better. The sorrel disintergrates into almost nothing. Leaving only little specks of its former green glory behind. And an incredibly subtle flavor. No...not quite a flavor, but an enhancement of the onion and stock. With a hint...the near indecernable suggestion of sour...like the notes left behind from a wine reduction.
It is elegant. And simple. A nostalgic rice treat. But now for adults...
Sunday, July 8, 2012
Roasted Chicken with Sorrel
I'm not sure where I first encountered it. An article on food in my youth. My sister experimenting with roast chicken. A snippet of a cooking show. But I was hooked the moment I discovered the trick...
Herbs layered under the poultry skin. The skin glistened...all golden and crisp...and through it, a beautiful arrangement of bay leaves, parsley and thyme. I continued this little tip off and on as I experimented with roasting chicken and turkey. Turkey was more frequently used, as the breast provided a much larger palette than their smaller poultry cousins.
When two bunches of fresh sorrel arrived in my CSA box this was my first idea. Well...after poking around in my cookbooks and online t learn more about sorrel. Driftless Organics describes the leafy herb as having a lemony flavor. Elsewhere it is described as similar to kiwi fruit or sour strawberries. Tasting it, I can certain detect these comparison...but something more. a bit peppery...almost grassy. Even a hint of raw rhubarb. That tang immediately paired it with chicken in my mind.
Many of the recipes I found when researching sorrel were for soups. And most recipes seem to come to us via the UK. Oddly enough, I found a recipe at the BBC providing a roast bird, just the way I hoped...rubbed with herbs and stuffed with lemon. The key being herbs slathered under the skin, of course.
Adapted from Steve Wallis' recipe at the BBC
serves 4
The Ingredients:
1 - 3 lb roasting chicken
6 sorrel leaves, finely chopped
1 lemon, quartered
2 bay leaves
1 bulb fresh garlic
1 bunch fresh thyme
salt and pepper
The Process:
Preheat the oven to 375
Combine the butter and sorrel in a bowl. Mound the sorrel butter on a square of wax paper and roll into a log. Refrigerate until ready to use.
Starting at the neck end, loosen the skin of the bird from the breast, being careful not to tear. Generously spread the butter under the skin and all over the surface of the bird (you will use about half of the butter). Reserve the remaining butter for a later use. Place the lemon, bay leaves, garlic and thyme into the cavity. Truss the chicken. Season with salt and pepper.
Place in a roasting pan, breast side up. Roast, uncovered, for about 60 minutes or until juices run clear and the internal temperature reaches 160.
Remove the chicken from the oven and turn the bird breast side down to allow
the juices to run into the breast meat. Cover loosely in aluminum foil and leave
to rest for 15 minutes in a warm place, reserving the pan juices to use
for gravy, if desired.
Transfer the bird to a carving board, carve and serve.
The Review:
A tasty bird, to be sure, but sadly this chicken was largely forgettable. Oh, the meat was tender and succulent (do people even use that word any more? Succulent?) Juicy through and through. Sadly I've had many a crisper skin. Lesson learned...hotter oven. I've made enough roats chicken to know not to set the oven below 400.
The flavor hinted at citrus and lemon, but in a vague, teasing way. I hoped the sorrel would impart more favor. Turns out, as lovely as the sorrel butter was, most of the dish drew its character from the lemon and garlic stuffed into the cavity. Will I try it again? Probably. But with a higher heat and a bit more help from basics like salt and pepper.
A tasty bird, to be sure, but sadly this chicken was largely forgettable. Oh, the meat was tender and succulent (do people even use that word any more? Succulent?) Juicy through and through. Sadly I've had many a crisper skin. Lesson learned...hotter oven. I've made enough roats chicken to know not to set the oven below 400.
The flavor hinted at citrus and lemon, but in a vague, teasing way. I hoped the sorrel would impart more favor. Turns out, as lovely as the sorrel butter was, most of the dish drew its character from the lemon and garlic stuffed into the cavity. Will I try it again? Probably. But with a higher heat and a bit more help from basics like salt and pepper.
Wednesday, June 27, 2012
Minnesotan Midsummer Minestrone
Right around 2 or 3pm everyday my mind begins to wander. My eyes drift out over the beautiful vista of the Stone arch bridge and the Mississippi River. The occasional eagle soars overhead. Segway tours, joggers and bikers meander on the paths below. And I day dream...
About what to make for dinner.
It never fails really. Shortly after lunch, my stomach begins to gurgle again as my mind turns to food. Recently the thoughts circle around how to use up the last bit of vegetables before our next CSA box arrives (time to start blanching, bagging and freezing some of those veggies). Stir frys and salads are quick, easy and reliable.
But this evening I had soup on the brain...
the recipe is my own
serves 8-10
The Ingredients:
2 Tbsp olive oil
2-3 stalks of celery, sliced
1 medium onion, diced
2-3 medium carrots, diced
4-5 garlic scapes, cut in to 1 inch lengths
1 bunch salad turnips and greens, turnips diced, greens chopped
2 Tbsp fresh sage, cut chiffonade
2 Tbsp fresh parsley, minced
1 - 14 oz can stewed tomatoes
4 cups vegetable, chicken or beef stock
2 cups water
1 - 14 oz can black or kidney beans, drained and rinsed
salt and pepper to taste
The Process:
In a large soup kettle, heat the oil over medium heat. Add the celery, onions and carrots. Saute until the onion and celery are tender, about 5-7 minutes. Stir in the garlic scapes, herbs, and turnips (reserve the greens for later) and cook an additional 2-3 minutes. Add the tomatoes, broth and water. Bring the mixture to a simmer and cook for 15-20 minutes, or until the turnips and carrots are tender. Add the beans, simmering for 10 minutes until the beans are heated through. Add the reserved turnip greens. Stir until wilted. Season with salt and pepper to taste.
The Review:
What a wonderful, deep flavor. The onion, celery and stewed tomatoes provided a base that was refreshingly familiar. The sage was nearly indiscernible among the other veggie flavors. The turnips added a wonderful oomph and were cooked to near perfection...tender with just a touch of bite left. The garlic scapes cooked down and little more than I would have liked during a 20 minutes simmer, but lent an amazing hint of garlic. I adore minestrone. Mostly because any veggie combination would work. Want pasta? okay. Don't like beans? Leave them out. Well this may not be the best soup for a sweltering summer day (but really what soup is when the heat index break 100), but it really does hit the spot.
Saturday, June 16, 2012
Oven Roasted German Butterball Potatoes with Rosemary
I had never heard of German Butterball Potatoes until a 3 lb bag was given to us in our CSA box. They sort of tare sort of a combination of the best traits of a russet and yukon. The potatoes are small and firm, with a russeted skin and a beautifully golden flesh. These little discoveries keep me eagerly awaiting my new box of veggies week after week. We are going to be so crushed when winter rolls around...
The recipe is my own
serve 6-8
The Ingredients:
3 lbs German Butterball Potatoes, washed and quartered
2 Tbsp olive oil
1 bulb green garlic
3 Tbsp fresh rosemary, finely minced
1 tsp salt
1/2 tsp pepper
The Process:
Preheat the oven to 400.
Toss the potatoes with remaining ingredients until well coated. Layer in a 9 x 13 inch baking pan. Bake uncovered for 1 hour, or until potatoes are tender and lightly browned, stirring once.
Serve hot.
The Review:
After trying these lovely little potatoes, I may be ruined from russets, reds and yukons ever again. These roasted potatoes were creamy, but still firm. The color was so incredibly golden. And the flesh slightly sweet. Garlic and rosemary are a favorite roasting combination of mine, but many an herb or spice blend would work.
The recipe is my own
serve 6-8
The Ingredients:
3 lbs German Butterball Potatoes, washed and quartered
2 Tbsp olive oil
1 bulb green garlic
3 Tbsp fresh rosemary, finely minced
1 tsp salt
1/2 tsp pepper
The Process:
Preheat the oven to 400.
Toss the potatoes with remaining ingredients until well coated. Layer in a 9 x 13 inch baking pan. Bake uncovered for 1 hour, or until potatoes are tender and lightly browned, stirring once.
Serve hot.
The Review:
After trying these lovely little potatoes, I may be ruined from russets, reds and yukons ever again. These roasted potatoes were creamy, but still firm. The color was so incredibly golden. And the flesh slightly sweet. Garlic and rosemary are a favorite roasting combination of mine, but many an herb or spice blend would work.
Monday, June 11, 2012
Collard Green Rolls
Such beautiful large collard green leaves were provided with our weekly veggies. It seemed a shame to treat them to the traditional methods of sauteing or creaming. I while back I came across the ingenious idea of using kale leaves in the same vein as cabbage leaves to craft filling rolls. Why not use collard greens the same way? This is a vegetarian version using lentils in lieu of beef, but with the familiar and well loved Italian seasonings.
The recipe is my own
server 6-8
The Ingredients:
1 cup lentils
1 cup brown rice
3 1/2 cups water or vegetable stock, divided
2 Tbsp olive oil
1 bulb green garlic, minced
4-5 potato onions. thinly sliced
2 stalks celery, thinly sliced
1- 14 oz can stewed tomatoes
1 - 4 oz can tomato paste
1 tsp dried parsley
1 tsp dried oregano
1 tsp dried basil
1/2 tsp red pepper flakes
salt and pepper to taste
8 large collard green leaves
1- 24 oz jar tomato sauce
The Process:
In a medium saucepan over medium high heat bring 1 3/4 cups of stock to a gentle boil. Add the rice, reduce to a simmer and cover. Cook, stirring occasionally, until most of the liquid is absorbed and the rice is tender, 35-40 minutes. Meanwhile in a second saucepan, add the lentils and remaining stock. Bring to a boil, cover and reduce to a simmer. Cook for 20-25 minutes until the lentils are soft and most of the liquid has been absorbed.
Preheat the oven to 350
Heat the oil in a large skillet over medium-high heat. Add the garlic, onions and celery and saute until tender, about 5-7 minutes. Add the tomatoes, paste and seasonings, stirring to combine. Simmer for about 5 minutes. Add the cooked rice and lentils. Set aside.
Trim away the woody potion of the collard green stems. Carefully run a knife parallel to the leaf along the raised edge of the stem on the back side, trimming away as much of the vein as possible, without split the leaf. Stem for 3-4 minutes until soft, or layer between damp paper towels and microwave for 2 minutes, flipping once.
Spray a 9x13 baking dish with cooking spray and set aside.
Working with one roll at a time, position one leaf on a flat surface with the trimmed side up and the stem end facing you. Scoop a 1/2 - 3/4 cup of the lentil/rice filling on the bottom third of the leaf.
Carefully fold in both sides of the leaf and roll the bundle up and away from you, completely encasing the filling.
Lay the roll in the baking dish seam side down and continue with the remaining leaves.
Ladle tomato sauce over the rolls and bake, uncovered, for 30-35 minutes. Serve hot.
The Review:
I seem to gravitate towards the labor intensive dishes at times, don't I? Perhaps I don't notice as much because I use the rice cooking time as the perfect excuse to attempt to keep the clutter from overwhelming the kitchen. Okay...it is a bit of a feeble attempt. But our kitchen has remained in some semblance of order for a little while now...
So time labor intensify, but highly worth the effort. Really, these take no longer than traditional cabbage rolls. Rice must still be cooked...only I suppose most cabbage rolls are prepared with uncooked hamburger. I made the mistake of cooking up the meat before stuffing once...not as easy to prepare.
Perhaps that's what's so lovely about this vegetarian version. The lentils cook down to a point where they almost act as a binder to the rest of the ingredients. And with out the raw meat filling, they are free to spend less time in the oven.
The collard greens were a wonderful change of pace from cabbage. Growing up I had often thought cabbage rolls too sour...at least the way mom and grandma made them. Perhaps the acidity from the tomatoes coupled with the cabbage reminded me too much of sauerkraut...which to this day I have not developed much of a taste for. There is no such pickled or fermented flavored with the collard greens. And they are much, much more sturdy. I never had the same ease of rolling up such bundles with cabbage. Either I never cooked the cabbage enough before hand for the leaves to roll easily, or I over cook them to the point that the leave fell apart at the slightest touch. And good luck finding 8 perfectly sized cabbage leaves on a head of cabbage. The collard greens were so much more forgiving, and quite a bit more filling in the end.
I'd love to try other variations of collard green or kale rolls in the future. Gluten-free burritos? Curry stuffed leaves? SO many ideas...
Friday, June 8, 2012
Strawberry Arugula Salad with Rosemary Vinaigrette
Our first CSA box is in, and with it a whole lot of questions about what to do with our beautiful bounty. Many salads come to mind with this first batch...so many leafy greens! And many many more salads are yet to come. I decided to make the inaugural dish from out CSA box using a recipe provided by the farm. The green garlic, rosemary, strawberries, arugula, potato onions, and mint were all provided in this week. Everything else...mustard, almonds, oil, vinegar, lemon, and honey...I already had on hand.
This is shaping up to be a tasty, tasty summer!
recipe courtesy of Driftless Organics
serves 3-4
The Ingredients:
for the dressing
1/3 cup balsamic vinegar
1 Tbsp Dijon mustard
1 Tbsp green garlic, minced
1 Tbsp fresh rosemary leaves, coarsely chopped
1 Tbsp fresh lemon juice
1 Tbsp honey
salt & pepper to taste
1/2 cup extra-virgin olive oil
for the salad:
pint strawberries, sliced
4 cups arugula or mixed greens (I used half arugula, half spinach to cut the peppery bite)
2-3 potato onions, thinly sliced
3-4 Tbsp rosemary vinaigrette (or any vinaigrette)
¼ cup fresh mint, cut chiffonade
¼ cup chopped almonds, toasted
The Process:
for the dressing
Combine the first seven in a bowl and blend with and immersion blender. Or combine in a blender. While machine is running, slowly pour in oil until emulsified. Store in the fridge for two to three weeks.
for the salad
In a large serving bowl, toss strawberries, arugula, onions, and mint with the vinaigrette. Top nuts and serve immediately.
The Review:
I couldn't have asked for a better recipe to show case all of our produce's glory. This salad was everything that I look for in a leafy green dish...crispy greens with some variety and a bit of flavor (I cannot remember the last time I actually had iceburg lettuce), a bit of sweet from the strawberries, a bit of sour from the dressing, an interesting twist from the mint and a bit of crunch from the nuts. Something with a bit more substantial salt could have sent this through the rough...I am a huge fan of a bit of feta or blue cheese crumbles on top of my salads. But with ingredients as fresh and bursting with flavor as this, the cheese was not missed much. The only change I made from Driftless Organic's original was to blend the arugula with spinach (also in our box this week). Arugula on its own always seemed a bit too aggressive to me.
The dressing had a wonderfully deep, sour yet slightly sweet flavor. The rosemary came through and complemented the vinegar so well. That piney touch added such a wonderful depth when paired with the sweet berries and grassy mint. The dressing lasted quite a while and was enjoyed on many an additional salad.
It's a pity the part of Wisconsin our farm in located in has had such a hot dry spell as of late. It looks as though the berries may be kaput for the rest of the season. The growing season is indeed short compared to our winters. We will surely savor our veggies while we are able to get them so fresh!
Labels:
30 minute meal,
arugula,
CSA,
dressing,
entree,
garlic,
gluten-free,
herbs,
mint,
nuts,
rosemary,
salad,
south beach phase 1,
spinach,
vegan,
vegetarian
Tuesday, April 24, 2012
Deceivingly Delicious Dry Rub and Mop Sauce
Get put the grill, smoker or broiler pan. This dry rub and mop sauce was nearly life changing. In my naive youth, my concept of BBQ was a rack of ribs or half a chicken served slightly charred, a little smokey and slathered in a heavy sweet red sauce. Now I still enjoy a good squirt of Sweet Baby Rays at a family BBQ, but I've since learned that you needed smoother a good piece of meat...but you do need to compliment it.
the recipe is my own
yields enough rub and mob for 2 racks of ribs
Ingredients:
dry rub
1 tsp granulated garlic
1 tsp onion powder
1 tsp chili powder
1/2 tsp cinnamon
1/2 tsp cumin
1/2 tsp parika
1/2 tsp thyme
1 tsp ground pepper
1 Tbsp kosher salt
2 Tbsp brown sugar
mop sauce
1/3 cup cider vinegar
1/3 cup apple cider
1/3 cup brown sugar
2 Tbsp Dijon style mustard
1 Tbsp granulated garlic
1/2 tsp ground ginger
The Process:
For the rub, combine all of the ingredients in a small bowl and mix until well combined. Apply the rub to chicken, beef or pork prior to grilling or broiling.
For the mop, in a medium bowl, whisk together all six ingredients until well combined. Brush over the meat periodically while grilling or broiling. Serve remaining mop on the side.
The Review:
Easy peasey. Mix, rub, grill, mop, flip, grill, mop, serve. Almost any cut of meat will work with this rub and mop combination. Though I crafted it with lighter meat, particularly pork ribs and split chicken in mind. I fear the mop may be a tad sweet for some beef cuts. I'll rise to that challenge when I come to it.
In the rub, the cumin was the dominating flavor, but not too overpowering. I personally adore cumin and prefer it over the go-to cayenne and chili powder...adds more depth without the heat. But maybe that's not your cup of tea. Maybe you need more chili powder. Or perhaps turmeric is you thing. Go for it.
While the rub laid an amazingly flavorful groundwork for the ribs, the mop elevated to mouth watering heights. The brown sugar and apple cider was just sweet enough to cut through the dripping fat, and caramelize into was can only be described as meat candy. Usually those charred little bits on the end are long ignored. Not so here. Meat candy I tell you. The ginger warmed it up and complimented the sweetness. And who doesn't love a bit of garlic.
With a mob and dry rub as flavorful as these, who needs to use BBQ sauce. Not a single condiment was added to the dinner plates as we devoured the ribs and licked our fingers clean. Baby back ribs were a huge success. Next time around the chicken comes up to bat...
Friday, April 20, 2012
Jerked Chicken Skewers and Cantaloupe Dipping Sauce
Ross is to
Added bonus, this recipe gave us the extra incentive to finally break down and buy a grill. Grilling season is upon us after all!
The Ingredients:
for the marinade:
1 onion, finely chopped
2 scallions, finely chopped
2 tsp fresh thyme leaves
1 tsp salt
1 Tbsp brown sugar
1 tsp ground allspice
1/2 tsp ground nutmeg
1/2 tsp ground cinnamon
1 dried red chili, finely ground (or 2 Scotch bonnet peppers)
1 tsp ground black pepper
3 Tbsp soy sauce
1Tbsp olive oil
1 Tbsp cider vinegar
for the skewers:
2 pounds chicken breast, cut into large cubes
bamboo skewers
1 1/2 cups water
1/2 cup lime juice
for the dipping sauce:
one quarter of a cantaloupe, peeled, seeded and cubed
1/2 cup sour cream
1/2 cup mayonnaise
1 Tbsp cider vinegar
1 tsp Dijon mustard
1 clove garlic, minced
1/2 tsp salt
pinch of cayenne pepper
The Process:
for the marinade:
In a medium bowl, whisk together all of the marinade ingredients (or puree in a blender or food processor until well combined.) Place the chicken in a large freezer bag. Pour the marinade over the chicken. Marinate in the refrigerator for at least 4 hours, preferably overnight.
to prepare and cook the chicken skewers:
At least 2 hours before grilling, soak the bamboo skewers. Combine 1 1/2 cups of water and 1/2 cup of lemon or lime juice in a pint glass. Place the skewers in the glass to soak
Prepare the grill or preheat the broiler.
Thread 4-5 cubes of chicken onto each soaked skewer. Discard the marinade. Grill or broil the skewers for 2-3 minutes per side. Serve immediately with dipping sauce.
for the dipping sauce:
Combine all of the ingredients in a blender and puree until smooth. Season with addition cayenne or salt to taste. Chill until ready to serve.
The Review:
In the darken light it became harder and harder to see how our skewers were doing on the grill. Some came off a little blackened. But that's okay, right? It is jerk chicken after all. But even with the generous charring suffered on some, the chicken remained tender and incredibly flavorful.
I adore marinades and spice blends such as this one. A little kick of spice. A hint of sweet. A burst of salt. And just a touch of sour. So many layers of flavor! Serve along grilled pineapple...pure bliss.
The sauce was the big surprise though. I didn't have cucumbers, but a gorgeous cantaloupe was sitting off to the side in my kitchen. Cucumber melon combinations are so common...if the compliment each other so well, why not try subbing one for the other. The result was surprisingly successful. The creamy and slightly tart base suggested a tziziki, but the sweetness of the cantaloupe, along with a subtle earthiness (it is known as musk melon for a reason) created something completely unique. The recipe made quite a lot, and it doesn't keep very long in the fridge before it begins to separate (there is a LOT of water in the melon...) Maybe three days. And this is a sauce much better the first day. Try to make up only as much as you think you can use.
Tuesday, April 10, 2012
Single Serving Veggie Lasagna *Gluten Free*
This is not your typical veggie lasagna. For one, there are no anemic vegetables swimming in a gluey cream-based sauce. And? No noodles. No kidding! Slice zucchini thin enough and it will fool even the most devout pasta-holic. I promise. Well, maybe maybe it won't fool them. But I doubt they'll complain much.
The individual loaf pans make these a breeze to serve as well. No fighting over utensils. No runny mess of cheese and sauce oozing in to replace the missing slices. And who needs a plate when you can enjoy it right out of your own personal pans!
When I first started assembling these there was much grumbling and groaning. All of the slicing, blanching, sauteing, mixing, baking...sheesh! For the amount of time I was looking into spending on these I was hoping for something stellar. It took a while before it dawned on me that this in no more time consuming than traditional noodle and meat lasagna...possibly even less so given that the zucchini noodle blanch quicker than the noodle boil and the onions cook down faster than the meat usually browns. If the time is a deterrent, make huge batch and freeze them for later...either pre or post baking (it doesn't really matter).
yields four single serving lasagna
The Ingredients:
2 medium zucchini
1 Tbsp olive oil
2 medium onions, thinly sliced
1 cup sliced mushrooms
4 cloves of garlic, minced
1 1/2 cups ricotta
1 egg
1 tsp oregano
1/2 tsp parsley
1/2 tsp basil
1/2 tsp salt
2 Tbsp fresh grated Parmesan
2 cups shredded Italian cheese blend (Mozzarella, Provolone, Parmesan, Fontina, Romano and Asiago)
1 large bunch fresh spinach
3 Roma tomatoes, thinly sliced
1 1/2 cups tomato sauce
equipment:
4 mini loaf pans
The Process:
Preheat the oven to 350.
Bring a large pot of lightly salted water to a gentle boil over medium high heat. Cut off stem end of the zucchini. Using a mandolin, vegetable peeler or a sharp knife cut the zucchini lengthwise into 1/8 - inch thick slices. Quickly blanch the zucchini in the salted water, about 1-2 minutes. Drain the zucchini ribbons and set aside.
Heat the olive oil in a large skillet over medium heat. Add the 2 cloves of garlic, onions and mushrooms. Saute until the mushrooms and onions are tender, 8-10 minutes. Set aside.
In a medium bowl, combine the ricotta, Parmesan, remaining garlic, egg, oregano, parsley and basil until well combined.
Gather all of the ingredients to assemble the lasagna.
Lightly oil the each of the four loaf pans. In the bottom of each mini loaf pan, layer 2-3 ribbons of zucchini, completely covering the bottom. Top with a layer of 6-8 spinach leaves, and 3-4 slices of tomato. Spread about 3 Tbsp of the ricotta mixture over the vegetables and sprinkle with about 3 Tbsp of shredded cheese.
Spoon a thin layer of the mushroom and onion mixture on top of the cheeses. Top with a layer of tomato sauce. Repeat all of the layers. Finish with a layer of 2-3 zucchini ribbons, 3-4 slices of tomato and a generous sprinkling of shredded cheese.
Cover each of the mini lasagna loosely with aluminum foil. Bake for 30-35 minutes. Remove the foil and bake an additional 10-15 minutes or until the cheese is bubbly and golden brown. Allow the lasagnas to cool for 5 to 10 minute prior to serving.
The Review:
Was this recipe worth all chopping, slicing, dicing and cursing. The meat loving pasta-holic in my household claimed not to miss the meat or the noodles (though he would have preferred I nixed the mushrooms). A huge plus for those wonderful vegetables. Come summer when our CSA boxes start to arrive, I suspect many a veggie will endure a similarly tasty fate.
The individual loaf pans make these a breeze to serve as well. No fighting over utensils. No runny mess of cheese and sauce oozing in to replace the missing slices. And who needs a plate when you can enjoy it right out of your own personal pans!
When I first started assembling these there was much grumbling and groaning. All of the slicing, blanching, sauteing, mixing, baking...sheesh! For the amount of time I was looking into spending on these I was hoping for something stellar. It took a while before it dawned on me that this in no more time consuming than traditional noodle and meat lasagna...possibly even less so given that the zucchini noodle blanch quicker than the noodle boil and the onions cook down faster than the meat usually browns. If the time is a deterrent, make huge batch and freeze them for later...either pre or post baking (it doesn't really matter).
yields four single serving lasagna
The Ingredients:
2 medium zucchini
1 Tbsp olive oil
2 medium onions, thinly sliced
1 cup sliced mushrooms
4 cloves of garlic, minced
1 1/2 cups ricotta
1 egg
1 tsp oregano
1/2 tsp parsley
1/2 tsp basil
1/2 tsp salt
2 Tbsp fresh grated Parmesan
2 cups shredded Italian cheese blend (Mozzarella, Provolone, Parmesan, Fontina, Romano and Asiago)
1 large bunch fresh spinach
3 Roma tomatoes, thinly sliced
1 1/2 cups tomato sauce
equipment:
4 mini loaf pans
The Process:
Preheat the oven to 350.
Bring a large pot of lightly salted water to a gentle boil over medium high heat. Cut off stem end of the zucchini. Using a mandolin, vegetable peeler or a sharp knife cut the zucchini lengthwise into 1/8 - inch thick slices. Quickly blanch the zucchini in the salted water, about 1-2 minutes. Drain the zucchini ribbons and set aside.
Heat the olive oil in a large skillet over medium heat. Add the 2 cloves of garlic, onions and mushrooms. Saute until the mushrooms and onions are tender, 8-10 minutes. Set aside.
In a medium bowl, combine the ricotta, Parmesan, remaining garlic, egg, oregano, parsley and basil until well combined.
Gather all of the ingredients to assemble the lasagna.
Lightly oil the each of the four loaf pans. In the bottom of each mini loaf pan, layer 2-3 ribbons of zucchini, completely covering the bottom. Top with a layer of 6-8 spinach leaves, and 3-4 slices of tomato. Spread about 3 Tbsp of the ricotta mixture over the vegetables and sprinkle with about 3 Tbsp of shredded cheese.
Spoon a thin layer of the mushroom and onion mixture on top of the cheeses. Top with a layer of tomato sauce. Repeat all of the layers. Finish with a layer of 2-3 zucchini ribbons, 3-4 slices of tomato and a generous sprinkling of shredded cheese.
Cover each of the mini lasagna loosely with aluminum foil. Bake for 30-35 minutes. Remove the foil and bake an additional 10-15 minutes or until the cheese is bubbly and golden brown. Allow the lasagnas to cool for 5 to 10 minute prior to serving.
The Review:
Was this recipe worth all chopping, slicing, dicing and cursing. The meat loving pasta-holic in my household claimed not to miss the meat or the noodles (though he would have preferred I nixed the mushrooms). A huge plus for those wonderful vegetables. Come summer when our CSA boxes start to arrive, I suspect many a veggie will endure a similarly tasty fate.
Labels:
basil,
Dairy,
eggs,
entree,
garlic,
gluten-free,
herbs,
italian,
mushrooms,
onions,
south beach phase 1,
tomato,
vegetarian,
zucchini
Subscribe to:
Posts (Atom)