If you have an afternoon to babysit this batch of braised short ribs, I promise you will be deeply rewarded. Three hours is a lot of time to commit to a dinner, but during the process, the kitchen will be engulfed in an incredible aroma. The meat begins shrinking from the bone about a half hour into cooking and towards the end fall off with the slightest touch. So incredibly tender. And I am so happy to have leftovers.
adapted from Eat, Drink, Paleo
serves 4
The Ingredients:
3 lb beef short ribs
4-5 lemongrass stalks, bruised
Medium knob of fresh ginger, peeled and sliced
4 garlic cloves, peeled and smashed
1 medium onion, sliced
1 medium orange, peel and juice
1/2 lime, juiced
2 Tbsp fish sauce
1 1/2 tsp sesame oil
3 Tbsp Tamari sauce
1/2 tsp of sea salt
1/2 to 1 tsp chilli flakes
1/4 tsp of black pepper
1/2 tsp of Chinese five spice powder
1 1/2 cup of water
1 crown of broccoli, cut into florets
The Process:
Preheat the oven to 400 degrees F
Arrange the short ribs in a single layer in a deep roasting pan. Scatter the lemon grass, ginger, onion, garlic and orange peel around the beef. In a medium bowl, whisk together the orange juice, lime juice, fish sauce, sesame oil, tamari sauce, water and seasoning. Pour mixture over the beef. Cover tightly with foil.
Bake, covered for 30 minutes at 400, turning the meat halfway through.
Reduce the oven temperature to 325 and cook, covered, an additional 2 hours, flipping the meat every 30 minutes.
Uncover the roasting pan and remove the meat from the bones. Roast, uncovered another 15 minutes. Add the broccoli, tossing to coat in the juices. Roast another 15 minutes or until the broccoli is tender-crisp and the meat has browned.
Seize the food! A new year's resolution to experiment with 100 new recipes in the coming year.
Showing posts with label asian flavors. Show all posts
Tuesday, July 8, 2014
Friday, June 28, 2013
Stir Fried Noodles and Steak
The wonderful thing about flank and skirt steak? It used to be such a wonderfully cheap cut of meat that nobody wanted. Sort of like chicken wings. And then somebody caught on to how awesome this under appreciated cut of meat is. Now I'm lucky if I can find the darn steak for under $8 a pound, if our butcher or grocer even has it in stock at all. Ah well. Other thin cuts of beef work equally as well when quickly fried and sliced across the grain.
adapted from Bon Appetit
serves 4
The Ingredients:
2 Tbsp sliced almonds
8 oz soba noodles
1 Tbsp sesame oil
12 oz skirt or flank steak
salt and pepper to taste
2 Tbsp vegetable oil
2 green onions, whites and greens separated, sliced
4 garlic cloves, minced
1-inch knob of fresh ginger, minced
1 large head of bok choi, coarsely chopped
1 medium carrot, peeled, thinly sliced on the diagonal
2 Tbsp oyster sauce
2 Tbsp soy sauce
2 Tbsp rice vinegar
2 tsp sesame oil
1/3 cup vegetable broth
The Process:
In a small, dry skillet set over medium heat, dry roast the almonds until evenly toasted. Set aside.
Bring a large pot of salted water to a boil, and noodles and cook, stirring occasionally, until al dente, about 6-8 minutes. Drain. Rinse in cool water and set aside.
Meanwhile, heat sesame oil
in a large skillet over medium-high heat. Season steak with salt and
pepper and sear until charred in spots, about 4 minutes per side. Remove form heat and allow to rest for 10 minutes. Thinly slice against the grain.
While steak rests, wipe out
skillet and heat the vegetable oil over medium heat. Add onion whites, garlic, and ginger; stir until fragrant, about 1
minute. Add bok choi and carrots. Saute, stirring occasionally, until
crisp-tender, about 4 minutes.
Whisk oyster sauce, soy sauce,
vinegar, sesame oil, and broth together in a small bowl. In a large bowl toss together noodles, sauteed vegetables, almonds and onion greens. Drizzle with dressing and stir to coat.
Serve with steak.
Wednesday, April 10, 2013
Sweet Ginger Soba Noodles with Shrimp
Shrimp, soba noodles and a delectable sauce. Quick, simple and absolutely packed with flavors. When I first read over the recipe, I had my reservations about the amount of scallions compared to the amount of liquid in the sauce. In the end it came together beautifully.
adapted from Reem Rizvi recipe at Simply Reem
serves 3-4
The Ingredients:
for the sauce:
1 1/2 cup scallions, diced
2 Tbsp ginger, minced
1/4 cilantro, chopped
1 Tbsp sesame oil
2 Tbsp grapeseed oil
1 Tbsp soy sauce
2 Tbsp rice wine vinegar
2 Tbsp honey
1 tsp black pepper
1 tsp crushed red pepper
for the pasta
12-16 large shrimp, raw and thawed if frozen
1 large broccoli stalked, juilienned
1 carrot, juilienned
9 oz soba noodles
2 Tbsp sesame seeds
The Process:
Whisk together all of the sauce ingredients in a medium bowl. Adjust soy sauce, honey and pepper flakes to taste. Cover and set aside for 10-15 minutes.
Cook the soba noodles according to package directions. Set aside.
Heat about 2 Tbsp sesame oil a large skillet set over high heat. Add the shrimp and sear until browned and opaque, 2-3 minutes per side. Set aside.
In a small skillet, dry roast the sesame seeds until toasted.
In a large bowl, toss together the noodles, juilienned vegetables and sesame seeds. Top with shrimp. Serve warm or cold.
Monday, March 11, 2013
Orange Chicken with Broccoli
Some nights call for a quick and simple dinner absolutely bursting with flavor. Okay, perhaps most nights call for this. While I adore intense, complex and leisurely recipes on occasion, I just do not have the time for them. This recipe is ridiculously simple to make and easily adaptable to whatever protein or veggies happen to be in your fridge.
I think this may have become my go-to stir sauce...
adapted from kitchen explorers at pbs.org
serves 4
The Ingredients:
for the sauce
juice and zest of 1 large orange (about 1/2 cup juice)
2 Tbsp soy sauce
2 Tbsp rice vinegar
1 Tbsp oyster sauce
1 Tbsp honey
small knob of ginger, minced
2 cloves of garlic, minced
1/2 tsp crushed red pepper
for the stir fry
1 lb chicken, diced
2 Tbsp corn starch
1-2 Tbsp sesame oil
1 onion, sliced
1 broccoli crown, florets and stem
2-3 carrots, sliced diagonally
1 rib of celery, sliced diagonally
The Process:
In a small bowl whisk together all of the ingredients for the sauce. Set aside.
Toss the chicken in the corn starch. Heat the oil in a large skillet or wok over high heat. Add the chicken and stir fry for 2-3 minutes. Add the onion and stir fry for 2-3 minutes more, or until the chicken has browned and the onion is just beginning to soften.
Add the vegetables and stir fry for 2-3 minutes. Add half of the sauce and toss until evenly coated. Allow to cook a minute or two, until the sauce begins to thicken. Add the remaining sauce. Cook until the sauce has thickened and heated through.
Serve with brown rice.
Labels:
30 minute meal,
asian flavors,
broccoli,
carrots,
chicken,
entree,
ginger,
oranges
Thursday, January 10, 2013
Maple Miso Salmon
The recipe is my own
serves 3
The Ingredients:
1 lb sockeye salmon
1 1/2 Tbsp white miso paste
1 1/2 Tbsp maple syrup
squirt of Srirachi
The Process:
Preheat the oven to 400
Paste together the miso, maple syrup and srirachi. Place the fish, skin side down on a foil lined baking sheet. Slather with miso/maple glaze. Bake 8-10 minutes, or until the flesh is opaque and the flakes easily.
Labels:
30 minute meal,
asian flavors,
entree,
miso,
seafood
Wednesday, December 12, 2012
Sticky Ginger Garlic Chicken Drummies
Need a batch of something simple to serve to a crowd? My usual standby is a crock pot full of chicken drummies. I tried an "Asian" inspired version for a holiday party a mere few weeks before I started blogging. In fact, I believe that recipe helped spawn my desire to blog my growth as a cook. I should have sat down that night and typed the recipe up. I can't seem to find it now...
Ah well.
This recipe is fairly similar. It hits those same sweet and salty notes, though the chicken is not as fall off the bone tender as the holiday version (I will continue to kick myself until I unbury that recipe!)*
Four marinade ingredients and two cooking options. The recipe will work equally as well for a variety of other cut of chicken. The cooking time in the oven may vary for thicker cuts such as breasts or thighs. And the marinade is easy to scale up or down for any amount of meat. In the end I believe I made about 6 pounds of meat...roughly 28 drummies. We'll start with two pounds here...
adapted from CanaryGirl via FakeGinger
serves 4-6
The Ingredients:
2 lbs chicken drumsticks or wings
1/2 cup soy sacue
1/2 cup brown sugar
2 cloves of garlic, minced
1-inch knob of ginger, minced
The Process:
Combine the soy sauce, brown sugar, ginger and garlic together in a large zip top bag. Massage until the sugar is dissolved and garlic and ginger evenly distributed. Add the chicken, seal and refrigerate for 6-8 hours, or preferably overnight.
for the oven:
Preheat the oven to 350. Arrange the chicken in a single layer in a lightly oiled baking dish. Bake for 45-60 minutes or until the internal temperature reads 160 and the juices run clear.
in the crock pot:
Dump the contents of the zip top bag, marinade and all, into the crock pot and cook on high for 4-6 hours or low for 6-8. This version is more likely to fall off the bone...
*It seems I did save the recipe from that holiday party. Just goes to show how much of a mess my bookmarks currently are. You can find the original recipe at Gina's Skinny Recipes
Labels:
asian flavors,
chicken,
garlic,
ginger,
marinade,
slow cooker
Friday, November 9, 2012
Curried Pumpkin Soup
Fall! Pumpkins! Soup! Curry! These are a few of my favorite things...
Light, complex, spicy, smooth and filling. Deceivingly filling. You'd be surprised how little soup you need to sate an appetite after an afternoon raking leaves. And perfect for a gathering when many hungry hands may be idling. This soup can be made ahead, chilled and re-heated when ready to serve. Or, transferered into a slow cooker to linger and warm for whenever pepple are ready to eat.
I prefer the slightly sweeter and smokey flavor oven roasted pumpkin lends to recipes, so I opted to replace a portion of the originally recipe's canned pumpkin with my own roasted variety. The spices are easily modified to accommodate any palate And the soup does play well with heat...so feel free to add more red pepper or a dash or too of hot pepper sauce to liven up the tongue a bit.
adapted from Epicurious
serves 16-18
The Ingredients:
2 medium onions, finely chopped
2 Tbsp oil
3-4 garlic cloves, mince
2-3 -inch knob of fresh ginger, peeled and minced
2 tsp ground cumin
1 tsp ground coriander
1/4 tsp cinnamon
1/8 tsp ground cardamom
2 tsp salt
1 small pie pumpkin (2-3 lbs)
1 - 15 oz can pumpkin puree
6 cups chicken or vegetable stock
1 - 15oz can coconut milk
The Process:
Preheat the oven to 450. Slice the pumpkin, scoop out the seeds and place cut side down on an oiled baking sheet. Bake for 45-60 minutes,or until soft and beginning to carmelize, flipping cut side up halfway through. Remove from oven and set aside until cool enough to handle.
Scoop out the softened pumpkin flesh. Mash slightly for a smoother soup, or leave as scooped for more texture.
Meanwhile, heat a large heavy bottomed saucepan over medium high heat, and sautee the onions until soft, about 3-5 minutes. Add the ginger and garlic, sautee 1 minute longer. Stir in the cumin, coriander, cardamom and cinnamon, mixing until the onions are well coated*.
Add the pepper flakes, salt, canned pumpkin, fresh pumpkin, broth, coconut milk. Bring to a simmer and let cook for 30 minutes, stirring occasionally. For a smooth soup, puree in batches with food process, or process with an immersion blender, or serve as is. Thin with additional broth, if desired.
* in lieu of the individual spices, you can substitute 1 Tbsp of your favorite garam masala.
Labels:
asian flavors,
cardamom,
cinnamon,
coconut,
cumin,
curry,
garlic,
ginger,
Indian,
pumpkin,
vegan,
vegetarian
Friday, August 3, 2012
Thai Inspired Stir Fried Eggplant
Every week has become a challenge to use up as many veggies as possible before our next box arrives from the farm. Even for a three adult household, a full bushel is a lot to take in! The last few weeks a huge amount of produce is immediately blanched and frozen, pickled or otherwise canned. To date I have about 3 pound of green beans, a scant pound of sugar peas, 6 jars of dill pickles, and 2 jars of pickled peppers already stored away. Pickled beets, more pickled peppers and possibly even some sauerkraut will all be in the works in the coming days. And we haven't even come into tomatoes yet! Oh the sauces and salsas that are to come! I'll be sure to post a few canned goodies down the road...
But back to this week's veggies.
Eggplants. Lots of them. One large deep purple Italian variety and several beautiful Japanese eggplants. Such a gorgeous pale lavender. They were almost too pretty to eat...
I do make eggplant on a fairly regular basis, but I never have this much to use up in so short a time. I wanted something quick that featured this veggie, so I looked to Thai food for inspiration. Added bonus...the onion, garlic and basil were all part of this week's CSA box as well!
adapted from a recipe at About.com, of all places!
serves 3
The Ingredients:
1 small red onion, diced
6 cloves garlic, minced
1-3 red chillies, juilienned
3 Japanese eggplants
2-3 Tbsp sesame oil
2 Tbsp soy sauce
1 Tbsp fish sauce
2 Tbsp oyster sauce
2 tsp brown sugar
1 tsp cornstarch dissolved in 2 Tbsp water
1/2 cup fresh basil
The Process:
Slice the eggplant in half lengthwise and slice into 1/2-inch pieces.
Heat the oil in a large skillet or wok set over medium-high heat. Add the onion, half of the garlic, chillies, and eggplant. Saute for 5 minutes, adding water a Tbsp at a time to keep the pan from becoming too dry.
Add the soy sauce and continue stir-frying for 5 more minutes, or until the eggplant is tender. Whisk together the fish sauce, oyster sauce and brown sugar. Add to the skillet with the remaining garlic. Mix until the eggplant is well coated.
Add the cornstarch/water mixture. Stir well so that the sauce thickens uniformly. Remove from heat.
Add three quarters of the basil to the eggplant and allow to wilt. Garnish with remaining basil. Serve with rice.
The Review:
The dish isn't much to look at, but don't judge a book by its cover...or an entree by how photogenic it is...
The taste speaks volumes!
I had my suspicions when I started adding the sauces. Well, one sauce in particular. Oyster sauce. I love the deep unami flavor this pungent sauce adds to dishes, but when I'm cooking...oh that smell...I won't describe it lest it discourage you, dear reader, from trying this dish. But don't be turned away. The pungent aroma is nothing like the wonderful depth the sauce will add to the dish.
I was also surprised how fragant and at times overpowering the basil ended up being. Most of us tried a leaf or two in the first forkfuls, but then began to eat around the herb, lest the eggplant be overpowered.
Though depending on your spice level, this may not be an issue. Our heat was set to "wuss"
Labels:
30 minute meal,
asian flavors,
basil,
CSA,
eggplant,
entree,
garlic,
onions,
thai
Saturday, July 14, 2012
Chilled Cilantro Green Bean Salad with Almonds
East meets West in this lovely cold green bean salad. With the scortching hot days we've been having, I've little desire to stand around in my kitchen. Perhaps I'd have a different view if the overworked window unit actually had any affect in our house on days like this. But until the luxury of central air is added to our home, I've little choice but to endure the heat.
One of the joys of this salad is the short amount of time needed over a heating element. Only a quick blanch in boiling water. Toss with the other ingredients and serve. Think of is as a chilled green beans almondine with a ginger sot dressing and generous helping of cilantro. Asian-influenced green beans? Ginger-soy dressings? I do seem to repeat myself, don't I?
recipe courtesy of NPR
serves 4-6
The Ingredients:
1 lb slender green beans
1 cup slivered almonds, lightly toasted
2-3 scallions, finely sliced on the diagonal (use both white and green parts)
1/2 cup fresh cilantro, chopped
for the dressing:
2 inch piece of fresh ginger, minced
2 garlic cloves, minced
1 tablespoon sesame oil
2 tablespoons rice vinegar
1 teaspoon soy sauce
The Process:
Wash the green beans and trim away the stem ends
Prep an extra large bowl or the basin of the sink with cold water and 1-2 dozen ice cubes. Set a colander near at hand.
Bring a large pot of generously salted water to a boil. Once the water comes to a rolling boil, add the beans and cook briefly: 1 or 2 minutes for thin haricots, 4 or 5 minutes for more mature beans. Once the beans turn vibrant green but are still firm, drain quickly into a colander. Immediately submerge the colander into the ice bath to shock the green beans, preventing them from cooking further. Agitate them briefly to evenly chill (about a minute). Remove the colander from the ice bath and allow to drain.
Once the beans have drained, slice them on the diagonally into 1 to 1-1/2 inch pieces
To prepare the dressing, pound the ginger and garlic into a paste using a mortar and pestle. Or mince them together as finely as you can, and mash with the side of a chef's knife or the back of a spoon. Add to a large bowl and whisk in the oil, vinegar,and soy sauce.. Add the blanched beans, scallions and cilantro; toss to coat. Sprinkle with almonds. Serve chilled or room temperature.
The Review:
After many a hot green bean dish, this salad was a treat. Slightly blanched beans are incredibly sweet and still hold onto their amazing crispness. Too often have I bit into an overcooked bean and lamented the lack of that pleasant snap. Watch them carefully...green beans, particularly thin fresh ones, take little more than a blink of an eye to cook.
Another concern...toss the beans only immediatley before serving. I learned this the hard way from a three bean salad. Three hours after prepping the salad, the taste was still fresh and fragrant, but the green beans had turned a unappetizing shade of olive from soaking too long in the vinegar. Lesson learned.
This salad did not last long at all. I hope yours is equally as successful!
Saturday, June 30, 2012
Crunchy Honey Garlic Chicken Breasts
This recipe is another treat that has been floating around on pinterest for some time. Sadly, every time I tried to click through to the original post I was directed to an error. After a bit of snooping, I found the recipe at the blog Rock Recipes. The site boasts to be "one of Canada's best food blogs." I may have to spend a little more time on that blog to see what other gems out neighbors to the north may be offering!
adapted from Rock Recipes
serves 6-8
The Ingredients:
4 large, boneless skinless chicken breasts, split in half
for the breading:
1 1/2 cup flour
2 Tbsp ground ginger
1 1/2 tbsp ground nutmeg
1 1/2 Tbsp paprika
1 Tbsp salt
1 Tbsp black pepper
1 Tbsp black pepper
2 tsp ground thyme
2 tsp ground sage
2 tsp ground sage
1 tsp cayenne pepper
for the egg wash
3 eggs
6 tbsp water
for the egg wash
3 eggs
6 tbsp water
for the honey garlic sauce:
2 Tbsp sesame oil
3 – 4 cloves garlic, minced
3/4 cup honey
1/4 cup soy sauce
1 tsp ground black pepper
1/4 cup soy sauce
1 tsp ground black pepper
The Process:
Place each chicken cutlet between two pieces of waxed paper or
plastic wrap. Starting in the center and
working out to edges, pound lightly with the flat side of a meat mallet until the chicken is an even 1/2" thickness.
In a shallow bowl large enough to accommodate the chicken, whisk together the the eggs and water. In a large bowl sift together all of the breading ingredients.
Dip the chicken in the flour mixture, coating evenly. Then dip into the eggwash. Return the chicken to the flour mixture, turning to ensure even coverage and gently pressing the breading into the egg wash. Set aside and repeat with the remaining chicken.
Heat about 1/2" of oil in a large skillet over medium-high heat. Working with 2-3 chicken pieces at a time, gently set the cutlets in the oil and fry gently until golden brown, 4-5 minutes per side. Remove the chicken to paper towels to drain and then set in an oven preheated to 200 to stay warm. Cook the remaining chicken in the same fashion.
for the garlic honey sauce:
Heat the sesame oil in a small saucepan set over medium-high heat. Add the garlic and saute until tender and fragrant. Add the honey, soy sauce and pepper; simmer for 5-10 minutes.
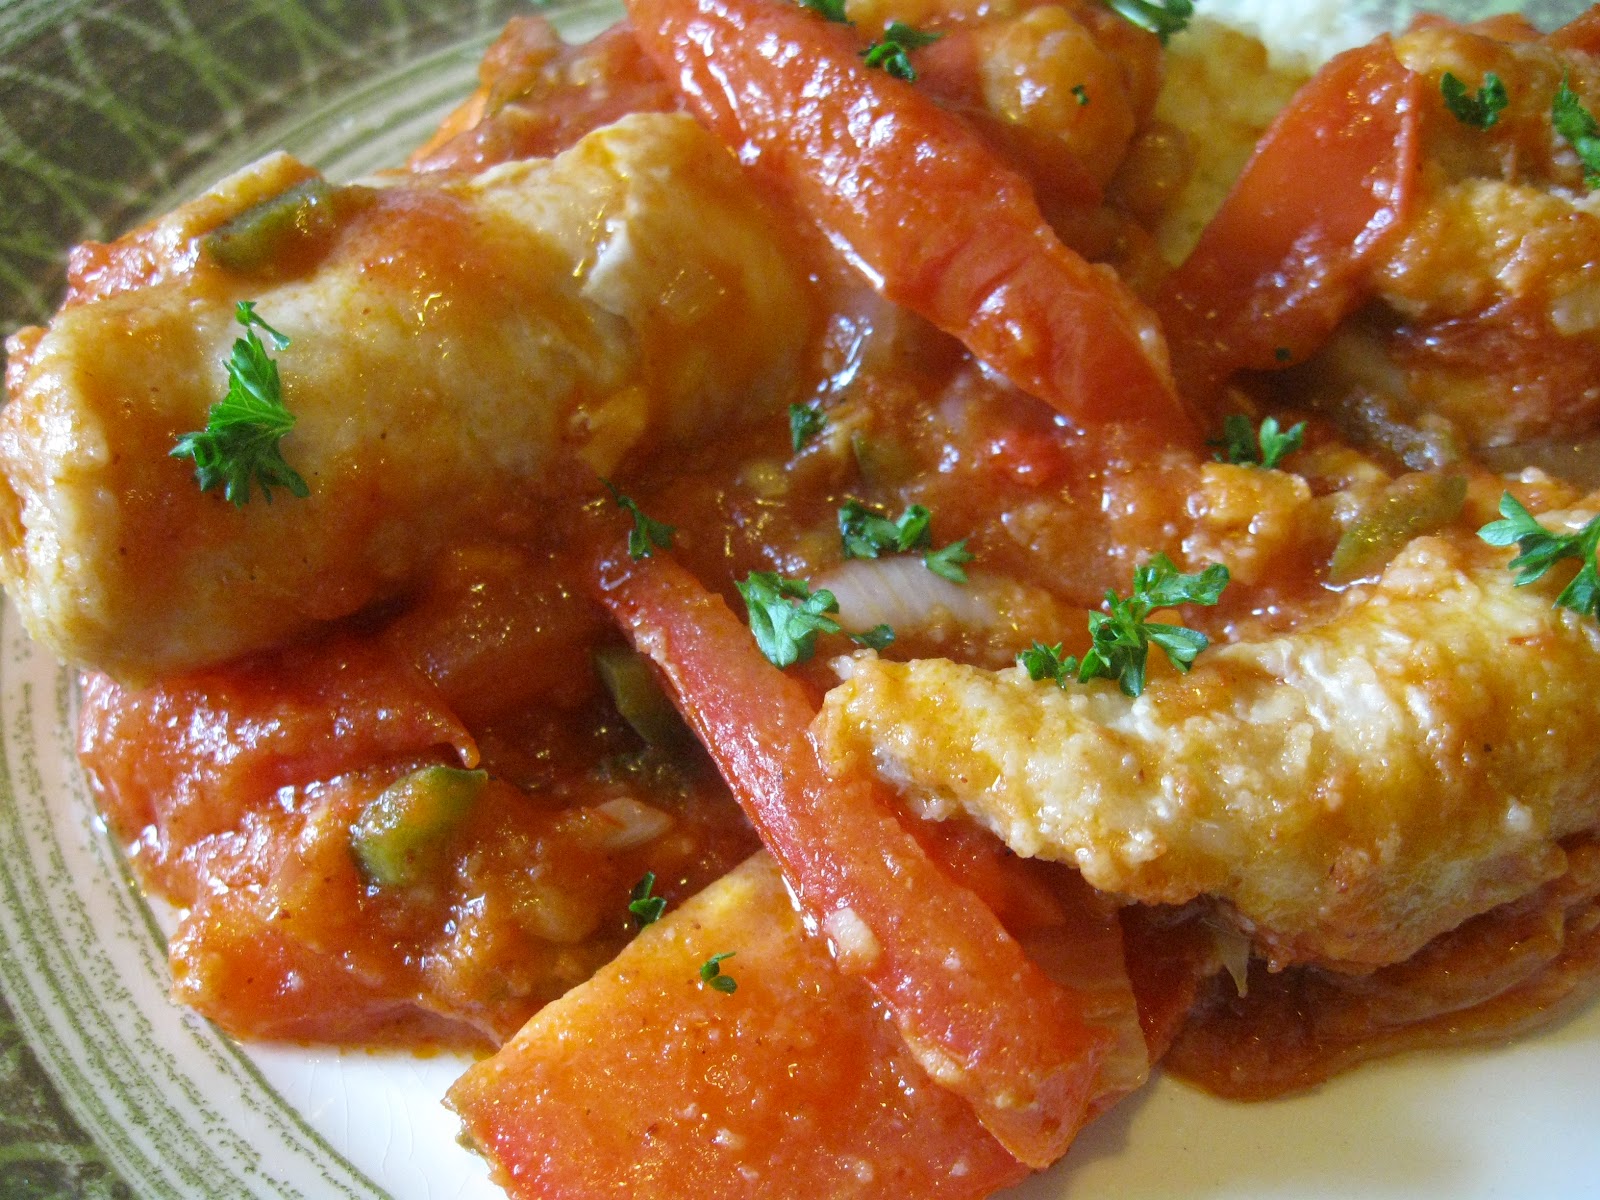
to serve:
Plate the chicken and generously drizzle with garlic honey sauce.
The Review:
Holy Mother of...
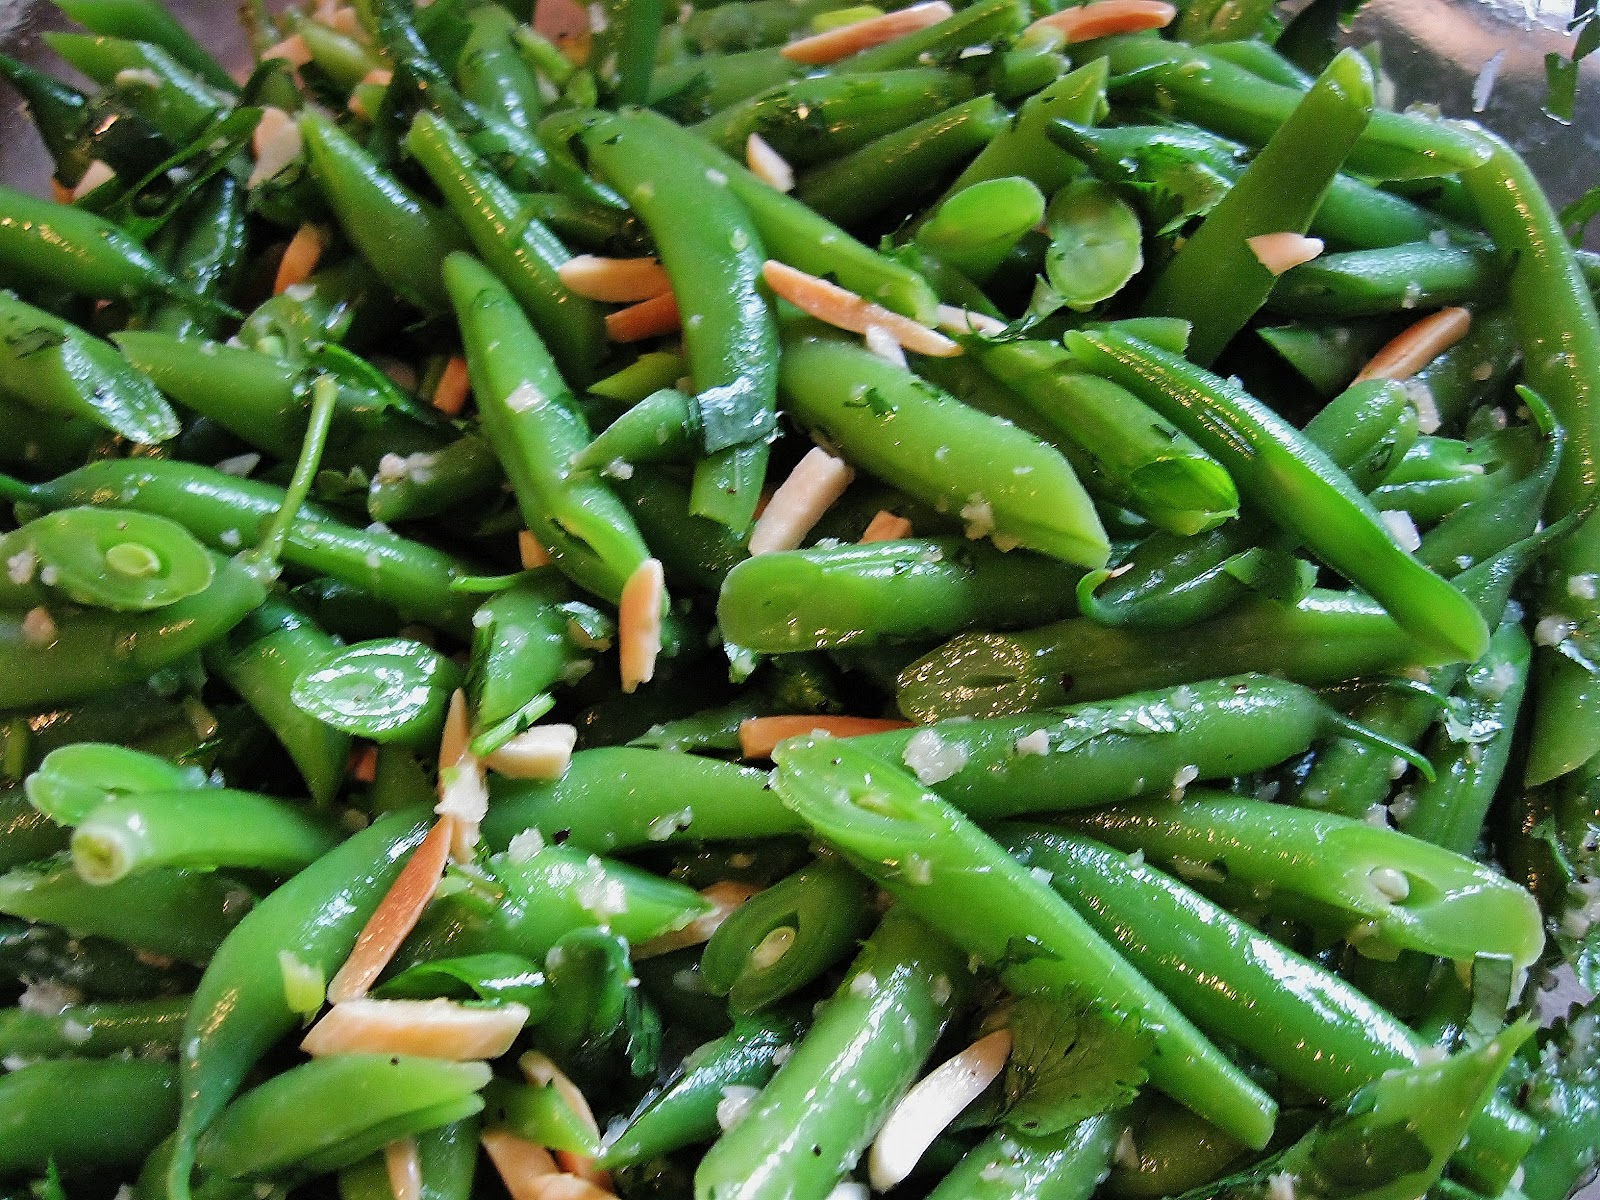
This dinner was originally supposed to be served to 4, accompanied by rice and stir fried snap peas. Somehow the company expanded to 8. The recipe comfortable fed us all...though we were all licking our plates by the end.
Adult chicken mcnuggets. I'm not sure why this recipe evokes the comparison. The breading was joyously crunchy, even after a brief rest in the oven. I had worried they would become soggy if not served immediately. Not the case. The meat...tender and juicy and made even more amazing by the spice blend that blanketed it. The nutmeg dominated the flavors, but in pleasant way...still allowing the pepper, ginger, sage and thyme to come through.
The sauce though. Oh the sauce! It stole the show. Tasting frequently as I added the honey, I stopped at 3/4 of a cup instead of the 1 cup the original recipe asked for. And still I found it quite sweet. But paired with the peppery and ginger laced chicken...
Maybe that's why my mind wandered to the childhood fast food favorite...tender nuggets of chicken coated in a peppery breaded, fried to perfection and drenched in glorious honey.
But multiplied beyond compare.
While all of the company that joined us this evening gladdened my heart, I was disappointed to discover that meant no leftovers.
Ah well. I suppose that means I will have to make this again...
Labels:
asian flavors,
chicken,
entree,
ginger,
honey,
nostalgia,
poultry,
sauces and dips,
thyme
Friday, June 29, 2012
Braised Joi Choi with Cashews
The veggies! They just keep coming! Agreeing to take on a full share of veggies, instead of a more manageable half share is proving to become a bit of a challenge for just two people. Thankfully, we have a recently welcomed a roommate into our abode, and are blessed with friends who never turn down a meal when offered. And a dog who begs for carrots and spinach.
To date, I've only had to discard one batch of pea tendrils that we were unable to get around to using.
A beautiful head of joi choi was provided in our CSA box this week. Unfamiliar with joi choi? So was I. Apparently this leafy green is a faster growing variety of bok choi. Bring on the stir fry!
recipe courtesy of Driftless Organics
serves 2-3
The Ingredients:
1 head joi choi or bok choi 1 Tbsp oil 1 Tbsp ginger, minced 1 Tbsp fresh garlic, minced 1 tsp red pepper flakes ¼ c. white or rice wine 1 Tbsp toasted sesame oil 2 Tbsp soy sauce 1 Tbsp rice vinegar 2 tsp honey or agaveBlack pepper to taste ¼ c cashews
The Process:
Cut the bok choi stems into ½ inch slices and coarsely chop greens separately. Heat oil in a wok or large cast iron pan. Add bok choi stems and stir fry for 2-3 minutes. Add garlic, ginger, and red pepper flakes; saute until fragrant. Add wine, toasted sesame oil, soy sauce, rice vinegar, sugar, black pepper. Cover and lower heat to medium-low; braise for about 4 minutes. Add bok choi greens and stir until wilted. Sprinkle with chopped cashews and serve with rice or noodles.
The Review:
This was a straight forward and simple preparation...incredible fast to whip up, and very filling on its own. The vinegar and rice wine made the greens a tad more acidic than I would have liked. Next time around I'd likely reduce the wine a touch, use sesame oil exclusively and up the sweetener to 1 Tbsp. Great side dish in a pinch, though!
Monday, June 25, 2012
Asian Salad with Ginger-Soy Marinated Chicken
salad is my own
dressing adapted form epicurious
chicken and marinade adapted from allrecipes.com
serves 4-6
The Ingredients:
for the chicken
4 boneless skinless chicken breasts
1/4 cup soy sauce
1 Tbsp sesame oil
2 Tbsp honey
1 Tbsp fresh ginger, minced
2 cloves garlic, minced
for the salad:
4 cups mixed Asian greens (arugula, red mustard and mizuna)
2 cups spinach
1/2 medium red pepper, thinly sliced
1 broccoli crown, cut into florets
1 carrot, juilianned
2-3 potato onions or scallions, sliced
handful of pea tendrils
1 cup snow peas, cut diagonally
1 - 6 oz can mandarin oranges, drained
peanuts
for the dressing:
1/4 cup soy sauce
2 Tbsp rice vinegar
2 Tbsp vegetable oil
1 Tbsp Asian sesame oil
1 Tbsp Dijon mustard
1 Tbsp finely grated peeled fresh ginger
1 Tbsp honey or agave syrup
1 tsp red pepper flakes
The Process:
For the chicken
Trim any fat from the chicken, rinse and pat dry. Place chicken in a resealable gallon-sized bag or shallow dish. In a medium bowl, whisk together the soy sauce, oil, honey, ginger and garlic. Pour the marinade over the chicken and refrigerate for 30 minutes to 2 hours.
Preheat the oven to 350. Place the chicken in a shallow baking dish and bake for 30-35 minutes. Remove from oven and allow to cool.
for the dressing:
Combine all of the ingredients and whisk well.
for the salad:
In a large salad bowl combine the first eight ingredients, reserving the mandarin oranges and peanuts. Drizzle about half of the dressing over the salad and toss to coat. Slice the cooled chicken into thin coins and layer over the salad. Top with mandarin orange and peanuts. Drizzle with remaining dressing.
The Review:
This is a salad to knock all fast food and chain restaurant varieties out of the park. The chicken was so juicy and tender, even after is had cooled. Burst of sweet peas or oranges, the crunch of carrots and peanuts, the peppery bite of the asian greens mellowed out by the vibrant spinach. Every bite brought a new and complex play of flavors and textures. The chicken easily could have starred in a meal of its own. But the same could honestly be said of the greens as well. The dressing brought every thing together...a touch of salt and sesame...
All of us were quite sad to reach the bottom of the salad bowl.
Labels:
arugula,
asian flavors,
broccoli,
carrots,
chicken,
CSA,
dressing,
fruits,
garlic,
ginger,
gluten-free,
honey,
marinade,
nuts,
salad,
south beach phase 3,
spinach
Wednesday, May 30, 2012
Bengalese Onion and Tomato Fish Curry
I was on a bit of a curry kick. I wanted something fast. Fish and veggiecurries often come to the rescue in such situations. This one grabbed my attention with its Italian like combination of onions and tomato. How ever would the other spices play into this?
Adapted from The Curry Bible by Jackie Passmore
serves four
The Ingredients:
1 1/2 lbs thick fish fillets, cut into tenders
1/2 cup flour
1 cup ghee, mustard oil, or vegetable oil
1 - 14 oz can crushed tomatoes
4 cloves of garlic, minced
1 large onion, thinly sliced
1 tsp ground chili
2 tsp sugar
1 Tbsp fresh lime juice
2 fresh green chilies (such as Serrano) de-seeded and diced
3 roma tomatoes, cut into wedges
1 inch knob of ginger, minced
fresh cilantro for garnish
The Process:
Place the fish fillets and flour in a large re-sealable bag and toss until the fish is evenly coated. Heat the oil or ghee in a large, deep skillet. Carefully add the fish and fry until crisp, but not cooked completely through flipping once, about 4-5 minutes. Remove the fish to a pan lined in paper towels. Set aside.
Pour off all but 2 Tbsp of the cooking oil. Add tomatoes, garlic, onion, and chili powder. Simmer until the onions have softened and the sauce has thickened. Add the sugar, lime juice, chilies and ginger. Stir until combined. Season with salt and pepper to taste, Carefully add the fish. Simmer gently, bring the fish with the sauce until the fish is tender and heated through (about 6-8 minutes).
Transfer to a serving dish or warmed plates and garnish with fresh cilantro.
The Review:
This curry strike me an a wonderful introduction to the hesitant eater. It boasts many of the same flavors of a well loved tomato-based Italian dish, with a little extra twist. The recipe is easily adaptable to many variety of fish, though not all are created equal. I had opted for catfish, despite my aversion to the fish in general. The flesh ended up chewy and rubbery...with that muddy undertone that I can never quite overcome. Swai or Tilapia would fair far better for the budget conscious, though cod, halibut, haddock, whiting or pollock would work equally as well.
The curry did make up for the awfully onion-y fish dumpling curry made a few weeks earlier. It is a dish worth attempting again.
Thursday, May 10, 2012
Fish Dumplings
I originally started this blog as an excuse to push myself to try new recipes. At first it was more of a documentation of the recipes I've tried, good or bad. Since then I feel I have, consciously or not, attempted to cater to a specific audience. As such I've noticed I cook more, but actually post less. I've tended to only share the good.
Granted I've had very few recipes that seemed to outright fail. But they do happen. This recipe these fish dumplings came from is a case in point.
Rather than dwell on how inedible we found this particular meal to be, I thought at the very least I would share the positive aspect. The meal was originally a Thai style curry with fish dumplings. The fish dumplings were amazing. But the curry was so potent...so awful, I'd rather not share that part. Lesson learned...if 6 shallots seems like a bit much onion to form the base of what should be a delicate curry sauce, it probably is. The curry paste was so pungent, my eyes watered from the moment I started slicing the shallots to the moment the garbage bag with the last remnants of the dinner was tied up.
But the dumplings were lovely...
Adapted from the Curry Bible by Jacki Passmore
serves 4
The Ingredients:
1 lb flaky white fish, cubed (tilapia or swai work well)
1/2 tsp salt
3-4 Tbsp water
The Process:
Place the fish, salt and water in food processor. Grind until soft and pasty. Moisten your hands and form the fish into walnut-sized balls
Bring a saucepan of lightly salted water to a gentle boil. Add the fish dumplings a few at a time and poach until the dumpling float to the surface, about 2 minutes. (They really do cook that fast)
Remove with a slotted spoon and drain. Gently toss with curry of your choice and serve warm.
The Review:
Easy, isn't it? And the dumplings are quite wonderful. Blending the fish into a paste and then forming them into little meatballs creates a texture most of us would never guess as seafood. They are heartier. Almost as dense as traditional meatballs, but with a wonderfully delicate flavor.
You can see why it was such a pity to have a horrendously pungent onion-dominate curry sauce with them. These little fish balls really need something incredibly light to set off they flavor.
Wednesday, April 4, 2012
Thai-Inspired Roasted Chicken
I do not roast chicken frequently enough. Which is a huge shame. They are so ridiculously simple--a bit of salt, pepper and oil; a hot oven; one hour. Done. The bird practically presents itself. And my favorite part...picking the last bits of meat off of the carcass and making my own stock. Growing up that was one task I was always happy to help my mom with after we had eaten our fill (as did the dog...I wasn't too terribly careful about keeping a scrap to two from hitting the floor).
It doesn't take much to make a memorable meal. Nor is much needed to notch the roast chicken up to the next level. Dara certainly sent this simple roast through the roof with this amazing Thai-inspired recipe. I was eagerly waiting the opportunity to try this recipe out.
adapted from Dara's recipe at Generation Y Foodie
serves 4-6
The Ingredients:
for the marinade
1 1/2 cups low sodium soy sauce
2 Tbsp fish sauce
2 Tbsp fresh ginger, minced
4 cloves of garlic, minced
1/4 cup or a small handful fresh cilantro
2 Thai chilies (seeded for less heat)
2 Tbsp fish sauce
2 Tbsp fresh ginger, minced
4 cloves of garlic, minced
1/4 cup or a small handful fresh cilantro
2 Thai chilies (seeded for less heat)
2 tsp ground coriander
2 small limes, juiced and zest
1 Tbsp tamarind paste
for the chicken
4 to 5lb roasting chicken
2 Tbsp olive oil
2 medium yellow onions, thinly sliced
for the chicken
4 to 5lb roasting chicken
2 Tbsp olive oil
2 medium yellow onions, thinly sliced
1 lime, juiced
fresh cracked pepper to taste
1 Tbsp coarse sea salt
1 small handful of cilantro, washed
1 lime, quartered
The Process:
1 Tbsp coarse sea salt
1 small handful of cilantro, washed
1 lime, quartered
The Process:
for the marinade
Rinse the chicken inside and out, drain and pat dry. Place in a gallon-sized freezer bag.In a food processor or blender, combine all marinade ingredients and pulse until pureed. Pour marinade over the chicken in freezer bag. Squeeze out excess air and zip shut. Marinate in the refrigerator for 3 or more hours or preferably overnight.
to roast:
Preheat the oven to 425.
Lightly oil a roasting pan slightly larger than the size of the chicken. Layer the sliced onions on the bottom of the pan, building them up more towards the side.
Remove chicken from the bag of marinade and and loosely pack cilantro and quartered limes into the cavity. Discard the remaining marinade. Place the chicken in the roasting pan amid the onions. Rub the chicken with olive oil. Drizzle with lime juice and sprinkle liberally with salt and pepper.
Roast at 425 for 45-60 minutes or until internal temperature reaches 165 and the juices run clear. Remove from oven, tent loosely with foil and allow to rest for 10-15 minutes before carving.
Transfer to a serving platter with the onion, garnish with additional lime and cilantro. Carve and serve!
The Review:
The picture does not do this bird justice. Though it is hard to set up a good photo with a hungry crowd in the wings! My husband understands the quirkiness our mealtimes have become infused with. He'll smile in quiet bemusement. Dinner guests and friends still eye me and my camera with bewilderment....
As with many other brined and marinaded meats, this bird was amazingly moist and tender. The skin crisped up beautifully (though I think mine could have benefited from another 5-10 minutes in the oven. The lime penetrated the meat through and through provided a wonderfully refreshing tang.
While the bird was incredibly flavorful, much of the uniqueness of the marinade dissipated. Hints of lime, cilantro and fish sauce were present, but not the heat I was expecting. Granted, my bird did only marinate for about four hours. I do think quite a bit more garlic, ginger and perhaps a bit of lemongrass is called for should I try this version again. That being said, the stock I made from the carcass was infused through and through with the wonderful Thai influence. I'll have to save it for a Southeast Asian inspired soup!
Though honestly, I think the onions were my favorite part. After simmering in the lime and cilantro scented chicken drippings, these were bursting with sweet and savory flavor. It was a shame I only sliced up two!
Labels:
asian flavors,
chicken,
cilantro,
entree,
lime,
marinade,
onions,
poultry,
roast,
south beach phase 1,
thai
Tuesday, March 13, 2012
Sesame Garlic Green Beans
I was in need of a quick and easy side to accompany the rosemary Sriracha chicken I made a few days back. Green beans have always been a reliable vegetable in situations like this. After a quick blanch and a scalding hot saute, these treats went from counter to plate in less than ten minutes.
the recipe is my own
serves 2
The Ingredients:
1/2 lb fresh green beans
1 Tbsp sesame oil
2 cloves garlic, minced
2 tsp soy sauce
1 tsp toasted sesame seeds
The Process:
In a medium saucepan bring 2 quarts of water to a boil. Add the green beans and blanch for 3-4 minutes, or until the beans are a uniform bright green color. Immediately strain and rinse with cold water.
In a large skillet, heat the sesame oil until near smoking. Add the garlic, green beans and soy sauce. Saute over high heat for 3-4 minutes or until the garlic is browned and the green beans begin to blister. Remove from heat.
Sprinkle with toasted sesame seeds to serve.
The Review:
Quick, simple, and full of flavor. You can't get much better than that.
Sunday, March 11, 2012
Rosemary Sriracha Chicken
Have you discovered Pinterest yet? I have so many recipes lined up to try due to that site; some days I have no idea where to begin. This entree stood out for its short ingredient list, all of which I already had on hand. The yogurt-based marinade was also a plus for me...many an Indian dish I've made has been prepared this way. The method is a wonderful way to tenderize the meat and add a lot of flavor. And I was curious to see how the Sriracha and yogurt played against each other...
adapted from A Sweet Life
serves 4
The Ingredients:
1/4 cup plain yogurt
2 Tbsp olive oil
2 Tbsp fresh lemon juice
1 Tbsp dried rosemary
1-2 Tbsp Sriracha
2 cloves garlic
1/2 tsp salt
1/4 tsp pepper
4 to 5 large bone-in, skin-on chicken legs and thighs
The Process
In a medium bowl, whisk together yogurt, oil, juice, rosemary, Sriracha, garlic, salt and pepper until well combined. Place chicken pieces in a large resealable food bag and pour marinade over. Massage the bag to thoroughly coat the chicken. Place in refrigerator and let marinate for at least one hour.
Preheat oven to 375
Arrange chicken pieces in a single layer in a baking dish or broiler pan. Brush the chicken with any remaining marinade. Bake for 35 to 40 minutes, or until chicken is no longer pink and the juices run clear. Switch the oven to broil and broil on high for 4 to 5 minutes, or until skin is crispy and golden brown.
The Review:
The first thing that struck me as I whisked together the marinade was how much this combination smelled like buffalo sauce. How curious! Although it makes sense...sriracha in lieu of hot sauce...lemon juice instead of vinegar. How would the rosemary meld?
Indeed, the crispy browned skin did taste slightly of that classic buffalo wing sauce, with a lovely kick of rosemary. Both flavors were very distinct, instead of blended to form a unique new surprise. The heat and flavor did not penetrate much beyond the crispy skin, however. For a more flavorful chicken I may be inclined to pierce the chicken pieces next time. Or let the meat marinate longer. But with that in mind, don't skimp on the heat. It lends a wonderful burn to the skin without making the meat itself too hot to handle.
Saturday, February 11, 2012
Spam Musubi
Even more ubiquitous than poke, spam musubi could be found at every convenient store, gas station, and local kine lunch counter. Even the finer restaurants get in on the action, offering deconstructed and carefully marinated versions of the quick snack. It is Hawaii at it's best. A fusion treat blending hands-free Japanese snacking with the Islander's love of Spam.
I've never been much of a fan of the salty meat product, but even this treat has its charms.
adapted from several people's input
makes 8 musubi
The Ingredients:
1 can Spam, original flavor
1 Tbsp soy sauce
2 Tbsp brown sugar
4 cups short grained sushi rice, cooked
4 sheets of nori, sliced in half lengthwise
small bowl of water
The Process:
Open the can of spam and set the luncheon meat on its side on a cutting board. Slice lengthwise into 8 equal pieces. Clean out the can. Using a sharp knife, can opener or kitchen shears, remove the other side of the can. File down any sharp edges. Save for use as the musubi mold. Alternatively, you can purchase mold specifically for this spam musubi.
In a small bowl whisk together soy sauce and brown sugar. Pour over spam and let set for about five minutes. Heat a large skillet over medium-high heat. Layer the spam in the skillet ans sautee for 2-3 mintues per side, or until the spam begins to caramelize. Remove from pan and set aside.
To assemble the musubi, lay one sheet of nori on a clean work surface. Place one slice of spam in the center of the nori. set the mold over the spam.
With damp fingers press about 1/2 cup of sushi rice into the mold. Pack the rice down as firmly as possible. Remove the mold. Fold both sides of the nori over the rice, sealing edges with a little water. Place on a plate seam side down.
Serve warm or warp in cling wrap and refrigerate.
The Review:
Salty, sweet, and a little odd. People either love it with a passion or avoid it like the plague..though of those who dare try it, most seem to be ambivalent. Most of our guests at least sampled the Hawaiian snack. While it was bu no means anyone's favorite dish of the night, a new respect for the pink gelatinous lunch meat emerged. This version was a fair tribute to the musubi we had on the islands.
Monday, February 6, 2012
Ahi Poke
This dish is Ross' kryptonite. It has been a sore spot since leaving Hawaii that we cannot find anything remotely similar to this marinated raw tuna in the Twin Cities metro. Sea Change makes a noble attempt, serving skewers of excellent fresh and fatty tuna with a drizzle of shoyu and sesame. But it's not the same. Poke was an everyman's food in Hawaii, not some delicacy served at raw bars, sushi houses and upscale seafood restaurants. Enter and supermarket and you'd be greeted with at least half a dozen varieties of the tender tidbit of raw fish at the deli counter.
This is my feeble attempt at grasping for that tropical ideal...
adapted from a recipe at food.com
The Ingredients:
2 lbs fresh ahi tuna
1 small round onion, julienned cut (Maui Onions preferred)
3 green onions, diced
1 tsp fresh ginger, minced
3 garlic cloves, minced
1/2 cup soy sauce
1 tsp sesame oil
1/2 tsp crushed red pepper flakes
1 tsp Chinese chili sauce (Rooster Brand)
1 tsp hawaiian sea salt or 1 teaspoon kosher salt
The Process:
Cut Ahi into half inch cubes. Place in large bowl, cover and refrigerate until ready to serve.
In another bowl, combine julienned onion, green onion, ginger, garlic, soy sauce, sesame oil, pepper flakes, chili sauce and salt. Stir well to combine and refrigerate for at least 30 minutes.
When ready to serve toss Ahi with the sauce. Let set for about ten minutes to marinate.
Serve on chilled platter with chopsticks or toothpicks.
The Review:
Unless you have a lot of sushi fans, this may not be the biggest hit. This was the one dish we had a lot of at the end of the night...not that Ross minded much.
Of all of the poke I remember, this version seemed particular salty. Perhaps too much soy sauce. The healthy red steaks quickly turned a dull brown once marinaded with the sauce too. Such a pity too...these were gorgeous tuna steaks to begin with.
The ginger and garlic lent a nice flavor but everything in combination seemed to overpower the tuna itself. In the case of poke, it would seem less is more. And the fresher thee fish the better...which is a feat in and of itself in a land locked state...
This is my feeble attempt at grasping for that tropical ideal...
adapted from a recipe at food.com
The Ingredients:
2 lbs fresh ahi tuna
1 small round onion, julienned cut (Maui Onions preferred)
3 green onions, diced
1 tsp fresh ginger, minced
3 garlic cloves, minced
1/2 cup soy sauce
1 tsp sesame oil
1/2 tsp crushed red pepper flakes
1 tsp Chinese chili sauce (Rooster Brand)
1 tsp hawaiian sea salt or 1 teaspoon kosher salt
The Process:
Cut Ahi into half inch cubes. Place in large bowl, cover and refrigerate until ready to serve.
In another bowl, combine julienned onion, green onion, ginger, garlic, soy sauce, sesame oil, pepper flakes, chili sauce and salt. Stir well to combine and refrigerate for at least 30 minutes.
When ready to serve toss Ahi with the sauce. Let set for about ten minutes to marinate.
Serve on chilled platter with chopsticks or toothpicks.
Unless you have a lot of sushi fans, this may not be the biggest hit. This was the one dish we had a lot of at the end of the night...not that Ross minded much.
Of all of the poke I remember, this version seemed particular salty. Perhaps too much soy sauce. The healthy red steaks quickly turned a dull brown once marinaded with the sauce too. Such a pity too...these were gorgeous tuna steaks to begin with.
The ginger and garlic lent a nice flavor but everything in combination seemed to overpower the tuna itself. In the case of poke, it would seem less is more. And the fresher thee fish the better...which is a feat in and of itself in a land locked state...
Saturday, February 4, 2012
Chicken Long Rice
No luau would be complete without several offerings of carbs. Rice and macaroni salad usually round out the plate lunch found around the island. To add a little variety to our starchy friends, we included chicken long rice.
The concept is simple...Mi-fen noodles softened and cut into short lengths and simmered in a ginger and garlic studded chicken broth.
adapted from a recipe at Aloha Friends Luau
serve 10-12
The Ingredients:
2-3 chicken thighs, with skin and bones
6 cups water
2 tsp chicken bouillon
1 Tbsp fresh ginger, minced
1 teaspoon Hawaiian salt, sea salt, or Kosher salt
2-3 cloves garlic, crushed
6 bundles rice vermicelli or mi-fen (2-6 oz packages)
The Process:
Place chicken thighs in large saucepan with water and bouillon. Add crushed ginger, salt, and garlic. Bring to a boil and then cover, simmering for 45 minutes or until chicken is tender and no longer pink. Remove the chicken from the stock and allow to cool. Remove the skin and bones. Shred the chicken meat and set aside. Reserve broth.
Meanwhile soak the rice noodles in hot water for about 10 minutes or until soft. Cut noodles in 4 inch lengths, and add to reserved broth. Bring to a boil, reduce heat and simmer for 15 minutes. Add shredded chicken and continue to simmer until chicken is heated through. Adjust seasoning to taste with salt, pepper, or soy sauce.
Serve warm or refrigerate for a cold noodle salad.
The Review:
Of all of the sides offered at the luau this came second only to the macaroni salad (which was store bought--I had enough cooking on my plate!). An odd douse of suspicion kept many guests from trying it until they learned it was simply a chicken noodle dish.
A rich chicken flavor shone through the simple noodles with the garlic and ginger adding a lovely balance. Most of the recipes I found included mushrooms as well, which I sadly omitted to give the dish a greater appeal. For those not afraid of fungus, I imagine the 'shrooms would add a wonderful, earthy depth.
Unlike many of the fast food varieties and plate lunch offerings I had sampled on the islands, this version maintained a bit of firmness to the noodles instead of disintegrating into a vaguely chicken flavored mush. The noodles take no time at all to cook...overcooking is such a shame...
With all of the other side offerings at our luau a little of this dish went a long, long way. I would highly recommend halving the amount unless this is served for a crowd or as the main course. I'll be eating chicken long rice at lunch for several days. So far, it holds up very well as a leftover!
Subscribe to:
Posts (Atom)