CSA veggies make for some of the best breakfasts! This recipe seems like a lot of produce. And it is. But most of the vegetables cook down quite a bit and are mixed up with just enough egg to hold the whole thing together.
A word of caution on using banana peppers...some a ridiculously hot, others are quite mild. You really won't know until you try a bite, so don't toss a whole pepper or two into the frittata willy-nilly. Wearing gloves is recommended when dealing with any spicy pepper. At the very least, be sure to thoroughly wash your hands prior to touching your face. Pepper spray is incredibly effective for a reason...
adapted from a recipe courtesy of Driftless Organics
serves 2
The Ingredients:
1 1/2 Tbsp butter, divided
2 cloves of garlic, minced
1/2 summer squash, coarsely grated
1 banana pepper, coarsely chopped
2-3 leaves of kale, stems removed and leaves coarsely chopped
3 eggs, beaten
1 1/2 tsp fresh thyme
salt and pepper to taste
1/4 cup feta, crumbled
The Process:
Preheat the broiler and adjust the oven rack to about 4" below.
Melt 1 Tbsp of the butter in a 8" cast iron skillet set over medium heat. Add the garlic and squash and cook for 2-3 minutes. Add the banana pepper and satuee an additional minute. Add the kale and thyme, cook until the kale is just beginning to wilt. Add the remaining butter and swirl to coat the pan.
Pour in the eggs, swirling the pan to distrubute them evenly. Reduce heat to low and cook 2-3 minutes, or until the edges have begun to set. Sprinkle with feta and place under the broiler.
Broil until the top of the frittata is set and is begining to brown, 3-4 minutes.
Allow to cool slightly before serving.
Seize the food! A new year's resolution to experiment with 100 new recipes in the coming year.
Showing posts with label eggs. Show all posts
Tuesday, August 26, 2014
Friday, July 18, 2014
Wilted Greens with Runny Eggs
To me, this is an ideal breakfast. Warm and filling. Ready in about 20 minutes. Perfectly portioned to share for a light morning nosh. Or generous enough single single serving for a more ravenous appetite.
Any greens will work: kale, collard greens, mustard greens, spinach. I opted for turnip greens. Nix the bacon to make the dish vegetarian. Or toss on some hot sauce for an extra punch. I love how easy this types of dishes adapt to many tastes!
the recipe is my own
serves 1-2
The Ingredients:
2 strips of bacon
2 green onions, thinly sliced
1 clove of garlic, minced
1 bunch of greens, 4-5 oz
2 eggs
salt and pepper
The Process:
Preheat the oven to 350 degrees F.
In a 9 inch cast iron skillet set over medium-high heat, fry the bacon until crisp and most of the fat has rendered, about 4-5 minutes. Transfer to a plate lined with paper towels to drain. Coarsely chop and set aside.
Reduce the heat to medium. Add the green onion and garlic to the bacon fat in the skillet. Sauté until fragrant, 1-2 minutes. Add the greens and saute until they just begin to wilt, another 2-3 minutes. Season with salt and pepper. Remove from heat.
Using the back of spoon, create two divots in the greens. Carefully break 1 egg into each divot, taking care to keep yolks intact. Bake until egg whites are set, 5-6 minutes for runny yolks, 8-10 minutes for hard set. Sprinkle with bacon and serve immediately, the eggs will continue to cook from the residual heat in the skillet.
Labels:
30 minute meal,
bacon,
breakfast,
CSA,
eggs,
garlic,
greens,
south beach phase 2
Wednesday, July 10, 2013
Plum Semifreddo
Dear lord, the heat! After the torrential rains of late June, the sunny skies are a blessing, but how I wouldn't love to be on a lake most days right now! A vacation to slightly cooler, Northwesternly climates is just around the bend. So in the meantime we make due with some chilly desserts to beat the heat. A batch of beer ice (recipe coming soon, I swear...) left me with several egg whites to use up. And this semifreddo recipe had just happened to catch my eye a few days earlier.
I have a soft spot in my heart for plums and plum jams. For years, Gramma made the most amazing jam out of fruit from her backyard. The nostalgia was worth the brief time standing over that simmering fruit in a scalding hot kitchen.
Everything comes together wonderfully quick; the rest is all self control as the dessert freezes. With its healthy dose of heavy cream and sugar, this dessert is by no means light, but the texture will deceive you. This semifreddo is a cloud spike with ribbons of tart plum.
adapted from bon appetit
serves 8
The Ingredients:
1 1/2 pounds red plums, pitted and cut into chunks
1 black cardamom pod, crushed
1 cup sugar, divided
Kosher salt
3 large egg whites
1/2 teaspoon vanilla extract
1 cup chilled heavy
The Process:
Mist a 9x5-inch loaf pan with nonstick spray and line with plastic wrap, leaving a generous overhang on all sides. Chill until ready to use.
Combine plums, cardamom, 1/3
cup sugar, and a pinch of salt in a medium saucepan. Cover and cook over
medium heat, stirring occasionally, until plums release their juices,
about 5 minutes. Uncover and cook until plums soften and start to fall
apart, 6–8 minutes longer. Let cool slightly.
Purée the plum mixture in a blender or with an immersion blender
until very smooth. Strain through a fine-mesh sieve into a medium bowl,
pressing on solids to extract as much pulp as possible. Chill. Set aside 1 cup purée for serving. The rest will be folded into the semifreddo.
Whisk egg whites, a pinch of
salt, and remaining 2/3 cup sugar in a double boiler or a medium heatproof bowl set over a saucepan of simmering water (do
not let bowl touch water). Heat, whisking constantly, until sugar is
dissolved and mixture is warm to the touch, about 4 minutes. Remove bowl
from saucepan. Add vanilla and, using an electric mixer or stand mixer with the whisk attachment set on high speed, whisk until mixture is tripled in volume, glossy, and completely cool,
about 10 minutes.
In another medium bowl whip the chilled cream until soft peaks form. Fold 1/3 of whipped cream
into the egg whites mixture until just combined. Fold in remaining whipped
cream until just combined. Fold in plum purée, leaving large streaks throughout mixture. The mixture will continue to mix and marble when poured in to the loaf pan.
Transfer mixture to prepared pan and smooth top. Fold plastic wrap overhang over top and freeze until firm, at least 8 hours.
Unwrap semifreddo and using plastic overhang, gently lift from pan. Invert and slice into 1" portions.
Spoon reserved plum puree over top and serve
Friday, June 7, 2013
Savory Bread Pudding with Rapini and Prosciutto
Breakfast for dinner? Certainly! But this dish is also a twist on what is typically thought of as dessert. Perhaps the end result is more strata than bread pudding. But with as inexpensive, yet full of flavor dish is, that seems like a minor detail worth overlooking...
adapted from Bon Appetit
serves 4-6
The Ingredients:
1 Tbsp olive oil
2-3 cloves of garlic, minced
1/2 tsp crushed red pepper
1 medium bunch rapini, cut into 1 inch pieces
2 tsp kosher salt
1/2 tsp ground black pepper
6 large eggs
1/2 cup heavy cream
1 cup milk
1 large baguette, torn into 1 inch pieces (about 8 cups)
1/2 cup + 2 Tbsp grated Parmesan
6-8 thin slices of prosciutto
The Process:
Preheat the oven to 350. Butter a casserole or baking dish and set aside.
Add the oil to a large skillet set over medium heat. Add the garlic and pepper flakes, stirring until fragrant, about 1 minute. Add the rapini and cook, stirring frequently, until the wilted. Allow to cool slightly.
In a large bowl, whisk together the eggs, cream, milk salt and pepper. Add the rapini, bread and 1/2 cup Parmesan. Toss to coat. Spread the mixture into the prepared baking dish. Evenly place the prosciutto over the top and sprinkle with remaining Parmesan.
Bake, uncovered, until the pudding is puffed, beginning to brown and is set in center, about 50 minutes.
Serve warm.
adapted from Bon Appetit
serves 4-6
The Ingredients:
1 Tbsp olive oil
2-3 cloves of garlic, minced
1/2 tsp crushed red pepper
1 medium bunch rapini, cut into 1 inch pieces
2 tsp kosher salt
1/2 tsp ground black pepper
6 large eggs
1/2 cup heavy cream
1 cup milk
1 large baguette, torn into 1 inch pieces (about 8 cups)
1/2 cup + 2 Tbsp grated Parmesan
6-8 thin slices of prosciutto
The Process:
Preheat the oven to 350. Butter a casserole or baking dish and set aside.
Add the oil to a large skillet set over medium heat. Add the garlic and pepper flakes, stirring until fragrant, about 1 minute. Add the rapini and cook, stirring frequently, until the wilted. Allow to cool slightly.
In a large bowl, whisk together the eggs, cream, milk salt and pepper. Add the rapini, bread and 1/2 cup Parmesan. Toss to coat. Spread the mixture into the prepared baking dish. Evenly place the prosciutto over the top and sprinkle with remaining Parmesan.
Bake, uncovered, until the pudding is puffed, beginning to brown and is set in center, about 50 minutes.
Serve warm.
Wednesday, October 17, 2012
Boozy Vanilla French Toast
You can thank Jackie at the Beeroness. I adore her so....
As per usual, I attempted to track down her beer recommendation, but only with moderate success. She based the French toast on Stone's Vanilla bean Smoked Porter.
Ross and I hit up our favorite local liquor store and their stellar craft brew selection. We were mildly let down. On hand was a bottle of Stone's Smoked Porter, but not the vanilla bean edition. (after poking around a little more I discovered this same porter was also brewed with chipotle...oh the fiesta we could have!)
I grabbed the bottle, my mind a whirl about how to up the vanilla essence without detracting from the smoky beer notes. Lost in thought, I almost passed up the vanilla imbided beer sitting next to the porter...Abita's Vanilla Doubledog...a 25th anniversary beer based on their Turbo dog. I almost squirreled the beer away to enjoy by myself, french toast be damned!
I'm glad I didn't
Each beer offered a unique taste, and I am wary to pick a favorite. You'll have to decide for yourself. The Stone offered a deeper more rounded flavor...calling to mind campfires and toasted marshmallow. The Abita was a sweeter variation.
adapted from the Beeroness
serves 6-8
The Ingredients
1 cup milk
2/3 cup porter or dark ale with caramel notes
1/2 cup vanilla sugar*
3 eggs
1 1/2 tsp vanilla extract**
2 tbs butter (plus additional as needed)
1 large loaf of crusty Italian bread, cut into 1 inch thick slices
*vanilla sugar is simply sugar that has shared a container with a vanilla bean or two. cooking with vanilla pods, instead of tossing the spent pod, I allow it to dry and then stick into an mason jar full of sugar. Within a few days the sugars takes on a wonderfully rich vanilla flavor
**if you do happen to find a beer with vanilla essence, reduce the extract to 1 tsp.
The Process
Heat a large skillet over medium high heat, and add enough oil or butter to well coat the surface.In a large bowl, whisk together the milk, beer, sugar, eggs and vanilla.
One at a time, dip the bread into the batter, thoroughly coating both sides. Add to the skillet and fry, flipping once, until golden brown, (2-3 minutes per side). Keep warm in a pre-heated oven and repeat with remaining bread. Serve warm. With Bacon.
Friday, July 20, 2012
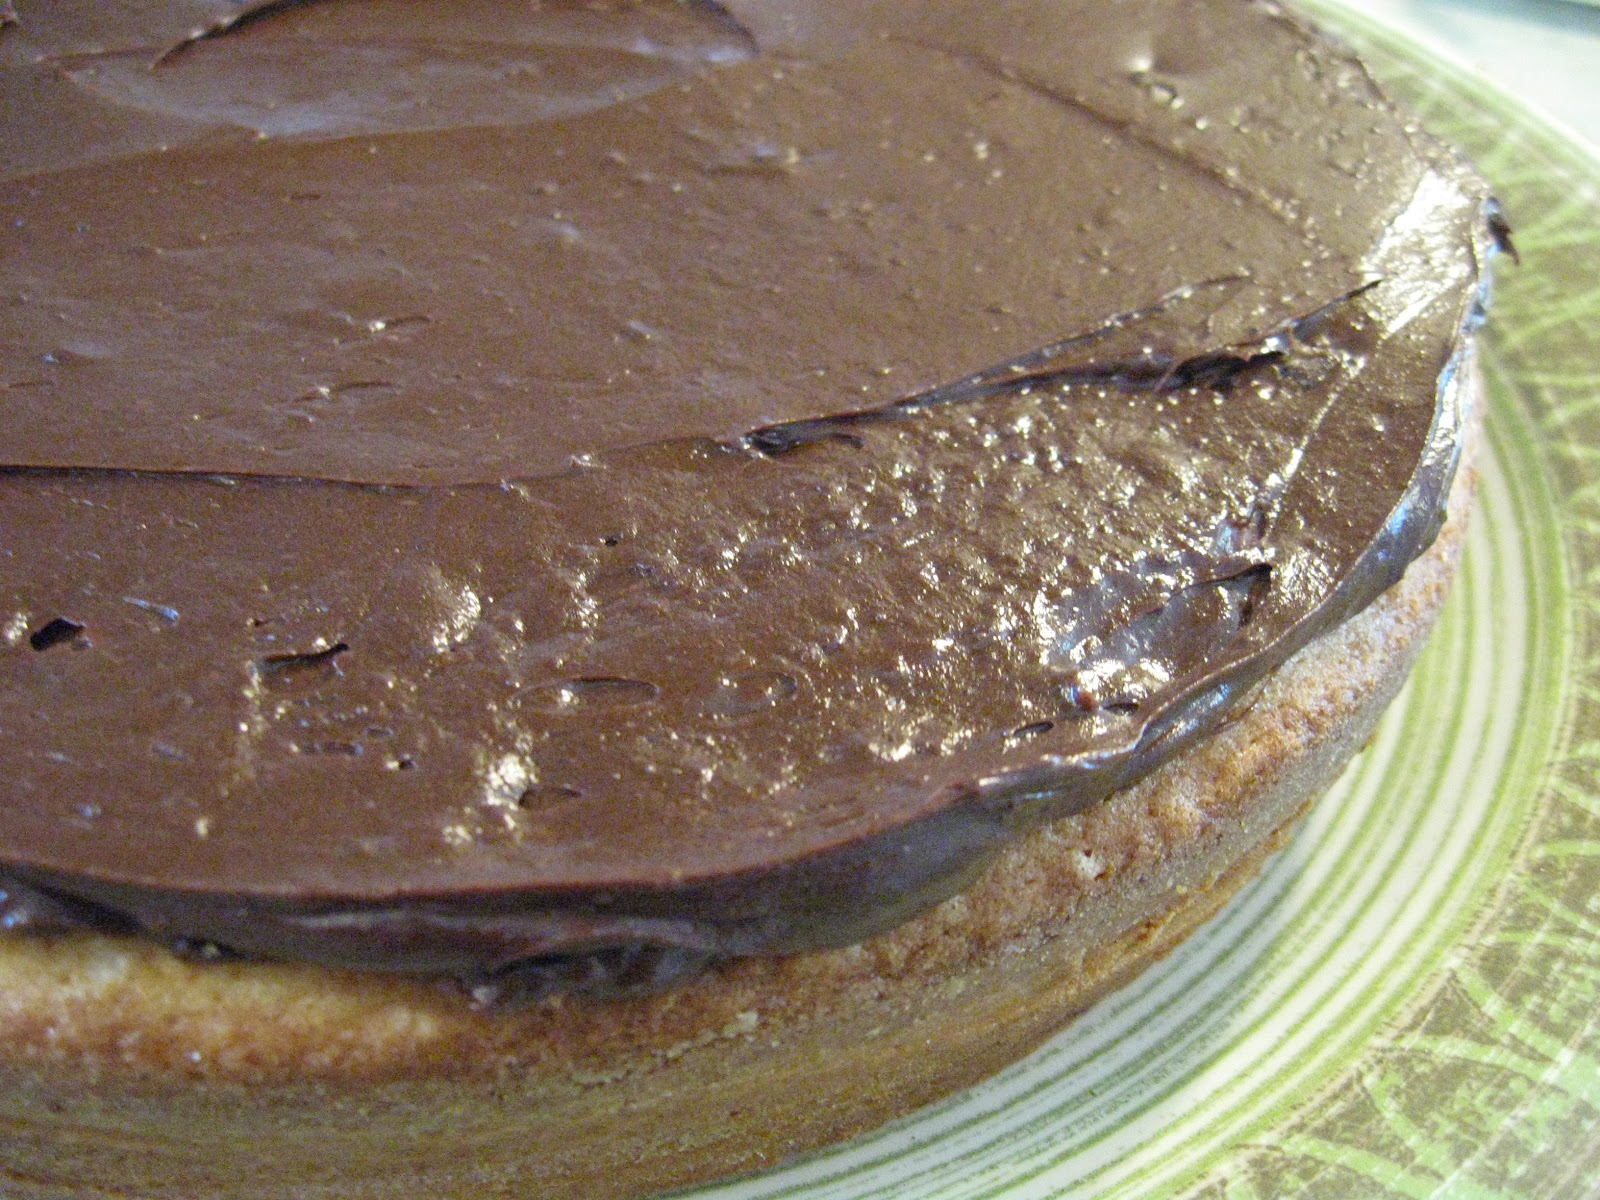
Classic Yellow Cake with Chocolate Frosting
What sort of dessert do you request on your birthday? For me, the cake of choice was usually yellow with chocolate frosting. Apparently great minds think alike. After much poking and prodding Ross finally requested a specific dessert. Low and behold, it was the classic yellow cake with chocolate frosting.
I knew any old box mix would not do the big day justice (sorry Betty Crocker and Pillsbury!) The cake had to be made from scratch. Thankfully a post from Liz at the Skinny Chick Can Bake caught my eye.
Holy heaven, is this cake a winner!
adapted from Martha Stewart via That Skinny Chick Can Bake
yields one 2-layered cake
The Ingredients:
for the cake
1 1/2 cups all-purpose flour
1 1/2 cups cake flour
1 Tbsp baking powder
1/2 tsp salt
1 cup unsalted butter ( 2 sticks), room temperature
1 3/4 cups sugar
4 eggs
2 tsp vanilla
1 1/4 cups milk
for the frosting:
1 lb semi-sweet chocolate, chopped
6 Tbsp cocoa powder
6 Tbsp cocoa powder
6 tablespoons boiling water
1 1/2 cups unsalted butter (3 sticks), room temperature
1/2 cup powdered sugar
1 tsp vanilla
The Process:
for the cake:
Preheat the oven to 350. Butter two 9-inch cake pans. Line the bottom with parchment paper. Butter the parchment and dust the entire pan with flour. Set aside.
In a medium bowl sift together the flours, baking powder and salt. Set aside.
In a large bowl cream together the butter and sugar until fluffy and well combined, about 4 minutes. Beat in the eggs one at a time, making sure each is well incorporated before adding the next. Mix in the vanilla.
With the mixer set to low, add one third of the flour at a time, alternating with the milk. Mix well after each addition.
Divide the batter between the two prepared pans. Bake in the preheated oven for 30-35 minutes or until a toothpick inserted into the center of the cake comes out clean.
Allow to cool in the pans for 10 minutes. Invert the pan to remove the cake from the pans and peel off the parchment paper. Allow to cool completely on wire racks.
for the frosting:
In a large microwaveable bowl, melt chocolate in microwave, stopping and stirring at 30 second
increments until the chocolate is melted and smooth. Set aside to cool to room
temperature, about 15 minutes...do not skip the cooling, especially on a hot day. The frosting will not be a spreadable consistency otherwise.
Whisk the cocoa powder into the boiling water until smooth.
In a large bowl, cream together the butter and powder sugar until fluffy, about 2-3 minutes. Beat in the vanilla. Add cooled chocolate and mix until well combined. Add cocoa mixture and beat until the desired consistency is achieved.
Assemble and frost the cake as desired.
Ross had the privilege of sampling as I mixed everything. It was his cake after all. I had to ensure it would meet his approval. Upon sampling the batter he exclaimed, is that the frosting! It's so good!" The wheels are churning for later. Has anyone ever attempted a cake batter frosting before?
The cake itself baked up beautiful and sat eagerly awaiting it's chocolatey covering.
Here I ran into a few problems. The recipe as written is not the problem in the slightest. The problem stemmed from the sheer quantity of butter on a sweltering July day. No amount of cooling outside of the refrigerator was going to keep the frosting from turning soupy during my feeble attempts at frosting (I'm getting better, but man, what I wouldn't give for an off set spatula!)
The problem I ran into with chilling the ingredients between steps was it cooled off TOO fast. Rock hard to soupy to rock hard again. I managed. And the cake looked stunning in the end. The finish beauty hung out in the fridge until the big moment. I broke 4 candles trying to poke the candles into the chilled frosting. 30 candles ablaze, the frosting wasn't so stiff anymore!
But even better than the look of the cake was the taste. Having sampled along the way, I warned people about the sugar bomb they were about to partake in. Only a few heeded the warning. Everyone loved it. There was nary a crumb left. Only it is truly, very rich and very sweet. A little bit goes a long way.
Next time...cupcakes...
Some of us need the built in portion control.
Saturday, June 23, 2012
Salad Nicoise with Salmon and Garlic Scapes
Our CSA box provided inspiration for this twist on the classic main-course salad. I've fallen for garlic scapes. Their mild flavor compliments so much without overpowering the other elements of the dish, like the more mature bulb form of garlic can (but oh, how I love garlic in all its forms!) Their crispness reminded me so much of fresh green beans. With that thought in my mind I decided to tackle salad Nicoise, but using as many veggies as possibly from our fresh and local batch.
The salad base is my own
Vinaigrette adapted from Julia Child
The Ingredients:
for the salad
2 - 4 oz salmon fillets
salt and pepper to taste
1 Tbsp oil
5-6 garlic scapes, cut into 1-inch lengths
3-4 cups mixed greens (I used spinach, green leaf lettuce and arugula)
2 roma tomatoes, halved lengthwise and sliced
3 small German butterball potatoes, boiled and sliced
3 hard boiled eggs, sliced
for the vinaigrette:
1 potato onion, finely minced
1/2 Tbsp Dijon-type mustard
1/4 tsp salt
1/2 Tbsp freshly squeezed lemon juice
1/2 Tbsp white wine vinegar
1/3 olive oil
Freshly ground pepper to taste
The Process:
for the vinaigrette:
combine all of the ingredients in a screw top jar and shake vigorously.
for the salad
Preheat the oven to 450 degrees F.
Season salmon with salt and pepper. Place salmon, skin side down, on a non-stick baking sheet Bake until salmon is cooked through, about 12 to 15 minutes. Allow to cool.
Heat the oil in a medium skillet over medium high heat. Add the garlic scapes and saute until tender, about 5 minutes. Remove from pan and allow to cool.
Toss the mixed greens with the vinaigrette and divide among three serving plates. Flake the salmon and arrange one third of the meat down one side of each plate. Layer one third of the tomato slices along side the salmon, followed by one third of the potatoes and on e hard boiled egg. Line one third of the garlic scapes down the other side.
Serve.
The review:
This dish can be a little tedious to prepare with all of the boiling, baking and sauteing needed, but the end result is a filling and refreshing summer treat. Tuna can be substituted, but I found salmon to be a nice change of pace. The garlic scapes add a wonderful twist. Green beans are lovely, but sort of band at times. The scapes provide a similar crunch and texture with a pleasantly mild garlic flavor. Paired with the acidic dressing...yum.
I kept the layers simpler than the classic salad...omitting the anchovies, capers, shallots and olives...to keep the focus on the uber fresh veggies from our CSA box. I was not disappointed.
Sunday, May 6, 2012
Cornmeal and Ricotta Waffles
Several weeks have passed without a waffle Sunday. Far too much time. As schedules pick up, Ross and I are finding fewer and fewer weekends off together. The stars aligned and this past Sunday found a morning together again.
I came across this recipe a while ago, and tagged it for a later date. The combination was intriguing, but it wasn't until I tried my hand at homemade ricotta that this recipe drew my attention again.
adapted from Michael Mina's recipe at Food and Wine
The Ingredients:
1 1/2 cups ricotta cheese
2 cups milk
6 large eggs, separated
1/2 cup sugar
2 cups flour
1/2 cup cornmeal
1/Tbsp baking powder
1/4 tsp salt
1 stick unsalted butter, melted
The Process:
Preheat oven to 200 and heat up the waffle iron.
In a large bowl, whisk the ricotta with the milk, egg yolks and sugar. In a medium bowl, whisk the flour with the cornmeal, baking powder and salt. Whisk the dry ingredients into the ricotta mixture until combined. Stir in the melted butter.
In a separate mixing bowl with an electric beater, or by hand with a strong wrist action, whisk the egg whites until they hold soft peaks. Fold the whites gently into the waffle batter, until just combined. Do not over mix! The batter should retain as much air as possible from the whites.
Brush or mist the waffle iron lightly with oil and spoon batter into waffle iron, spreading quickly with a spatula to cover the entire griddle surface (amount varies depending on waffle iron, mine uses just over 1/2 a cup). Cook according to iron manufacturer’s instructions.
Transfer finished waffles to rack in oven to keep warm and crisp. Make more waffles in same manner.
Serve warm with toppings of your choice.
The Review:
One thing I've come to truly love about Waffle Sundays is the sheer variety of flavors out there. Is waffle is so similar, and yet so unique in their own right. Oh, the shape my be the same. And the general consistency. But some are lighter, some are denser. Some have a smooth, almost creamy center with a crisp exterior while others are more toothsome. Flavors very from yeasty to sweet to vanilla or cinnamon spiked. Filler abound: bacon, blueberries, nuts, or nothing at all. Some hold up to a mountain of toppings. Others are the perfect sponge for syrup.
And I love every single one of them. Some may be more successful than others. But each and every waffle Sunday has been a treat to look forward to.
SO where does this waffle fall? This variation was a little denser than most, with a bit pleasant grittiness from the cornmeal. It soaked up the syrup on a heart beat, yet only the lightest drizzle was needed to offset the light cornmeal flavor. Of course I added butter, but a silken buttery flavor was present even before the waffle was doused in toppings. It puffed and crisped wonderfully, and maintained it's crispness under the power of the syrup longer than some, but not quite long enough for my taste. Yet the interior was wonderfully moist.
All that sums up to mean these waffles will be amazing frozen for later and reheated in the toaster for a quick breakfast later this week.
And the ricotta? A creaminess was present, but if you didn't know the ricotta was there, you wouldn't be able to tell. I used homemade ricotta...this batch turned out a tad drier than the last ricotta, but the waffles did not suffer.
These may not be the healthiest of waffles, with 6 eggs and 1 stick of butter. But the fat and sugar is offset by a higher protein content than most other waffles. This is a waffle that will keep you fuller longer. And at a 6-8 waffle yield...you are only looking at about 1 egg per serving. The butter may be a bit excessive if you're watching the fat. Next time around I may swap out half the butter with applesauce.
Of course, with so many other waffles to choose from, who knows when I'll make it back around to this one!
Tuesday, April 10, 2012
Single Serving Veggie Lasagna *Gluten Free*
This is not your typical veggie lasagna. For one, there are no anemic vegetables swimming in a gluey cream-based sauce. And? No noodles. No kidding! Slice zucchini thin enough and it will fool even the most devout pasta-holic. I promise. Well, maybe maybe it won't fool them. But I doubt they'll complain much.
The individual loaf pans make these a breeze to serve as well. No fighting over utensils. No runny mess of cheese and sauce oozing in to replace the missing slices. And who needs a plate when you can enjoy it right out of your own personal pans!
When I first started assembling these there was much grumbling and groaning. All of the slicing, blanching, sauteing, mixing, baking...sheesh! For the amount of time I was looking into spending on these I was hoping for something stellar. It took a while before it dawned on me that this in no more time consuming than traditional noodle and meat lasagna...possibly even less so given that the zucchini noodle blanch quicker than the noodle boil and the onions cook down faster than the meat usually browns. If the time is a deterrent, make huge batch and freeze them for later...either pre or post baking (it doesn't really matter).
yields four single serving lasagna
The Ingredients:
2 medium zucchini
1 Tbsp olive oil
2 medium onions, thinly sliced
1 cup sliced mushrooms
4 cloves of garlic, minced
1 1/2 cups ricotta
1 egg
1 tsp oregano
1/2 tsp parsley
1/2 tsp basil
1/2 tsp salt
2 Tbsp fresh grated Parmesan
2 cups shredded Italian cheese blend (Mozzarella, Provolone, Parmesan, Fontina, Romano and Asiago)
1 large bunch fresh spinach
3 Roma tomatoes, thinly sliced
1 1/2 cups tomato sauce
equipment:
4 mini loaf pans
The Process:
Preheat the oven to 350.
Bring a large pot of lightly salted water to a gentle boil over medium high heat. Cut off stem end of the zucchini. Using a mandolin, vegetable peeler or a sharp knife cut the zucchini lengthwise into 1/8 - inch thick slices. Quickly blanch the zucchini in the salted water, about 1-2 minutes. Drain the zucchini ribbons and set aside.
Heat the olive oil in a large skillet over medium heat. Add the 2 cloves of garlic, onions and mushrooms. Saute until the mushrooms and onions are tender, 8-10 minutes. Set aside.
In a medium bowl, combine the ricotta, Parmesan, remaining garlic, egg, oregano, parsley and basil until well combined.
Gather all of the ingredients to assemble the lasagna.
Lightly oil the each of the four loaf pans. In the bottom of each mini loaf pan, layer 2-3 ribbons of zucchini, completely covering the bottom. Top with a layer of 6-8 spinach leaves, and 3-4 slices of tomato. Spread about 3 Tbsp of the ricotta mixture over the vegetables and sprinkle with about 3 Tbsp of shredded cheese.
Spoon a thin layer of the mushroom and onion mixture on top of the cheeses. Top with a layer of tomato sauce. Repeat all of the layers. Finish with a layer of 2-3 zucchini ribbons, 3-4 slices of tomato and a generous sprinkling of shredded cheese.
Cover each of the mini lasagna loosely with aluminum foil. Bake for 30-35 minutes. Remove the foil and bake an additional 10-15 minutes or until the cheese is bubbly and golden brown. Allow the lasagnas to cool for 5 to 10 minute prior to serving.
The Review:
Was this recipe worth all chopping, slicing, dicing and cursing. The meat loving pasta-holic in my household claimed not to miss the meat or the noodles (though he would have preferred I nixed the mushrooms). A huge plus for those wonderful vegetables. Come summer when our CSA boxes start to arrive, I suspect many a veggie will endure a similarly tasty fate.
The individual loaf pans make these a breeze to serve as well. No fighting over utensils. No runny mess of cheese and sauce oozing in to replace the missing slices. And who needs a plate when you can enjoy it right out of your own personal pans!
When I first started assembling these there was much grumbling and groaning. All of the slicing, blanching, sauteing, mixing, baking...sheesh! For the amount of time I was looking into spending on these I was hoping for something stellar. It took a while before it dawned on me that this in no more time consuming than traditional noodle and meat lasagna...possibly even less so given that the zucchini noodle blanch quicker than the noodle boil and the onions cook down faster than the meat usually browns. If the time is a deterrent, make huge batch and freeze them for later...either pre or post baking (it doesn't really matter).
yields four single serving lasagna
The Ingredients:
2 medium zucchini
1 Tbsp olive oil
2 medium onions, thinly sliced
1 cup sliced mushrooms
4 cloves of garlic, minced
1 1/2 cups ricotta
1 egg
1 tsp oregano
1/2 tsp parsley
1/2 tsp basil
1/2 tsp salt
2 Tbsp fresh grated Parmesan
2 cups shredded Italian cheese blend (Mozzarella, Provolone, Parmesan, Fontina, Romano and Asiago)
1 large bunch fresh spinach
3 Roma tomatoes, thinly sliced
1 1/2 cups tomato sauce
equipment:
4 mini loaf pans
The Process:
Preheat the oven to 350.
Bring a large pot of lightly salted water to a gentle boil over medium high heat. Cut off stem end of the zucchini. Using a mandolin, vegetable peeler or a sharp knife cut the zucchini lengthwise into 1/8 - inch thick slices. Quickly blanch the zucchini in the salted water, about 1-2 minutes. Drain the zucchini ribbons and set aside.
Heat the olive oil in a large skillet over medium heat. Add the 2 cloves of garlic, onions and mushrooms. Saute until the mushrooms and onions are tender, 8-10 minutes. Set aside.
In a medium bowl, combine the ricotta, Parmesan, remaining garlic, egg, oregano, parsley and basil until well combined.
Gather all of the ingredients to assemble the lasagna.
Lightly oil the each of the four loaf pans. In the bottom of each mini loaf pan, layer 2-3 ribbons of zucchini, completely covering the bottom. Top with a layer of 6-8 spinach leaves, and 3-4 slices of tomato. Spread about 3 Tbsp of the ricotta mixture over the vegetables and sprinkle with about 3 Tbsp of shredded cheese.
Spoon a thin layer of the mushroom and onion mixture on top of the cheeses. Top with a layer of tomato sauce. Repeat all of the layers. Finish with a layer of 2-3 zucchini ribbons, 3-4 slices of tomato and a generous sprinkling of shredded cheese.
Cover each of the mini lasagna loosely with aluminum foil. Bake for 30-35 minutes. Remove the foil and bake an additional 10-15 minutes or until the cheese is bubbly and golden brown. Allow the lasagnas to cool for 5 to 10 minute prior to serving.
The Review:
Was this recipe worth all chopping, slicing, dicing and cursing. The meat loving pasta-holic in my household claimed not to miss the meat or the noodles (though he would have preferred I nixed the mushrooms). A huge plus for those wonderful vegetables. Come summer when our CSA boxes start to arrive, I suspect many a veggie will endure a similarly tasty fate.
Labels:
basil,
Dairy,
eggs,
entree,
garlic,
gluten-free,
herbs,
italian,
mushrooms,
onions,
south beach phase 1,
tomato,
vegetarian,
zucchini
Wednesday, March 21, 2012
Mini Caramelized Onion Quiches with Sriracha Glazed Bacon
Have you noticed how many recipes for mini quiches are out there? And yet so few of them utilize a crust. I completely sympathize. The pastry is fussy and time consuming when you're trying to work small. One of my least favorite tasks in the kitchen is rolling out uniformly thin layers of pastry crust or cookie dough. But in this instance, the butter crust adds a lot to the texture and flavor of the quiche. And the crimped and pleated edges of pastry practically blossom out of the muffin tins. They are quite stunning.
Many tarts, galettes, pastries and quiches have been featuring caramelized onions as of late. So I have decided to jump on the bandwagon. Added bonus...mini quiches means I'll breakfast ready to heat on eat for the next few days.
the recipe is my own
yields 12 mini quiches
The Ingredients:
for the bacon
3 slices thick cut bacon
1 Tbsp honey
1-2 tsp Sriracha
for the onions
2-3 medium onions, peeled and thinly sliced
1 Tbsp olive oil
1 Tbsp butter
1/4 tsp salt
for the quiche
pie crust or pate brisse for a dbl crust
4 eggs
1/2 cup +2 Tbsp heavy cream
1/2 cup + 2 Tbsp milk
1/2 tsp salt
1/4 tsp pepper
1/4 tsp thyme
pinch cinnamon
3/4 cup cheese of your choice, shredded
The Process:
for the bacon:
Preheat the oven to 450. On an aluminum lined baking sheet, lay the bacon out in a single layer. In a small cup or bowl, stir together the honey and sriracha. Brush the glaze evenly over each slice of bacon.
Bake for 10-15 minutes or until the bacon reaches the desired level of crispness. Remove the bacon to paper towels to drain and cool.
for the onions:
In a large skillet over high heat, melt the butter and heat the oil. Add the onions in a single layer over the entire bottom of the skillet. Reduce the heat to medium, medium-low. Saute the onions over low heat, stirring every 2-3 minutes. After 5-7 minutes sprinkle with salt to extract more of the liquid from the onions. Continue to saute over medium-low heat, stirring only every 2-3 minutes. The onions should slowly begin to brown and caramelize.

After the desired caramelization is achieved, about 20-30 minutes, remove from heat and set aside.
for the quiche:
Preheat the oven to 375 and lightly oil a 12 cup, standard-sized muffin tin.
Roll out the pastry crust or pate brisse. Cut out twelve 5- inch circles and gently press one circle into each cup of the tin, gently pleating and folding the edges as needed.
In a medium bowl whisk together the eggs, cream, milk and seasonings. Set the egg mixture aside.
Divide the caramelized onions between the 12 pastry cups, using roughly 1 tsp per quiche. Top each with 1/4 strip of bacon, snipped into small pieces. Sprinkle with 2-3 tsp of shredded cheese. Pour about 3 Tbsp of the egg mixture into each cup, filling within 1/4 inch of the crust's lip.
Bake for 30 to 35 minutes until the quiche puffs up and begins to brown. A toothpick inserted into the middle should come out clean. Allow the mini quiches to cool in the tin for 5-10 minutes, enabling the egg mixture to set up. Gently remove the mini quiches from the muffin tin to a cooling rack. Let rest until the egg settles and levels out and the quiches are cool enough to handle.
Serve warm.
The Review:
Fresh out of the oven, domed golden treasures peeked out from their pastry petals. They quickly settled, but with that first glimpse I knew I was in for a treat.
I had a hard time waiting for the mini quiche to cool enough to take a bite. But that first bite...heavenly. The crust broke away in a flaky, buttery burst to reveal the smooth, velvety egg within. A salty, smokey pop of bacon followed, and close behind that...the slight sweetness and almost creamy layer of caramelized onion. A subtle warmth danced across my tongue as the Sriracha came forward to finish off the bite. One small bite...so many flavors and textures.
While still warm, the egg and bacon flavors dominated these lovely little breakfast bites. As with many things, the flavor improved with time. The next day the Sriracha created the most wonderful subtle warmth without a trace of vinegar or bite. The onions held their own more strongly against the smokey burst of bacon. And all in all the flavors mellowed and mingled a little more harmoniously.
Of course, saving them for next morning's breakfast sacrifices that gloriously flaky crust, unless you have time to reheat them in the oven. Convenience always has its price.
Ross didn't care much for the Sriracha. But the fillings for these quiche are limitless. Even a change as simple as a maple-peppercorn or honey-whiskey glaze on the bacon would be enough to launch these breakfast gems into completely different flavor-filled waters.
Many tarts, galettes, pastries and quiches have been featuring caramelized onions as of late. So I have decided to jump on the bandwagon. Added bonus...mini quiches means I'll breakfast ready to heat on eat for the next few days.
the recipe is my own
yields 12 mini quiches
The Ingredients:
for the bacon
3 slices thick cut bacon
1 Tbsp honey
1-2 tsp Sriracha
for the onions
2-3 medium onions, peeled and thinly sliced
1 Tbsp olive oil
1 Tbsp butter
1/4 tsp salt
for the quiche
pie crust or pate brisse for a dbl crust
4 eggs
1/2 cup +2 Tbsp heavy cream
1/2 cup + 2 Tbsp milk
1/2 tsp salt
1/4 tsp pepper
1/4 tsp thyme
pinch cinnamon
3/4 cup cheese of your choice, shredded
The Process:
for the bacon:
Preheat the oven to 450. On an aluminum lined baking sheet, lay the bacon out in a single layer. In a small cup or bowl, stir together the honey and sriracha. Brush the glaze evenly over each slice of bacon.
Bake for 10-15 minutes or until the bacon reaches the desired level of crispness. Remove the bacon to paper towels to drain and cool.
for the onions:
In a large skillet over high heat, melt the butter and heat the oil. Add the onions in a single layer over the entire bottom of the skillet. Reduce the heat to medium, medium-low. Saute the onions over low heat, stirring every 2-3 minutes. After 5-7 minutes sprinkle with salt to extract more of the liquid from the onions. Continue to saute over medium-low heat, stirring only every 2-3 minutes. The onions should slowly begin to brown and caramelize.
After the desired caramelization is achieved, about 20-30 minutes, remove from heat and set aside.
for the quiche:
Preheat the oven to 375 and lightly oil a 12 cup, standard-sized muffin tin.
Roll out the pastry crust or pate brisse. Cut out twelve 5- inch circles and gently press one circle into each cup of the tin, gently pleating and folding the edges as needed.
In a medium bowl whisk together the eggs, cream, milk and seasonings. Set the egg mixture aside.
Divide the caramelized onions between the 12 pastry cups, using roughly 1 tsp per quiche. Top each with 1/4 strip of bacon, snipped into small pieces. Sprinkle with 2-3 tsp of shredded cheese. Pour about 3 Tbsp of the egg mixture into each cup, filling within 1/4 inch of the crust's lip.
Bake for 30 to 35 minutes until the quiche puffs up and begins to brown. A toothpick inserted into the middle should come out clean. Allow the mini quiches to cool in the tin for 5-10 minutes, enabling the egg mixture to set up. Gently remove the mini quiches from the muffin tin to a cooling rack. Let rest until the egg settles and levels out and the quiches are cool enough to handle.
Serve warm.
The Review:
Fresh out of the oven, domed golden treasures peeked out from their pastry petals. They quickly settled, but with that first glimpse I knew I was in for a treat.
I had a hard time waiting for the mini quiche to cool enough to take a bite. But that first bite...heavenly. The crust broke away in a flaky, buttery burst to reveal the smooth, velvety egg within. A salty, smokey pop of bacon followed, and close behind that...the slight sweetness and almost creamy layer of caramelized onion. A subtle warmth danced across my tongue as the Sriracha came forward to finish off the bite. One small bite...so many flavors and textures.
While still warm, the egg and bacon flavors dominated these lovely little breakfast bites. As with many things, the flavor improved with time. The next day the Sriracha created the most wonderful subtle warmth without a trace of vinegar or bite. The onions held their own more strongly against the smokey burst of bacon. And all in all the flavors mellowed and mingled a little more harmoniously.
Of course, saving them for next morning's breakfast sacrifices that gloriously flaky crust, unless you have time to reheat them in the oven. Convenience always has its price.
Ross didn't care much for the Sriracha. But the fillings for these quiche are limitless. Even a change as simple as a maple-peppercorn or honey-whiskey glaze on the bacon would be enough to launch these breakfast gems into completely different flavor-filled waters.
Friday, March 9, 2012
Blood Orange Cake with Honey Whipped Cream
Or "how Samantha makes things much more difficult than they need to be."
About a month ago Audra at the Baker Chick posted a wonderful blood orange yogurt cake. It sounded simply amazing and ridiculously easy to whip together. The simplicity of the recipe was built around the 6 oz container of yogurt. All of the other ingredients were measured using this container. Easy peasy. No need for measuring utensils. Just a 3:2:1 ratio. Oh...and self rising flour.
Well...
I use yogurt a lot. I have long ago given into purchasing the large tubs of plain yogurt instead of individual serving sizes. So no 6 oz container to conveniently measure out my other ingredients. To make matters more complicated, yogurt isn't sold by volume...it's sold by weight. How to figure the volume of the other ingredients?
Ugh. This is where the obsessive compulsive fabric dyer in me took over. On a daily basis I convert units of measure and compare ratios to ensure the fabric I dye is consistent from one batch to the next. Math. Math everywhere. This ratio of weight to volume was right up my alley...frustrating as it was.
After poking around I found that a cup of yogurt weighs roughly 8.6 oz...so 6 oz by weight of yogurt would be about 0.69 cups by volume. (WHY do we use oz for weight and volume...things needn't be this complicated). Multiplied by the units conveniently listed in Audra's recipe and voila...the measures listed below...within a few teaspoons...
Okay...I'll stop with the math. Seriously...buy a 6oz container of yogurt...it will make the process so much easier!
Second problem...I don't have self rising flour. Thankfully that's an easy enough fix. Self rising flour is just boring old flour with salt and baking powder already mixed in..roughly 1 1/4- 1 1/2 tsp of baking powder and 1/2 tsp of salt per cup of flour.
Now...I finally had a recipe. And a bit of a headache from making things harder than they need to be. This cake is certainly worth it. And please do visit Audra's site to see the much less migraine-inducing method of measuring.
adapted from Sylvia Bors recipe via Audra at TheBakerChick
yields one 9-inch singe layer cake
The Ingredients:
for the cake
6 oz yogurt (or 1/2 cup + 2 Tbsp)
2 blood oranges, both juiced, one zested
1/2 cup + 2 Tbsp safflower oil or vegetable oil
2 eggs
2 cups all purpose flour
1 1/4 cup sugar
2 1/2 tsp baking powder
1/2 tsp salt
for the frosting:
1 cup whipping cream
1 tablespoon honey
The Process:
Preheat the oven to 350
In a large bowl, whisk together the yogurt, orange juice, and oil. Beat the eggs in one at a time until incorporated. In a separate bowl sift together sugar, flour, baking powder and salt. Mix the dry ingredients into the yogurt mixture, one third at a time, mixing thoroughly after each addition.
Lightly oil a 9" cake pan and line with parchment paper. Pour the batter into the pan and smooth the top. Bake for 30-35 minutes. Reduce the oven temperature to 325 and bake an additional 10-20 minutes, depending on the oven.
Remove cake from pan and allow to cool completely.
While the cake cools, in a chilled bowl whisk the honey into the whipped cream. Beat the cream until stiff peaks form. Spread onto the cooled cake.
The Review:
After the headache of math and measuring I was almost immediately rewarded with the most amazing smells...lightly citrus and wonderfully cakey...
But my oven is finicky. The center of the cake did not seem to want to set. At the end of the full 20 minutes after dropping the temperature to 325 the toothpick finally came out clean...and the edges a little browner than I'd like. I may have to bake the cake at 325 for the duration next time...or split the batter between two pans...
My cake mounded a lot in the center. I suspect this may have to do with using fresher baking powder and all purpose flour in lieu of self rising flour whose leavening has been sitting for god knows how long. The height didn't bother me in the slightest. I may have obsessed a bit about the math, but not having a level cake. Meh.
The flavors are so simple and clean. And not overly sweet. The whipped frosting was the perfect topping, creamy and ever so slightly sweet, without weighing down the cake or overpowering the citrus with cloying sweetness. I'd love to try the cake again. Perhaps with lemon. And almond extract. Or if I get really ambitious...layers...
I confess...I had some for breakfast. Judging from the bit of frosting missing this morning I take it the cat did too...
It is that good.
Tuesday, March 6, 2012
Ham and Cheese Quinoa Cups
I am horrible when it comes to eating breakfast. I know I should. But most mornings that extra few minutes of sleep usually out ranks the need to properly fuel up for the day ahead. Often I pour a cup of coffee and bolt out of the door.
One trick that seems to work well for me is to make a large batch of something ahead that can be quickly reheated in the microwave, stove top or toaster oven. Quiche cups, frittata, and turkey/fennel sausage patties were key players when I planned ahead. But it is possible to overload on quiche, believe it or not. Quinoa thrown into the mix adds excitement (and a fun texture) back to my breakfast routine.
In a bit of poor planning I discovered I did not have enough quinoa to make Kristin's full recipe from Iowa Girl Eats. But it halved easily enough. I omitted the additional egg whites and stuck with whole eggs. And I used a standard muffin tin instead of the Kristin's mini tins. As a result, I needed to extend the baking time a bit.
But I was set for a few days of breakfast, with surprising little hands-on time.
adapted from Iowa Girl Eats
yields 6 Quinoa Cups
The Ingredients:
1 cups cooked quinoa (about 3/4 cup uncooked)
2 eggs
1 small zucchini, shredded
1/2 cup shredded sharp cheddar cheese
2 oz diced ham
2 Tbsp parsley, chopped
1 Tbsp Parmesan cheese
1 green onions,thinly sliced
salt and pepper to taste
The Process:
Preheat the oven to 350 degrees. In a large bowl combine all of the ingredients and whisk together until well combined. Lightly butter or oil a standard-size muffin tin. Spoon mixture into the tin, bringing the mixture level to the tin's lip. Bake for 25-30 minutes, or until the edges of the cups are golden brown. Let cool for at least 5 minutes before removing from the tin.
The Review:
These truly were heaven sent for a non-morning person such as myself, The day after making them, I had something to look forward to that I knew would fill me up without needing much time. Granted, the quinoa cups were much, much better fresh out of the oven. After a night in the fridge they lost that beautiful crispness to their browned edges. But I'll take a warm, albeit slightly soggy breakfast over toast or cold cereal any day.
The filling combination here is classic. Ham and Cheddar. But the recipe is in no way limiting. Spinach, mushroom and Gruyere may be my next batch. Turkey sausage and Swiss? Tomato, olive and feta? So many wonderful flavor combinations. The quinoa and eggs provide a near perfect canvas for these flavors, with the quinoa added a welcome pop of texture.
enjoy!
One trick that seems to work well for me is to make a large batch of something ahead that can be quickly reheated in the microwave, stove top or toaster oven. Quiche cups, frittata, and turkey/fennel sausage patties were key players when I planned ahead. But it is possible to overload on quiche, believe it or not. Quinoa thrown into the mix adds excitement (and a fun texture) back to my breakfast routine.
In a bit of poor planning I discovered I did not have enough quinoa to make Kristin's full recipe from Iowa Girl Eats. But it halved easily enough. I omitted the additional egg whites and stuck with whole eggs. And I used a standard muffin tin instead of the Kristin's mini tins. As a result, I needed to extend the baking time a bit.
But I was set for a few days of breakfast, with surprising little hands-on time.
adapted from Iowa Girl Eats
yields 6 Quinoa Cups
The Ingredients:
1 cups cooked quinoa (about 3/4 cup uncooked)
2 eggs
1 small zucchini, shredded
1/2 cup shredded sharp cheddar cheese
2 oz diced ham
2 Tbsp parsley, chopped
1 Tbsp Parmesan cheese
1 green onions,thinly sliced
salt and pepper to taste
The Process:
Preheat the oven to 350 degrees. In a large bowl combine all of the ingredients and whisk together until well combined. Lightly butter or oil a standard-size muffin tin. Spoon mixture into the tin, bringing the mixture level to the tin's lip. Bake for 25-30 minutes, or until the edges of the cups are golden brown. Let cool for at least 5 minutes before removing from the tin.
The Review:
These truly were heaven sent for a non-morning person such as myself, The day after making them, I had something to look forward to that I knew would fill me up without needing much time. Granted, the quinoa cups were much, much better fresh out of the oven. After a night in the fridge they lost that beautiful crispness to their browned edges. But I'll take a warm, albeit slightly soggy breakfast over toast or cold cereal any day.
The filling combination here is classic. Ham and Cheddar. But the recipe is in no way limiting. Spinach, mushroom and Gruyere may be my next batch. Turkey sausage and Swiss? Tomato, olive and feta? So many wonderful flavor combinations. The quinoa and eggs provide a near perfect canvas for these flavors, with the quinoa added a welcome pop of texture.
enjoy!
Friday, February 17, 2012
Pineapple Rum Upside Down Cake
I've made a glorious pineapple upside down cake before. I've also tried a wonderful spin called the banana foster's upside down cake. But never have I tried a cake containing so much butter or so much rum. What better way to round out our tropical adventure this month than by saying Aloha with this boozy treat.
The Ingredients:
for the sauce
1/2 cup butter
1/2 cup light brown sugar
1 large can pineapple rings (about 10)
1/4 cup Meyer's dark Jamaican rum
1/2 cup heavy cream
for the cake
2 cup sifted flour
1/4 tsp salt
1 cup butter, room temp
1 3/4 cups granulated sugar
5 large eggs
2 tsp Meyer's dark Jamaican rum
for the glaze:
4 Tbsp butter
2 Tbsp water
1/2 cup granulated sugar
1/4 cup Meyer's dark Jamaican rum
The Process:
Butter a 10-inch round cake pan (a cheesecake pan with removable sides works well) and line with parchment paper. Set on a rimmed baking sheet to catch any leaks. Arrange pineapple rings to cover bottom of pan. Blot cherries with a paper towel and place them in the center of the pineapple rings. Pour rum and cream sauce over pineapple and set pan aside.
Pour into prepared cake pan. Bake at 325 degrees. between 1 hour and 1 hour and 15 minutes or until a toothpick inserted in the center comes out clean.
The Ingredients:
for the sauce
1/2 cup butter
1/2 cup light brown sugar
1 large can pineapple rings (about 10)
1/4 cup Meyer's dark Jamaican rum
1/2 cup heavy cream
for the cake
2 cup sifted flour
1/4 tsp salt
1 cup butter, room temp
1 3/4 cups granulated sugar
5 large eggs
2 tsp Meyer's dark Jamaican rum
for the glaze:
4 Tbsp butter
2 Tbsp water
1/2 cup granulated sugar
1/4 cup Meyer's dark Jamaican rum
The Process:
Combine butter and brown sugar in a large skillet and heat until bubbly. Add pineapple and caramelize to a deep golden brown, turning once. Remove and set aside. Pour rum and cream into the skillet and cook over low heat 5 minutes, until thickened, stirring constantly with a whisk. Remove from heat.
Butter a 10-inch round cake pan (a cheesecake pan with removable sides works well) and line with parchment paper. Set on a rimmed baking sheet to catch any leaks. Arrange pineapple rings to cover bottom of pan. Blot cherries with a paper towel and place them in the center of the pineapple rings. Pour rum and cream sauce over pineapple and set pan aside.
Preheat oven to 325 degrees. In a small bowl, sift together flour and salt. Set aside. In a mixing bowl, beat butter with an electric mixer until light and creamy. Add sugar gradually and continue beating for five minutes, or until the mixture is fluffy. Beat in eggs, one at a time, beating well after each addition. Add rum. Fold in the dry ingredients, mixing just until the batter is smooth and blended.
Pour into prepared cake pan. Bake at 325 degrees. between 1 hour and 1 hour and 15 minutes or until a toothpick inserted in the center comes out clean.
Prepare the glaze shortly before the cake is done so it will be warm.
Remove cake from oven when done and poke several holes in the cake with a small wooden skewer. Carefully pour this mixture over the warm cake, allowing it to seep into the holes and drizzle remaining over the top. Let it soak in for a few minutes.
Invert onto a serving platter.
Allow to cool completely before serving
The Review:
This cake was dense and wonderfully moist. The sides and and edges caramelized into a beautiful crunch, but the center was disappointing soggy. Granted, there is a lot of rum and fruit weighting the cake down. I'm curious to try the cake again in an iron skillet to see if I'd have better luck The sauce poured over the pineapple at the begin just didn't seem to get hot and bubbly enough in the spring form pan to create the decedent caramel I was envisioning.
While fresh the cake had a dense wonderful texture, but again succumbed to the soggy weight of fruit and sauce. A frustration with my crappy hand mixer may be the culprit. With a mixer that jams at the slightest provocation I couldn't beat the sugar and butter as creamy as this cake desires. Reading through a few reviews, it does sounds as though sifted cake flour, instead of all purpose flour, makes a noticeable improvement.
This cake was dense and wonderfully moist. The sides and and edges caramelized into a beautiful crunch, but the center was disappointing soggy. Granted, there is a lot of rum and fruit weighting the cake down. I'm curious to try the cake again in an iron skillet to see if I'd have better luck The sauce poured over the pineapple at the begin just didn't seem to get hot and bubbly enough in the spring form pan to create the decedent caramel I was envisioning.
While fresh the cake had a dense wonderful texture, but again succumbed to the soggy weight of fruit and sauce. A frustration with my crappy hand mixer may be the culprit. With a mixer that jams at the slightest provocation I couldn't beat the sugar and butter as creamy as this cake desires. Reading through a few reviews, it does sounds as though sifted cake flour, instead of all purpose flour, makes a noticeable improvement.
Thursday, February 9, 2012
Chocolate Waffles with Cherry Bourbon Compote and Fresh Whipped Cream
Please excuse this minor break in the regularly scheduled luau menu...
Two weeks have passed since our last chance to enjoy Sunday morning waffles. Since that time I've created a short list of combinations I am itching to try. Chocolate waffles? Breakfast for dessert, baby. What better toppings to pair chocolate with than juicy cherries and velvety whipped cream. You may never go back to syrup again...
the compote recipe is my own
the whipped cream recipe is adapted from BHG Cookbook
the chocolate waffles are adapted from Gale Gand's recipe at FoodNetwork.com
Makes 4-8 waffles, depending on the waffle iron.
The Ingredients:
6 Tbsp sugar
1/4 cup water
1/4 cup bourbon
3 Tbsp fresh lemon juice
1 lb (about 2 1/2 cups) fresh cherries, rinsed and pitted
1/2 tsp vanilla extract
1/2 tsp corn starch
for the whipped cream
1 cup whipping cream
2 Tbsp sugar
1/2 tsp vanilla
for the waffles
2 eggs, separated
3 Tbsp sugar
1 1/2 cups milk
1 cup all-purpose flour
1/4 cup cocoa powder, preferably Dutch-processed
2 tsp baking powder
1/2 cup salted butter, melted
The Process:
for the compote
In a medium saucepan combine water, bourbon, sugar and lemon juice. Bring to boil over high heat, stirring until sugar dissolves. Continue to boil until thin syrup forms, about 7 minutes. Reduce to simmer; add cherries and vanilla extract. Cook over medium heat, stirring gently for 5 to 7 minutes, or until the cherries soften, but retain their shape. Remove cherries from the syrup with a slotted spoon and set aside in a serving dish. Add the corn starch to the syrup, whisking until well combined. Bring the syrup to gentle boil and cook until thickened and reduced by half, about 5 minutes. Pour syrup over cherries. Cool, cover and set aside.
for the whipped cream
In a chilled bowl combine whipping cream, sugar and vanilla. Beat with chilled beaters on medium speed until soft peaks form. Set aside in the fridge.
for the waffles
Preheat oven to 200 and warm up the waffle iron
In a medium bowl whisk the whites by hand or with a mixer until soft peaks form. Add the sugar and continue whipping until stiff.
In a medium bowl whisk the egg yolks and milk until well combined. Slowly incorporate the flour, cocoa powder, and baking powder. Add melted butter and mix until smooth. Gently old in the whipped whites, being careful not to overwork the batter.
Brush or mist the waffle iron lightly with oil and spoon batter into waffle iron, spreading quickly with a spatula to cover the entire griddle surface (amount varies depending on waffle iron, mine uses just over 1/2 a cup). Cook according to iron manufacturer’s instructions.
Transfer waffles to rack in oven to keep warm and crisp. Make more waffles in same manner.
The Review:
Pure unadulterated bliss. Tart cherries; red, ripe and round. Erupting with a juicy burst of bourbon. Smooth, velvety whipped cream offering a rich douse of sweetness to cut the tang of the fruit and slightly bitter cocoa. Wonderfully white and as pure and light as summer clouds. And the dark platter of decadence that supports it all...the rich chocolate waffle.
Taken together this combination is a force to be reckoned with. And for the most part the components stand well on their own. The only downside was the texture of the waffles. For some reason this version did not puff up and retain its shape as well as previous waffles had. The underside was nicely crisped while shielding a fluffy interior...the top side unfortunately remained slight soft and deflated quickly...no beautiful geometric ridges to contain the cherry studded heaven that the waffles supported. With a tweak or two to make the waffle stand on its own, this may be the best Belgian inspired breakfast variation yet.
Two weeks have passed since our last chance to enjoy Sunday morning waffles. Since that time I've created a short list of combinations I am itching to try. Chocolate waffles? Breakfast for dessert, baby. What better toppings to pair chocolate with than juicy cherries and velvety whipped cream. You may never go back to syrup again...
the compote recipe is my own
the whipped cream recipe is adapted from BHG Cookbook
the chocolate waffles are adapted from Gale Gand's recipe at FoodNetwork.com
Makes 4-8 waffles, depending on the waffle iron.
The Ingredients:
6 Tbsp sugar
1/4 cup water
1/4 cup bourbon
3 Tbsp fresh lemon juice
1 lb (about 2 1/2 cups) fresh cherries, rinsed and pitted
1/2 tsp vanilla extract
1/2 tsp corn starch
for the whipped cream
1 cup whipping cream
2 Tbsp sugar
1/2 tsp vanilla
for the waffles
2 eggs, separated
3 Tbsp sugar
1 1/2 cups milk
1 cup all-purpose flour
1/4 cup cocoa powder, preferably Dutch-processed
2 tsp baking powder
1/2 cup salted butter, melted
The Process:
for the compote
In a medium saucepan combine water, bourbon, sugar and lemon juice. Bring to boil over high heat, stirring until sugar dissolves. Continue to boil until thin syrup forms, about 7 minutes. Reduce to simmer; add cherries and vanilla extract. Cook over medium heat, stirring gently for 5 to 7 minutes, or until the cherries soften, but retain their shape. Remove cherries from the syrup with a slotted spoon and set aside in a serving dish. Add the corn starch to the syrup, whisking until well combined. Bring the syrup to gentle boil and cook until thickened and reduced by half, about 5 minutes. Pour syrup over cherries. Cool, cover and set aside.
for the whipped cream
In a chilled bowl combine whipping cream, sugar and vanilla. Beat with chilled beaters on medium speed until soft peaks form. Set aside in the fridge.
for the waffles
Preheat oven to 200 and warm up the waffle iron
In a medium bowl whisk the whites by hand or with a mixer until soft peaks form. Add the sugar and continue whipping until stiff.
In a medium bowl whisk the egg yolks and milk until well combined. Slowly incorporate the flour, cocoa powder, and baking powder. Add melted butter and mix until smooth. Gently old in the whipped whites, being careful not to overwork the batter.
Brush or mist the waffle iron lightly with oil and spoon batter into waffle iron, spreading quickly with a spatula to cover the entire griddle surface (amount varies depending on waffle iron, mine uses just over 1/2 a cup). Cook according to iron manufacturer’s instructions.
Transfer waffles to rack in oven to keep warm and crisp. Make more waffles in same manner.
The Review:
Pure unadulterated bliss. Tart cherries; red, ripe and round. Erupting with a juicy burst of bourbon. Smooth, velvety whipped cream offering a rich douse of sweetness to cut the tang of the fruit and slightly bitter cocoa. Wonderfully white and as pure and light as summer clouds. And the dark platter of decadence that supports it all...the rich chocolate waffle.
Taken together this combination is a force to be reckoned with. And for the most part the components stand well on their own. The only downside was the texture of the waffles. For some reason this version did not puff up and retain its shape as well as previous waffles had. The underside was nicely crisped while shielding a fluffy interior...the top side unfortunately remained slight soft and deflated quickly...no beautiful geometric ridges to contain the cherry studded heaven that the waffles supported. With a tweak or two to make the waffle stand on its own, this may be the best Belgian inspired breakfast variation yet.
Sunday, January 15, 2012
Blueberry Buttermilk Waffles
I appear to be on a waffle kick recently. Perhaps the rarity of two lazy Sundays in a row with my husband are to blame. It's not often both of us are off of work in the morning together.
So far every waffle I've attempted has been a wonderful success. Why stop now? This recipe offers a completely different base than the previous waffles I've tried. Fresh blueberries are the featured star. Oh blueberries...how you taunt with thoughts of summer warmth when the weather outside lingers around 13 degrees...
adapted from Nicole's' recipe at Baking Bites
yields 6-8 Belgian style waffles (depending on the iron used)
The Ingredients:
1 3/4 cups all purpose flour
1/4 cup cornstarch
1 tsp baking powder
1 tsp baking soda
1/4 tsp salt
3 tbsp sugar
1 1/2 cups buttermilk
2 large eggs, separated
2 tsp vanilla extract
6 Tbsp unsalted butter, melted and cooled
1 cup fresh blueberries
The Process:
Preheat oven to 250 and warm up the waffle iron.
In a large bowl, whisk together flour, cornstarch, baking powder, baking soda, salt and sugar. In a medium bowl, whisk together buttermilk, egg yolks, vanilla and melted butter until smooth. Pour into dry ingredients and whisk until well combined.
In a separate mixing bowl with an electric beater, or by hand with a strong wrist action, whisk the egg whites until they hold soft peaks. Fold the whites gently into the waffle batter, until just combined. Do not over mix! The batter should retain as much air as possible from the whites.
Gently stir in blueberries. Allow batter to rest for 5-10 minutes.
Brush or mist the waffle iron lightly with oil and spoon batter into waffle iron, spreading quickly with a spatula to cover the entire griddle surface (amount varies depending on waffle iron, mine uses just over 1/2 a cup). Cook according to iron manufacturer’s instructions.
Transfer waffles to rack in oven to keep warm and crisp. Make more waffles in same manner.
Serve warm, garnished with additional blueberries and topped with powder sugar or syrup
The Review:
Another successful waffle! And quite a bit different from the previous waffle recipes I've tried recently. The batter was very thick and a bit sponge-like, making it tricky to spread over the griddle. For those with in interest in chemistry in the kitchen, this is a good recipe to try. You can see the effects of baking soda, baking powder and buttermilk...acids and bases...bubbling up to make the batter dense, yet air. The reaction accounts for the spongy look of the batter.
The batter was a good indication of how the waffles would turn out. The waffles were light, but the texture much denser than both the pumpkin and plain waffles. Also, the extra moisture added as the blueberries burst opened and steamed up the griddle prevented the beautifully crisp outer layer I adore on my waffles. But i doubt there is anyway around that when you use fresh fruits to cook. Beautiful purple juices sputtered and dripped over the side of the iron as the blueberries swelled and burst, sizzling away on the hot surface. Be prepared for extra clean up!
But the flavors were divine...just sweet enough to compliment the blueberries, with just a hint of vanilla. A hint of buttery flavor. A burst of alternating tart and sweet berries...
I could get used to a Sunday morning waffle tradition...
So far every waffle I've attempted has been a wonderful success. Why stop now? This recipe offers a completely different base than the previous waffles I've tried. Fresh blueberries are the featured star. Oh blueberries...how you taunt with thoughts of summer warmth when the weather outside lingers around 13 degrees...
adapted from Nicole's' recipe at Baking Bites
yields 6-8 Belgian style waffles (depending on the iron used)
The Ingredients:
1 3/4 cups all purpose flour
1/4 cup cornstarch
1 tsp baking powder
1 tsp baking soda
1/4 tsp salt
3 tbsp sugar
1 1/2 cups buttermilk
2 large eggs, separated
2 tsp vanilla extract
6 Tbsp unsalted butter, melted and cooled
1 cup fresh blueberries
The Process:
Preheat oven to 250 and warm up the waffle iron.
In a large bowl, whisk together flour, cornstarch, baking powder, baking soda, salt and sugar. In a medium bowl, whisk together buttermilk, egg yolks, vanilla and melted butter until smooth. Pour into dry ingredients and whisk until well combined.
In a separate mixing bowl with an electric beater, or by hand with a strong wrist action, whisk the egg whites until they hold soft peaks. Fold the whites gently into the waffle batter, until just combined. Do not over mix! The batter should retain as much air as possible from the whites.
Gently stir in blueberries. Allow batter to rest for 5-10 minutes.
Brush or mist the waffle iron lightly with oil and spoon batter into waffle iron, spreading quickly with a spatula to cover the entire griddle surface (amount varies depending on waffle iron, mine uses just over 1/2 a cup). Cook according to iron manufacturer’s instructions.
Transfer waffles to rack in oven to keep warm and crisp. Make more waffles in same manner.
Serve warm, garnished with additional blueberries and topped with powder sugar or syrup
The Review:
Another successful waffle! And quite a bit different from the previous waffle recipes I've tried recently. The batter was very thick and a bit sponge-like, making it tricky to spread over the griddle. For those with in interest in chemistry in the kitchen, this is a good recipe to try. You can see the effects of baking soda, baking powder and buttermilk...acids and bases...bubbling up to make the batter dense, yet air. The reaction accounts for the spongy look of the batter.
The batter was a good indication of how the waffles would turn out. The waffles were light, but the texture much denser than both the pumpkin and plain waffles. Also, the extra moisture added as the blueberries burst opened and steamed up the griddle prevented the beautifully crisp outer layer I adore on my waffles. But i doubt there is anyway around that when you use fresh fruits to cook. Beautiful purple juices sputtered and dripped over the side of the iron as the blueberries swelled and burst, sizzling away on the hot surface. Be prepared for extra clean up!
But the flavors were divine...just sweet enough to compliment the blueberries, with just a hint of vanilla. A hint of buttery flavor. A burst of alternating tart and sweet berries...
I could get used to a Sunday morning waffle tradition...
Subscribe to:
Posts (Atom)