CSA veggies, meet Thai. I have no apologies anymore.
Vegan and gluten-free. Dear lord this seems so unlike me...
The original recipe calls for creamy peanut butter. I used crunchy because it is what I had on hand. Personally, I enjoy the extra bit of texture. And the almond milk is unnecessary. The other ingredients pack so much flavor, you need only add a touch of water to thin it to your desired consistency. Adjust the heat level to your personal taste by using more or less Sriracha.
adapted from Running to the Kitchen
serves 4
The Ingredients:
3 cups carrot, shredded or julienned
2 cups thinly sliced kale
3 Tbsps peanut butter
1 -1 1/2 tsp sriracha
½ teaspoon sesame oil
½ tsp olive oil
1 tsp lime juice
1 Tbsp maple syrup
½ tsp freshly grated ginger
2-3 Tbsp water
salt to taste
1- 2 Tbsp toasted sesame seeds
The Process:
In a large bowl, combine the carrots and kale.
In a small bowl whisk together the peanut butter, sriracha, sesame oil, olive oil, lime juice, maple syrup and ginger. Add water 1 Tbsp at a time until the desired consistency is reached. Season with salt to taste.
Drizzle the peanut butter dressing over the vegetables and toss to coat. Sprinkle with sesame seeds.
Seize the food! A new year's resolution to experiment with 100 new recipes in the coming year.
Showing posts with label south beach phase 2. Show all posts
Tuesday, September 9, 2014
Sunday, September 7, 2014
Curried Chickpea and Carrot Salad
With the heat of summer at its apex, avoiding the heat of the kitchen is a must. But the need to prepare food calls. This recipe is prefect for those sweltering days. No hot ovens or stove tops. And it comes together in a flash
adapted from Vegan Yack Attack
serves 4
The Ingredients:
2 - 14.5 oz cans garbanzo beans, drained and rinsed
1 1/2 cups grated carrots
1 cup shredded cabbage
1/2 cup golden raisins
3 Tbsp tahini
1 Tbsp lemon juice
1 Tbsp apple cider vinegar
2 Tbsp water
1 Tbsp tamari or soy sauce
2 tsp maple syrup
1 tsp curry powder
The Process
In a large bowl toss together the garbanzo beans, carrots, cabbage and raisins.
In a small bowl, whisk together the remaining ingredients. Season with salt and pepper to taste. Add additional water as necessary to thin.
Pour the dressing over the salad and toss to coat.
Sunday, July 20, 2014
Gluten Free Zucchini Crust Pizza
I'm not truly on board with the whole gluten-free movement. I have a co-worker who actually has Celiac's and we accommodate her to the best of our ability when planning snacks and treats for work. But recently I've been running into SO many people who've hopped on the band wagon without the faintest idea about what gluten actually is.
Many such folk rave about their health and weight loss a few weeks into the diet. But inevitably, they slide. Oh, they stay gluten free. But where in those first few weeks bread, pasta, pretzels and the like were either ignored or replaced with low carb and less-processed foods (hummus is gluten-free! And salsa! Who knew! Give me a break...) the weeks that follow see a slow influx of the pre-packaged over processed products that replace the gluten for what? Hopefully nut or alternative grain based flours, but more likely than not an onslaught of chemicals, fat and sugar. Processed food is processed food. Everything moderation...
I digress...
So why this gluten free pizza crust? Quite frankly, I have far too much zucchini on my hands at the moment and it seemed like a good idea at the time. Plus this glorified zucchini pancake comes together much more quickly than waiting for pizza dough to rise.
What do you put on these lovely little crusts? Whatever strikes your fancy! I pressed out three crusts, which was a hearty meal for two people, but could easily sate three with a salad or side. Our pizzas included a cheese, a cheese and pepperoni, and a spinach, kalamata olive and cheese version. All with red sauce.
Keep the toppings light. The crusts sadly do not crisp up the way flour based crust does. The zucchini pizza, while incredibly tasty, is more of a knife and fork sort of meal. You can blame the gluten for the durability of your traditional pizza.
adapted from Kalyn's Kitchen
yields three 7-8 inch pizzas
The Ingredients:
2 medium zucchini, shredded
1/2 cup finely shredded Mozzarella
1/3 cup almond flour/meal
2 Tbsp finely grated Parmesan
1 tsp dried oregano
1/2 tsp garlic powder
pinch of salt
1 egg, beaten
pizza toppings, as desired
The Process
Pulse the shredded zucchini in a food processor until a coarse mixture forms. Do not over process...the mixture should be crumbly, not a purée. Transfer the zucchini to a cheesecloth lined sieve and allow to drain for 30 minutes.
Preheat the oven to 450
Generously oil a baking stone.
After 30 minutes, gather up the edges of the cheesecloth and squeeze out as much liquid from the zucchini as you can. You should have a scant 2 cups.
In a large bowl, combine the zucchini, mozzarella, almond flour, Paremesan, garlic, oregano and egg. Divide the mixture into 3 balls. On the baking stone, gently press each ball into a disc of uniform thickness, about 7 inches across.
Bake at 450 for about 15 minutes. The crusts should be beginning to brown on top and crisp around the edges.
Top with toppings of your choice and bake an additional 3-4 minutes or until the cheese has melted.
Allow to cool slightly before serving
Many such folk rave about their health and weight loss a few weeks into the diet. But inevitably, they slide. Oh, they stay gluten free. But where in those first few weeks bread, pasta, pretzels and the like were either ignored or replaced with low carb and less-processed foods (hummus is gluten-free! And salsa! Who knew! Give me a break...) the weeks that follow see a slow influx of the pre-packaged over processed products that replace the gluten for what? Hopefully nut or alternative grain based flours, but more likely than not an onslaught of chemicals, fat and sugar. Processed food is processed food. Everything moderation...
I digress...
So why this gluten free pizza crust? Quite frankly, I have far too much zucchini on my hands at the moment and it seemed like a good idea at the time. Plus this glorified zucchini pancake comes together much more quickly than waiting for pizza dough to rise.
What do you put on these lovely little crusts? Whatever strikes your fancy! I pressed out three crusts, which was a hearty meal for two people, but could easily sate three with a salad or side. Our pizzas included a cheese, a cheese and pepperoni, and a spinach, kalamata olive and cheese version. All with red sauce.
Keep the toppings light. The crusts sadly do not crisp up the way flour based crust does. The zucchini pizza, while incredibly tasty, is more of a knife and fork sort of meal. You can blame the gluten for the durability of your traditional pizza.
adapted from Kalyn's Kitchen
yields three 7-8 inch pizzas
The Ingredients:
2 medium zucchini, shredded
1/2 cup finely shredded Mozzarella
1/3 cup almond flour/meal
2 Tbsp finely grated Parmesan
1 tsp dried oregano
1/2 tsp garlic powder
pinch of salt
1 egg, beaten
pizza toppings, as desired
The Process
Pulse the shredded zucchini in a food processor until a coarse mixture forms. Do not over process...the mixture should be crumbly, not a purée. Transfer the zucchini to a cheesecloth lined sieve and allow to drain for 30 minutes.
Preheat the oven to 450
Generously oil a baking stone.
After 30 minutes, gather up the edges of the cheesecloth and squeeze out as much liquid from the zucchini as you can. You should have a scant 2 cups.
In a large bowl, combine the zucchini, mozzarella, almond flour, Paremesan, garlic, oregano and egg. Divide the mixture into 3 balls. On the baking stone, gently press each ball into a disc of uniform thickness, about 7 inches across.
Bake at 450 for about 15 minutes. The crusts should be beginning to brown on top and crisp around the edges.
Top with toppings of your choice and bake an additional 3-4 minutes or until the cheese has melted.
Allow to cool slightly before serving
Friday, July 18, 2014
Wilted Greens with Runny Eggs
To me, this is an ideal breakfast. Warm and filling. Ready in about 20 minutes. Perfectly portioned to share for a light morning nosh. Or generous enough single single serving for a more ravenous appetite.
Any greens will work: kale, collard greens, mustard greens, spinach. I opted for turnip greens. Nix the bacon to make the dish vegetarian. Or toss on some hot sauce for an extra punch. I love how easy this types of dishes adapt to many tastes!
the recipe is my own
serves 1-2
The Ingredients:
2 strips of bacon
2 green onions, thinly sliced
1 clove of garlic, minced
1 bunch of greens, 4-5 oz
2 eggs
salt and pepper
The Process:
Preheat the oven to 350 degrees F.
In a 9 inch cast iron skillet set over medium-high heat, fry the bacon until crisp and most of the fat has rendered, about 4-5 minutes. Transfer to a plate lined with paper towels to drain. Coarsely chop and set aside.
Reduce the heat to medium. Add the green onion and garlic to the bacon fat in the skillet. Sauté until fragrant, 1-2 minutes. Add the greens and saute until they just begin to wilt, another 2-3 minutes. Season with salt and pepper. Remove from heat.
Using the back of spoon, create two divots in the greens. Carefully break 1 egg into each divot, taking care to keep yolks intact. Bake until egg whites are set, 5-6 minutes for runny yolks, 8-10 minutes for hard set. Sprinkle with bacon and serve immediately, the eggs will continue to cook from the residual heat in the skillet.
Labels:
30 minute meal,
bacon,
breakfast,
CSA,
eggs,
garlic,
greens,
south beach phase 2
Tuesday, July 8, 2014
Lemongrass Beef Short Ribs
If you have an afternoon to babysit this batch of braised short ribs, I promise you will be deeply rewarded. Three hours is a lot of time to commit to a dinner, but during the process, the kitchen will be engulfed in an incredible aroma. The meat begins shrinking from the bone about a half hour into cooking and towards the end fall off with the slightest touch. So incredibly tender. And I am so happy to have leftovers.
adapted from Eat, Drink, Paleo
serves 4
The Ingredients:
3 lb beef short ribs
4-5 lemongrass stalks, bruised
Medium knob of fresh ginger, peeled and sliced
4 garlic cloves, peeled and smashed
1 medium onion, sliced
1 medium orange, peel and juice
1/2 lime, juiced
2 Tbsp fish sauce
1 1/2 tsp sesame oil
3 Tbsp Tamari sauce
1/2 tsp of sea salt
1/2 to 1 tsp chilli flakes
1/4 tsp of black pepper
1/2 tsp of Chinese five spice powder
1 1/2 cup of water
1 crown of broccoli, cut into florets
The Process:
Preheat the oven to 400 degrees F
Arrange the short ribs in a single layer in a deep roasting pan. Scatter the lemon grass, ginger, onion, garlic and orange peel around the beef. In a medium bowl, whisk together the orange juice, lime juice, fish sauce, sesame oil, tamari sauce, water and seasoning. Pour mixture over the beef. Cover tightly with foil.
Bake, covered for 30 minutes at 400, turning the meat halfway through.
Reduce the oven temperature to 325 and cook, covered, an additional 2 hours, flipping the meat every 30 minutes.
Uncover the roasting pan and remove the meat from the bones. Roast, uncovered another 15 minutes. Add the broccoli, tossing to coat in the juices. Roast another 15 minutes or until the broccoli is tender-crisp and the meat has browned.
adapted from Eat, Drink, Paleo
serves 4
The Ingredients:
3 lb beef short ribs
4-5 lemongrass stalks, bruised
Medium knob of fresh ginger, peeled and sliced
4 garlic cloves, peeled and smashed
1 medium onion, sliced
1 medium orange, peel and juice
1/2 lime, juiced
2 Tbsp fish sauce
1 1/2 tsp sesame oil
3 Tbsp Tamari sauce
1/2 tsp of sea salt
1/2 to 1 tsp chilli flakes
1/4 tsp of black pepper
1/2 tsp of Chinese five spice powder
1 1/2 cup of water
1 crown of broccoli, cut into florets
The Process:
Preheat the oven to 400 degrees F
Arrange the short ribs in a single layer in a deep roasting pan. Scatter the lemon grass, ginger, onion, garlic and orange peel around the beef. In a medium bowl, whisk together the orange juice, lime juice, fish sauce, sesame oil, tamari sauce, water and seasoning. Pour mixture over the beef. Cover tightly with foil.
Bake, covered for 30 minutes at 400, turning the meat halfway through.
Reduce the oven temperature to 325 and cook, covered, an additional 2 hours, flipping the meat every 30 minutes.
Uncover the roasting pan and remove the meat from the bones. Roast, uncovered another 15 minutes. Add the broccoli, tossing to coat in the juices. Roast another 15 minutes or until the broccoli is tender-crisp and the meat has browned.
Sunday, July 22, 2012
Ina Garten's Creamy Cucumber Salad
Beyond the cucumber, onion and sour cream, I have no idea how my mom prepared that summer time favorite. I suspect if I got her to talk me through the recipe the result would read "a dollop of this, a dash of that." Sometimes those are the best recipes.
Perhaps I should have picked her brain before searching online for another creamy cucumber salad. I found one at foodnetwork which seemed acceptable. But as with other attempts of Ina Garten's recipes, I greatly reduced the amount of salt and dressing used. The dish is good. Not Mom's, but still good....
adapted from Ina Garten's recipe at foodnetwork.
serves 8-10
The Ingredients:
2 lbs cucumbers (2-3 medium), thinly sliced
1 small onion, thinly sliced
kosher salt
1 1/3 cups Greek yogurt
1/3 cup sour cream
1 Tbsp white wine vinegar or lemon juice
1/3 cup fresh dill, finely chopped
pepper to taste
The Process:
Combine the onions and cucumbers in a large sieve or colander. Generously sprinkle with salt. Toss to coat. Place the colander over a bowl and set in the refrigerator to drain for 4 hour or over night...the longer the cucumbers can weep, the less soupy the salad will be in the long run. Discard any liquid that collects in the bowl. Pat the cucumber and onions dry, removing some of the excess salt. Set aside
In a large bowl, whisk together the Greek yogurt, sour cream, vinegar and dill. Add the cucumber and onions; toss to coat. Season with pepper and salt to taste. Refrigerate for at least one hour prior to serving to allow the flavors to mingle. Serve chilled.
The Review:
Wow, Ina. This recipe after modification was near perfect. Highly reminiscent of my mother's. I cannot imagine how soupy the dish would have been had I not cut back on the the quantity of yogurt and sour cream her recipe called for. More tzatziki than salad, I suppose.
Nit picking aside, this was indeed a close recollection of mom's classic summer dish. Cool. Refreshing. Pack with crunch, yet mellow and creamy. It is a perfect accompaniment to spicier grilled dishes...serving as a palette cleanser.
The was not a favorite of many at our BBQ, however. Those who tries it enjoyed it. But a lot was left over at the end of the day. And it is not a salad that keeps particularly well. The next day the leftovers had wept a salty pool of cucumber tears...even after having drained them a full 6 hours before assembling the salad. Draining off some of the liquid we found the cucumbers still maintained some of their crunch. Only the flavor was not as wonderful as it had been the day before.
No wonder my mom made the dish one cucumber at a time...
Monday, July 16, 2012
Punjabi Greens
The last few CSA boxes we've received have been blessed with gorgeous root vegetables, even in the midst of the drought the farm has been facing. A few of the season's plants are beyond reviving...lettuce, broccoli, cauliflower.... The peas have given up. The fennel has bolted. It is a rough year for them. Yet still they have managed to provided an astounding and tasty array of vegetables every week. Never have I felt to connected to th4e food I prepare, nor so grateful for all of the hard work that goes into preparing it!
But the root veggies...beets, turnips, radishes! They are small, sweet and such an amazing treat. When we opened our box we were treated to an added bonus. We were given the plant root and all So many tasty greens! These would not go to waste.
Rather than sauteeing them up with garlic as I am usually wont to do, I turned to an Indian cookbook to see what other recipes may avail themselves to these dark leafy greens. I'd had wonderful luck with Paleek paneer and hoped for similar inspiration.
The recipe I fell upon was Sarson Da Saag...Punjabi Mustard Greens. No mustard greens were to be had, but the jist of the recipe is the same.
adapted from the Everything Indian Cookbook by Monica Bhide
serves 4
The Ingredients:
1 lb assorted greens (mustard, collard, turnip, beet)
1/4 lb fresh spinach
1 small turnip, diced
3 cups water or vegetable stock
2 Tbsp ghee or oil
1 tsp ginger-garlic paste *
2 Tbsp cornmeal
salt to taste
butter for serving
*if you cannot find ginger-garlic paste, mince together equal parts fresh ginger and fresh garlic
The Process:
Combine the greens, spinach and turnip in a large saucepan set over medium-high heat. Add about 2 cups of water or stock and bring to a boil. Cook until the turnips are tender, about 12 minutes. Remove from heat and drain any liquid. Allow the vegetables to cool slightly.
Using a food processor or bleder, puree the vegetables into a thick paste. Set aside.
Heat the ghee or oil in a large skillet over medium-high heat. Add the ginger-garlic and saute until fragrant, about 30 seconds. Add the pureed vegetables and saute for 2-3 minutes. Sprinkle in the cornmeal and stir well to combine. Add salt to taste.
Add the remaining water or stock to the skillet and reduce heat to low. Simmer for 25-30 minutes, adding more water or stock as needed to prevent the dish from dryin gout.
Serve hot, garnished with butter.
The Review:
The dish is traditional served up alongside a large plate of makki di roti. I can certainly see why! The creamy greens just scream to be scooped up by an accompanying flatbread.
This is comfort food at its best. The preparation brings out all of the best of these leafy greens, without weighing down with too much cream or butter. I adore creamed spinach and other hearty Southern dishes, but on some sweltering days the extra dairy is just too much. This dish was so incredibly filling, but light at the same time.
The original recipe called for frozen greens...thawed and drained. I only had fresh on hand. Either way this dish is a treat.
I do believe I have found my new favorite go-to recipe when I have extra greens on hand.
But the root veggies...beets, turnips, radishes! They are small, sweet and such an amazing treat. When we opened our box we were treated to an added bonus. We were given the plant root and all So many tasty greens! These would not go to waste.
Rather than sauteeing them up with garlic as I am usually wont to do, I turned to an Indian cookbook to see what other recipes may avail themselves to these dark leafy greens. I'd had wonderful luck with Paleek paneer and hoped for similar inspiration.
The recipe I fell upon was Sarson Da Saag...Punjabi Mustard Greens. No mustard greens were to be had, but the jist of the recipe is the same.
adapted from the Everything Indian Cookbook by Monica Bhide
serves 4
The Ingredients:
1 lb assorted greens (mustard, collard, turnip, beet)
1/4 lb fresh spinach
1 small turnip, diced
3 cups water or vegetable stock
2 Tbsp ghee or oil
1 tsp ginger-garlic paste *
2 Tbsp cornmeal
salt to taste
butter for serving
*if you cannot find ginger-garlic paste, mince together equal parts fresh ginger and fresh garlic
The Process:
Combine the greens, spinach and turnip in a large saucepan set over medium-high heat. Add about 2 cups of water or stock and bring to a boil. Cook until the turnips are tender, about 12 minutes. Remove from heat and drain any liquid. Allow the vegetables to cool slightly.
Using a food processor or bleder, puree the vegetables into a thick paste. Set aside.
Heat the ghee or oil in a large skillet over medium-high heat. Add the ginger-garlic and saute until fragrant, about 30 seconds. Add the pureed vegetables and saute for 2-3 minutes. Sprinkle in the cornmeal and stir well to combine. Add salt to taste.
Add the remaining water or stock to the skillet and reduce heat to low. Simmer for 25-30 minutes, adding more water or stock as needed to prevent the dish from dryin gout.
Serve hot, garnished with butter.
The Review:
The dish is traditional served up alongside a large plate of makki di roti. I can certainly see why! The creamy greens just scream to be scooped up by an accompanying flatbread.
This is comfort food at its best. The preparation brings out all of the best of these leafy greens, without weighing down with too much cream or butter. I adore creamed spinach and other hearty Southern dishes, but on some sweltering days the extra dairy is just too much. This dish was so incredibly filling, but light at the same time.
The original recipe called for frozen greens...thawed and drained. I only had fresh on hand. Either way this dish is a treat.
I do believe I have found my new favorite go-to recipe when I have extra greens on hand.
Labels:
CSA,
entree,
garlic,
ginger,
gluten-free,
greens,
Indian,
south beach phase 2,
spinach,
turnips
Friday, June 29, 2012
Braised Joi Choi with Cashews
The veggies! They just keep coming! Agreeing to take on a full share of veggies, instead of a more manageable half share is proving to become a bit of a challenge for just two people. Thankfully, we have a recently welcomed a roommate into our abode, and are blessed with friends who never turn down a meal when offered. And a dog who begs for carrots and spinach.
To date, I've only had to discard one batch of pea tendrils that we were unable to get around to using.
A beautiful head of joi choi was provided in our CSA box this week. Unfamiliar with joi choi? So was I. Apparently this leafy green is a faster growing variety of bok choi. Bring on the stir fry!
recipe courtesy of Driftless Organics
serves 2-3
The Ingredients:
1 head joi choi or bok choi 1 Tbsp oil 1 Tbsp ginger, minced 1 Tbsp fresh garlic, minced 1 tsp red pepper flakes ¼ c. white or rice wine 1 Tbsp toasted sesame oil 2 Tbsp soy sauce 1 Tbsp rice vinegar 2 tsp honey or agaveBlack pepper to taste ¼ c cashews
The Process:
Cut the bok choi stems into ½ inch slices and coarsely chop greens separately. Heat oil in a wok or large cast iron pan. Add bok choi stems and stir fry for 2-3 minutes. Add garlic, ginger, and red pepper flakes; saute until fragrant. Add wine, toasted sesame oil, soy sauce, rice vinegar, sugar, black pepper. Cover and lower heat to medium-low; braise for about 4 minutes. Add bok choi greens and stir until wilted. Sprinkle with chopped cashews and serve with rice or noodles.
The Review:
This was a straight forward and simple preparation...incredible fast to whip up, and very filling on its own. The vinegar and rice wine made the greens a tad more acidic than I would have liked. Next time around I'd likely reduce the wine a touch, use sesame oil exclusively and up the sweetener to 1 Tbsp. Great side dish in a pinch, though!
Wednesday, June 27, 2012
Minnesotan Midsummer Minestrone
Right around 2 or 3pm everyday my mind begins to wander. My eyes drift out over the beautiful vista of the Stone arch bridge and the Mississippi River. The occasional eagle soars overhead. Segway tours, joggers and bikers meander on the paths below. And I day dream...
About what to make for dinner.
It never fails really. Shortly after lunch, my stomach begins to gurgle again as my mind turns to food. Recently the thoughts circle around how to use up the last bit of vegetables before our next CSA box arrives (time to start blanching, bagging and freezing some of those veggies). Stir frys and salads are quick, easy and reliable.
But this evening I had soup on the brain...
the recipe is my own
serves 8-10
The Ingredients:
2 Tbsp olive oil
2-3 stalks of celery, sliced
1 medium onion, diced
2-3 medium carrots, diced
4-5 garlic scapes, cut in to 1 inch lengths
1 bunch salad turnips and greens, turnips diced, greens chopped
2 Tbsp fresh sage, cut chiffonade
2 Tbsp fresh parsley, minced
1 - 14 oz can stewed tomatoes
4 cups vegetable, chicken or beef stock
2 cups water
1 - 14 oz can black or kidney beans, drained and rinsed
salt and pepper to taste
The Process:
In a large soup kettle, heat the oil over medium heat. Add the celery, onions and carrots. Saute until the onion and celery are tender, about 5-7 minutes. Stir in the garlic scapes, herbs, and turnips (reserve the greens for later) and cook an additional 2-3 minutes. Add the tomatoes, broth and water. Bring the mixture to a simmer and cook for 15-20 minutes, or until the turnips and carrots are tender. Add the beans, simmering for 10 minutes until the beans are heated through. Add the reserved turnip greens. Stir until wilted. Season with salt and pepper to taste.
The Review:
What a wonderful, deep flavor. The onion, celery and stewed tomatoes provided a base that was refreshingly familiar. The sage was nearly indiscernible among the other veggie flavors. The turnips added a wonderful oomph and were cooked to near perfection...tender with just a touch of bite left. The garlic scapes cooked down and little more than I would have liked during a 20 minutes simmer, but lent an amazing hint of garlic. I adore minestrone. Mostly because any veggie combination would work. Want pasta? okay. Don't like beans? Leave them out. Well this may not be the best soup for a sweltering summer day (but really what soup is when the heat index break 100), but it really does hit the spot.
Monday, June 11, 2012
Collard Green Rolls
Such beautiful large collard green leaves were provided with our weekly veggies. It seemed a shame to treat them to the traditional methods of sauteing or creaming. I while back I came across the ingenious idea of using kale leaves in the same vein as cabbage leaves to craft filling rolls. Why not use collard greens the same way? This is a vegetarian version using lentils in lieu of beef, but with the familiar and well loved Italian seasonings.
The recipe is my own
server 6-8
The Ingredients:
1 cup lentils
1 cup brown rice
3 1/2 cups water or vegetable stock, divided
2 Tbsp olive oil
1 bulb green garlic, minced
4-5 potato onions. thinly sliced
2 stalks celery, thinly sliced
1- 14 oz can stewed tomatoes
1 - 4 oz can tomato paste
1 tsp dried parsley
1 tsp dried oregano
1 tsp dried basil
1/2 tsp red pepper flakes
salt and pepper to taste
8 large collard green leaves
1- 24 oz jar tomato sauce
The Process:
In a medium saucepan over medium high heat bring 1 3/4 cups of stock to a gentle boil. Add the rice, reduce to a simmer and cover. Cook, stirring occasionally, until most of the liquid is absorbed and the rice is tender, 35-40 minutes. Meanwhile in a second saucepan, add the lentils and remaining stock. Bring to a boil, cover and reduce to a simmer. Cook for 20-25 minutes until the lentils are soft and most of the liquid has been absorbed.
Preheat the oven to 350
Heat the oil in a large skillet over medium-high heat. Add the garlic, onions and celery and saute until tender, about 5-7 minutes. Add the tomatoes, paste and seasonings, stirring to combine. Simmer for about 5 minutes. Add the cooked rice and lentils. Set aside.
Trim away the woody potion of the collard green stems. Carefully run a knife parallel to the leaf along the raised edge of the stem on the back side, trimming away as much of the vein as possible, without split the leaf. Stem for 3-4 minutes until soft, or layer between damp paper towels and microwave for 2 minutes, flipping once.
Spray a 9x13 baking dish with cooking spray and set aside.
Working with one roll at a time, position one leaf on a flat surface with the trimmed side up and the stem end facing you. Scoop a 1/2 - 3/4 cup of the lentil/rice filling on the bottom third of the leaf.
Carefully fold in both sides of the leaf and roll the bundle up and away from you, completely encasing the filling.
Lay the roll in the baking dish seam side down and continue with the remaining leaves.
Ladle tomato sauce over the rolls and bake, uncovered, for 30-35 minutes. Serve hot.
The Review:
I seem to gravitate towards the labor intensive dishes at times, don't I? Perhaps I don't notice as much because I use the rice cooking time as the perfect excuse to attempt to keep the clutter from overwhelming the kitchen. Okay...it is a bit of a feeble attempt. But our kitchen has remained in some semblance of order for a little while now...
So time labor intensify, but highly worth the effort. Really, these take no longer than traditional cabbage rolls. Rice must still be cooked...only I suppose most cabbage rolls are prepared with uncooked hamburger. I made the mistake of cooking up the meat before stuffing once...not as easy to prepare.
Perhaps that's what's so lovely about this vegetarian version. The lentils cook down to a point where they almost act as a binder to the rest of the ingredients. And with out the raw meat filling, they are free to spend less time in the oven.
The collard greens were a wonderful change of pace from cabbage. Growing up I had often thought cabbage rolls too sour...at least the way mom and grandma made them. Perhaps the acidity from the tomatoes coupled with the cabbage reminded me too much of sauerkraut...which to this day I have not developed much of a taste for. There is no such pickled or fermented flavored with the collard greens. And they are much, much more sturdy. I never had the same ease of rolling up such bundles with cabbage. Either I never cooked the cabbage enough before hand for the leaves to roll easily, or I over cook them to the point that the leave fell apart at the slightest touch. And good luck finding 8 perfectly sized cabbage leaves on a head of cabbage. The collard greens were so much more forgiving, and quite a bit more filling in the end.
I'd love to try other variations of collard green or kale rolls in the future. Gluten-free burritos? Curry stuffed leaves? SO many ideas...
Wednesday, May 30, 2012
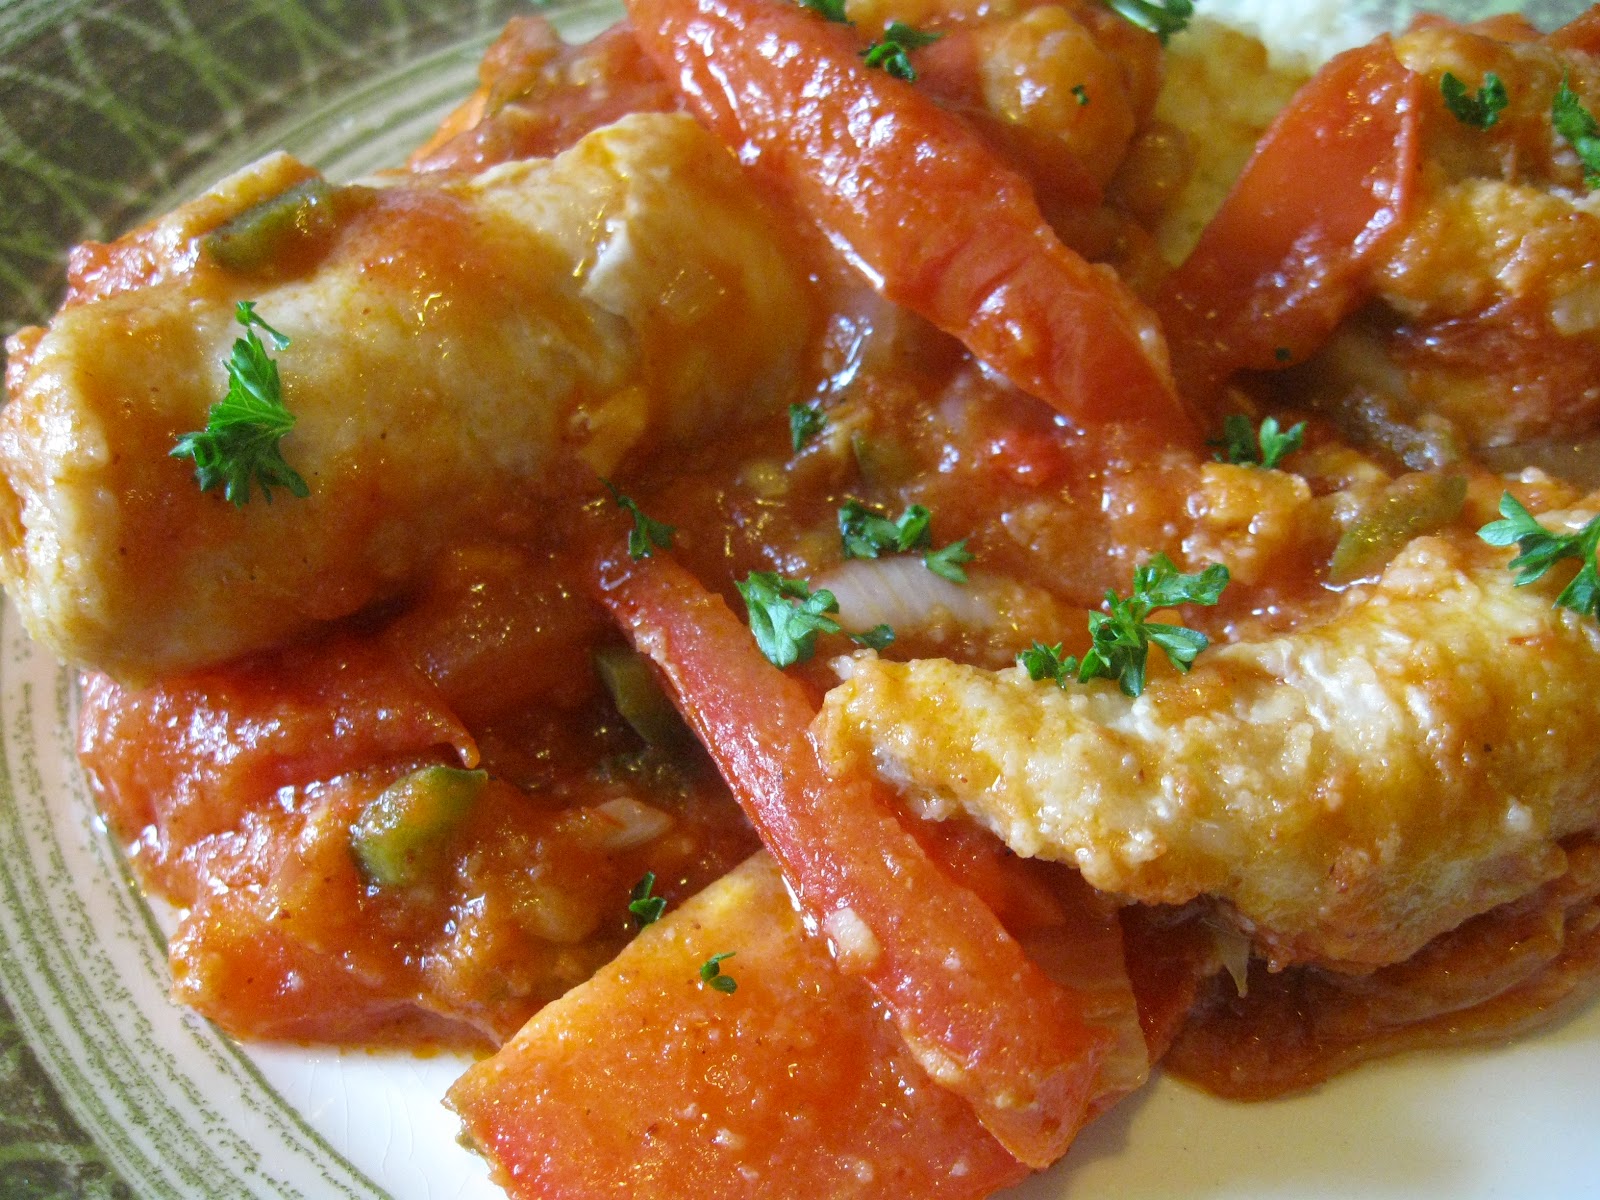
Bengalese Onion and Tomato Fish Curry
I was on a bit of a curry kick. I wanted something fast. Fish and veggiecurries often come to the rescue in such situations. This one grabbed my attention with its Italian like combination of onions and tomato. How ever would the other spices play into this?
Adapted from The Curry Bible by Jackie Passmore
serves four
The Ingredients:
1 1/2 lbs thick fish fillets, cut into tenders
1/2 cup flour
1 cup ghee, mustard oil, or vegetable oil
1 - 14 oz can crushed tomatoes
4 cloves of garlic, minced
1 large onion, thinly sliced
1 tsp ground chili
2 tsp sugar
1 Tbsp fresh lime juice
2 fresh green chilies (such as Serrano) de-seeded and diced
3 roma tomatoes, cut into wedges
1 inch knob of ginger, minced
fresh cilantro for garnish
The Process:
Place the fish fillets and flour in a large re-sealable bag and toss until the fish is evenly coated. Heat the oil or ghee in a large, deep skillet. Carefully add the fish and fry until crisp, but not cooked completely through flipping once, about 4-5 minutes. Remove the fish to a pan lined in paper towels. Set aside.
Pour off all but 2 Tbsp of the cooking oil. Add tomatoes, garlic, onion, and chili powder. Simmer until the onions have softened and the sauce has thickened. Add the sugar, lime juice, chilies and ginger. Stir until combined. Season with salt and pepper to taste, Carefully add the fish. Simmer gently, bring the fish with the sauce until the fish is tender and heated through (about 6-8 minutes).
Transfer to a serving dish or warmed plates and garnish with fresh cilantro.
The Review:
This curry strike me an a wonderful introduction to the hesitant eater. It boasts many of the same flavors of a well loved tomato-based Italian dish, with a little extra twist. The recipe is easily adaptable to many variety of fish, though not all are created equal. I had opted for catfish, despite my aversion to the fish in general. The flesh ended up chewy and rubbery...with that muddy undertone that I can never quite overcome. Swai or Tilapia would fair far better for the budget conscious, though cod, halibut, haddock, whiting or pollock would work equally as well.
The curry did make up for the awfully onion-y fish dumpling curry made a few weeks earlier. It is a dish worth attempting again.
Adapted from The Curry Bible by Jackie Passmore
serves four
The Ingredients:
1 1/2 lbs thick fish fillets, cut into tenders
1/2 cup flour
1 cup ghee, mustard oil, or vegetable oil
1 - 14 oz can crushed tomatoes
4 cloves of garlic, minced
1 large onion, thinly sliced
1 tsp ground chili
2 tsp sugar
1 Tbsp fresh lime juice
2 fresh green chilies (such as Serrano) de-seeded and diced
3 roma tomatoes, cut into wedges
1 inch knob of ginger, minced
fresh cilantro for garnish
The Process:
Place the fish fillets and flour in a large re-sealable bag and toss until the fish is evenly coated. Heat the oil or ghee in a large, deep skillet. Carefully add the fish and fry until crisp, but not cooked completely through flipping once, about 4-5 minutes. Remove the fish to a pan lined in paper towels. Set aside.
Pour off all but 2 Tbsp of the cooking oil. Add tomatoes, garlic, onion, and chili powder. Simmer until the onions have softened and the sauce has thickened. Add the sugar, lime juice, chilies and ginger. Stir until combined. Season with salt and pepper to taste, Carefully add the fish. Simmer gently, bring the fish with the sauce until the fish is tender and heated through (about 6-8 minutes).
Transfer to a serving dish or warmed plates and garnish with fresh cilantro.
The Review:
This curry strike me an a wonderful introduction to the hesitant eater. It boasts many of the same flavors of a well loved tomato-based Italian dish, with a little extra twist. The recipe is easily adaptable to many variety of fish, though not all are created equal. I had opted for catfish, despite my aversion to the fish in general. The flesh ended up chewy and rubbery...with that muddy undertone that I can never quite overcome. Swai or Tilapia would fair far better for the budget conscious, though cod, halibut, haddock, whiting or pollock would work equally as well.
The curry did make up for the awfully onion-y fish dumpling curry made a few weeks earlier. It is a dish worth attempting again.
Sunday, May 20, 2012
Kolivartha Curry
I few days ago I handed Ross one of my curry books and told him to pick a chicken dish. Sometimes meal planning and shopping lists happen more easily when delegated this way. This recipe below was the one he chose. His reasoning? We already had most of the ingredient list. Gotta love the man who knows the content of the pantry.
From what I could gather this chicken curry dish is hails from the Chettinad region of Southern Indian. I am hardly an expert in Indian fare, though I adore curries from all over the subcontinent. Please let me know if you have further tidbits on this culinary destination
Adapted form the Curry Bible by Jacki Passmore
serves 4
The Ingredients:
1 1/2 lbs skinless chicken thigh fillets, cut into tenders
4 cloves garlic, minced
1 inch finger fresh ginger, minced
1 onion, diced
1 large tomato, deseeded and diced
2 Tbsp ghee or oil
1/2 cup finely ground almonds or cashews
1 tsp Garam Masala
1 Tbsp ground coriander
1 tsp ground cumin
1/2 - 1 tsp chili powder
1/2 tsp turmeric
2-3 whole cloves
1 1/2 cups coconut milk
salt to taste
fresh lemon or lime
chopped cilantro to serve
The Process:
Rinse the chicken tenders and pat dry,
In a blender or food processor, pulse the garlic, ginger, and onion until a thick paste forms. Add the tomato and set aside.
In a large skillet over medium-high heat, heat the oil or ghee. Add the chicken and saute until lightly browned on all sides. Remove the chicken and set aside. Add the tomato-onion mixture to the skillet and cook for 5-6 minutes, stirring constantly. Add the ground nuts and spices; stir until well mixed.
Return the chicken to the pan. Pour in the coconut milk and season with salt to taste. Bring the mixture to a simmer and cook, uncovered, until the chicken is tender and the sauce has thickened.
Serve with a drizzle of fresh lemon or lime juice and sprinkled with cilantro.
The Review:
Curries with the slightly sweet flavor of coconut seem to be the biggest hits in our household. The mild creamy flavors were well balanced and complimented the chicken instead of overpowering it. I haven't tried many curried with ground nuts, and I loved they way the ground cashews thickened the sauce...added only the slightest nutty flavor. The cashews have a creaminess all of their own. I suspect almonds wouldn't have quite as distinct a flavor when paired with all of the other spices in the dish. .The easy and quickness in which this dish came together was a huge bonus as well. As most of the ingredients are staple in our household, I'm sure we'll be enjoying this curry again!
From what I could gather this chicken curry dish is hails from the Chettinad region of Southern Indian. I am hardly an expert in Indian fare, though I adore curries from all over the subcontinent. Please let me know if you have further tidbits on this culinary destination
Adapted form the Curry Bible by Jacki Passmore
serves 4
The Ingredients:
1 1/2 lbs skinless chicken thigh fillets, cut into tenders
4 cloves garlic, minced
1 inch finger fresh ginger, minced
1 onion, diced
1 large tomato, deseeded and diced
2 Tbsp ghee or oil
1/2 cup finely ground almonds or cashews
1 tsp Garam Masala
1 Tbsp ground coriander
1 tsp ground cumin
1/2 - 1 tsp chili powder
1/2 tsp turmeric
2-3 whole cloves
1 1/2 cups coconut milk
salt to taste
fresh lemon or lime
chopped cilantro to serve
The Process:
Rinse the chicken tenders and pat dry,
In a blender or food processor, pulse the garlic, ginger, and onion until a thick paste forms. Add the tomato and set aside.
In a large skillet over medium-high heat, heat the oil or ghee. Add the chicken and saute until lightly browned on all sides. Remove the chicken and set aside. Add the tomato-onion mixture to the skillet and cook for 5-6 minutes, stirring constantly. Add the ground nuts and spices; stir until well mixed.
Return the chicken to the pan. Pour in the coconut milk and season with salt to taste. Bring the mixture to a simmer and cook, uncovered, until the chicken is tender and the sauce has thickened.
Serve with a drizzle of fresh lemon or lime juice and sprinkled with cilantro.
The Review:
Curries with the slightly sweet flavor of coconut seem to be the biggest hits in our household. The mild creamy flavors were well balanced and complimented the chicken instead of overpowering it. I haven't tried many curried with ground nuts, and I loved they way the ground cashews thickened the sauce...added only the slightest nutty flavor. The cashews have a creaminess all of their own. I suspect almonds wouldn't have quite as distinct a flavor when paired with all of the other spices in the dish. .The easy and quickness in which this dish came together was a huge bonus as well. As most of the ingredients are staple in our household, I'm sure we'll be enjoying this curry again!
Labels:
30 minute meal,
chicken,
coconut,
cumin,
curry,
entree,
garlic,
ginger,
gluten-free,
Indian,
lemon,
lime,
low sugar/no sugar,
nuts,
onions,
south beach phase 2,
tomato
Tuesday, May 15, 2012
Black Bean and Sweet Potato Soup
The time has come to purge the fridge and pantry again...my cabinets are perpetually stocked with broths, beans, chilies and tomatoes. Coupled with the oddball tidbits of vegetables that fall between the cracks mid-week, I usually have the fixings for some amazing soups and chilis. As the weather becomes warmer, soups, stews, chilis and chowders will become far more rare. This hearty vegan dish sends them off in style. Until the fall, of course.
the recipe is my own
serves 6-8
The Ingredients:
1 Tbsp olive oil
1 onion, chopped
4 cloves of garlic, minced
2 stalks of celery, diced
2 small carrots,diced
1 can green chilies
1 can stewed tomatoes (15 oz)
2 cans black beans (15 oz each), drained and rinsed
2 medium sweet potatoes, peeled and cubed
4 cups water or vegetable stock
1/2 tsp cumin
2 bay leaves
1 tsp salt
The Process:
Combine all of the ingredients in a large stockpot over medium high heat. Bring to a boil, reduce to a simmer, cover and cook for 2-3 hours or until the sweet potato is soft and the black beans are tender. Gently mash or puree if desired.
The Review:
I'm not sure why, but the combination of sweet potato and black beans is fast becoming a favorite. I'll be making this again. Once I finish up the leftovers I had to stash in the freezer...
the recipe is my own
serves 6-8
The Ingredients:
1 Tbsp olive oil
1 onion, chopped
4 cloves of garlic, minced
2 stalks of celery, diced
2 small carrots,diced
1 can green chilies
1 can stewed tomatoes (15 oz)
2 cans black beans (15 oz each), drained and rinsed
2 medium sweet potatoes, peeled and cubed
4 cups water or vegetable stock
1/2 tsp cumin
2 bay leaves
1 tsp salt
The Process:
Combine all of the ingredients in a large stockpot over medium high heat. Bring to a boil, reduce to a simmer, cover and cook for 2-3 hours or until the sweet potato is soft and the black beans are tender. Gently mash or puree if desired.
The Review:
I'm not sure why, but the combination of sweet potato and black beans is fast becoming a favorite. I'll be making this again. Once I finish up the leftovers I had to stash in the freezer...
Friday, April 20, 2012
Jerked Chicken Skewers and Cantaloupe Dipping Sauce
Ross is to
Added bonus, this recipe gave us the extra incentive to finally break down and buy a grill. Grilling season is upon us after all!
The Ingredients:
for the marinade:
1 onion, finely chopped
2 scallions, finely chopped
2 tsp fresh thyme leaves
1 tsp salt
1 Tbsp brown sugar
1 tsp ground allspice
1/2 tsp ground nutmeg
1/2 tsp ground cinnamon
1 dried red chili, finely ground (or 2 Scotch bonnet peppers)
1 tsp ground black pepper
3 Tbsp soy sauce
1Tbsp olive oil
1 Tbsp cider vinegar
for the skewers:
2 pounds chicken breast, cut into large cubes
bamboo skewers
1 1/2 cups water
1/2 cup lime juice
for the dipping sauce:
one quarter of a cantaloupe, peeled, seeded and cubed
1/2 cup sour cream
1/2 cup mayonnaise
1 Tbsp cider vinegar
1 tsp Dijon mustard
1 clove garlic, minced
1/2 tsp salt
pinch of cayenne pepper
The Process:
for the marinade:
In a medium bowl, whisk together all of the marinade ingredients (or puree in a blender or food processor until well combined.) Place the chicken in a large freezer bag. Pour the marinade over the chicken. Marinate in the refrigerator for at least 4 hours, preferably overnight.
to prepare and cook the chicken skewers:
At least 2 hours before grilling, soak the bamboo skewers. Combine 1 1/2 cups of water and 1/2 cup of lemon or lime juice in a pint glass. Place the skewers in the glass to soak
Prepare the grill or preheat the broiler.
Thread 4-5 cubes of chicken onto each soaked skewer. Discard the marinade. Grill or broil the skewers for 2-3 minutes per side. Serve immediately with dipping sauce.
for the dipping sauce:
Combine all of the ingredients in a blender and puree until smooth. Season with addition cayenne or salt to taste. Chill until ready to serve.
The Review:
In the darken light it became harder and harder to see how our skewers were doing on the grill. Some came off a little blackened. But that's okay, right? It is jerk chicken after all. But even with the generous charring suffered on some, the chicken remained tender and incredibly flavorful.
I adore marinades and spice blends such as this one. A little kick of spice. A hint of sweet. A burst of salt. And just a touch of sour. So many layers of flavor! Serve along grilled pineapple...pure bliss.
The sauce was the big surprise though. I didn't have cucumbers, but a gorgeous cantaloupe was sitting off to the side in my kitchen. Cucumber melon combinations are so common...if the compliment each other so well, why not try subbing one for the other. The result was surprisingly successful. The creamy and slightly tart base suggested a tziziki, but the sweetness of the cantaloupe, along with a subtle earthiness (it is known as musk melon for a reason) created something completely unique. The recipe made quite a lot, and it doesn't keep very long in the fridge before it begins to separate (there is a LOT of water in the melon...) Maybe three days. And this is a sauce much better the first day. Try to make up only as much as you think you can use.
Tuesday, March 6, 2012
Ham and Cheese Quinoa Cups
I am horrible when it comes to eating breakfast. I know I should. But most mornings that extra few minutes of sleep usually out ranks the need to properly fuel up for the day ahead. Often I pour a cup of coffee and bolt out of the door.
One trick that seems to work well for me is to make a large batch of something ahead that can be quickly reheated in the microwave, stove top or toaster oven. Quiche cups, frittata, and turkey/fennel sausage patties were key players when I planned ahead. But it is possible to overload on quiche, believe it or not. Quinoa thrown into the mix adds excitement (and a fun texture) back to my breakfast routine.
In a bit of poor planning I discovered I did not have enough quinoa to make Kristin's full recipe from Iowa Girl Eats. But it halved easily enough. I omitted the additional egg whites and stuck with whole eggs. And I used a standard muffin tin instead of the Kristin's mini tins. As a result, I needed to extend the baking time a bit.
But I was set for a few days of breakfast, with surprising little hands-on time.
adapted from Iowa Girl Eats
yields 6 Quinoa Cups
The Ingredients:
1 cups cooked quinoa (about 3/4 cup uncooked)
2 eggs
1 small zucchini, shredded
1/2 cup shredded sharp cheddar cheese
2 oz diced ham
2 Tbsp parsley, chopped
1 Tbsp Parmesan cheese
1 green onions,thinly sliced
salt and pepper to taste
The Process:
Preheat the oven to 350 degrees. In a large bowl combine all of the ingredients and whisk together until well combined. Lightly butter or oil a standard-size muffin tin. Spoon mixture into the tin, bringing the mixture level to the tin's lip. Bake for 25-30 minutes, or until the edges of the cups are golden brown. Let cool for at least 5 minutes before removing from the tin.
The Review:
These truly were heaven sent for a non-morning person such as myself, The day after making them, I had something to look forward to that I knew would fill me up without needing much time. Granted, the quinoa cups were much, much better fresh out of the oven. After a night in the fridge they lost that beautiful crispness to their browned edges. But I'll take a warm, albeit slightly soggy breakfast over toast or cold cereal any day.
The filling combination here is classic. Ham and Cheddar. But the recipe is in no way limiting. Spinach, mushroom and Gruyere may be my next batch. Turkey sausage and Swiss? Tomato, olive and feta? So many wonderful flavor combinations. The quinoa and eggs provide a near perfect canvas for these flavors, with the quinoa added a welcome pop of texture.
enjoy!
One trick that seems to work well for me is to make a large batch of something ahead that can be quickly reheated in the microwave, stove top or toaster oven. Quiche cups, frittata, and turkey/fennel sausage patties were key players when I planned ahead. But it is possible to overload on quiche, believe it or not. Quinoa thrown into the mix adds excitement (and a fun texture) back to my breakfast routine.
In a bit of poor planning I discovered I did not have enough quinoa to make Kristin's full recipe from Iowa Girl Eats. But it halved easily enough. I omitted the additional egg whites and stuck with whole eggs. And I used a standard muffin tin instead of the Kristin's mini tins. As a result, I needed to extend the baking time a bit.
But I was set for a few days of breakfast, with surprising little hands-on time.
adapted from Iowa Girl Eats
yields 6 Quinoa Cups
The Ingredients:
1 cups cooked quinoa (about 3/4 cup uncooked)
2 eggs
1 small zucchini, shredded
1/2 cup shredded sharp cheddar cheese
2 oz diced ham
2 Tbsp parsley, chopped
1 Tbsp Parmesan cheese
1 green onions,thinly sliced
salt and pepper to taste
The Process:
Preheat the oven to 350 degrees. In a large bowl combine all of the ingredients and whisk together until well combined. Lightly butter or oil a standard-size muffin tin. Spoon mixture into the tin, bringing the mixture level to the tin's lip. Bake for 25-30 minutes, or until the edges of the cups are golden brown. Let cool for at least 5 minutes before removing from the tin.
The Review:
These truly were heaven sent for a non-morning person such as myself, The day after making them, I had something to look forward to that I knew would fill me up without needing much time. Granted, the quinoa cups were much, much better fresh out of the oven. After a night in the fridge they lost that beautiful crispness to their browned edges. But I'll take a warm, albeit slightly soggy breakfast over toast or cold cereal any day.
The filling combination here is classic. Ham and Cheddar. But the recipe is in no way limiting. Spinach, mushroom and Gruyere may be my next batch. Turkey sausage and Swiss? Tomato, olive and feta? So many wonderful flavor combinations. The quinoa and eggs provide a near perfect canvas for these flavors, with the quinoa added a welcome pop of texture.
enjoy!
Thursday, February 23, 2012
Trout with Tamarind Sauce
Whole fish are slightly intimidating. The tom boy in me loves the thought of catching, gutting and scaling my own fish. The girlie part of me squeals to look at those glassy eyes and gaping jaws set on ice at the fish mongers. However, I have been noticing trout more and more frequently at our grocer. While the beady eyes staring back still weird me out a little, the fish called to purchased. Rainbow trout were the fish of choice. These two beauties came fully cleaned. Clear glassy eyes; shimmering green and silver skin with the slightest aura of pink luminescence...it almost seemed a pity to brown them...
The sauce is Thai inspired and incredibly mild. Up the pepper quantity if you can take the heat, but keep in mind trout is a very mild fish and can quickly become over powered.
adapted from Main Courses 365 edited by Jenni Fleetwood
serves 2
The Ingredients:
2 trout, about 12 oz each, cleaned
2 Tbsp soy sauce
3 green onions, thinly sliced on the diagonal
1 Tbsp oil, (vegetable and sesame were used here)
for sauce:
1 oz tamarind pulp (about 2 Tbsp)
5 Tbsp boiling water
1 shallot, coarsely chopped
1/2 to 1 whole fresh red chilli, seeded and chopped ( I used fresno)
1 inch piece fresh ginger root
1 Tbsp brown sugar
1 1/2 Tbsp fish sauce
for garnish:
2 Tbsp fresh cilantro
1 green onion, thinly sliced on the diagonal
the other half of the red pepper, juilenned
The Process:
Rinse the trout and pat dry. Slash the flesh diagonally four to five time on each side with a sharp knife. Place in a shallow dish. Fill the cavities of each fish with about 1/3 of the sliced onion. Pour 1 Tbsp of soy sauce over each fish. Carefully flip the fish to coat both sides. Sprinkle with remaining onion and set aside until ready to use...about 5 to 10 minutes.
To prepare the sauce put the tamarind paste in a small bowl. Cover with the boiling water and allow to set for about 5 minutes. Mash well with a fork until soft. Put the tamarind along with its liquid in a blender or food processor. Add shallots, ginger, chilli, brown sugar and fish sauce. Blend to a coarse pulp, adding water 1 tsp at a time to thin as necessary.
Heat the oil in a large skillet over medium high heat. Add the trout, preparing one at a time if necessary. Cook covered, for about 5 minutes on each side, or until the skin is browned and the flesh flakes easily. Uncover for the last 2-3 minutes of cooking.
Prepare two plates by spooning a small amount of sauce into the center of each. Gently transfer one trout to each platter. Spoon additional sauce over each fish and sprinkle with cilantro, green onion and chili pepper. Serve warm with remaining sauce.
The Review:
Eating trout is an exercise in patience and due diligence...thin transparent bones force you to savor every bite lest you wish to inadvertently pierce you lip. The flesh was incredibly mild and tender, the sauce offering up the perfect amount of salt, sour and heat. Taking tiny bites, we found dipping the tines of the fork in a small amount of sauce and then gently lifting off a portion of fish gave the optimum flavor. Because the potentially hot and potent sauce is spooned on right before serving, the quality of the fish can really shine through without being masked by other flavors. For those who desire more punch you could spoon some of the sauce into the cavity prior to frying.
I have been told the cheeks and eyes are the best part...As you can see from the carnage below, I am still a little squeamish on that front. Maybe some day....
Tuesday, December 20, 2011
Chili-Mango Chicken
All of us have those stressful, rushed days when the last thing you want to do is spent a lot of time standing in the kitchen slaving over dinner. But even on my most stressful days I'm more inclined to root through my cabinets than order take out. Enter this recipe. It has all the comforts of Chinese take-out, but is cooked up quicker than delivery would take, with the added satisfaction of having made a meal from scratch.
I first perused the recipe in one of Ross' Men's Health magazines and made a mental note of it should I want a quick, but impressive dinner. The article boasts fridge to plate in 19 minutes. Including time to cook the rice and a secret trick that makes the chicken silken and ridiculously tender, my dinner was on the table in less than thirty minutes.
adapted from Short Order Cook in Men's Health, October 2011
serves 4
The Ingredients:
1 pound boneless, skinless chicken breasts, cut into 1/2" pieces
2 tsp baking soda
1 Tbsp cornstarch
1 Tbsp low-sodium soy sauce
1/2 Tbsp sesame oil
1/2 Tbsp peanut or canola oil
1 red onion, finely chopped
1 Tbsp fresh ginger, minced
1 green pepper, chopped
1 mango, peeled, pitted, and chopped
1/2 to 2 Tbsp chili garlic sauce (I used Huy Fong)
Black pepper to taste
The Process:
Prepare rice as per your preference.
To tenderize the chicken combine the meat with baking soda in a medium bowl. Allow to marinate for 10 minutes. Thoroughly rinse the chicken and pat dry.
Combine the chicken, cornstarch, soy sauce, and sesame oil in a mixing bowl and let sit for additional 10 minutes.
Meanwhile, heat the peanut or canola oil in a wok or large skillet over high heat. Add the onion and ginger and cook for 1 to 2 minutes, until the onion is translucent. Add the green pepper and stir-fry for 1 minute more, stirring constantly. Add the chicken, along with its marinade, and stir-fry for about 2 minutes, until the meat begins to brown. Add the mango, 1/2 T chili garlic sauce, and black pepper. stir-fry until the chicken is cooked through and the mango has softened into a near sauce-like consistency. Add additional chili garlic sauce until the desired heat is achieved.
Serve with rice.
The Review:
I may have been a little zealous with the chili garlic sauce on my first pass with this recipe. Be sure to know your audience before dosing your dish with too much heat! That being said, I loved the simplicity of the process and the ingredients. The recipe is ridiculously quick and lends itself to many variations of meats and vegetables. A spicy beef-broccoli, a gingery shrimp with a kick, maybe a few cashew for extra crunch. The marinade is simple enough to not over power the other flavors (unless of course you really pour on the chili garlic sauce) and will certainly compliment a wide range of ingredients. The dish is filling while still being light. And did I mention how simple it is?
And trust me on the baking soda marinade. The step only takes another 10 to 12 minutes but it is the only method I have come across that creates that incredibly silken texture found in Chinese take out.
Added bonus for a dish truly from scratch...try making your own chili garlic paste
I first perused the recipe in one of Ross' Men's Health magazines and made a mental note of it should I want a quick, but impressive dinner. The article boasts fridge to plate in 19 minutes. Including time to cook the rice and a secret trick that makes the chicken silken and ridiculously tender, my dinner was on the table in less than thirty minutes.
adapted from Short Order Cook in Men's Health, October 2011
serves 4
The Ingredients:
1 pound boneless, skinless chicken breasts, cut into 1/2" pieces
2 tsp baking soda
1 Tbsp cornstarch
1 Tbsp low-sodium soy sauce
1/2 Tbsp sesame oil
1/2 Tbsp peanut or canola oil
1 red onion, finely chopped
1 Tbsp fresh ginger, minced
1 green pepper, chopped
1 mango, peeled, pitted, and chopped
1/2 to 2 Tbsp chili garlic sauce (I used Huy Fong)
Black pepper to taste
The Process:
Prepare rice as per your preference.
To tenderize the chicken combine the meat with baking soda in a medium bowl. Allow to marinate for 10 minutes. Thoroughly rinse the chicken and pat dry.
Combine the chicken, cornstarch, soy sauce, and sesame oil in a mixing bowl and let sit for additional 10 minutes.
Meanwhile, heat the peanut or canola oil in a wok or large skillet over high heat. Add the onion and ginger and cook for 1 to 2 minutes, until the onion is translucent. Add the green pepper and stir-fry for 1 minute more, stirring constantly. Add the chicken, along with its marinade, and stir-fry for about 2 minutes, until the meat begins to brown. Add the mango, 1/2 T chili garlic sauce, and black pepper. stir-fry until the chicken is cooked through and the mango has softened into a near sauce-like consistency. Add additional chili garlic sauce until the desired heat is achieved.
Serve with rice.
The Review:
I may have been a little zealous with the chili garlic sauce on my first pass with this recipe. Be sure to know your audience before dosing your dish with too much heat! That being said, I loved the simplicity of the process and the ingredients. The recipe is ridiculously quick and lends itself to many variations of meats and vegetables. A spicy beef-broccoli, a gingery shrimp with a kick, maybe a few cashew for extra crunch. The marinade is simple enough to not over power the other flavors (unless of course you really pour on the chili garlic sauce) and will certainly compliment a wide range of ingredients. The dish is filling while still being light. And did I mention how simple it is?
And trust me on the baking soda marinade. The step only takes another 10 to 12 minutes but it is the only method I have come across that creates that incredibly silken texture found in Chinese take out.
Added bonus for a dish truly from scratch...try making your own chili garlic paste
Friday, November 11, 2011
Black Bean and Pumpkin Soup
Rounding out our evening of pumpkin and beer...and adding a bit more substance to an otherwise carb-ridden table, was this black bean and pumpkin soup. I first happened upon the recipe at Saucy and Bossy and had been waiting all fall for an oppertuner time to try it out. When Ross annouced his next beer would be a pumpkin ale, I knew the soup's moment had come.
I added about twice as much pumpkin as either of the linked recipes used. My pumpkin of choice was roasted and pureed from a fresh pumpkin...not canned. But in a pinch either will work. I also omitted the ham steak and used vegetable broth to make this a vegan/vegetarian friendly dish.
The recipe was also adapted for use in the slow cooker, as to be readily on hand throughout several hours of entertaining.
Adapted from the recipe posted at Saucy and Bossy, but originally from Smitten Kitchen
yields 9 cups
The Ingredients:
3 cans (15.5 oz) black beans, rinsed and drained
1 cans stewed tomatoes, drained and chopped
1 medium red onion, diced
1 shallot, diced
5 cloves of garlic, minced
2 Tbsp ground cumin
1 tsp salt
1/2 tsp. fresh ground black pepper
3 Tbsp olive oil
6 cups vegetable, chicken or beef stock
2 cups pumpkin puree
1/2 cup sherry, cider or dry white wine
3-4 Tbsp red wine vinegar
additional slat and pepper to taste
The Process:
Combine drained tomatoes and black beans in a food processor. Blend beans and tomatoes into a course puree
In large skillet, sautee onions, shallot, garlic, cumin, salt and pepper in olive oil until onion is beginning to brown and the cumin is fragrant. Transfer onion mixture to a 6-qt slow cooker. Stir in bean puree, stock, pumpkin puree and sherry.
Simmer the soup on high for 2-3 hours or on low for 4-6 hours
Just before serving, stir in the vinegar and season to taste with salt and pepper. Garnish with sour cream and toasted pepitas.
The Review:
I really wanted to like this soup. I really truly did. I make several varaiations of black bean soup throughout the colder months and hoped this incarantion would add a welcome diversion from my cumin studded, chili-like line up.
It wasn't as new and exciting as I had hoped. The dominate flavor was most assuredly the cumin. I adore cumin, but I can't seem to avoid a black bean soup that relies on this spice. The pumpkin was present, but in more of supporting role than leading actor. The textures were good, though a bit smooth for my taste. The sherry did add a lovely bright finish to the dish, but only when ladled freshly after adding. Allowed to simmer longer in the crock pot, it's clean bite quickly faded.
More pumpkin, less bean. Less cumin. And sorry vegetarians...I think the soup needs the beef stock for that added depth. And the ham steak for more interest. Better yet...stock made from a ham shank...now I know what to do with those holiday leftovers.
I added about twice as much pumpkin as either of the linked recipes used. My pumpkin of choice was roasted and pureed from a fresh pumpkin...not canned. But in a pinch either will work. I also omitted the ham steak and used vegetable broth to make this a vegan/vegetarian friendly dish.
The recipe was also adapted for use in the slow cooker, as to be readily on hand throughout several hours of entertaining.
Adapted from the recipe posted at Saucy and Bossy, but originally from Smitten Kitchen
yields 9 cups
The Ingredients:
3 cans (15.5 oz) black beans, rinsed and drained
1 cans stewed tomatoes, drained and chopped
1 medium red onion, diced
1 shallot, diced
5 cloves of garlic, minced
2 Tbsp ground cumin
1 tsp salt
1/2 tsp. fresh ground black pepper
3 Tbsp olive oil
6 cups vegetable, chicken or beef stock
2 cups pumpkin puree
1/2 cup sherry, cider or dry white wine
3-4 Tbsp red wine vinegar
additional slat and pepper to taste
The Process:
Combine drained tomatoes and black beans in a food processor. Blend beans and tomatoes into a course puree
In large skillet, sautee onions, shallot, garlic, cumin, salt and pepper in olive oil until onion is beginning to brown and the cumin is fragrant. Transfer onion mixture to a 6-qt slow cooker. Stir in bean puree, stock, pumpkin puree and sherry.
Simmer the soup on high for 2-3 hours or on low for 4-6 hours
Just before serving, stir in the vinegar and season to taste with salt and pepper. Garnish with sour cream and toasted pepitas.
The Review:
I really wanted to like this soup. I really truly did. I make several varaiations of black bean soup throughout the colder months and hoped this incarantion would add a welcome diversion from my cumin studded, chili-like line up.
It wasn't as new and exciting as I had hoped. The dominate flavor was most assuredly the cumin. I adore cumin, but I can't seem to avoid a black bean soup that relies on this spice. The pumpkin was present, but in more of supporting role than leading actor. The textures were good, though a bit smooth for my taste. The sherry did add a lovely bright finish to the dish, but only when ladled freshly after adding. Allowed to simmer longer in the crock pot, it's clean bite quickly faded.
More pumpkin, less bean. Less cumin. And sorry vegetarians...I think the soup needs the beef stock for that added depth. And the ham steak for more interest. Better yet...stock made from a ham shank...now I know what to do with those holiday leftovers.
Sunday, October 23, 2011
Chicken and Sweet Potato Stew
Oh for the chance to cook a decent dinner once and again! Life has become ridiculously busy over the past weeks (as my more faithful follows may have noticed due to the lapse in postings...trust me, it's not for lack of cooking or interest so much as lack of time in front of the computer). Short of the odd gathering or forced night with company I haven't focused on many entrees of late. But when I came across this recipe I knew I'd have to make the time. Though with a crock pot in the mix, I was free most of the afternoon to carry on with my overbooked list of projects, with the satisfaction of knowing a hot dinner would await me in a few hours.
Adapted from Eating Well, March/April 2006
Serves 6
The Ingredients:
6 bone-in chicken thighs, skin removed, trimmed of fat
2 lbs sweet potatoes, peeled and cut into spears
1/2 lb white button mushrooms, thinly sliced
6 large shallots, peeled and halved
4 cloves garlic, peeled and sliced
1 cup dry white wine
2 tsp chopped fresh rosemary
1 tsp salt
1/2 tsp freshly ground pepper
1 1/2 Tbsp white-wine vinegar
The Process:
Layer the chicken, sweet potatoes, mushrooms, shallots, garlic, wine, rosemary, salt and pepper in a 6-quart slow cooker. Put the lid on and cook on low until the potatoes are tender, about 5 hours. Before serving, remove bones from the chicken, if desired, and stir in vinegar.
The Review:
I was amazed at the simplicity and elegance of the dish. I was wary to layer so much with so little liquid, but as everything cooked down over the 5-6 hours, a wonderful broth emerged. The sweet potatoes needn't be stirred or submerge to cook fully. The chicken stayed picturesquely intact but fell from the bone in tender forkfuls. The broth was cloudy but clean. A picture perfect dinner with very little effort.
The flavors were light and earthy. Meaty chicken, savory rosemary, tart and slightly sour broth from the wine and vinegar underscored with an earthiness from the mushrooms. Despite these being run of the mill white button mushrooms, they lent quite a bit of flavor. While our mushroom-phobe was able to pick around the slices of fungi, he did complain about the flavor lingering the dish.
Adapted from Eating Well, March/April 2006
Serves 6
The Ingredients:
6 bone-in chicken thighs, skin removed, trimmed of fat
2 lbs sweet potatoes, peeled and cut into spears
1/2 lb white button mushrooms, thinly sliced
6 large shallots, peeled and halved
4 cloves garlic, peeled and sliced
1 cup dry white wine
2 tsp chopped fresh rosemary
1 tsp salt
1/2 tsp freshly ground pepper
1 1/2 Tbsp white-wine vinegar
The Process:
Layer the chicken, sweet potatoes, mushrooms, shallots, garlic, wine, rosemary, salt and pepper in a 6-quart slow cooker. Put the lid on and cook on low until the potatoes are tender, about 5 hours. Before serving, remove bones from the chicken, if desired, and stir in vinegar.
The Review:
I was amazed at the simplicity and elegance of the dish. I was wary to layer so much with so little liquid, but as everything cooked down over the 5-6 hours, a wonderful broth emerged. The sweet potatoes needn't be stirred or submerge to cook fully. The chicken stayed picturesquely intact but fell from the bone in tender forkfuls. The broth was cloudy but clean. A picture perfect dinner with very little effort.
The flavors were light and earthy. Meaty chicken, savory rosemary, tart and slightly sour broth from the wine and vinegar underscored with an earthiness from the mushrooms. Despite these being run of the mill white button mushrooms, they lent quite a bit of flavor. While our mushroom-phobe was able to pick around the slices of fungi, he did complain about the flavor lingering the dish.
Sunday, September 18, 2011
Black Bean Brownies
adapted from a recipe as described by my intern
yields one pan (about 12-16 brownies)
The Ingredients:
1 - 15 oz can of black beans (preferably low or no sodium)
1/3 cup agave syrup
1/4 cup sugar substitute (truvia or splenda)
3 Tbsp vegetable oil
1/3 cup cocoa powder
1 tsp instant coffee
1 tsp baking powder
1 tsp vanilla extract
pinch of salt
3 eggs
8 oz chocolate chips, or semi-sweet chocolate, chopped
The Process:
Preheat the oven to 350.
Drain the black beans and rinse thoroughly. Add beans to a food processor and blend on high until a smooth puree is formed. Transfer to a large bowl. Whisk in agave, sugar substitute, oil, cocoa powder, instant coffee, baking powder vanilla extract and salt, and blend until just combined. Gently beat in the eggs, one at a time. The batter will be runnier compared to other brownie batters. Fold in chocolate chips. Pour the batter into a lightly greased, 8 x 8 inch baking pan.
Bake in preheated oven 30-35 minutes until the brownies begin to pull away from the side of the pan and a toothpick inserted in the center comes out clean. Cool slightly before serving.
The Review:
Don't be fooled. Something is afoot...these aren't your fudge-y, Betty Crocker variety of brownie. But I bet most people would be hard pressed to put their finger on what really is different about these brownies.
In batter form the flavor of the legumes is still present, but as the brownies baked the chocolate aroma took over. Out of oven the counterfeit brownies looked denser and darker than typical boxed brownie mixes, but still had an airy, cake-like appearance. They were moister than most, and just as prone to crumbling as other brownies we've had.
The major difference any of us could deceiver was a slightly mealy texture, but not in a bad way. It made for a brownie that was smooth and almost dissolved in your mouth. The chocolate was rich, but mellower than in other chocolate brownies. Overall they had a richer, more earthy taste. Had I not known, I never would have guessed that the key ingredient was black beans. I certainly would not have been able to tell they were made without flour.
Unlike other gluten-free brownie recipes, these were actually cake-like. Most gluten-free brownies and flourless cakes I've tried in the past had a wonderfully dense and fudge-like texture. While good in their own regard, I was pleased that this black bean version offered a more airy alternative.
Try these out on some fellow unsuspecting brownie connoisseurs. I'd love to hear what their impressions were...and if any were able to guess the secret.
For the health nuts among you, here is the approximate break down compared to Betty Crocker's fudge brownies:
Betty: ____________ Black Bean:
170 calories ________ 155 calories
9g fat_____________ 7.9 g fat
90 mg sodium _______80 g sodium
65 mg potassium_____ 109 mg potassium
23 g carbs __________20 g carbs
16 g sugar __________12.3 g sugar
less than 1 g fiber_____ 2.3 g fiber
1 g protein _________3.2 g protein
Subscribe to:
Posts (Atom)