Showing posts with label belgian. Show all posts

Friday, November 28, 2014

Spiced Cheesecake with Black Currant Sauce

This cheesecake is the last recipe of my Thanksgiving collaboration with Boom Island Brewing Company. Every holiday season the brewery releases a Belgian holiday brew, dubbed Yule. Yule is a potent beer...upwards of 12%-13% ABV. A Belgian dark strong ale is probably the closest style one could use to describe it. Each year this holiday treat is brewed with a different fruit. This year...black currant.

To match the richness of the boozy backbone and rich malt, I felt a cheesecake was appropriate. The spices are a nod to the holiday season...cinnamon, allspice, and nutmeg. And the gingersnap crust of course! The topping I opted for a black currant jam (far easier to find than fresh or frozen black currants this time of year) to tie into the fruit undertones of this beer. Raspberries, blackberries or blueberries would be equally as welcome.

This cheesecake was a treat to come up with. I hope you enjoy it as much as we did!

The recipe is my own

serves 10-12

Ingredients
for the crust
• 25-30 gingersnap cookies (2 cups finely ground)
• ½ tsp ground cinnamon
• 5 Tbsp unsalted butter, melted
• 2 Tbsp brown sugar
• ¼ tsp salt

for the filling
• 24 oz cream cheese, softened
• ½ cup sugar
• ½ cup brown sugar, packed
• 4 eggs, lightly beaten
• 1 ½ cups sour cream
• 1 tsp ground cinnamon
• ½ tsp ground nutmeg
• ¼ tsp of allspice
• ½ tsp salt

for the topping
• 1 cup black currant jam

Preparation
• Preheat oven to 350°F
• Place gingersnap cookies in a food processor. Cover and process until the cookies are the texture of very coarse sand. Add butter, brown sugar salt, and cinnamon. Process until well combined. Transfer mixture into a lightly greased 9-inch spring form pan. Using the smooth bottom of a glass, press the crumbs down into the base and 1-inch up the sides. Refrigerate for 10 minutes. Once chilled, place spring form pan on a baking sheet and bake until crust is fragrant and set, about 10 minutes.
• In a mixer with a paddle attachment, cream together the sour cream, cream cheese and sugars until smooth and free of lumps, 1-2 minutes. Add eggs, one at a time, beating until just combined. Stir vanilla, spices and salt. Pour into crust.
• Lower oven temperature to 325°F. Set the cheesecake on a baking sheet and bake for 60-65 minutes, or until the center is mostly set, but still jiggles slightly. Remove from oven and allow to cool in the spring form pan for 30 minutes. Chill in the refrigerator, loosely covered, for at least 4 hours. Carefully run a knife around edge of pan to loosen. Unmold and transfer to a cake plate.
• Spread a thin layer of currant jam over the top of the cheesecake. Enjoy!

Saturday, July 13, 2013

Sour Braised Beef with Polenta Fries


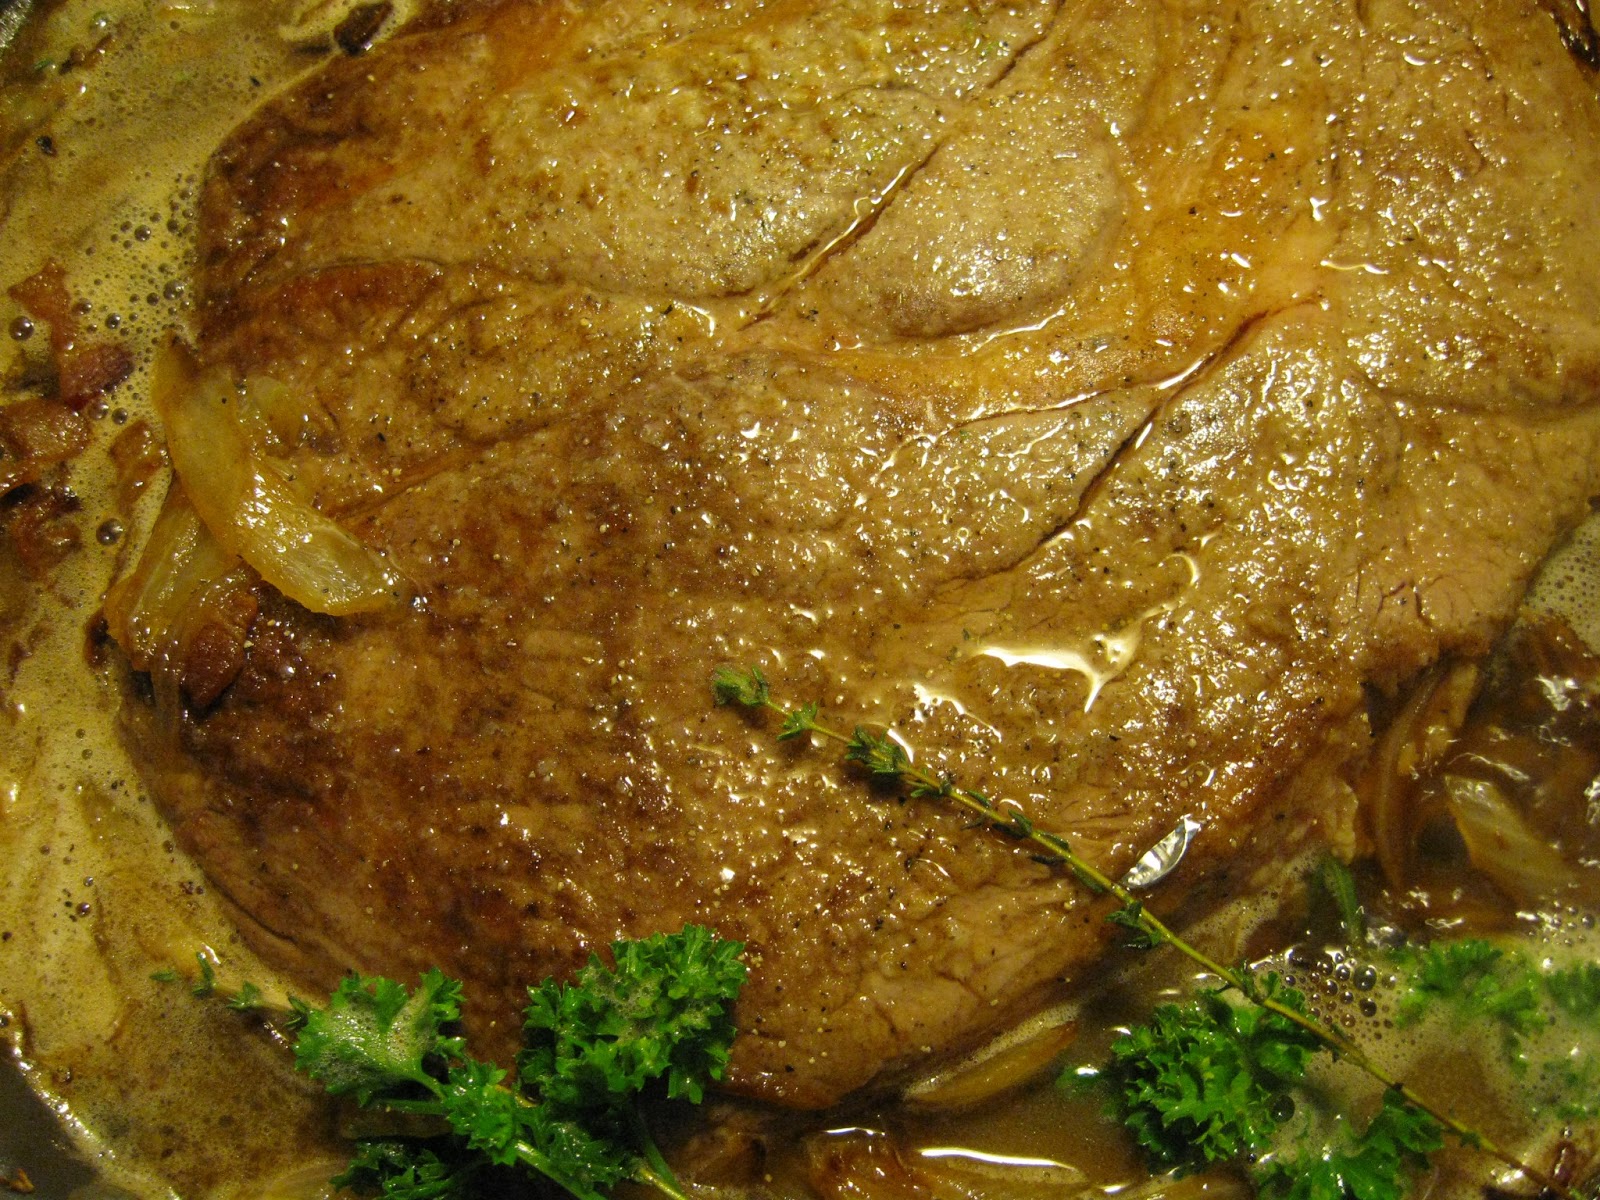
Some mornings I spend the entire bus ride to work day dreaming about what to concoct for dinner.  I have taken to carrying a notebook about with me (finally) lest I be hit with an idea unprepared. The inspiration for this dish first came about after an amazing beer dinner at Stout's Pub in Roseville, featuring the skills of chef Daniel Parker and the wonderful ales of Ommegang.  Five courses and several drinks in, we were served an amazingly fork tender mound of meat accompanied by bacon fried potatoes and sweet and sour onions.  The beef had been braised in Curvee Brut to compliment the sour cherry hints in the Three Philosopher's that was paired with the course.  Daniel lamented the lack of tartness to come through in the braising process.  Thus the sweet and sour onions served alongside.  Daniel truly had little to lament.  The dish was the highlight of the dinner for me.

Vamping off that...and out a desire to have a bit of leftover beef for a recipe down the road...I turned to a classic beef carbonnade, but with a much, much more sour beer.  The cooking time can be reduced slightly by cutting the beef down into smaller chunks, but I opted to stick with a full roast.  Look for a cut of meat with a lot of fat marbled throughout.

For the beer, Flanders red and oud bruins are a good place to start. I found myself looking towards the Rodenbach Grand Cru.
 This is a sour I can never seem to get enough of. The result was amazing.  Because of the acidity of the beer, there was no need to add vinegar as many recipe variants recommend.  The sour dissipates to an earthly, slightly tart flavor that perfectly compliments the sweet caramelized onions and rich fat of the bacon.

The cooking process generated far, far more jus than I was anticipating.  But you know what?  After dinner is done, skim the fat off of the remaining juices and transfer it--onions, bacon bits, and all--to the fridge.  The next day, heat it up, ladle it into a ramekin and top with a bit of crusty bread and some Gruyère.  After a quick trip under the broiler, you'll be treated to an amazing twist on French onion soup...

beef carbonnade adapted from chef Charlie Palmer and Saveur
polenta fries adapted from Epicurious

serves 4-6

The Ingredients:
for the beef
3 lb beef chuck roast
salt and pepper
1/4 cup flour
4 Tbsp butter
4 slices of bacon, coarsely chopped
3 yellow onions, thinly sliced
4 cloves of garlic, minced
2 cup sour beer such as a Flanders red ale
1 cup beef stock
2 Tbsp brown sugar
3 sprigs fresh thyme
3 sprigs fresh parsley
1 bay leaf

for the polenta fries
1 1/2 cups milk
1 1/2 cups water
1 cup cornmeal
1/2 tsp salt
2 Tbsp unsalted butter
1/4 Parmesan (optional)
additional salt for sprinkling

The Process:
 Generously season the beef with salt and pepper and dredge in the flour.

 In a large heavy-bottomed pot or Dutch oven, melt 2 Tbsp butter over medium-high heat.  Add the beef and brown, 3-4 minutes per side.  Transfer beef to a plate, cover and keep warm.

Add the bacon to the same pot and cook until most of the fat renders, 6-8 minutes.  Reduce heat to medium-low and add the remaining butter, along with the onions and garlic.  Cook until the onions have caramelized, about 30 minutes (long, low and slow is key).

Add half of the ale to deglaze the bottom of the pan.  Simmer for about 5 minutes or until reduced slightly.    Whisk together remaining beer, broth and sugar.  Return the beef to the pot.  Add the herbs and pour the beer mixture over top.  Bring to a boil, cover tightly, and reduce heat to simmer.  Cook until the beef is tender, about 2 hours.

Slice or shred to serve.

for the polenta fries:
Combine the milk and water in a medium saucepan over medium heat.  Once the mixture comes to a simmer, whisk in cornmeal and salt.  Cook the mixture until thick and creamy, about 20 minutes.  Stir in the butter and Parmesan.

Prepare a 9x13 baking dish with a coat of non-stick cooking spray.  Once the polenta has thicken, pour in to prepared dish.  Spread into an even thickness, smoothing the surface out as much as possible.  Cover and chill 30-45 minutes, or until the polenta has set.

Preheat the broiler and place the oven rack 4-6 inches from the heat.

Carefully turn out the polenta onto a large cutting surface.  Cut crosswise into four even rectangles.   Cut each rectangle into 10- 12 even strips.  Line cut polenta onto a lightly oiled baking sheet. Bring the fries with oil and generously sprinkle with salt.

Broil, flipping once, about 10 minutes per side or until evenly browned.

Serve immediately with beef and juices.

Sunday, March 4, 2012

Belgian-style Yeast Waffles

Happy Sunday!  Ross was fortunate enough to have another Sunday morning at home, so thus the waffle tradition continues.  I have tried quite a few varieties of waffles to date, but none of the traditional TRUE Belgian-style waffles using yeast. Our puppy was kind enough to wake me up a good two hours before Ross this morning so I was able to get the batter fermenting early enough that he wasn't teased with the thought waffles before they were ready to cook.  AND I got to crawl back into bed for a while. If you'd rather have waffle batter ready to pour and go, the batter can be made ahead of time and refrigerated overnight.  I'd love to try both time frames to see how the flavor truly develops...

adapted from King Arther Flour

Yields 4 Belgian-style waffles (dependent on the waffle iron)

The Ingredients:
1 1/2 cups lukewarm milk, divided
1 1/2 tsp instant yeast
6 Tbsp butter, melted
2 to 3 Tbsp sugar
1/2 tsp salt
1 tsp vanilla extract
2 large eggs, room temperature, separated
2 cups all purpose flour

The Process:
In a small bowl or measuring cup, dissolve the yeast in 1/4 cup warm milk. Set aside for 10 minutes, or until the yeast begins to foam.

In a large bowl, whisk together the egg yolks, 1/4 cup of the warm milk and the melted butter. Stir in the yeast mixture, sugar, salt and vanilla. Blend in the remaining milk alternately with the flour, ending with the flour. 

In a separate mixing bowl with an electric beater, or by hand with a strong wrist action, whisk the egg whites until they hold soft peaks.  Fold the whites gently into the waffle batter, until just combined.  Do not over mix!  The batter should retain as much air as possible from the whites.

Cover and allow to rest for about 1 hour or until doubled in size.  The batter may also be prepared the night before and refrigerated at this point.


Preheat oven to 250 and warm up the waffle iron.

Brush or mist the waffle iron lightly with oil and spoon batter into waffle iron, spreading quickly with a spatula to cover the entire griddle surface (amount varies depending on waffle iron, due to the amount of air in the batter, mine iron used about 1  cup, instead of the usual 1/2 cup). Cook according to iron manufacturer’s instructions.


Transfer waffles to rack in oven to keep warm and crisp. Make more waffles in same manner.

Serve warm, garnished with fruit and whipped cream, dusted with powder sugar, or simply with butter and syrup.

The Review:
Uncovering the bowl of batter and ladling it into the iron was like walking into the front dough of a bakery.  That welcoming, yeasty aroma filled the kitchen and helped coax Ross out of bed.  These waffles were unlike any of the others I've tried to date.  The exterior was much crisper than the non-yeast varieties.  And that crispness held up better to the barrage of syrup and butter.  Yet the waffle still yielded and sopped up all of the sweet goodness drizzled on top.


These waffles are not sweet.  They were not reminiscent of funnel cakes like so many previous waffles had been.  The flavor was deeper, richer...and...well...yeastier.  The yeast was subtle, at least to me.  Those not fond of the flavor may find it more overbearing than I did.  The yeast lent a wonderful depth and complexity, almost a tartness, to the waffles.  The interiors were lighter than air, but not in the least bit fluffy.  Almost creamy...

With the deeper yeast flavor and more substantial body, I think I have discovered my go-to waffle for the next beer and waffle gathering.  The #8 Belgian style ale we brewed is about ready to crack open...

Sunday, February 12, 2012

Banana Waffles with Nutella

Sunday has come again, and with it my obsession with my waffle iron and a use for a banana or two from my freezer.  Does that happen to you?  Bananas are purchased with every intent on eating them within the next few days only to see the brown spots creep in almost overnight.  Rather than throw out the perfectly ripe fruit, the banana is banished to the freezer until time is made to concoct something wonderful at a later date...preferably not endless loaves of banana bread.  Before you realize it and army of frozen banana has begun to take over...

The recipe is an attempt to hold the bananas at bay...at least for a while.  Its dancing partner was inspired by a childhood joy of spreading Nutella on bananas as a snack.  Okay, maybe more of an adult joy...I didn't truly discover and come to appreciate Nutella until college.  As a child, pre-Nutella, I actually preferred dipping bananas in strawberry yogurt and rolling it in Grape-nuts.  Did anyone else ever do that?  But yogurt/Grape-nut/banana waffles doesn't sound quite as appealing as banana Nutella waffles...

This waffle recipe is a nice alternative for those too groggy to beat egg whites to soft peaks first thing in the morning.

waffle recipe adapted from Waffles of Insane Greatness at foodnetwork.com

serves 3-4

The Ingredients:
3/4 cup flour
1/4 cup cornstarch
1 1/2 Tbsp sugar
1/2 tsp baking powder
1/4 tsp baking soda
1/4 tsp salt
2 Tbsp unsalted butter, melted
1 overripe banana, mashed
1 egg, beaten
1 cup buttermilk
1/2 tsp vanilla

for topping:
1/3- 1/2 cup Nutella
1 ripe banana sliced


The Process:
Preheat the oven to 200.  Preheat and lightly oil the waffle iron.

In a large bowl whisk together flour, cornstarch, baking powder and soda, salt and sugar.  In a medium bowl blend butter and mashed banana until well combined.  Whisk in egg, buttermilk and vanilla.  Slowly pour wet ingredients into dry, folding and stirring until just combined.  Do not over mix the batter. 

Cook waffles according to iron manufacturer's directions.  My waffle iron used about 1/2 cup of batter.  This batter is thicker than some and may need to be spread before closing the iron.  The batter also puffs up a lot more than other batters I've tried, so be careful not to overfill the iron.

Once cooked, set waffle aside on plate in the oven to keep warm.  Prepare other waffles in the same manner.

The make the topping, heat the Nutella in the microwave at 20 second intervals or in a double boiler on the stove top until liquid enough to pour.  Drizzle each waffle with about 2 Tbsp of Nutella and top with sliced banana.

The Review:
After beating egg whites for waffle batter during my last few waffles, it was nice to give my wrist a break (my hand mixer bit the dust and for those who actually have a stand mixer...do you really want to haul that thing out just to beat one egg white?).  I may have found my go to waffle base for future fruit additive varieties.  The original recipe called for 1/3 cup of oil.  Figuring the banana would sub well for the wet, I nixed the oil...but did add in a little butter.  I also kept the sugar on the low end knowing the Nutella topping was going to be pretty sweet.

The banana flavor was wonderfully subtle, just enough real ripe fruit flavor to make the waffle interesting.  The waffle wasn't quite sweet or flavorful enough on its own, but with the Nutella and sliced bananas on top, it was a match made in heaven.  I would like to find a way to may the Nutella into more of a sauce.  The chocolate nut butter does not stay very fluid for long.

The waffles puffed up a lot and remained soft in the center, though a bit dense.  The outside reached my platonic ideal of crispness and retained the soft to crunch ratio even after topping.  With syrup though, I'm not sure how soggy they may become, nor how quickly.  But there are many a future Sunday to find out.

Thursday, February 9, 2012

Chocolate Waffles with Cherry Bourbon Compote and Fresh Whipped Cream

Please excuse this minor break in the regularly scheduled luau menu... 

Two weeks have passed since our last chance to enjoy Sunday morning waffles.  Since that time I've created a short list of combinations I am itching to try.  Chocolate waffles?  Breakfast for dessert, baby.  What better toppings to pair chocolate with than juicy cherries and velvety whipped cream.  You may never go back to syrup again...

the compote recipe is my own
the whipped cream recipe is adapted from BHG Cookbook
the chocolate waffles are adapted from Gale Gand's recipe at FoodNetwork.com

Makes 4-8 waffles, depending on the waffle iron.
The Ingredients:
6 Tbsp sugar
1/4 cup water
1/4 cup bourbon
3 Tbsp fresh lemon juice
1 lb (about 2 1/2 cups) fresh cherries, rinsed and pitted
1/2 tsp vanilla extract
1/2 tsp corn starch

for the whipped cream
1 cup whipping cream
2 Tbsp sugar
1/2 tsp vanilla

for the waffles
2 eggs, separated
3 Tbsp sugar
1 1/2 cups milk
1 cup all-purpose flour
1/4 cup cocoa powder, preferably Dutch-processed
2 tsp baking powder
1/2 cup salted butter, melted

The Process:
for the compote
In a medium saucepan combine water, bourbon, sugar and lemon juice. Bring to boil over high heat, stirring until sugar dissolves. Continue to boil until thin syrup forms, about 7 minutes. Reduce to simmer; add cherries and vanilla extract. Cook over medium heat, stirring gently for 5 to 7 minutes, or until the cherries soften, but retain their shape.  Remove cherries from the syrup with a slotted spoon and set aside in a serving dish.  Add the corn starch to the syrup, whisking until well combined.  Bring the syrup to gentle boil and cook until  thickened and reduced by half, about 5 minutes.  Pour syrup over cherries.  Cool, cover and set aside.

for the whipped cream
In a chilled bowl combine whipping cream, sugar and vanilla.  Beat with chilled beaters on medium speed until soft peaks form.  Set aside in the fridge.


for the waffles
Preheat oven to 200 and warm up the waffle iron

In a medium bowl whisk the whites by hand or with a mixer until soft peaks form.   Add the sugar and continue whipping until stiff.

In a medium bowl whisk the egg yolks and milk until well combined.  Slowly incorporate the flour, cocoa powder, and baking powder.  Add melted butter and mix until smooth. Gently old in the whipped whites, being careful not to overwork the batter.

Brush or mist the waffle iron lightly with oil and spoon batter into waffle iron, spreading quickly with a spatula to cover the entire griddle surface (amount varies depending on waffle iron, mine uses just over 1/2 a cup). Cook according to iron manufacturer’s instructions.

Transfer waffles to rack in oven to keep warm and crisp. Make more waffles in same manner.


The Review:
Pure unadulterated bliss.  Tart cherries; red, ripe and round.  Erupting with a juicy burst of bourbon.  Smooth, velvety whipped cream offering a rich douse of sweetness to cut the tang of the fruit and slightly bitter cocoa.  Wonderfully white and as pure and light as summer clouds.  And the dark platter of  decadence that supports it all...the rich chocolate waffle.


Taken together this combination is a force to be reckoned with.  And for the most part the components stand well on their own.  The only downside was the texture of the waffles.  For some reason this version did not puff up and retain its shape as well as previous waffles had.  The underside was nicely crisped while shielding a fluffy interior...the top side unfortunately remained slight soft and deflated quickly...no beautiful geometric ridges to contain the cherry studded heaven that the waffles supported.  With a tweak or two to make the waffle stand on its own, this may be the best Belgian inspired breakfast variation yet.

Sunday, January 15, 2012

Blueberry Buttermilk Waffles

I appear to be on a waffle kick recently.  Perhaps the rarity of two lazy Sundays in a row with my husband are to blame.  It's not often both of us are off of work in the morning together.

So far every waffle I've attempted has been a wonderful success. Why stop now?  This recipe offers a completely different base than the previous waffles I've tried. Fresh blueberries are the featured star.  Oh blueberries...how you taunt with thoughts of summer warmth when the weather outside lingers around 13 degrees...

adapted from Nicole's' recipe at Baking Bites

yields 6-8 Belgian style waffles (depending on the iron used)

The Ingredients:
1 3/4 cups all purpose flour
1/4 cup cornstarch
1 tsp baking powder
1 tsp baking soda
1/4 tsp salt
3 tbsp sugar
1 1/2 cups buttermilk
2 large eggs, separated
2 tsp vanilla extract
6 Tbsp unsalted butter, melted and cooled
1 cup fresh blueberries

The Process:
Preheat oven to 250 and warm up the waffle iron.

In a large bowl, whisk together flour, cornstarch, baking powder, baking soda, salt and sugar. In a medium bowl, whisk together buttermilk, egg yolks, vanilla and melted butter until smooth. Pour into dry ingredients and whisk until well combined.

In a separate mixing bowl with an electric beater, or by hand with a strong wrist action, whisk the egg whites until they hold soft peaks.  Fold the whites gently into the waffle batter, until just combined.  Do not over mix!  The batter should retain as much air as possible from the whites.

Gently stir in blueberries. Allow batter to rest for 5-10 minutes.

Brush or mist the waffle iron lightly with oil and spoon batter into waffle iron, spreading quickly with a spatula to cover the entire griddle surface (amount varies depending on waffle iron, mine uses just over 1/2 a cup). Cook according to iron manufacturer’s instructions.

Transfer waffles to rack in oven to keep warm and crisp. Make more waffles in same manner.

Serve warm, garnished with additional blueberries and topped with powder sugar or syrup 

The Review: 
Another successful waffle! And quite a bit different from the previous waffle recipes I've tried recently.  The batter was very thick and a bit sponge-like, making it tricky to spread over the griddle.  For those with in interest in chemistry in the kitchen, this is a good recipe to try.  You can see the effects of baking soda, baking powder and buttermilk...acids and bases...bubbling up to make the batter dense, yet air. The reaction accounts for the spongy look of the batter.

The batter was a good indication of how the waffles would turn out.  The waffles were light, but the texture much denser than both the pumpkin and plain waffles.  Also, the extra moisture added as the blueberries burst opened and steamed up the griddle prevented the beautifully crisp outer layer I adore on my waffles.  But i doubt there is anyway around that when you use fresh fruits to cook.  Beautiful purple juices sputtered and dripped over the side of the iron as the blueberries swelled and burst, sizzling away on the hot surface.  Be prepared for extra clean up!


But the flavors were divine...just sweet enough to compliment the blueberries, with just a hint of vanilla.  A hint of buttery flavor.  A burst of alternating tart and sweet berries...

I could get used to a Sunday morning waffle tradition...