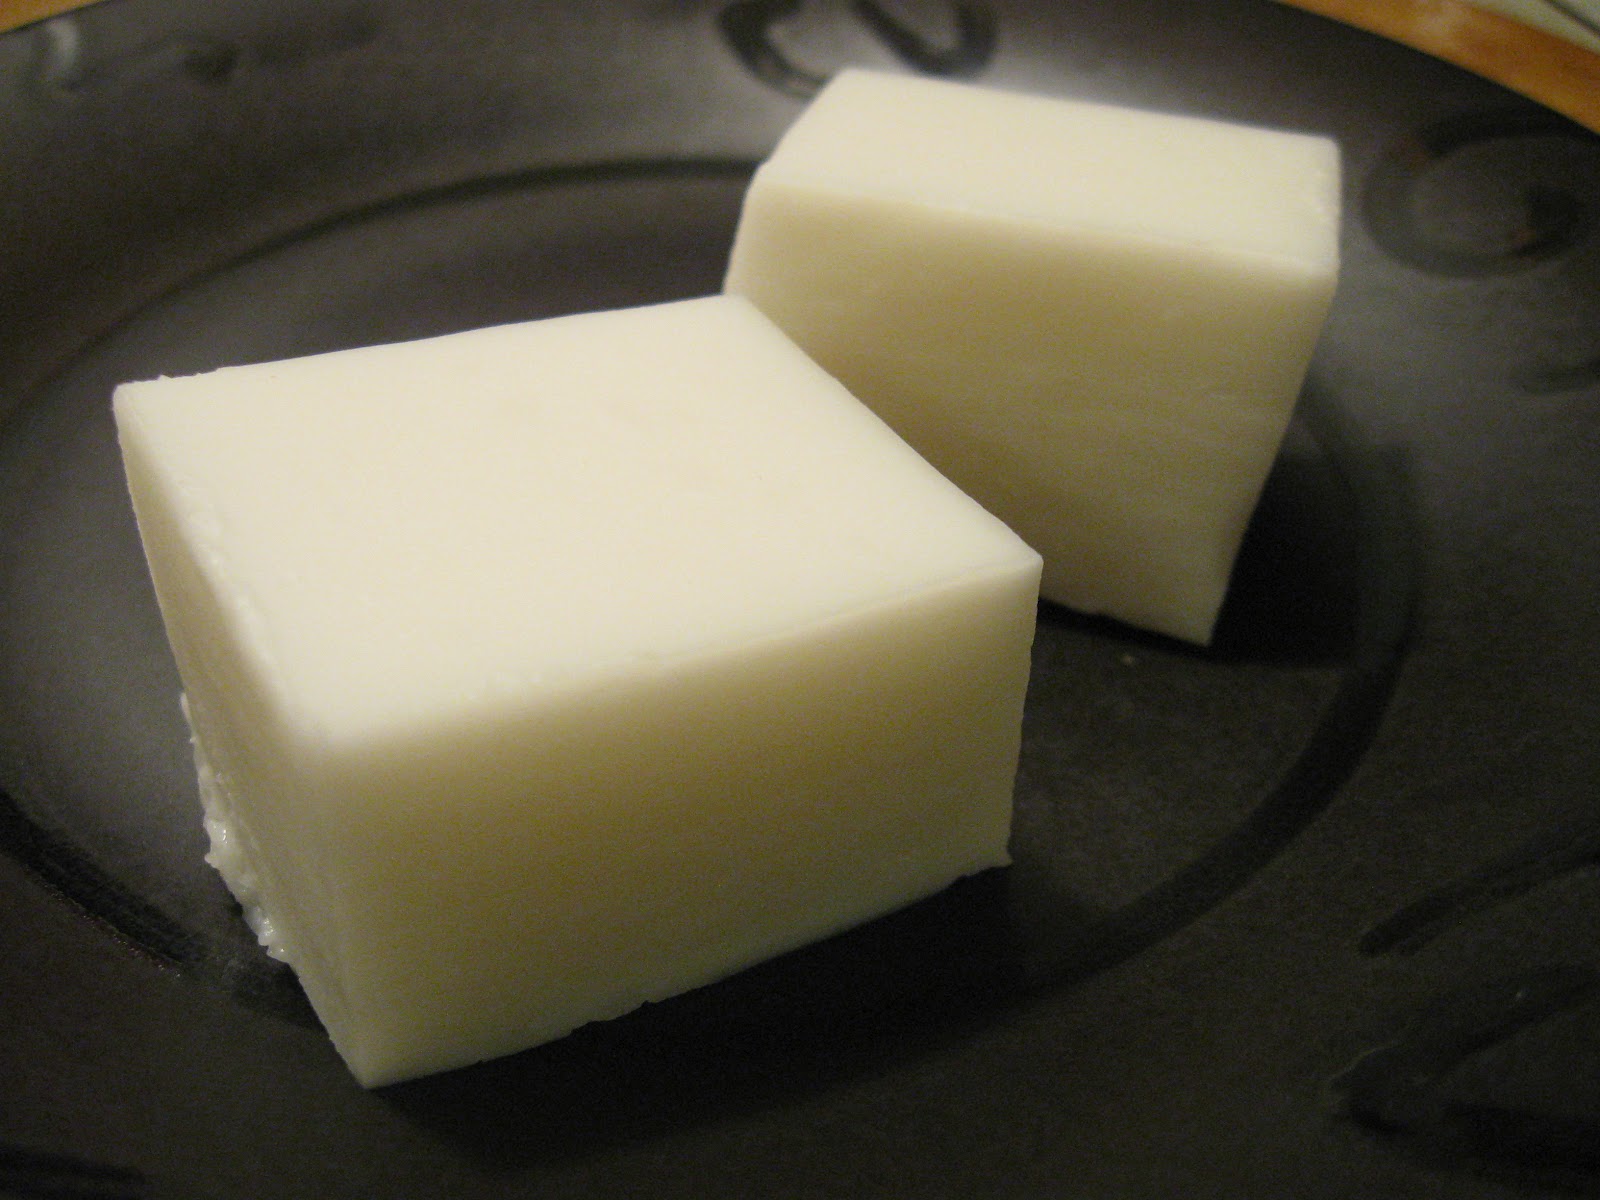
Happy Valentine's Day! Tired of boxed chocolates and red velvet cupcakes that seem to be the Valentine's Day staple? This coconut pudding is a wonderfully light and tropical alternative. While traditionally chilled and then cut into squares to serve, individual haupia can be prepared in heart shaped ramekins. Or for the more ambitious, cut the chilled pudding into heart shapes for your sweet heart. Orchids make a beautiful garnish.
adapted from the Luau recipe at Aloha Friends Luau
Serves 8 to 10
The Ingredients:
12 ounces chilled coconut milk
1 1/2 cups water
1/2 cup + 2 T. sugar
1/2 cup + 2 T. cornstarch
The Process:
Combine all ingredients in saucepan and stir over medium heat until thickened. Lower heat and cook for ten minutes, stirring constantly to avoid lumping or burning. Pout into 8x8 inch dish and chill until set, about 2 hours. Cut haupia into squares & serve.
The Review:
Haupia turned out to be the sleeper of all the treats laid out before us at the luau. At first most people avoided it, given its gelatinous appearance and slight resemblance to tofu. Those that bit into the unremarkable white cubes were greeted with a sweet coconut flavor and a smooth velvety texture. Guest's eye list up with wonder. Word quickly spread and the unassuming dessert became a quick favorite. With the short ingredient list, and easy preparation, this dessert is quick to become an impressive offering for guests.
Seize the food! A new year's resolution to experiment with 100 new recipes in the coming year.
Tuesday, February 14, 2012
Sunday, February 12, 2012
Banana Waffles with Nutella
Sunday has come again, and with it my obsession with my waffle iron and a use for a banana or two from my freezer. Does that happen to you? Bananas are purchased with every intent on eating them within the next few days only to see the brown spots creep in almost overnight. Rather than throw out the perfectly ripe fruit, the banana is banished to the freezer until time is made to concoct something wonderful at a later date...preferably not endless loaves of banana bread. Before you realize it and army of frozen banana has begun to take over...
The recipe is an attempt to hold the bananas at bay...at least for a while. Its dancing partner was inspired by a childhood joy of spreading Nutella on bananas as a snack. Okay, maybe more of an adult joy...I didn't truly discover and come to appreciate Nutella until college. As a child, pre-Nutella, I actually preferred dipping bananas in strawberry yogurt and rolling it in Grape-nuts. Did anyone else ever do that? But yogurt/Grape-nut/banana waffles doesn't sound quite as appealing as banana Nutella waffles...
This waffle recipe is a nice alternative for those too groggy to beat egg whites to soft peaks first thing in the morning.
waffle recipe adapted from Waffles of Insane Greatness at foodnetwork.com
serves 3-4
The Ingredients:
3/4 cup flour
1/4 cup cornstarch
1 1/2 Tbsp sugar
1/2 tsp baking powder
1/4 tsp baking soda
1/4 tsp salt
2 Tbsp unsalted butter, melted
1 overripe banana, mashed
1 egg, beaten
1 cup buttermilk
1/2 tsp vanilla
for topping:
1/3- 1/2 cup Nutella
1 ripe banana sliced
The Process:
Preheat the oven to 200. Preheat and lightly oil the waffle iron.
In a large bowl whisk together flour, cornstarch, baking powder and soda, salt and sugar. In a medium bowl blend butter and mashed banana until well combined. Whisk in egg, buttermilk and vanilla. Slowly pour wet ingredients into dry, folding and stirring until just combined. Do not over mix the batter.
Cook waffles according to iron manufacturer's directions. My waffle iron used about 1/2 cup of batter. This batter is thicker than some and may need to be spread before closing the iron. The batter also puffs up a lot more than other batters I've tried, so be careful not to overfill the iron.
Once cooked, set waffle aside on plate in the oven to keep warm. Prepare other waffles in the same manner.
The make the topping, heat the Nutella in the microwave at 20 second intervals or in a double boiler on the stove top until liquid enough to pour. Drizzle each waffle with about 2 Tbsp of Nutella and top with sliced banana.
The Review:
After beating egg whites for waffle batter during my last few waffles, it was nice to give my wrist a break (my hand mixer bit the dust and for those who actually have a stand mixer...do you really want to haul that thing out just to beat one egg white?). I may have found my go to waffle base for future fruit additive varieties. The original recipe called for 1/3 cup of oil. Figuring the banana would sub well for the wet, I nixed the oil...but did add in a little butter. I also kept the sugar on the low end knowing the Nutella topping was going to be pretty sweet.
The banana flavor was wonderfully subtle, just enough real ripe fruit flavor to make the waffle interesting. The waffle wasn't quite sweet or flavorful enough on its own, but with the Nutella and sliced bananas on top, it was a match made in heaven. I would like to find a way to may the Nutella into more of a sauce. The chocolate nut butter does not stay very fluid for long.
The waffles puffed up a lot and remained soft in the center, though a bit dense. The outside reached my platonic ideal of crispness and retained the soft to crunch ratio even after topping. With syrup though, I'm not sure how soggy they may become, nor how quickly. But there are many a future Sunday to find out.
The recipe is an attempt to hold the bananas at bay...at least for a while. Its dancing partner was inspired by a childhood joy of spreading Nutella on bananas as a snack. Okay, maybe more of an adult joy...I didn't truly discover and come to appreciate Nutella until college. As a child, pre-Nutella, I actually preferred dipping bananas in strawberry yogurt and rolling it in Grape-nuts. Did anyone else ever do that? But yogurt/Grape-nut/banana waffles doesn't sound quite as appealing as banana Nutella waffles...
This waffle recipe is a nice alternative for those too groggy to beat egg whites to soft peaks first thing in the morning.
waffle recipe adapted from Waffles of Insane Greatness at foodnetwork.com
serves 3-4
The Ingredients:
3/4 cup flour
1/4 cup cornstarch
1 1/2 Tbsp sugar
1/2 tsp baking powder
1/4 tsp baking soda
1/4 tsp salt
2 Tbsp unsalted butter, melted
1 overripe banana, mashed
1 egg, beaten
1 cup buttermilk
1/2 tsp vanilla
for topping:
1/3- 1/2 cup Nutella
1 ripe banana sliced
The Process:
Preheat the oven to 200. Preheat and lightly oil the waffle iron.
In a large bowl whisk together flour, cornstarch, baking powder and soda, salt and sugar. In a medium bowl blend butter and mashed banana until well combined. Whisk in egg, buttermilk and vanilla. Slowly pour wet ingredients into dry, folding and stirring until just combined. Do not over mix the batter.
Cook waffles according to iron manufacturer's directions. My waffle iron used about 1/2 cup of batter. This batter is thicker than some and may need to be spread before closing the iron. The batter also puffs up a lot more than other batters I've tried, so be careful not to overfill the iron.
Once cooked, set waffle aside on plate in the oven to keep warm. Prepare other waffles in the same manner.
The make the topping, heat the Nutella in the microwave at 20 second intervals or in a double boiler on the stove top until liquid enough to pour. Drizzle each waffle with about 2 Tbsp of Nutella and top with sliced banana.
The Review:
After beating egg whites for waffle batter during my last few waffles, it was nice to give my wrist a break (my hand mixer bit the dust and for those who actually have a stand mixer...do you really want to haul that thing out just to beat one egg white?). I may have found my go to waffle base for future fruit additive varieties. The original recipe called for 1/3 cup of oil. Figuring the banana would sub well for the wet, I nixed the oil...but did add in a little butter. I also kept the sugar on the low end knowing the Nutella topping was going to be pretty sweet.
The banana flavor was wonderfully subtle, just enough real ripe fruit flavor to make the waffle interesting. The waffle wasn't quite sweet or flavorful enough on its own, but with the Nutella and sliced bananas on top, it was a match made in heaven. I would like to find a way to may the Nutella into more of a sauce. The chocolate nut butter does not stay very fluid for long.
The waffles puffed up a lot and remained soft in the center, though a bit dense. The outside reached my platonic ideal of crispness and retained the soft to crunch ratio even after topping. With syrup though, I'm not sure how soggy they may become, nor how quickly. But there are many a future Sunday to find out.
Saturday, February 11, 2012
Spam Musubi
Even more ubiquitous than poke, spam musubi could be found at every convenient store, gas station, and local kine lunch counter. Even the finer restaurants get in on the action, offering deconstructed and carefully marinated versions of the quick snack. It is Hawaii at it's best. A fusion treat blending hands-free Japanese snacking with the Islander's love of Spam.
I've never been much of a fan of the salty meat product, but even this treat has its charms.
adapted from several people's input
makes 8 musubi
The Ingredients:
1 can Spam, original flavor
1 Tbsp soy sauce
2 Tbsp brown sugar
4 cups short grained sushi rice, cooked
4 sheets of nori, sliced in half lengthwise
small bowl of water
The Process:
Open the can of spam and set the luncheon meat on its side on a cutting board. Slice lengthwise into 8 equal pieces. Clean out the can. Using a sharp knife, can opener or kitchen shears, remove the other side of the can. File down any sharp edges. Save for use as the musubi mold. Alternatively, you can purchase mold specifically for this spam musubi.
In a small bowl whisk together soy sauce and brown sugar. Pour over spam and let set for about five minutes. Heat a large skillet over medium-high heat. Layer the spam in the skillet ans sautee for 2-3 mintues per side, or until the spam begins to caramelize. Remove from pan and set aside.
To assemble the musubi, lay one sheet of nori on a clean work surface. Place one slice of spam in the center of the nori. set the mold over the spam.
With damp fingers press about 1/2 cup of sushi rice into the mold. Pack the rice down as firmly as possible. Remove the mold. Fold both sides of the nori over the rice, sealing edges with a little water. Place on a plate seam side down.
Serve warm or warp in cling wrap and refrigerate.
The Review:
Salty, sweet, and a little odd. People either love it with a passion or avoid it like the plague..though of those who dare try it, most seem to be ambivalent. Most of our guests at least sampled the Hawaiian snack. While it was bu no means anyone's favorite dish of the night, a new respect for the pink gelatinous lunch meat emerged. This version was a fair tribute to the musubi we had on the islands.
I've never been much of a fan of the salty meat product, but even this treat has its charms.
adapted from several people's input
makes 8 musubi
The Ingredients:
1 can Spam, original flavor
1 Tbsp soy sauce
2 Tbsp brown sugar
4 cups short grained sushi rice, cooked
4 sheets of nori, sliced in half lengthwise
small bowl of water
The Process:
Open the can of spam and set the luncheon meat on its side on a cutting board. Slice lengthwise into 8 equal pieces. Clean out the can. Using a sharp knife, can opener or kitchen shears, remove the other side of the can. File down any sharp edges. Save for use as the musubi mold. Alternatively, you can purchase mold specifically for this spam musubi.
In a small bowl whisk together soy sauce and brown sugar. Pour over spam and let set for about five minutes. Heat a large skillet over medium-high heat. Layer the spam in the skillet ans sautee for 2-3 mintues per side, or until the spam begins to caramelize. Remove from pan and set aside.
To assemble the musubi, lay one sheet of nori on a clean work surface. Place one slice of spam in the center of the nori. set the mold over the spam.
With damp fingers press about 1/2 cup of sushi rice into the mold. Pack the rice down as firmly as possible. Remove the mold. Fold both sides of the nori over the rice, sealing edges with a little water. Place on a plate seam side down.
Serve warm or warp in cling wrap and refrigerate.
The Review:
Salty, sweet, and a little odd. People either love it with a passion or avoid it like the plague..though of those who dare try it, most seem to be ambivalent. Most of our guests at least sampled the Hawaiian snack. While it was bu no means anyone's favorite dish of the night, a new respect for the pink gelatinous lunch meat emerged. This version was a fair tribute to the musubi we had on the islands.
Thursday, February 9, 2012
Chocolate Waffles with Cherry Bourbon Compote and Fresh Whipped Cream
Please excuse this minor break in the regularly scheduled luau menu...
Two weeks have passed since our last chance to enjoy Sunday morning waffles. Since that time I've created a short list of combinations I am itching to try. Chocolate waffles? Breakfast for dessert, baby. What better toppings to pair chocolate with than juicy cherries and velvety whipped cream. You may never go back to syrup again...
the compote recipe is my own
the whipped cream recipe is adapted from BHG Cookbook
the chocolate waffles are adapted from Gale Gand's recipe at FoodNetwork.com
Makes 4-8 waffles, depending on the waffle iron.
The Ingredients:
6 Tbsp sugar
1/4 cup water
1/4 cup bourbon
3 Tbsp fresh lemon juice
1 lb (about 2 1/2 cups) fresh cherries, rinsed and pitted
1/2 tsp vanilla extract
1/2 tsp corn starch
for the whipped cream
1 cup whipping cream
2 Tbsp sugar
1/2 tsp vanilla
for the waffles
2 eggs, separated
3 Tbsp sugar
1 1/2 cups milk
1 cup all-purpose flour
1/4 cup cocoa powder, preferably Dutch-processed
2 tsp baking powder
1/2 cup salted butter, melted
The Process:
for the compote
In a medium saucepan combine water, bourbon, sugar and lemon juice. Bring to boil over high heat, stirring until sugar dissolves. Continue to boil until thin syrup forms, about 7 minutes. Reduce to simmer; add cherries and vanilla extract. Cook over medium heat, stirring gently for 5 to 7 minutes, or until the cherries soften, but retain their shape. Remove cherries from the syrup with a slotted spoon and set aside in a serving dish. Add the corn starch to the syrup, whisking until well combined. Bring the syrup to gentle boil and cook until thickened and reduced by half, about 5 minutes. Pour syrup over cherries. Cool, cover and set aside.
for the whipped cream
In a chilled bowl combine whipping cream, sugar and vanilla. Beat with chilled beaters on medium speed until soft peaks form. Set aside in the fridge.
for the waffles
Preheat oven to 200 and warm up the waffle iron
In a medium bowl whisk the whites by hand or with a mixer until soft peaks form. Add the sugar and continue whipping until stiff.
In a medium bowl whisk the egg yolks and milk until well combined. Slowly incorporate the flour, cocoa powder, and baking powder. Add melted butter and mix until smooth. Gently old in the whipped whites, being careful not to overwork the batter.
Brush or mist the waffle iron lightly with oil and spoon batter into waffle iron, spreading quickly with a spatula to cover the entire griddle surface (amount varies depending on waffle iron, mine uses just over 1/2 a cup). Cook according to iron manufacturer’s instructions.
Transfer waffles to rack in oven to keep warm and crisp. Make more waffles in same manner.
The Review:
Pure unadulterated bliss. Tart cherries; red, ripe and round. Erupting with a juicy burst of bourbon. Smooth, velvety whipped cream offering a rich douse of sweetness to cut the tang of the fruit and slightly bitter cocoa. Wonderfully white and as pure and light as summer clouds. And the dark platter of decadence that supports it all...the rich chocolate waffle.
Taken together this combination is a force to be reckoned with. And for the most part the components stand well on their own. The only downside was the texture of the waffles. For some reason this version did not puff up and retain its shape as well as previous waffles had. The underside was nicely crisped while shielding a fluffy interior...the top side unfortunately remained slight soft and deflated quickly...no beautiful geometric ridges to contain the cherry studded heaven that the waffles supported. With a tweak or two to make the waffle stand on its own, this may be the best Belgian inspired breakfast variation yet.
Two weeks have passed since our last chance to enjoy Sunday morning waffles. Since that time I've created a short list of combinations I am itching to try. Chocolate waffles? Breakfast for dessert, baby. What better toppings to pair chocolate with than juicy cherries and velvety whipped cream. You may never go back to syrup again...
the compote recipe is my own
the whipped cream recipe is adapted from BHG Cookbook
the chocolate waffles are adapted from Gale Gand's recipe at FoodNetwork.com
Makes 4-8 waffles, depending on the waffle iron.
The Ingredients:
6 Tbsp sugar
1/4 cup water
1/4 cup bourbon
3 Tbsp fresh lemon juice
1 lb (about 2 1/2 cups) fresh cherries, rinsed and pitted
1/2 tsp vanilla extract
1/2 tsp corn starch
for the whipped cream
1 cup whipping cream
2 Tbsp sugar
1/2 tsp vanilla
for the waffles
2 eggs, separated
3 Tbsp sugar
1 1/2 cups milk
1 cup all-purpose flour
1/4 cup cocoa powder, preferably Dutch-processed
2 tsp baking powder
1/2 cup salted butter, melted
The Process:
for the compote
In a medium saucepan combine water, bourbon, sugar and lemon juice. Bring to boil over high heat, stirring until sugar dissolves. Continue to boil until thin syrup forms, about 7 minutes. Reduce to simmer; add cherries and vanilla extract. Cook over medium heat, stirring gently for 5 to 7 minutes, or until the cherries soften, but retain their shape. Remove cherries from the syrup with a slotted spoon and set aside in a serving dish. Add the corn starch to the syrup, whisking until well combined. Bring the syrup to gentle boil and cook until thickened and reduced by half, about 5 minutes. Pour syrup over cherries. Cool, cover and set aside.
for the whipped cream
In a chilled bowl combine whipping cream, sugar and vanilla. Beat with chilled beaters on medium speed until soft peaks form. Set aside in the fridge.
for the waffles
Preheat oven to 200 and warm up the waffle iron
In a medium bowl whisk the whites by hand or with a mixer until soft peaks form. Add the sugar and continue whipping until stiff.
In a medium bowl whisk the egg yolks and milk until well combined. Slowly incorporate the flour, cocoa powder, and baking powder. Add melted butter and mix until smooth. Gently old in the whipped whites, being careful not to overwork the batter.
Brush or mist the waffle iron lightly with oil and spoon batter into waffle iron, spreading quickly with a spatula to cover the entire griddle surface (amount varies depending on waffle iron, mine uses just over 1/2 a cup). Cook according to iron manufacturer’s instructions.
Transfer waffles to rack in oven to keep warm and crisp. Make more waffles in same manner.
The Review:
Pure unadulterated bliss. Tart cherries; red, ripe and round. Erupting with a juicy burst of bourbon. Smooth, velvety whipped cream offering a rich douse of sweetness to cut the tang of the fruit and slightly bitter cocoa. Wonderfully white and as pure and light as summer clouds. And the dark platter of decadence that supports it all...the rich chocolate waffle.
Taken together this combination is a force to be reckoned with. And for the most part the components stand well on their own. The only downside was the texture of the waffles. For some reason this version did not puff up and retain its shape as well as previous waffles had. The underside was nicely crisped while shielding a fluffy interior...the top side unfortunately remained slight soft and deflated quickly...no beautiful geometric ridges to contain the cherry studded heaven that the waffles supported. With a tweak or two to make the waffle stand on its own, this may be the best Belgian inspired breakfast variation yet.
Monday, February 6, 2012
Ahi Poke
This dish is Ross' kryptonite. It has been a sore spot since leaving Hawaii that we cannot find anything remotely similar to this marinated raw tuna in the Twin Cities metro. Sea Change makes a noble attempt, serving skewers of excellent fresh and fatty tuna with a drizzle of shoyu and sesame. But it's not the same. Poke was an everyman's food in Hawaii, not some delicacy served at raw bars, sushi houses and upscale seafood restaurants. Enter and supermarket and you'd be greeted with at least half a dozen varieties of the tender tidbit of raw fish at the deli counter.
This is my feeble attempt at grasping for that tropical ideal...
adapted from a recipe at food.com
The Ingredients:
2 lbs fresh ahi tuna
1 small round onion, julienned cut (Maui Onions preferred)
3 green onions, diced
1 tsp fresh ginger, minced
3 garlic cloves, minced
1/2 cup soy sauce
1 tsp sesame oil
1/2 tsp crushed red pepper flakes
1 tsp Chinese chili sauce (Rooster Brand)
1 tsp hawaiian sea salt or 1 teaspoon kosher salt
The Process:
Cut Ahi into half inch cubes. Place in large bowl, cover and refrigerate until ready to serve.
In another bowl, combine julienned onion, green onion, ginger, garlic, soy sauce, sesame oil, pepper flakes, chili sauce and salt. Stir well to combine and refrigerate for at least 30 minutes.
When ready to serve toss Ahi with the sauce. Let set for about ten minutes to marinate.
Serve on chilled platter with chopsticks or toothpicks.
The Review:
Unless you have a lot of sushi fans, this may not be the biggest hit. This was the one dish we had a lot of at the end of the night...not that Ross minded much.
Of all of the poke I remember, this version seemed particular salty. Perhaps too much soy sauce. The healthy red steaks quickly turned a dull brown once marinaded with the sauce too. Such a pity too...these were gorgeous tuna steaks to begin with.
The ginger and garlic lent a nice flavor but everything in combination seemed to overpower the tuna itself. In the case of poke, it would seem less is more. And the fresher thee fish the better...which is a feat in and of itself in a land locked state...
This is my feeble attempt at grasping for that tropical ideal...
adapted from a recipe at food.com
The Ingredients:
2 lbs fresh ahi tuna
1 small round onion, julienned cut (Maui Onions preferred)
3 green onions, diced
1 tsp fresh ginger, minced
3 garlic cloves, minced
1/2 cup soy sauce
1 tsp sesame oil
1/2 tsp crushed red pepper flakes
1 tsp Chinese chili sauce (Rooster Brand)
1 tsp hawaiian sea salt or 1 teaspoon kosher salt
The Process:
Cut Ahi into half inch cubes. Place in large bowl, cover and refrigerate until ready to serve.
In another bowl, combine julienned onion, green onion, ginger, garlic, soy sauce, sesame oil, pepper flakes, chili sauce and salt. Stir well to combine and refrigerate for at least 30 minutes.
When ready to serve toss Ahi with the sauce. Let set for about ten minutes to marinate.
Serve on chilled platter with chopsticks or toothpicks.
Unless you have a lot of sushi fans, this may not be the biggest hit. This was the one dish we had a lot of at the end of the night...not that Ross minded much.
Of all of the poke I remember, this version seemed particular salty. Perhaps too much soy sauce. The healthy red steaks quickly turned a dull brown once marinaded with the sauce too. Such a pity too...these were gorgeous tuna steaks to begin with.
The ginger and garlic lent a nice flavor but everything in combination seemed to overpower the tuna itself. In the case of poke, it would seem less is more. And the fresher thee fish the better...which is a feat in and of itself in a land locked state...
Saturday, February 4, 2012
Chicken Long Rice
No luau would be complete without several offerings of carbs. Rice and macaroni salad usually round out the plate lunch found around the island. To add a little variety to our starchy friends, we included chicken long rice.
The concept is simple...Mi-fen noodles softened and cut into short lengths and simmered in a ginger and garlic studded chicken broth.
adapted from a recipe at Aloha Friends Luau
serve 10-12
The Ingredients:
2-3 chicken thighs, with skin and bones
6 cups water
2 tsp chicken bouillon
1 Tbsp fresh ginger, minced
1 teaspoon Hawaiian salt, sea salt, or Kosher salt
2-3 cloves garlic, crushed
6 bundles rice vermicelli or mi-fen (2-6 oz packages)
The Process:
Place chicken thighs in large saucepan with water and bouillon. Add crushed ginger, salt, and garlic. Bring to a boil and then cover, simmering for 45 minutes or until chicken is tender and no longer pink. Remove the chicken from the stock and allow to cool. Remove the skin and bones. Shred the chicken meat and set aside. Reserve broth.
Meanwhile soak the rice noodles in hot water for about 10 minutes or until soft. Cut noodles in 4 inch lengths, and add to reserved broth. Bring to a boil, reduce heat and simmer for 15 minutes. Add shredded chicken and continue to simmer until chicken is heated through. Adjust seasoning to taste with salt, pepper, or soy sauce.
Serve warm or refrigerate for a cold noodle salad.
The Review:
Of all of the sides offered at the luau this came second only to the macaroni salad (which was store bought--I had enough cooking on my plate!). An odd douse of suspicion kept many guests from trying it until they learned it was simply a chicken noodle dish.
A rich chicken flavor shone through the simple noodles with the garlic and ginger adding a lovely balance. Most of the recipes I found included mushrooms as well, which I sadly omitted to give the dish a greater appeal. For those not afraid of fungus, I imagine the 'shrooms would add a wonderful, earthy depth.
Unlike many of the fast food varieties and plate lunch offerings I had sampled on the islands, this version maintained a bit of firmness to the noodles instead of disintegrating into a vaguely chicken flavored mush. The noodles take no time at all to cook...overcooking is such a shame...
With all of the other side offerings at our luau a little of this dish went a long, long way. I would highly recommend halving the amount unless this is served for a crowd or as the main course. I'll be eating chicken long rice at lunch for several days. So far, it holds up very well as a leftover!
Thursday, February 2, 2012
Huli Huli Chicken
Walking around Honolulu on a Saturday afternoon you are bound to come across the drifting aroma of countless barbeques. Occasionally the rich meaty smells float on wafts of smoke emanating from school or church parking lots. Probably a fundraiser. Most likely serving Huli Huli Chicken.
Huli Huli means turn turn in Hawaiian, and often you'll see whole birds sandwiched between grills and turned over flames at the larger events. The marinade is something between a teriyaki and a Kansas City BBQ sauce, and oh so wonderful.
With the freezing cold and lack of a grill, we were unable to replicate the charred BBQ beauty of these birds, but in a pinch our broiler did a wonderful job.
adapted from John's recipe at Hawaii Magazine
serves 10-12
The Ingredients:
3 chickens, cut into pieces
1/3 cup ketchup
1/3 cup soy sauce
1/4 cup brown sugar
1/4 cup honey
1/4 cup sherry
1-2 Tbsp. sesame oil
1-2-more pieces ginger root, crushed
3 cloves garlic, crushed
Worchestershire sauce to taste
Sriracha or Asian chili paste (or red pepper flakes) to taste
Squeeze a lemon in if you've got one
The Process:
Trim the chicken as desired, rinse and pat dry. Pierce in several places with a sharp knife and set aside.
Combine the remaining ingredients in a medium bowl and whisk until well combined. Divide th chicken into large shallow dishes or freezer bags and cover with marinade. Cover and refridgerate for 2 to 3 hours, turning once.
Grill chicken over hot coals, turning frequently and basting with remaining marinade. Or broil in the oven, 8 to 10 minutes per side , turning once.
The Review:
Charred, tender and just a touch of sweet, these birds sang at the Luau. The pieces had been transferred to a slow cooker to stay warm through out the evening, which lead to soggy skin, but otherwise this was a pleasant BBQ twist for many of our guests.
I look forward to trying this on the grill when the weather warms up!
Huli Huli means turn turn in Hawaiian, and often you'll see whole birds sandwiched between grills and turned over flames at the larger events. The marinade is something between a teriyaki and a Kansas City BBQ sauce, and oh so wonderful.
With the freezing cold and lack of a grill, we were unable to replicate the charred BBQ beauty of these birds, but in a pinch our broiler did a wonderful job.
adapted from John's recipe at Hawaii Magazine
serves 10-12
The Ingredients:
3 chickens, cut into pieces
1/3 cup ketchup
1/3 cup soy sauce
1/4 cup brown sugar
1/4 cup honey
1/4 cup sherry
1-2 Tbsp. sesame oil
1-2-more pieces ginger root, crushed
3 cloves garlic, crushed
Worchestershire sauce to taste
Sriracha or Asian chili paste (or red pepper flakes) to taste
Squeeze a lemon in if you've got one
The Process:
Trim the chicken as desired, rinse and pat dry. Pierce in several places with a sharp knife and set aside.
Combine the remaining ingredients in a medium bowl and whisk until well combined. Divide th chicken into large shallow dishes or freezer bags and cover with marinade. Cover and refridgerate for 2 to 3 hours, turning once.
Grill chicken over hot coals, turning frequently and basting with remaining marinade. Or broil in the oven, 8 to 10 minutes per side , turning once.
The Review:
Charred, tender and just a touch of sweet, these birds sang at the Luau. The pieces had been transferred to a slow cooker to stay warm through out the evening, which lead to soggy skin, but otherwise this was a pleasant BBQ twist for many of our guests.
I look forward to trying this on the grill when the weather warms up!
Subscribe to:
Posts (Atom)