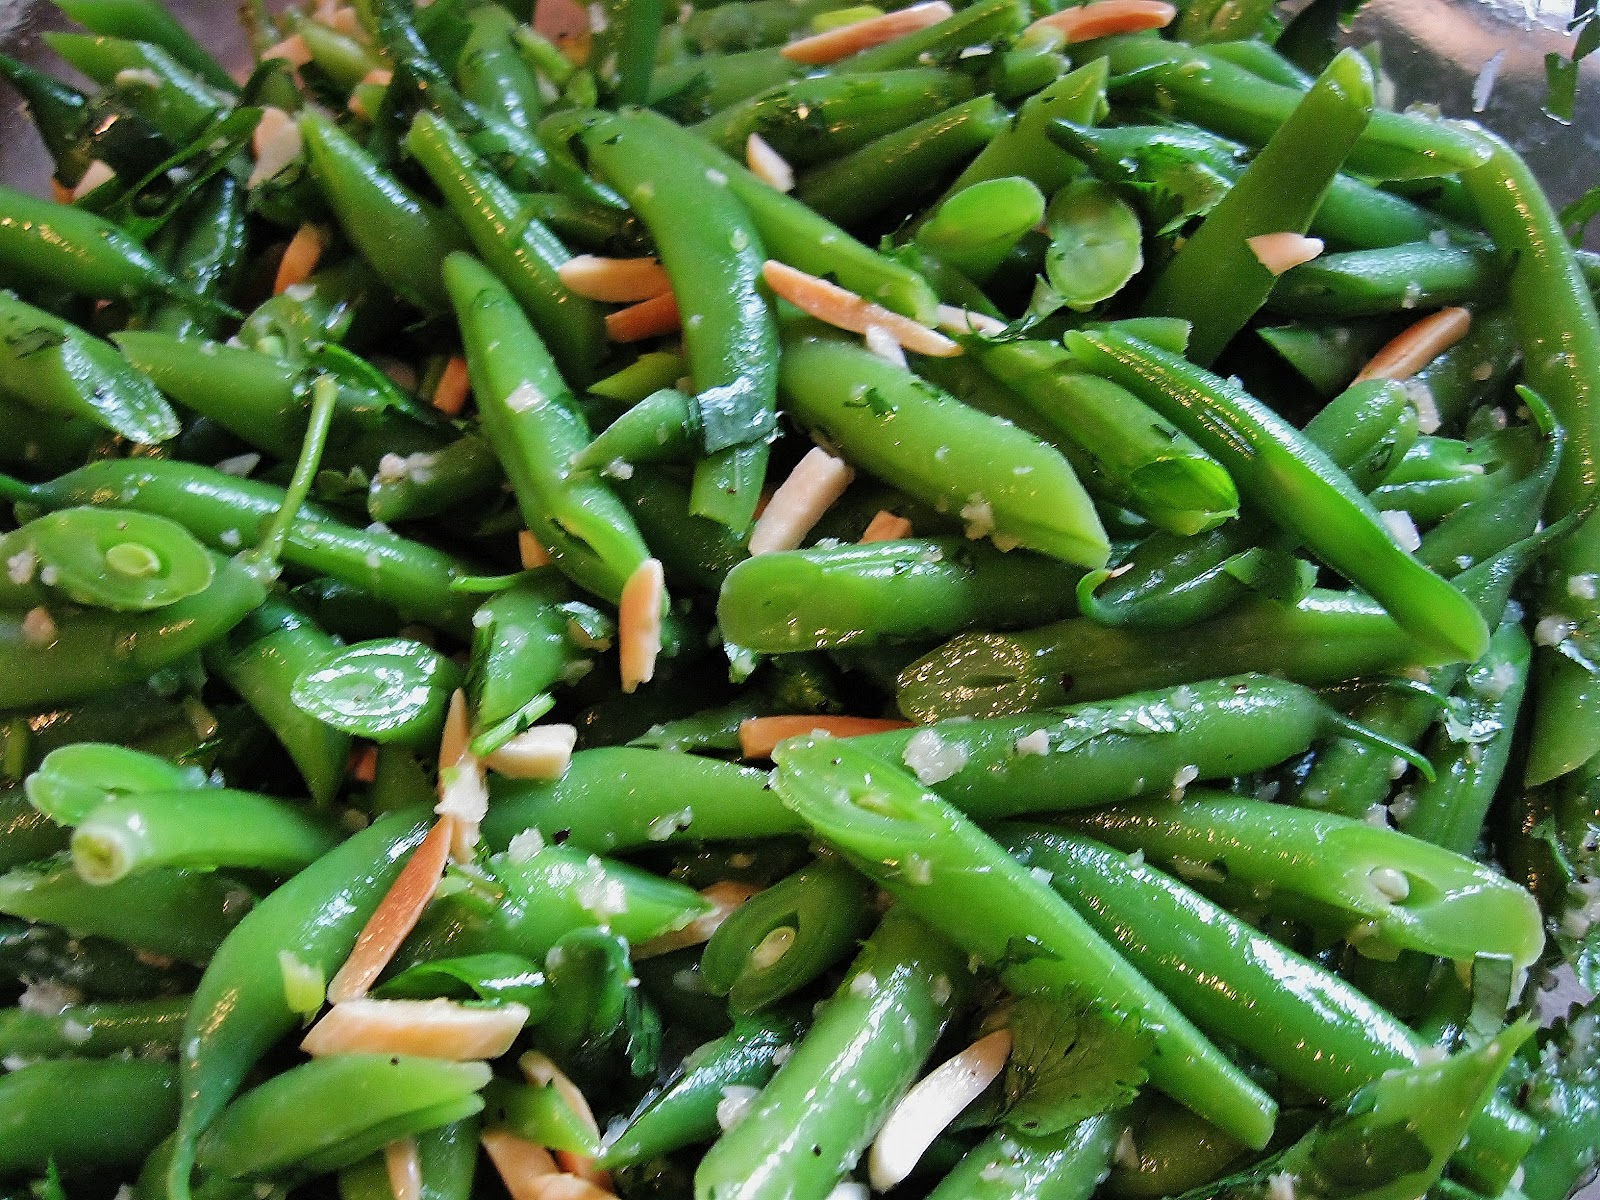
East meets West in this lovely cold green bean salad. With the scortching hot days we've been having, I've little desire to stand around in my kitchen. Perhaps I'd have a different view if the overworked window unit actually had any affect in our house on days like this. But until the luxury of central air is added to our home, I've little choice but to endure the heat.
One of the joys of this salad is the short amount of time needed over a heating element. Only a quick blanch in boiling water. Toss with the other ingredients and serve. Think of is as a chilled green beans almondine with a ginger sot dressing and generous helping of cilantro. Asian-influenced green beans? Ginger-soy dressings? I do seem to repeat myself, don't I?
recipe courtesy of NPR
serves 4-6
The Ingredients:
1 lb slender green beans
1 cup slivered almonds, lightly toasted
2-3 scallions, finely sliced on the diagonal (use both white and green parts)
1/2 cup fresh cilantro, chopped
for the dressing:
2 inch piece of fresh ginger, minced
2 garlic cloves, minced
1 tablespoon sesame oil
2 tablespoons rice vinegar
1 teaspoon soy sauce
The Process:
Wash the green beans and trim away the stem ends
Prep an extra large bowl or the basin of the sink with cold water and 1-2 dozen ice cubes. Set a colander near at hand.
Bring
a large pot of generously salted water to a boil. Once the water comes to a rolling boil, add the beans and cook briefly: 1 or 2
minutes for thin haricots, 4 or 5 minutes for more mature beans. Once the beans turn vibrant green but are still firm, drain quickly into a colander. Immediately submerge the colander into the ice bath to shock the green beans, preventing them from cooking further. Agitate them briefly to evenly chill (about a
minute). Remove the colander from the ice bath and allow to drain.
Once the beans have drained, slice them on the diagonally into 1 to 1-1/2 inch pieces
To prepare the dressing, pound the ginger and garlic into a paste using a mortar and pestle. Or mince them together as finely as you can,
and mash with the side of a chef's knife or the back of a spoon. Add to a large bowl and whisk in the
oil, vinegar,and soy sauce.. Add the blanched
beans, scallions and cilantro; toss to coat. Sprinkle with almonds. Serve chilled or room temperature.
The Review:
After many a hot green bean dish, this salad was a treat. Slightly blanched beans are incredibly sweet and still hold onto their amazing crispness. Too often have I bit into an overcooked bean and lamented the lack of that pleasant snap. Watch them carefully...green beans, particularly thin fresh ones, take little more than a blink of an eye to cook.
Another concern...toss the beans only immediatley before serving. I learned this the hard way from a three bean salad. Three hours after prepping the salad, the taste was still fresh and fragrant, but the green beans had turned a unappetizing shade of olive from soaking too long in the vinegar. Lesson learned.
This salad did not last long at all. I hope yours is equally as successful!
Seize the food! A new year's resolution to experiment with 100 new recipes in the coming year.
Saturday, July 14, 2012
Thursday, July 12, 2012
Spaghetti with Rainbow Chard
For a quick and light weekend lunch, pasta is always near at hand in our household (I really should consider making some pasta from scratch one of these days.) Thankfully tomato sauce isn't the only option available to the hungry eater. This veggie and garlic topping was was inspired by the beautiful bunch of rainbow chard that came in the CSA box
the recipe is my own
serves 3-4
The Ingredients:
8 oz uncooked whole wheat spaghetti
2 Tbsp olive oil
2-3 cloves of garlic, minced
2-3 green onions, chopped
2 roma tomatoes, diced
1 Tbsp fresh parsley, minced
1 Tbsp fresh basil, minced
1 bunch of rainbow chard, stems and leaves separated
salt and pepper to taste
splash of red wine
Parmesan cheese (optional)
The Process:
Cook the pasta al dente, according to package directions. Drain and set aside
Heat the oil in a large skillet over medium heat. Add the garlic and onions. Saute until the garlic is fragrant and tender, about 2-3 minutes. Add the tomatoes, parsley, and basil and cook until the tomatoes begin to break down. Stir in the chard stems, simmering until tender. Add a splash of wine and season with salt and pepper. Add the chopped chard leaves and stir until wilted.
Toss with pasta. Sprinkle with Parmesan and serve hot.
The Review:
This may not become a fast favorite for spaghetti...or greens for that matter. But this prepartion was a refreshing change of pace for both. How freeing not to have to rely on red sauce for pasta. And plain greens sauteed with garlic...so dull after a while. The humbrum and routine can really bring a person down.
The vibrancy of the chard stems truly is a pick-me-up here...and the colors did not diminish in cooking. Beautiful deep greens; glowing pinks. yellows and oranges. All kissed with the bright red from the tomatoes. Next time around I'd likely use a squeeze of lemon juice instead of that splash of wine. A touch more garlic and ground pepper may be in order as well.
The leaves of this particular batch of chard were on the larger side. As a result the greens were a bit tougher and more bitter than I would have liked. But I nit pick. Spinach, kale, or greens of the mustard, turnip or collard variety would probably work equally as well.
the recipe is my own
serves 3-4
The Ingredients:
8 oz uncooked whole wheat spaghetti
2 Tbsp olive oil
2-3 cloves of garlic, minced
2-3 green onions, chopped
2 roma tomatoes, diced
1 Tbsp fresh parsley, minced
1 Tbsp fresh basil, minced
1 bunch of rainbow chard, stems and leaves separated
salt and pepper to taste
splash of red wine
Parmesan cheese (optional)
The Process:
Cook the pasta al dente, according to package directions. Drain and set aside
Heat the oil in a large skillet over medium heat. Add the garlic and onions. Saute until the garlic is fragrant and tender, about 2-3 minutes. Add the tomatoes, parsley, and basil and cook until the tomatoes begin to break down. Stir in the chard stems, simmering until tender. Add a splash of wine and season with salt and pepper. Add the chopped chard leaves and stir until wilted.
Toss with pasta. Sprinkle with Parmesan and serve hot.
The Review:
This may not become a fast favorite for spaghetti...or greens for that matter. But this prepartion was a refreshing change of pace for both. How freeing not to have to rely on red sauce for pasta. And plain greens sauteed with garlic...so dull after a while. The humbrum and routine can really bring a person down.
The vibrancy of the chard stems truly is a pick-me-up here...and the colors did not diminish in cooking. Beautiful deep greens; glowing pinks. yellows and oranges. All kissed with the bright red from the tomatoes. Next time around I'd likely use a squeeze of lemon juice instead of that splash of wine. A touch more garlic and ground pepper may be in order as well.
The leaves of this particular batch of chard were on the larger side. As a result the greens were a bit tougher and more bitter than I would have liked. But I nit pick. Spinach, kale, or greens of the mustard, turnip or collard variety would probably work equally as well.
Labels:
30 minute meal,
basil,
CSA,
entree,
garlic,
greens,
italian,
pasta,
tomato,
vegan,
vegetarian
Tuesday, July 10, 2012
Sorrel Risotto
One interesting discovery...no mater how much sorrel I added, the bright green arrow-shaped leaves will cook down to nearly nothing. Nothing but flecks. You could have just srpinkle the dish with a smattering of dry herbs and it'll look all the same for it.
It make me curious to see how it fairs in a soup...
adapted from the basic risotto directions from Village Harvest
serves 6-8
The Ingredients:
4 Tbsp sorrel butter
2 Tbsp olive oil
1 medium onion
1 1/2 cups short grain rice, such as arborio
5 cup chicken or vegetable stock
1 bunch (10-12 leaves) of sorrel, minced
salt and pepper to taste
The Process:
Brown the onion in the oil and butter in a 2 qt saucepan over medium heat. Saute until the onion is tender and beginning to brown.
In another saucepan, bring the stock to a gentle simmer.
Add the rice to the onion, butter, oil mixture and stir until well coated. Add just enough stock to cover the rice. Bring to a simmer and stir frequently. As the rice absorbs the stock, add the remaining stock, one ladelful at a time...adding the next addition as the previous is absorbed.
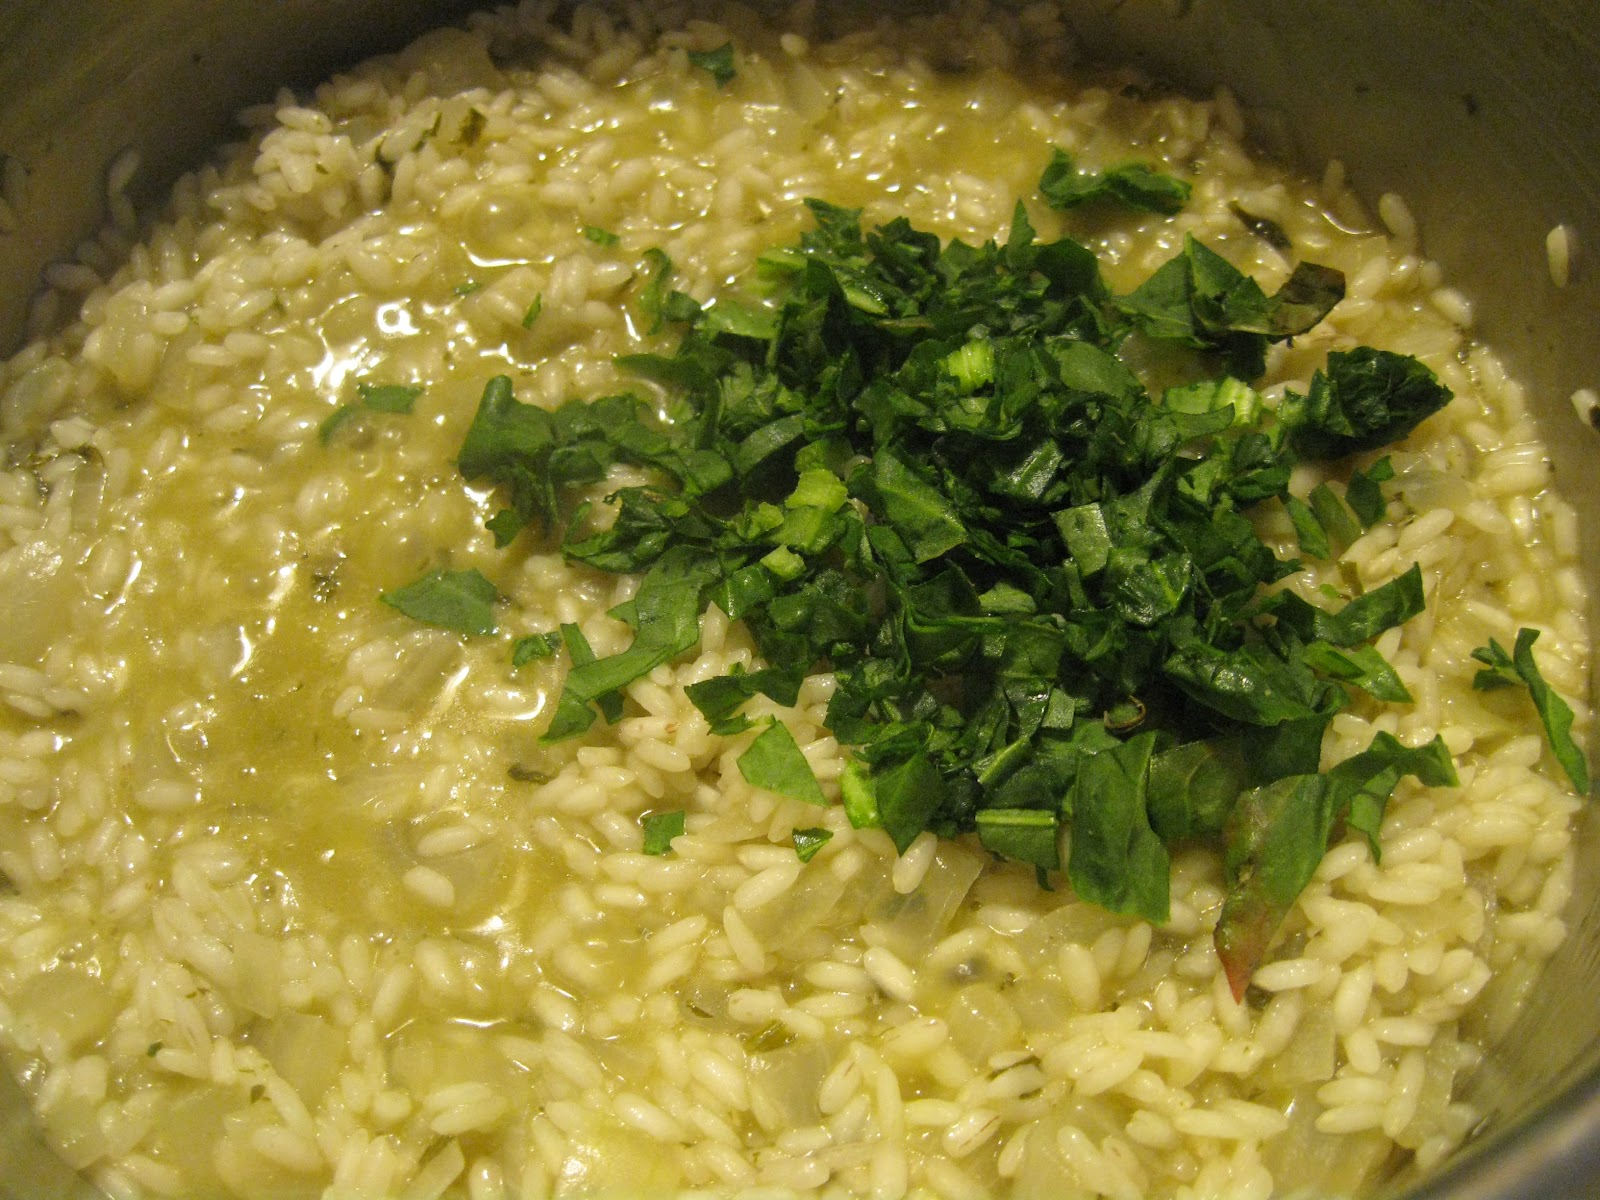
One minute it's there...
After about half of the stock has been added, stir in the minced sorrel. Continue to add the stock as before, stirring frequently.
The next, it's gone.
Once the last of the stock has been absorbed, remove the risotto from the heat. Add salt and pepper to taste. Allow the risotto to rest for five minutes before serving.
The Review:
Remember the classic chicken rice a roni? Yeah. This is that. Only so much better. The sorrel disintergrates into almost nothing. Leaving only little specks of its former green glory behind. And an incredibly subtle flavor. No...not quite a flavor, but an enhancement of the onion and stock. With a hint...the near indecernable suggestion of sour...like the notes left behind from a wine reduction.
It is elegant. And simple. A nostalgic rice treat. But now for adults...
Sunday, July 8, 2012
Roasted Chicken with Sorrel
I'm not sure where I first encountered it. An article on food in my youth. My sister experimenting with roast chicken. A snippet of a cooking show. But I was hooked the moment I discovered the trick...
Herbs layered under the poultry skin. The skin glistened...all golden and crisp...and through it, a beautiful arrangement of bay leaves, parsley and thyme. I continued this little tip off and on as I experimented with roasting chicken and turkey. Turkey was more frequently used, as the breast provided a much larger palette than their smaller poultry cousins.
When two bunches of fresh sorrel arrived in my CSA box this was my first idea. Well...after poking around in my cookbooks and online t learn more about sorrel. Driftless Organics describes the leafy herb as having a lemony flavor. Elsewhere it is described as similar to kiwi fruit or sour strawberries. Tasting it, I can certain detect these comparison...but something more. a bit peppery...almost grassy. Even a hint of raw rhubarb. That tang immediately paired it with chicken in my mind.
Many of the recipes I found when researching sorrel were for soups. And most recipes seem to come to us via the UK. Oddly enough, I found a recipe at the BBC providing a roast bird, just the way I hoped...rubbed with herbs and stuffed with lemon. The key being herbs slathered under the skin, of course.
Adapted from Steve Wallis' recipe at the BBC
serves 4
The Ingredients:
1 - 3 lb roasting chicken
6 sorrel leaves, finely chopped
1 lemon, quartered
2 bay leaves
1 bulb fresh garlic
1 bunch fresh thyme
salt and pepper
The Process:
Preheat the oven to 375
Combine the butter and sorrel in a bowl. Mound the sorrel butter on a square of wax paper and roll into a log. Refrigerate until ready to use.
Starting at the neck end, loosen the skin of the bird from the breast, being careful not to tear. Generously spread the butter under the skin and all over the surface of the bird (you will use about half of the butter). Reserve the remaining butter for a later use. Place the lemon, bay leaves, garlic and thyme into the cavity. Truss the chicken. Season with salt and pepper.
Place in a roasting pan, breast side up. Roast, uncovered, for about 60 minutes or until juices run clear and the internal temperature reaches 160.
Remove the chicken from the oven and turn the bird breast side down to allow
the juices to run into the breast meat. Cover loosely in aluminum foil and leave
to rest for 15 minutes in a warm place, reserving the pan juices to use
for gravy, if desired.
Transfer the bird to a carving board, carve and serve.
The Review:
A tasty bird, to be sure, but sadly this chicken was largely forgettable. Oh, the meat was tender and succulent (do people even use that word any more? Succulent?) Juicy through and through. Sadly I've had many a crisper skin. Lesson learned...hotter oven. I've made enough roats chicken to know not to set the oven below 400.
The flavor hinted at citrus and lemon, but in a vague, teasing way. I hoped the sorrel would impart more favor. Turns out, as lovely as the sorrel butter was, most of the dish drew its character from the lemon and garlic stuffed into the cavity. Will I try it again? Probably. But with a higher heat and a bit more help from basics like salt and pepper.
A tasty bird, to be sure, but sadly this chicken was largely forgettable. Oh, the meat was tender and succulent (do people even use that word any more? Succulent?) Juicy through and through. Sadly I've had many a crisper skin. Lesson learned...hotter oven. I've made enough roats chicken to know not to set the oven below 400.
The flavor hinted at citrus and lemon, but in a vague, teasing way. I hoped the sorrel would impart more favor. Turns out, as lovely as the sorrel butter was, most of the dish drew its character from the lemon and garlic stuffed into the cavity. Will I try it again? Probably. But with a higher heat and a bit more help from basics like salt and pepper.
Friday, July 6, 2012
Picnic Pesto Pasta Salad
A few days ago I got fed up with arugula and turned a huge bunch of it into a very tasty pesto. However, it is also a very potent pesto. So its consumption has been slow. Thankfully, a picnic party presented itself. Potluck style. Perfect.
Presto...Picnic presto pasta.
The salad recipe is my own, using Driftless Organic's arugula pesto recipe
serves 8-10
The Ingredients:
16 oz dry farfelle, rigatoni or other pasta of your choice
2 Tbsp olive oil
3/4 cup pesto
1 1/2 cup fresh or previously frozen peas
1 large red bell pepper, cut julienne
1 pint cherry tomatoes, halved
1/2 cup green olives, sliced
2 Tbsp capers, drained
salt and pepper to taste
The Process:
Cook the pasta al dente and drain. Transfer to a large bowl and toss with olive oil. Add the remaining ingredients and mix until well combined. Refrigerate at least 1 hour before serving. Serve chilled or room temperature.
The Review:
The secret to this dish is truly in the pesto. So use your favorite variety. I am a huge advocate of homemade whenever possible...that and I had a ton of leftover pesto...but many a store bought variety with suffice. I love the salty, briny flavors added by the olives and capers, coupled with the sweet crunch of the peppers and tomatoes.
One of the best things about dishes like this is its adaptability. Throw in whatever veggies you want...broccoli, artichoke hearts, zucchini...
Or a bit of meat? Why not. Leftover rotisserie chicken or even bites of salami would work wonderfully.
Everybody has a favorite combination..
What's yours?
Presto...Picnic presto pasta.
The salad recipe is my own, using Driftless Organic's arugula pesto recipe
serves 8-10
The Ingredients:
16 oz dry farfelle, rigatoni or other pasta of your choice
2 Tbsp olive oil
3/4 cup pesto
1 1/2 cup fresh or previously frozen peas
1 large red bell pepper, cut julienne
1 pint cherry tomatoes, halved
1/2 cup green olives, sliced
2 Tbsp capers, drained
salt and pepper to taste
The Process:
Cook the pasta al dente and drain. Transfer to a large bowl and toss with olive oil. Add the remaining ingredients and mix until well combined. Refrigerate at least 1 hour before serving. Serve chilled or room temperature.
The Review:
The secret to this dish is truly in the pesto. So use your favorite variety. I am a huge advocate of homemade whenever possible...that and I had a ton of leftover pesto...but many a store bought variety with suffice. I love the salty, briny flavors added by the olives and capers, coupled with the sweet crunch of the peppers and tomatoes.
One of the best things about dishes like this is its adaptability. Throw in whatever veggies you want...broccoli, artichoke hearts, zucchini...
Or a bit of meat? Why not. Leftover rotisserie chicken or even bites of salami would work wonderfully.
Everybody has a favorite combination..
What's yours?
Labels:
30 minute meal,
arugula,
entree,
garlic scapes,
pasta,
picnic
Wednesday, July 4, 2012
Yogurt Banana Muffins with Streusel Topping
This is not a healthy muffin. I know, I know! But it uses yogurt! Half the flour is whole wheat! It uses fruit and wheat germ! How can it not be healthy! Well...the stick of butter certainly doesn't help. Or the sugar. Never mind the fact that's it's mostly a carb bomb...
Okay, these may be a more healthful version than many out there...particularly among the pre-packaged varieties.
But don't be fooled. These aren't health food.
Know what, though? I don't care. They're still darn tasty.
I had started out with a recipe at food.com, but honestly was so taken aback by the amount of butter and sugar I almost started over with another recipe. Thus commenced a lot of tweaking. Less sugar...and using more brown sugar than granulated. Halving the amount of butter. Increasing the yogurt. Adding some spice. And a streusel topping. Still not a healthy muffin.
muffin recipe adapted from Sharon at food.com and BHG
topping adapted from the BHG Cookbook
yields 12 muffins
The Ingredients:
for the muffin:
4 Tbsp unsalted butter, room temperature
1/4 sugar
1/2 cup brown sugar
2 eggs
1 tsp vanilla extract
2/3 cup plain, unsweetened yogurt
1 cup ripe bananas, mashed (about 2-3)
3/4 cup white flour
3/4 cup whole wheat flour
1 Tbsp wheat germ
1 tsp baking soda
1/2 tsp salt
1/2 tsp cinnamon
The Process:
Preheat the oven to 400. Lightly grease a 12-count muffin tin (do not use baking liners...they will stick).
In a large bowl, cream together the butter, sugar, eggs and vanilla. Mash in the bananas and yogurt. In a separate bowl, sift together the flours, wheat germ, baking soda, salt and cinnamon.
Add the dry to the wet, mixing until just combined.
For the topping, combine the flour, brown sugar, and cinnamon. Cut in the butter until the mixture resembles coarse crumbs.
Pour the batter into the muffin liners, filling about 2/3 full. Sprinkle the streusel generously over the top. Bake for 15-20 minutes or until a toothpick poked in the center comes out clean. Cool in the tin for 5 minutes. Serve warm.
Okay, these may be a more healthful version than many out there...particularly among the pre-packaged varieties.
But don't be fooled. These aren't health food.
Know what, though? I don't care. They're still darn tasty.
I had started out with a recipe at food.com, but honestly was so taken aback by the amount of butter and sugar I almost started over with another recipe. Thus commenced a lot of tweaking. Less sugar...and using more brown sugar than granulated. Halving the amount of butter. Increasing the yogurt. Adding some spice. And a streusel topping. Still not a healthy muffin.
muffin recipe adapted from Sharon at food.com and BHG
topping adapted from the BHG Cookbook
yields 12 muffins
The Ingredients:
for the muffin:
4 Tbsp unsalted butter, room temperature
1/4 sugar
1/2 cup brown sugar
2 eggs
1 tsp vanilla extract
2/3 cup plain, unsweetened yogurt
1 cup ripe bananas, mashed (about 2-3)
3/4 cup white flour
3/4 cup whole wheat flour
1 Tbsp wheat germ
1 tsp baking soda
1/2 tsp salt
1/2 tsp cinnamon
for the streusel topping:
1/4 cup flour
1/4 cup brown sugar
1/2 tsp cinnamon
2 Tbsp unsalted butter
The Process:
Preheat the oven to 400. Lightly grease a 12-count muffin tin (do not use baking liners...they will stick).
In a large bowl, cream together the butter, sugar, eggs and vanilla. Mash in the bananas and yogurt. In a separate bowl, sift together the flours, wheat germ, baking soda, salt and cinnamon.
Add the dry to the wet, mixing until just combined.
For the topping, combine the flour, brown sugar, and cinnamon. Cut in the butter until the mixture resembles coarse crumbs.
Pour the batter into the muffin liners, filling about 2/3 full. Sprinkle the streusel generously over the top. Bake for 15-20 minutes or until a toothpick poked in the center comes out clean. Cool in the tin for 5 minutes. Serve warm.
The Review:
I won't say these are the best ever banana muffins out there. Far too many muffins already lay that claim, and I know I'm no pastry chef. But they are a favorite by far.
The muffin texture was unlike many a quick bread I've tried. It was less crumb and more bread like. Spongy and soft. Wonderfully moist. The banana flavor was not as strong as other banana breads. Which I personally loved.
These will be a regular use of those over ripe bananas from now on.
The muffin texture was unlike many a quick bread I've tried. It was less crumb and more bread like. Spongy and soft. Wonderfully moist. The banana flavor was not as strong as other banana breads. Which I personally loved.
These will be a regular use of those over ripe bananas from now on.
Monday, July 2, 2012
Arugula and Garlic Scape Pesto
Enough with the arugula, please! Every week for the past month we've been blessed with an incredibly large bag of the peppery greens. But there's only some much of it I can handle! Our farm has promised this to be the last bunch (for a while, if not for the season). The ridiculously hot and dry weather that part of the state has been dealing with resulted in the arugula all coming ready far before expected.
This batch, this possible last bundle, was full of large mature leaves even more fragrant then baby greens we'd been treated to earlier. Taking the farm's suggestion, I turned this last bunch into a pesto.
recipe courtesy of Driftless Organics
yields about 2 cups
The Ingredients:
1 cup garlic scapes cut into 1" pieces
2 cups chopped arugula, lightly packed
1/2 cup almonds, toasted
1/4 cup Parmesan cheese, grated
1/2 tsp salt
freshly ground pepper
1/3 cup olive oil
The Process:
Combine everything but the oil in a food processor and pulse into a coarse paste. Add oil in a thin stream while the processor is going. Store in an air-tight container in the fridge for up to a week or freeze.
The Review:
Now that you have that bright green concoction, how do you use it? First I tried a spoonful and was wowed by how the usually subtle flavor of the scapes came forward.
Next we tired is tossed with pasta. A little bit of pesto went a very long way. The flavor was bright and grassy...rounded out with the rich, but not overwhelming garlic.
How else? Straight up with fresh veggies. Not bad...but the strong flavor of the pesto was a bit much for the delicate red pepper and snap peas. WAY too peppery served with raw radish, but worth the try.
Spread on buttered bread and broiled? Amazing.
Mixed with a bit of cream cheese and scooped up with celery...a much better alternative with raw veggies than served straight up.
So many ways...so many things to try.
I'm a little disappointed I didn't start making pesto with the arugula earlier!
This batch, this possible last bundle, was full of large mature leaves even more fragrant then baby greens we'd been treated to earlier. Taking the farm's suggestion, I turned this last bunch into a pesto.
recipe courtesy of Driftless Organics
yields about 2 cups
The Ingredients:
1 cup garlic scapes cut into 1" pieces
2 cups chopped arugula, lightly packed
1/2 cup almonds, toasted
1/4 cup Parmesan cheese, grated
1/2 tsp salt
freshly ground pepper
1/3 cup olive oil
The Process:
Combine everything but the oil in a food processor and pulse into a coarse paste. Add oil in a thin stream while the processor is going. Store in an air-tight container in the fridge for up to a week or freeze.
The Review:
Now that you have that bright green concoction, how do you use it? First I tried a spoonful and was wowed by how the usually subtle flavor of the scapes came forward.
Next we tired is tossed with pasta. A little bit of pesto went a very long way. The flavor was bright and grassy...rounded out with the rich, but not overwhelming garlic.
How else? Straight up with fresh veggies. Not bad...but the strong flavor of the pesto was a bit much for the delicate red pepper and snap peas. WAY too peppery served with raw radish, but worth the try.
Spread on buttered bread and broiled? Amazing.
Mixed with a bit of cream cheese and scooped up with celery...a much better alternative with raw veggies than served straight up.
So many ways...so many things to try.
I'm a little disappointed I didn't start making pesto with the arugula earlier!
Subscribe to:
Posts (Atom)