Friday, June 17, 2011

Quinoa with Currents, Dill and Zucchini


I have have been noticing quinoa more and more frequently as of late. First quinoa 'sliders' were appearing in a restaurant here and there as a veggie version of the appetizer-sized burgers. Then our grocer started stocking it in their bulk section in addition to offering packaged parcels from Bob's Red Mill. And now an onslaught of summer salad recipes has bombarded me while on the prowl for new dishes.

I'll take this all as a sign that it is time explore this ancient grain.

adapted from Ancient Grains for Modern Meals, by Maria Speck

serves 6

The Ingredients:
1 Tbsp extra-virgin olive oil
1 bunch green onions, chopped
3/4 tsp fine-grain sea salt
1 cup quinoa, well rinsed and drained
2 cups water
1/4 cup dried currants
1 lemon
2 sm-med zucchini, grated on box grater
4 Tbsp toasted sesame seeds
4 Tbsp chopped fresh dill

feta cheese, crumbled - as much or as little as you like (omitted for a vegan version)

The Process:
To make the quinoa, heat the olive oil in a medium saucepan over medium heat. Add most of the green onions, a pinch of the salt, and cook until the onions soften, just a couple minutes. Add the quinoa and cook, stirring occasionally, until the grains dry out and toast a bit, roughly another 3 minutes. Add the water, the currants, the remaining salt; bring to a boil. Dial back the heat and simmer, covered, until the water is absorbed and the quinoa is just cooked through- 15 minutes or so. Be mindful here, you don't want to overcook the quinoa, and have it go to mush.

While the quinoa is cooking zest the lemon, and squeeze 2 tablespoons of lemon juice into a small bowl.

When the quinoa is cooked, remove the pan from the heat. Stir in the zucchini, lemon juice and zest, most of the sesame seeds, and most of the dill. Taste and adjust for salt.

Serve, turned out onto a platter, topped with crumbled feta, and the remaining green onions, sesame seeds, and dill.

The Review:
The zested lemon and chopped dill tickled my senses as I awaited the quinoa to finish cooking. This pairing has frequently accompanied fish dishes in the past. This recipe marks the first time dill and lemon would be mixed with grains.

And I felt a little let down. The lemon provided all tart and sour without the refreshing citrus notes. I did not find the flavors to meld well with the nutty quinoa. The sweetness of the currants was sporadic from one bite to the next, not allowing it to compliment the tartness of the lemon. The zucchini quickly wilted from the steam, which was a blessing...those first initial forkfuls unfortunately yielded a chalky flavor from the raw squash. The feta added some much needed salt.
Link
The textures however were amazing...the creaminess of the quinoa, paired with the crunch of the sesame seeds. And the dished looked like a beautiful experiment in pointillism.

On the blog where I originally located the recipe, the writer suggested forming patties out of any leftovers...adding an egg and bread crumb to help bind the mixture. I did try this, adding a touch of salt as well. The quinoa patties, once formed and fried had a much more balanced flavor...but crumbled very easily.

I won't give up on quinoa. I just do not believe this was a recipe for me.

Tuesday, June 14, 2011

Hazelnut Pesto


Most of my encounters with hazelnuts have involved either bowls of un-shelled nuts served during the holidays only to become an overlooked centerpiece... or chocolate. Nutella has long been a guilty pleasure. And the confection, Ferrero Rocher, frequently made holiday appearances. Rarely, if ever, have I tried hazelnuts in an entree.

This recipe felt like a simple enough way to incorporate these nuts into a more hearty role.

adapted from 1001 Recipes edited by Martha Day

serves 4
The Ingredients:
2 garlic cloves, crushed
1 oz fresh basil leaves
1/4 cup chopped hazelnuts
scant 1 cup soft cheese
8 oz pasta (tagliatelle recommended)
ground black pepper

The Process:
Place the garlic, basil, hazelnuts and cheese in food processor or blender and process to a thick paste.

Bring a large pan of lightly salted water to a boil and cook the pasta until until al dente. Drain well.

Spoon the sauce into the hot pasta, tossing until melted. Sprinkle with pepper and serve immediately.

My Modification:
I added about 1 Tbsp of oil while blending the pesto to smooth the consistency. My blender was not a fan of this paste...I may have had better luck using a food processor. A scant 1/2 tsp of salt was also added to enhance the other flavors.

The Review:
I don't think this pesto will permanently replace the traditional version in my recipe book, but it was worth the try. The hazelnut flavor was incredibly subtle...provided more of an after thought than a featured flavor. Once the pasta cooled to about room temperature, the nutty flavor became more pronounced. The garlic was biting and cut through everything else with an aggressive assault. The cheese added a nice, melted texture. But all in all the pesto was a bit dry.

Monday, June 13, 2011

God of Carnage Clafouti


In Yasmina Reza's play God of Carnage, one character attempts to smooth over a difficult confrontation by playing a good host and serving clafouti...a French dessert. She waxes poetic and debates whether it is technically a cake or a tart. The dish sounds elegant, sophisticated and quite frankly, pretentious. But in reality the dessert is nothing more than a country custard. Simple. Base. A showy facade, much like the characters in the play.

In honor of the Guthrie Theater's production of God of Carnage, I attempted to make this specific incarnation of the dish.

Veronica describes her clafouti as one made with apple and pear...the apple sliced more thinly than the pear, because the pears cook more quickly. And her secret ingredient: gingerbread.

Clafouti is traditionally made with cherries, but it appears any fruit is game for this custard-like concoction. After discovering the basic batter, the clafouti was easy enough to adapt per Veronica's instructions.

inspired by a dessert mentioned in God of Carnage by Yasmina Reza
batter adapted from Julia Child's cherry clafouti

serves 6-8

The Ingredients:
1 Tbsp butter
1/3 cup +1 Tbsp sugar
1/2 cup flour
2-3 Tbsp crushed gingerbread
1/4 tsp salt
3 eggs
1 1/4 cups whole milk
1 tsp vanilla extract
1 anjou pear peeled, cored, and thinly sliced
1 golden delicious apple peeled, cored and thinly sliced
powdered sugar for dusting

The Process:
Preheat the oven to 375.

Generously butter the bottom and sides of a 10" tart pan or 9" pie plate. Dust with 1 Tbsp of sugar.

In a blender or food processor combine the remaining sugar, gingerbread, flour, salt, eggs, milk, and vanilla. Blend on medium until thoroughly mixed. Set aside.

Arrange the pear and apple in alternating slices, covering the bottom of the pie plate. Carefully pour the batter over the top. Place pan on the middle rack of the pre-heated oven. Bake undisturbed for 35-40 minutes. The clafouti is done when puffed and brown and and a knife plunged in the center comes out clean. The center will settle as the clafouti cools. Sprinkle with powdered sugar, serve warm.

The Review:
If you like custardy desserts, this will be right up your alley. The egg and milk create such a rich base that the gingerbread was barely discernable. But like most secret ingredients, that may be the key...provided just a touch of je ne sais quoi, without giving itself away. Even with only 1/3 of a cup of sugar the clafouti was a bit sweet. The pears were cooked to perfection, though the apples remained a little crisp (despite following the character's suggetion in regards to slicing).

The dessert certainly looks fancy and time consuming, particularly if you've taken the care to arrange the fruit in the bottom of the pie plate. But in reality it is ridiculously simple to prepare. I ended up making two...one for a snack this evening and tomorrow's breakfast, and a second to take over to a friends.

I am curious to try this with un-pitted cherries once the trees began baring their fruit this summer. Supposedly, though hazardous to teeth, the pits add a pleasant almond-y touch.

Saturday, June 11, 2011

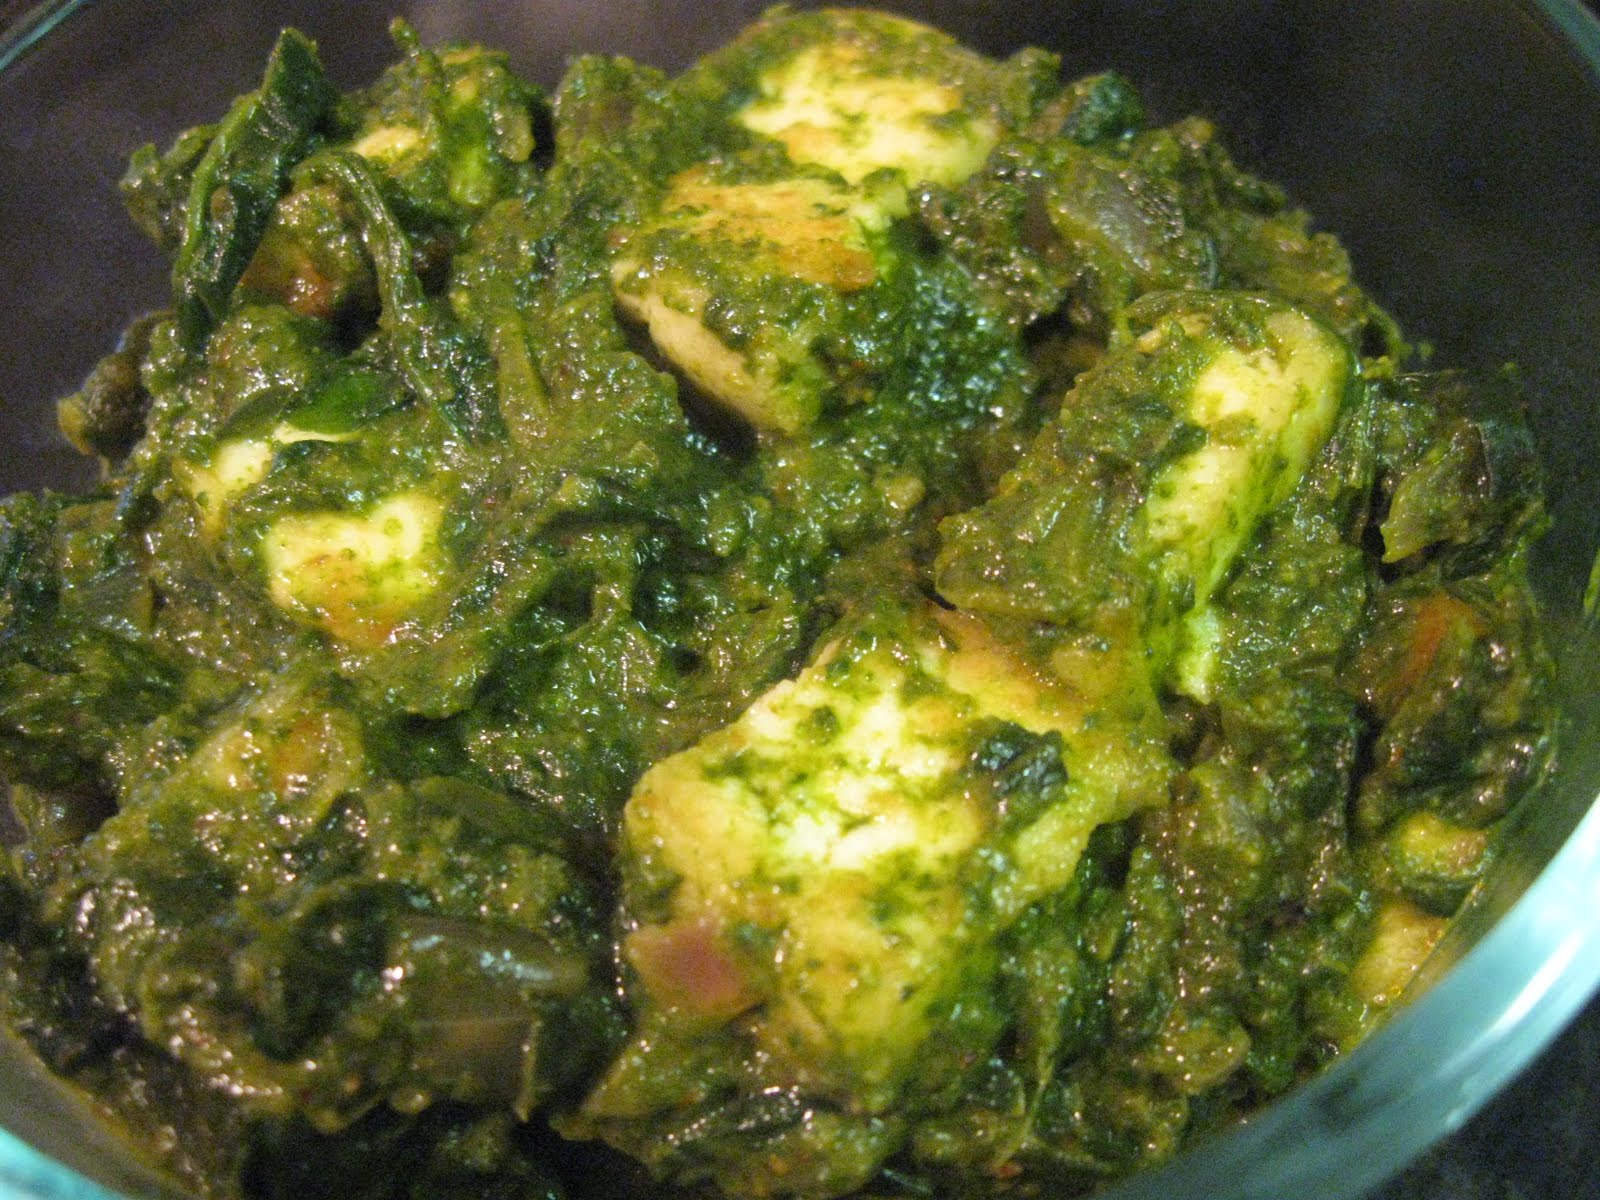
Paalak Paneer


The entire purpose of yesterday's experiment in cheese-making was to make this dish: Paalak Paneer. Simply defined, this common Indian dish is a cheese and spinach curry. It is deceptively simple to make (once you have secured your paneer, anyway). And I found it to be a pleasant way to trick my husband into eating a hearty helping of leafy greens.

You should be able to find cubed paneer at any Indian market, but do consider making you own. The process is incredibly simple. You only need two ingredients. The one draw back is having to plan ahead to ensure the paneer has enough time to cool and become firm.

adapted from The Everything Indian Cookbook by Monica Bhide

serves 4

The Ingredients:
2 Tbsp vegetable oil
1 medium-sized onion, peeled and minced
2 1/2 tsp ginger-garlic paste (equal parts minced ginger and minced garlic)
1/4 cup tomato puree (fresh or canned)
2 Serrano green chilies, seeded and minced
1/4 tsp turmeric powder
1/2 tsp garam masala
1/2 tsp cumin powder
1/2 tsp coriander powder
1/4 tsp red chili powder
salt to taste
1 (10-oz) pkg chopped frozen spinach, thawed
1/2 cup water, at room temperature
1 cup paneer, fried*
1 Tbsp heavy cream, for garnish

The Process:
In a medium-sized pan, heat the vegetable oil on medium. Add the onion and fry, stirring continuously until the onions are golden brown in color, about 5 minutes.

Add the ginger-garlic paste and saute for 1 minute. Add the tomato puree and cook for 2 minutes.

Quickly add the serrano chilies, turmeric, garam masala, cumin, coriander, red chili and salt saute for 30 seconds.

Add the spinach and fry for about 3 minutes, stirring constantly. Add the water and cook, uncovered on low heat for about 20 minutes. If the mixture starts to dry out, add more water. Cook until spinach is soft.

Add the paneer to the spinach mixture; saute uncovered for 5 minutes. Garnish with heavy cream and serve hot.

*My paneer was home-made and barely one day old. To prepare the firm cake of cheese: cube the paneer with a sharp knife. In a deep skillet heat oil on medium. Pan-fry a few of paneer at a time until golden brown on all sides. A remove to a paper towel to cool and to drain the excess oil.

My Modifications:
I doubled the spinach and curry base, but kept the paneer to the generous cup that my cheese-making had yielded. I did not double the Serrano peppers, either...hoping to make a milder and more enticing dish for a broader scope of people.

And as recommended by a footnote on the recipe a pureed a portion of the spinach to create a creamier dish.

The Review:
Healthy, hearty and full of flavor. Despite the strong Indian spices, ginger and garlic, the mild lemony flavor of the paneer held its own. The flavor of the spinach, however fell by the wayside.

I was incredibly pleased with this vegetarian entree...the only thing I may try differently is using fresh spinach...especially now that the farmer's markets are out in full force.

Thursday, June 9, 2011

Paneer


The first time I encountered paneer, it was on the buffet of an Indian restaurant. I dismissed the cubes as flavorless tofu and passed it on for tikka masala and naan. Little did I know I had just turned down one of the world's simplest forms of cheese.

To make amends to this Indian delight, I purchased a half gallon of whole milk, dug out my candy thermometer, sieve and cheesecloth, and set to.

Unaged, acid set and with not a trace of salt, paneer is a great introduction to cheese making.

adapted from The Everything Indian Cookbook by Monica Bhide
the visually inclined can view the step by step process here

yields approximately one cup

The Ingredients:
8 cups whole milk
2 lemons, juiced

The Process:
Bring the milk to a boil in a large pan over medium heat. Line a sieve with several layers of cheesecloth. Set aside the sieve in a clean dry sink.

Once the milk has reached the boiling point, remove the pan from the heat. Add the lemon juice slowly. The milk will begin to form a curd cheese. Using a wooden spoon, stir the mixture until all of the milk has curdled, about 1 to 2 minutes. You will see the curd cheese, which white, separating from the whey, a cloudy-looking liquid.
Pour the mixture into the cheesecloth-lined sieve to drain off the whey. When the cheese has cooled (about 20 minutes), fold the corners of the cheesecloth and squeeze to remove any remaining whey. To make the paneer firm, put it between 2 large plates and place something heavy (such as a large pot of water) on top to weigh it down. Once it has set for about 2 hours, remove the cloth.

My Modifications:
I only used about half of my lemon juice before the milk began to curdle...taking my cue from another paneer tutorial, I added the citrus a tsp at a time. You'll be surprised how little you need.

I cooled the curds and whey in the pot before straining. And while straining I rinsed the curd with cold water to remove any remaining whey. The whey has a very tart flavor that I did not want to affect the final product.

The paneer was weighted down overnight, until I was ready to use it in a palak paneer recipe.

The Review:
I made my own cheese. Seriously. How amazing is that! The flavor of the paneer was incredibly mild...sort of like a ricotta, but creamier and with a very subtle lemony aftertaste. The texture was smooth and firm, but just a touch grainy. I have read elsewhere that soaking the paneer cool water for 2-3 hours prior to use yields a more tender cheese. I was in too much of a hurry the next day to cube my creation and fry it for the palak paneer to take that extra step. Perhaps next time.

For those leery of fat content...I have read that milk other than whole can be used, but yields a much less creamy result.

The uses for the cheese are boundless...served cubed and plain, or with chutneys as an appetizer; added to a number of Indian curries--saag, palak, matter to name few; dressed up in salads; sweetened up and served for dessert. I'm going to love trying this again. And again. And again.

I have read that milk other than whole can be used, but yields a much less creamy result

Sunday, June 5, 2011

Hearty Fish Chowder

Soups and chowders are often the realm of chilly winter evenings; however, on this lazy, sunny Sunday a hearty slow-cooked dish called out to be made.

The great joy of soups is the ease with which we can modify them to varied tastes. Don't care for the lima beans? Toss in spring peas, shelled edamame or fava beans. Like a little kick? Stir in some tabasco or sriracha. Trying to cut back on carbs? Omit the potatoes. I'd love to hear what veggies and seasonings you'd stir in to make this chowder your own!

adapted from Biggest Book of Slow Cooker Recipes by BHG

serves 6

The Ingredients:
2 medium potatoes, finely chopped (2 cups)
1 cup chopped onions (2 medium)
2 cloves garlic, minced
1 - 10 3/4 oz can condensed cream of celery soup
1 - 10 oz package frozen whole kernel corn
1 - 10 oz package frozen baby lima beans
1 1/2 cups chicken broth
1/3 cup dry white wine
1 tsp lemon pepper seasoning
1 lb cod or other whitefish fillets
1 - 14.5 oz can stewed tomatoes
1/3 cup non-fat milk powder

The Process:
In a 3 1/2 to 4 quart slow cooker, combine potatoes, onion, garlic, condensed soup, corn, lima beans, broth, white wine and lemon-pepper seasoning.

Cover; cook on low heat setting for 6-7 hours or on high heat setting for 3-3 1/2 hours. Place fish on the mixture in the cooker. If using low heat setting, turn to heat heat setting. Cover an cook for 1 hour more.

Add undrained tomatoes and the dry milk powder to cooker, stirring gently to break up the fish.

My Modifications:
Cod was not to be had at the market, so white fish was substituted. These fillets added some additional prep time as their skins and fins needed to be removed.

I have a tendency of stocking my pantry with low sodium broths, soups and misc canned goods. As a result I often find myself needed to add salt to taste. I personally prefer this, as an over salted dish is hard to rescue.

And as usual, the produce on the market today seems to be on steroids. One potato yielded the suggested 2 cups. Three quarters of an onion provided the suggested 1 cup. Of course that's not to say you can't go veggie happy and throw more in!

The Review:
This soup certainly was hearty, though not very rich. For some reason I was anticipating a creamier base similar to New England clam chowder, even though nothing in the ingredient list really supports this assumption. This broth remained fairly thin.

The flavor did benefit from the addition of salt, but overall the recipe was fairly bland. This subdued taste did allow the flavor of the fish and the veggies to shine through...but I would have preferred a little extra something. Taking my cues from a traditional bouillabaisse, next time I'll consider adding fennel, thyme, basil, bay leaf, saffron and a bit of orange peel.

But hearty it was. And though bland, it wasn't without its charms.

Friday, June 3, 2011

Jungle Chicken


If you have never tried your hand at Thai cuisine, this dish provides a great introduction. The four key flavors are present: sweet, sour, citrus and spice. The ingredients are minimal and relatively easy to come by. And from first dice to serving plate the dish is ready in about 15-20 minutes.

adapted from The Everything Thai Cookbook by Jennifer Malott Kotylo

serves 2-3

The Ingredients:
2-4 serrano chilies, stems and seeds removed
1 stalk lemon grass, inner portion roughly chopped
2 (2 inch-long, 1/2 inch wide) strips of lime peel
2 Tbsp vegetable oil
1/2 cup coconut milk
1 whole boneless, skinless chicken breast, cut into thin strips
2-4 Tbsp fish sauce
10-15 basil leaves

The Process:
Place the chilies, lemongrass, and lime peel into a food processor and process until ground.

Heat the oil over medium-high heat in a wok or large skillet. Add the chili misture and saute for 1-2 minutes.

Stir in the coconut milk and cook for two minutes.

Add the chicken and cook until the chicken is cooked through, about 5 minutes

Reduce heat to low and add the fish sauce adn basil leaves to taste.

Serve with plenty of Jasmine rice.

The Review:
Summer. Sun. Fresh cut grass. This dish brought forth the essence of summer. The sauce was light, bright and citrus-y with the perfect amount of heat. I adored how quickly everything came together. Fifteen minutes over a hot skillet and dinner's done. To me, that makes an ideal summer dish. The only thing that seemed lacking were a few choice vegetables, but that is easy enough to rectify. The honey-ginger glazed carrots served on the side filled that veggie void.